版本控制gitlab
版本控制gitlab
版本控制介绍
版本控制是指对软件开发过程中各种程序代码、配置文件及说明文档等文件变更的管理,是软件配置管理的核心思想之一。
版本控制最主要的功能就是追踪文件的变更。它将什么时候、什么人更改了文件的什么内容等信息忠实地了记录下来。每一次文件的改变,文件的版本号都将增加。除了记录版本变更外,版本控制的另一个重要功能是并行开发。软件开发往往是多人协同作业,版本控制可以有效地解决版本的同步以及不同开发者之间的开发通信问题,提高协同开发的效率。并行开发中最常见的不同版本软件的错误(Bug)修正问题也可以通过版本控制中分支与合并的方法有效地解决。
具体来说,在每一项开发任务中,都需要首先设定开发基线,确定各个配置项的开发初始版本,在开发过程中,开发人员基于开发基线的版本,开发出所需的目标版本。当发生需求变更时,通过对变更的评估,确定变更的影响范围,对被影响的配置项的版本进行修改,根据变更的性质使配置项的版本树继续延伸或产生新的分支,形成新的目标版本,而对于不受变更影响的配置项则不应发产生变动。同时,应能够将变更所产生的对版本的影响进行记录和跟踪。必要时还可以回退到以前的版本。例如当开发需求或需求变更被取消时,就需要有能力将版本回退到开发基线版本。在曾经出现过的季度升级包拆包和重新组包的过程中,其实就是将部分配置项的版本回退到开发基线,将对应不同需求的不同分支重新组合归并,形成新的升级包版本。
版本控制是软件配置管理的核心功能。所有置于配置库中的元素都应自动予以版本的标识,并保证版本命名的唯一性。版本在生成过程中,自动依照设定的使用模型自动分支、演进。除了系统自动记录的版本信息以外,为了配合软件开发流程的各个阶段。还需要定义、收集一些元数据来记录版本的辅助信息和规范开发流程,并为今后对软件过程的度量做好准备。当然如果选用的工具支持,这些辅助数据将能直接统计出过程数据,从而方便软件过程改进活动的进行。对于配置库中的各个基线控制项,应该根据其基线的位置和状态来设置相应的访问权限。一般来说,对于基线版本之前的各个版本都应处于被锁定的状态,如需要对它们进行变更,则应按照变更控制的流程来进行操作。
常用的版本控制工具:
- gitlab
- subversion
gitlab 服务组件
-
Nginx:静态 web 服务器。
-
gitlab-shell:用于处理 Git 命令和修改 authorized keys 列表。(Ruby)
-
gitlab-workhorse: 轻量级的反向代理服务器。(go)
它会处理一些大的 HTTP 请求,比如文件上传、文件下载、Git push/pull 和 Git 包下载。 其它请求会反向代理到 GitLab Rails 应用,即反向代理给后端的 unicorn。 -
logrotate:日志文件管理工具。
-
postgresql:数据库。
-
redis:缓存数据库。
-
sidekiq:用于在后台执行队列任务(异步执行)。(Ruby)
-
unicorn:An HTTP server for Rack applications,GitLab Rails 应用是托管在这个服务器上面的。(Ruby Web Server, 主要使用 Ruby 编写
常用命令
gitlab-ctl start:启动全部服务
gitlab-ctl restart:重启全部服务
gitlab-ctl stop:停止全部服务
gitlab-ctl reconfigure:使配置文件生效(一般修改完主配置文件/etc/gitlab/gitlab.rb,需要执行此命令)
gitlab-ctl show-config :验证配置文件
gitlab-ctl uninstall:删除gitlab(保留数据)
gitlab-ctl cleanse:删除所有数据,从新开始
gitlab-ctl tail 查看服务的日志
Gitlab基础目录
/var/opt/gitlab/git-data/repositories:库默认存储目录
/opt/gitlab: 应用代码和相应的依赖程序
/var/opt/gitlab:gitlab-ctl reconfigure命令编译后的应用数据和配置文件,不需要人为修改配置
/etc/gitlab: 配置文件目录
/var/log/gitlab:此目录下存放了gitlab各个组件产生的日志
/var/opt/gitlab/backups/:备份文件生成的目录
gitlab部署
使用国内源下载gitlab
#配置好yum源和epel源下载软件包和依赖包
[root@localhost ~]# wget https://mirrors.tuna.tsinghua.edu.cn/gitlab-ce/yum/el7/gitlab-ce-13.2.2-ce.0.el7.x86_64.rpm

[root@localhost ~]# yum -y install git  curl openssh-server openssh-clients postfix cronie policycoreutils-python

#启动postfix服务并设置开机自启
[root@localhost ~]# systemctl restart postfix
[root@localhost ~]# systemctl enable postfix

#安装gitlab
[root@localhost ~]# rpm -ivh gitlab-ce-13.2.1-ce.0.el7.x86_64.rpm
warning: gitlab-ce-13.2.1-ce.0.el7.x86_64.rpm: Header V4 RSA/SHA1 Signature, key ID f27eab47: NOKEY
Preparing...                          ################################# [100%]
Updating / installing...
   1:gitlab-ce-13.2.1-ce.0.el7        ################################# [100%]
It looks like GitLab has not been configured yet; skipping the upgrade script.

       *.                  *.
      ***                 ***
     *****               *****
    .******             *******
    ********            ********
   ,,,,,,,,,***********,,,,,,,,,
  ,,,,,,,,,,,*********,,,,,,,,,,,
  .,,,,,,,,,,,*******,,,,,,,,,,,,
      ,,,,,,,,,*****,,,,,,,,,.
         ,,,,,,,****,,,,,,
            .,,,***,,,,
                ,*,.


     _______ __  __          __
    / ____(_) /_/ /   ____ _/ /_
   / / __/ / __/ /   / __ `/ __ \
  / /_/ / / /_/ /___/ /_/ / /_/ /
  \____/_/\__/_____/\__,_/_.___/


Thank you for installing GitLab!
GitLab was unable to detect a valid hostname for your instance.
Please configure a URL for your GitLab instance by setting `external_url`
configuration in /etc/gitlab/gitlab.rb file.
Then, you can start your GitLab instance by running the following command:
  sudo gitlab-ctl reconfigure

For a comprehensive list of configuration options please see the Omnibus GitLab readme
https://gitlab.com/gitlab-org/omnibus-gitlab/blob/master/README.md


#修改配置文件
[root@localhost ~]# vim /etc/gitlab/gitlab.rb
#找到
external_url 'http://gitlab.example.com'
#修改为
external_url 'http://192.168.32.125'

#重载配置文件并重启gitlab
[root@localhost ~]# gitlab-ctl reconfigure
[root@localhost ~]# gitlab-ctl restart
ok: run: alertmanager: (pid 25928) 0s
ok: run: gitaly: (pid 25938) 1s
ok: run: gitlab-exporter: (pid 25956) 0s
ok: run: gitlab-workhorse: (pid 25967) 0s
ok: run: grafana: (pid 25980) 1s
ok: run: logrotate: (pid 25993) 0s
ok: run: nginx: (pid 25999) 1s
ok: run: node-exporter: (pid 26005) 0s
ok: run: postgres-exporter: (pid 26089) 1s
ok: run: postgresql: (pid 26101) 0s
ok: run: prometheus: (pid 26110) 0s
ok: run: puma: (pid 26123) 0s
ok: run: redis: (pid 26128) 1s
ok: run: redis-exporter: (pid 26133) 0s
ok: run: sidekiq: (pid 26140) 0s


#查看当前的gitlab版本
[root@localhost ~]# head -1 /opt/gitlab/version-manifest.txt
gitlab-ce 13.2.1
输入ip访问,初始化
输入两次密码,至少8位字符长度
登录
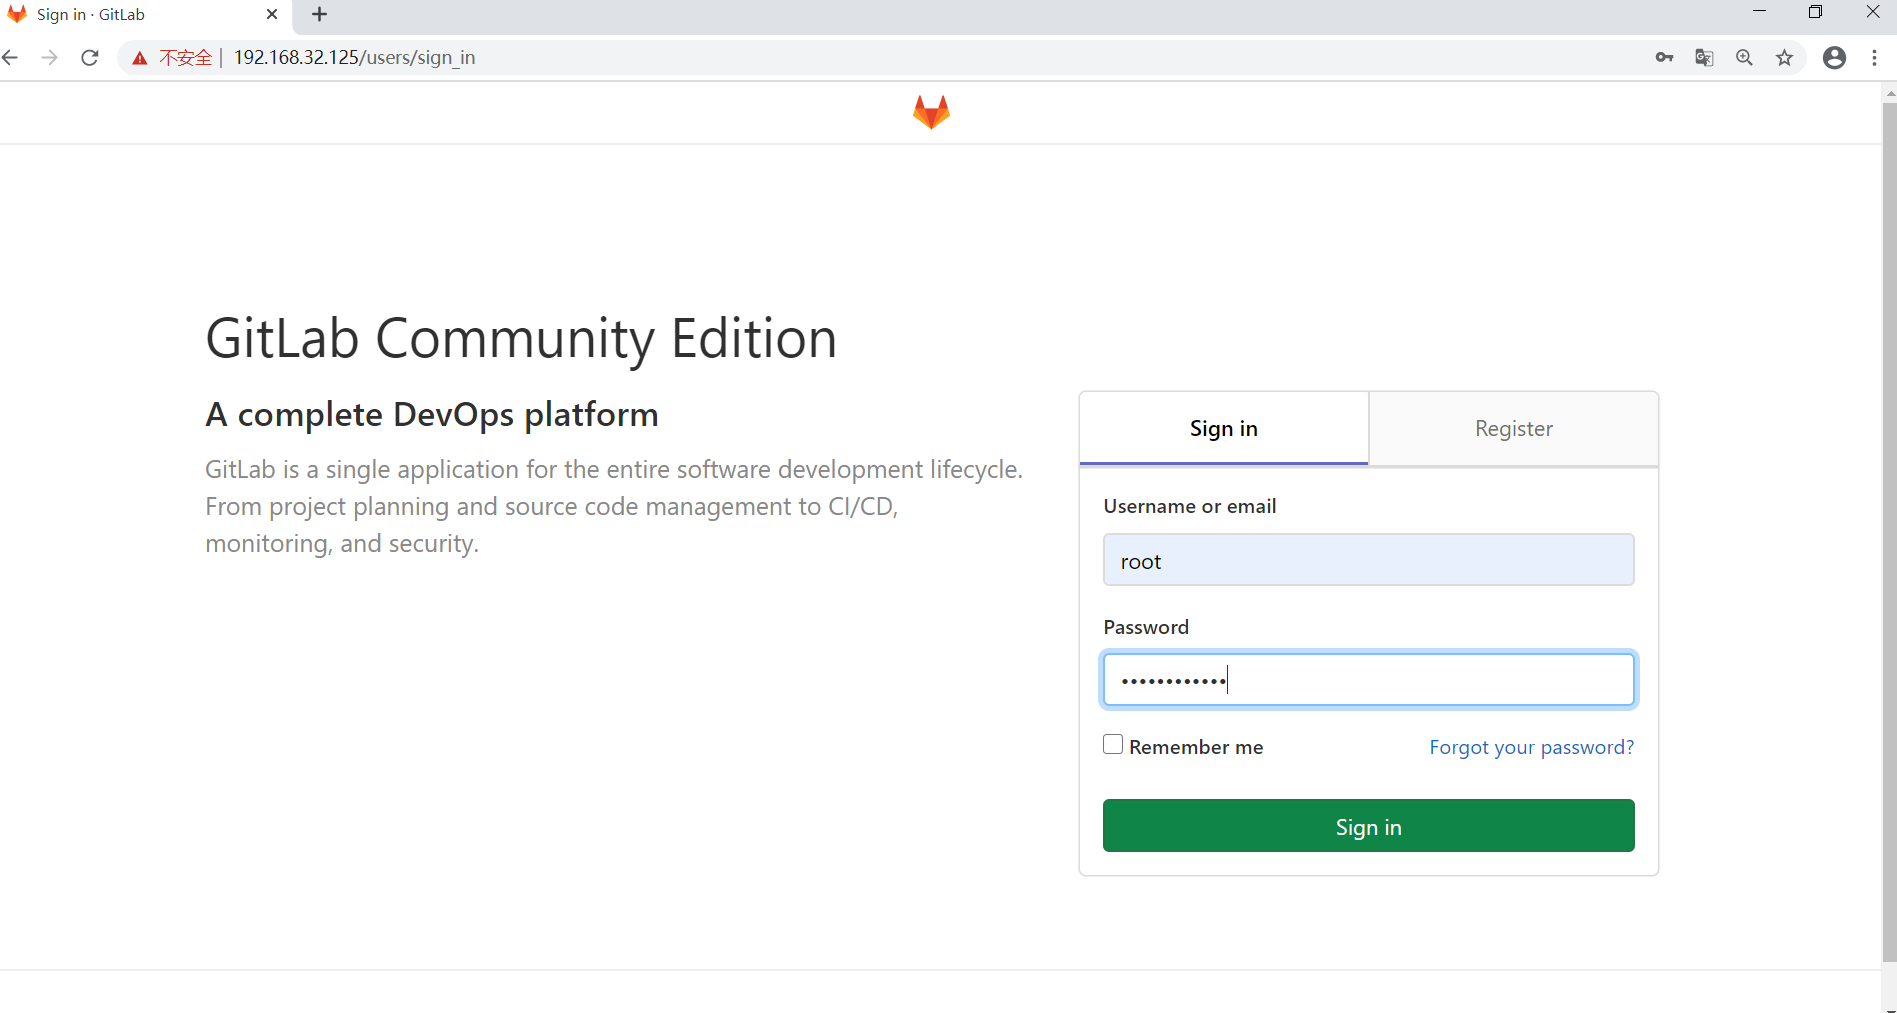
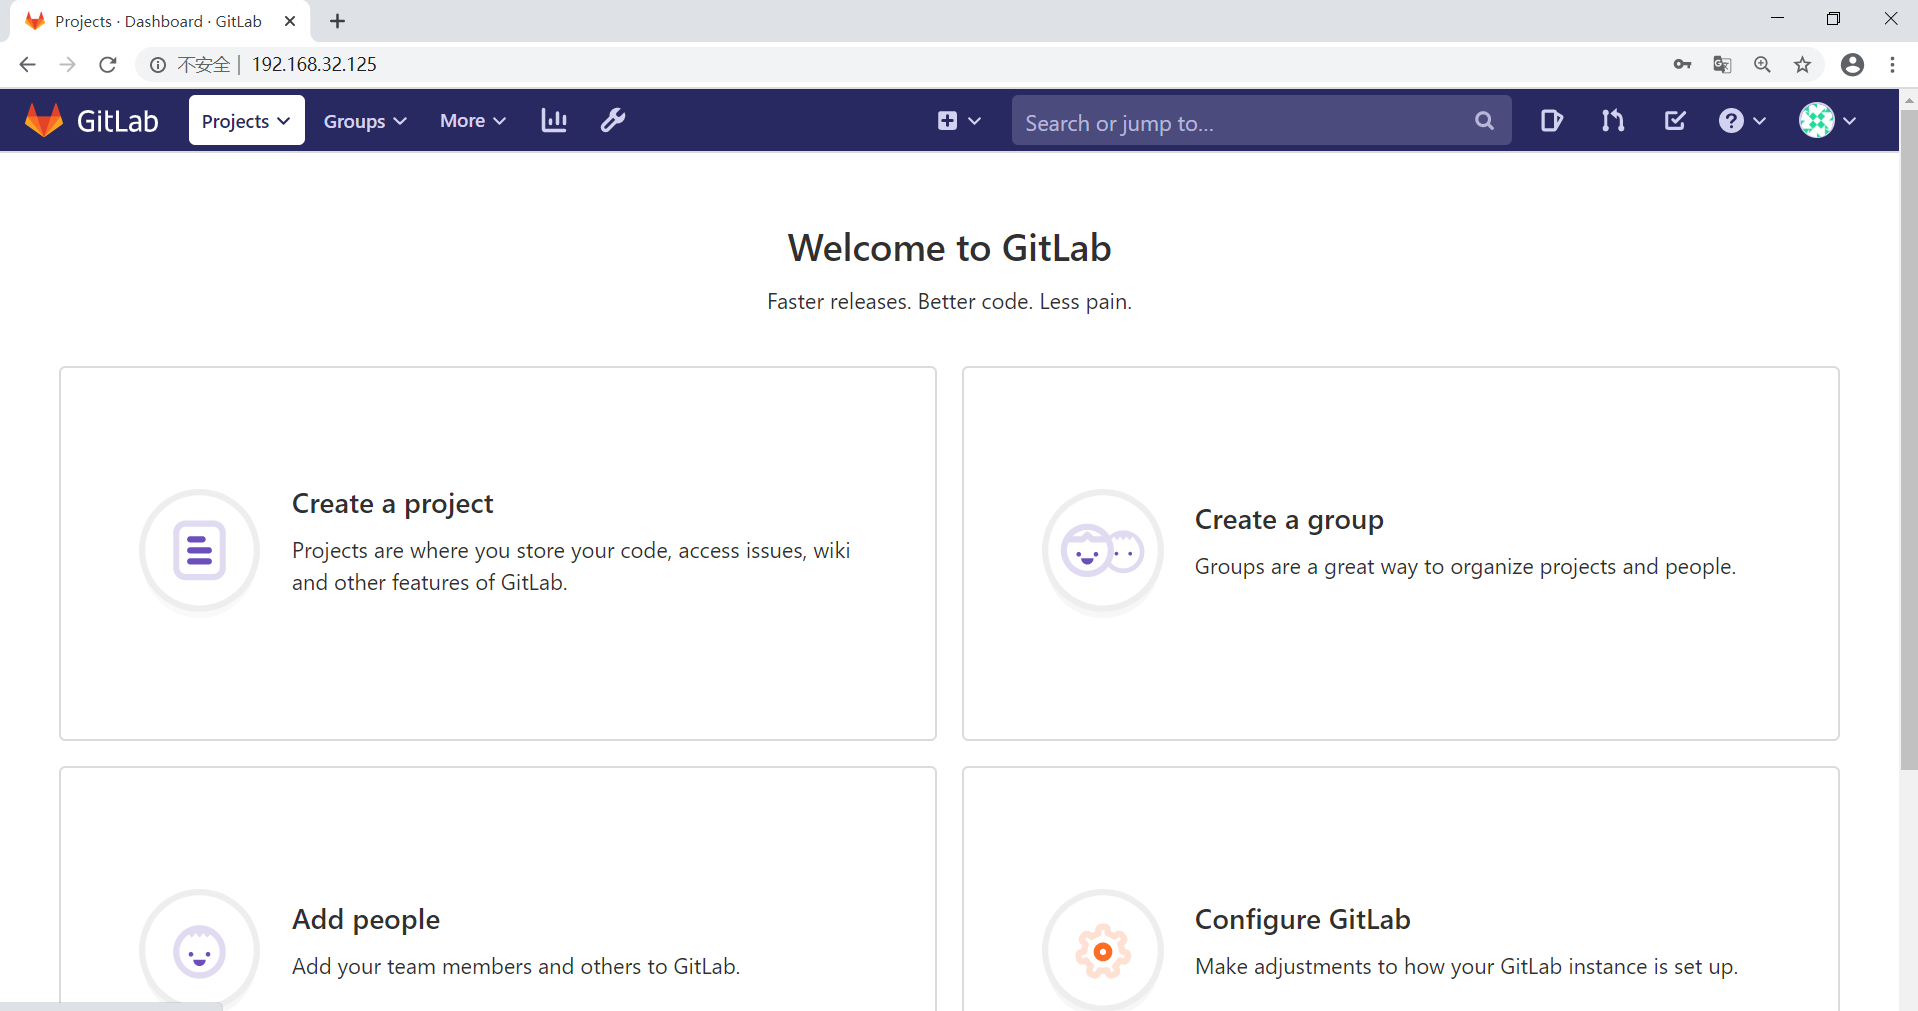
如果忘记密码,在服务端破解
[root@localhost ~]# gitlab-rails console -e production
--------------------------------------------------------------------------------
 GitLab:       13.2.1 (b55baf593e6) FOSS
 GitLab Shell: 13.3.0
 PostgreSQL:   11.7
--------------------------------------------------------------------------------
Loading production environment (Rails 6.0.3.1)
irb(main):001:0> user = User.where(id: 1).first			//id为1的是超级管理员
=> #<User id:1 @root>
irb(main):002:0> user.password = 'qwer!@#$'		//密码必须至少8个字符
=> "qwer!@\#$"
irb(main):003:0> user.password_confirmation = 'qwer!@#$'
=> "qwer!@\#$"
irb(main):004:0> user.save!				 //保存修改,若无问题将返回true
Enqueued ActionMailer::MailDeliveryJob (Job ID: 8f342f3c-843e-46cf-9cf3-dea3cd207354) to Sidekiq(mailers) with arguments: "DeviseMailer", "password_change", "deliver_now", {:args=>[#<GlobalID:0x00007fcdd5ce6b48 @uri=#<URI::GID gid://gitlab/User/1>>]}
=> true
irb(main):005:0> exit
[root@localhost ~]#
gitlab管理
1. 项目管理
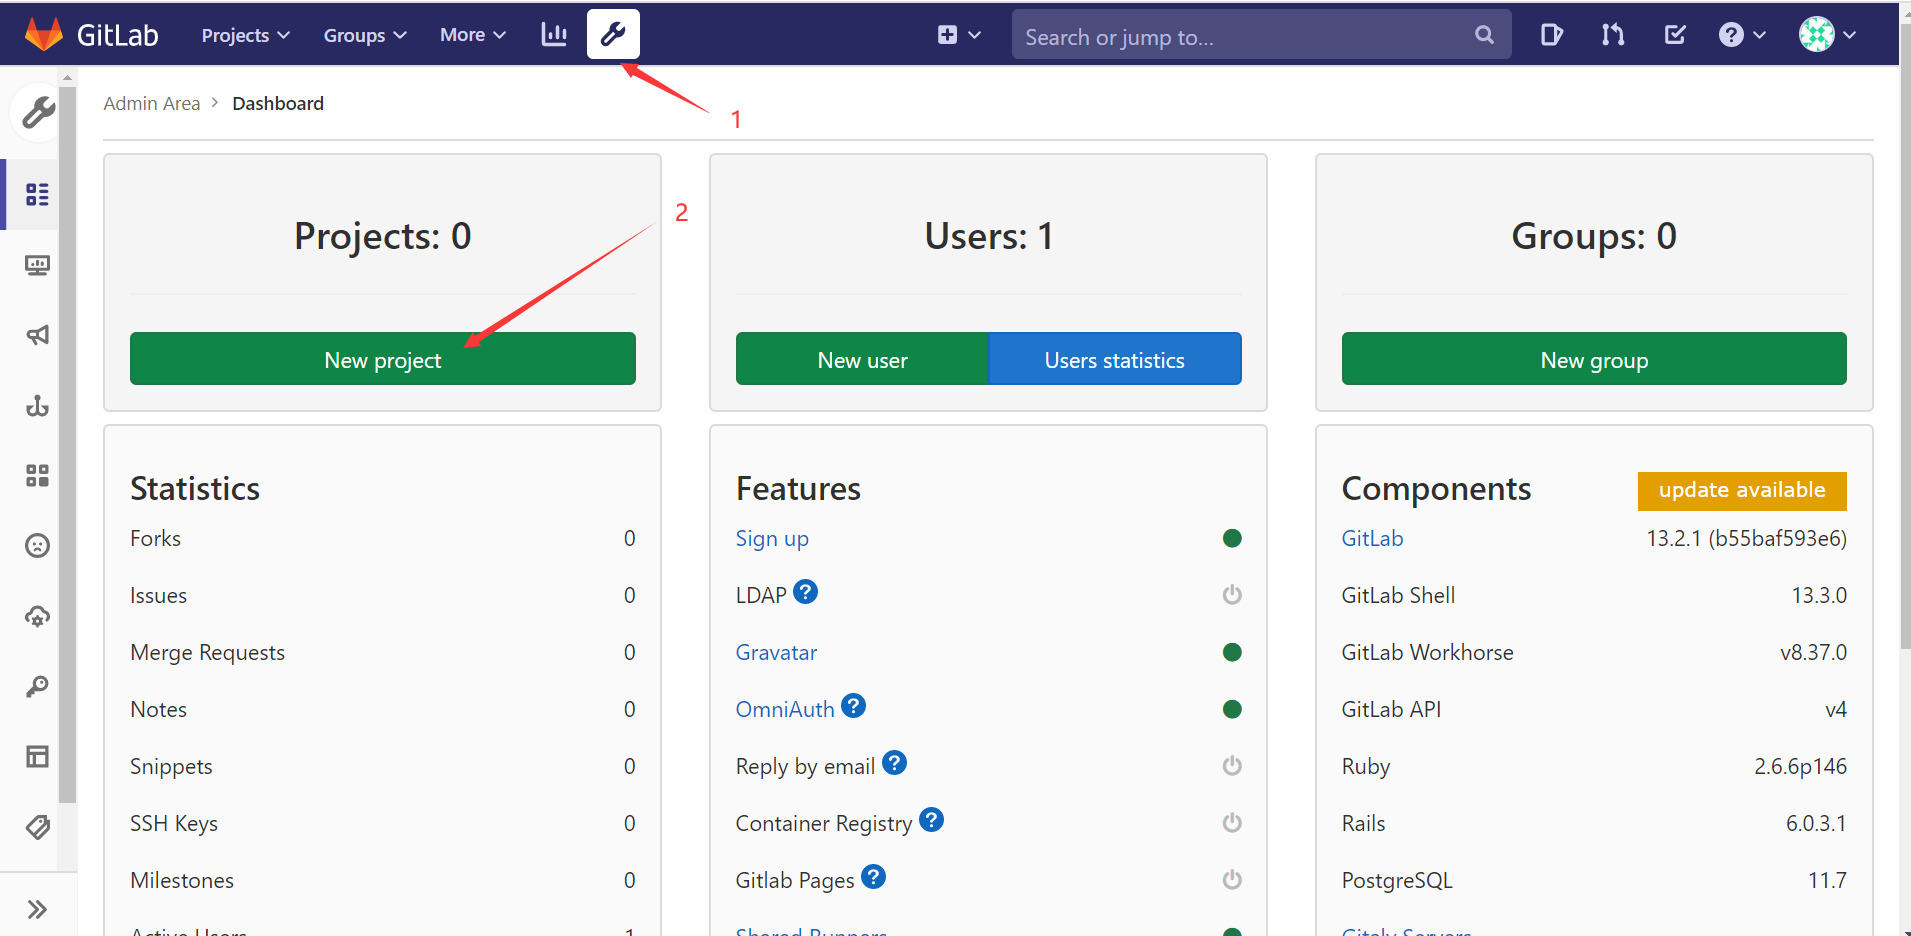
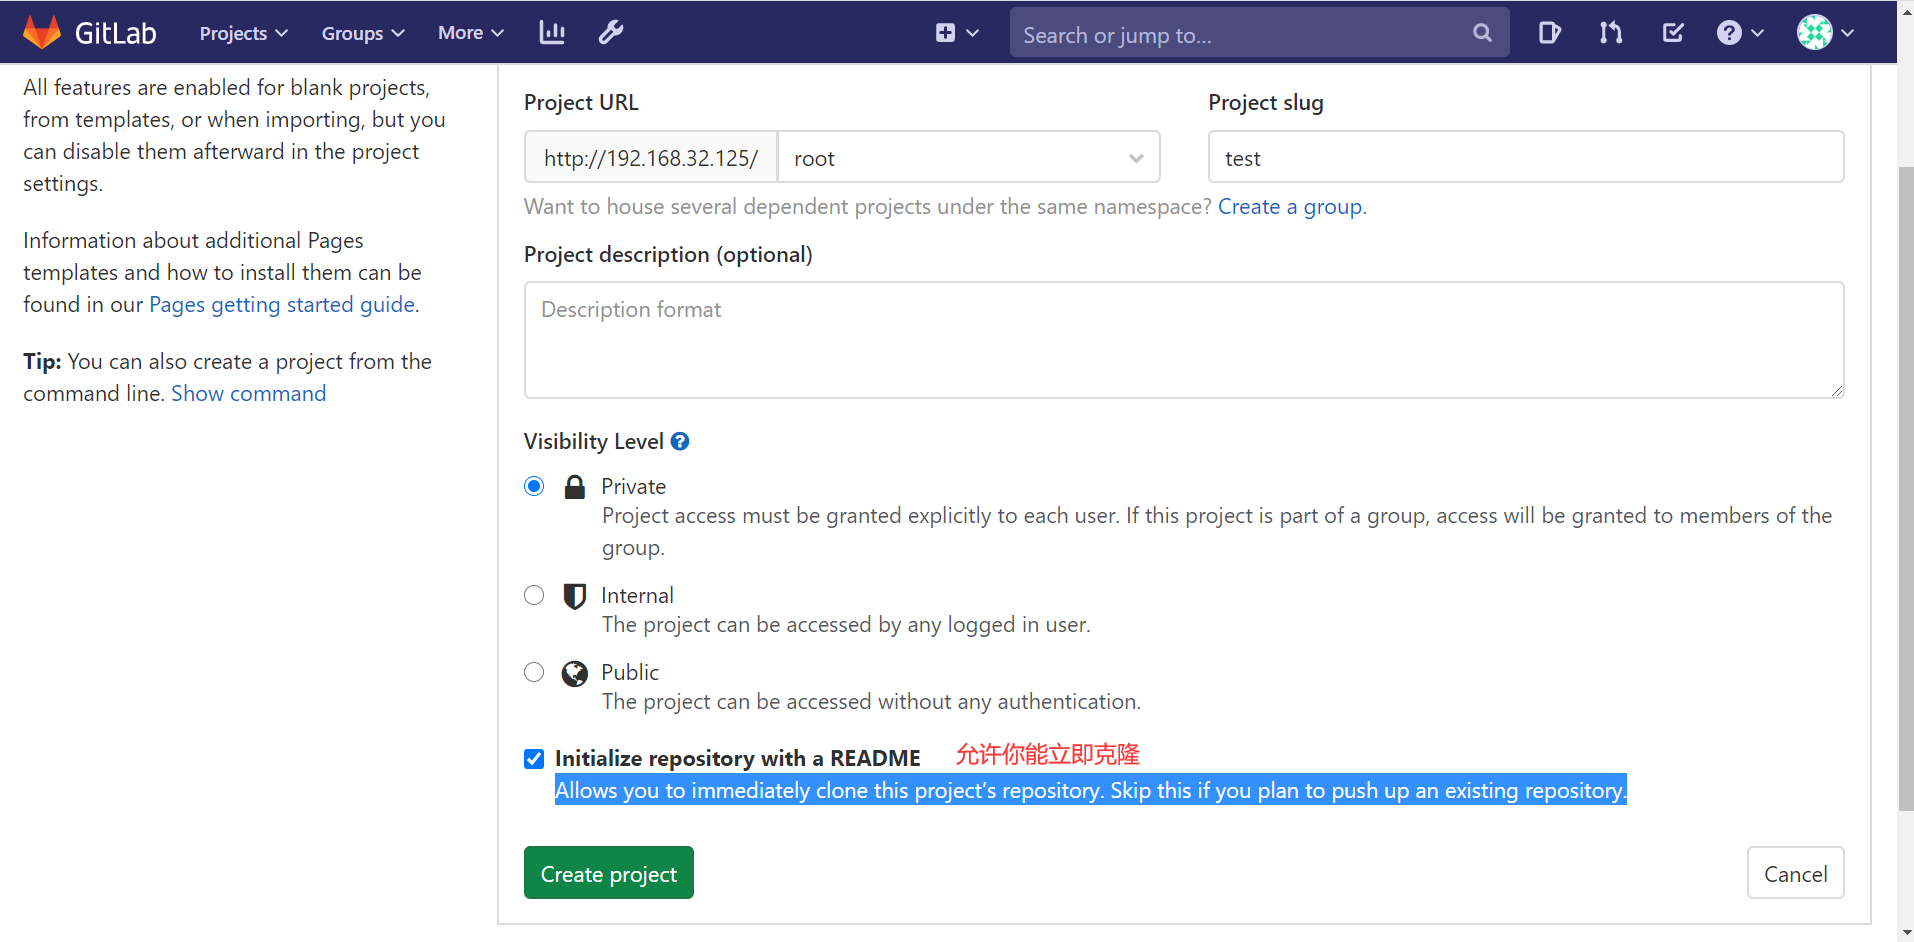
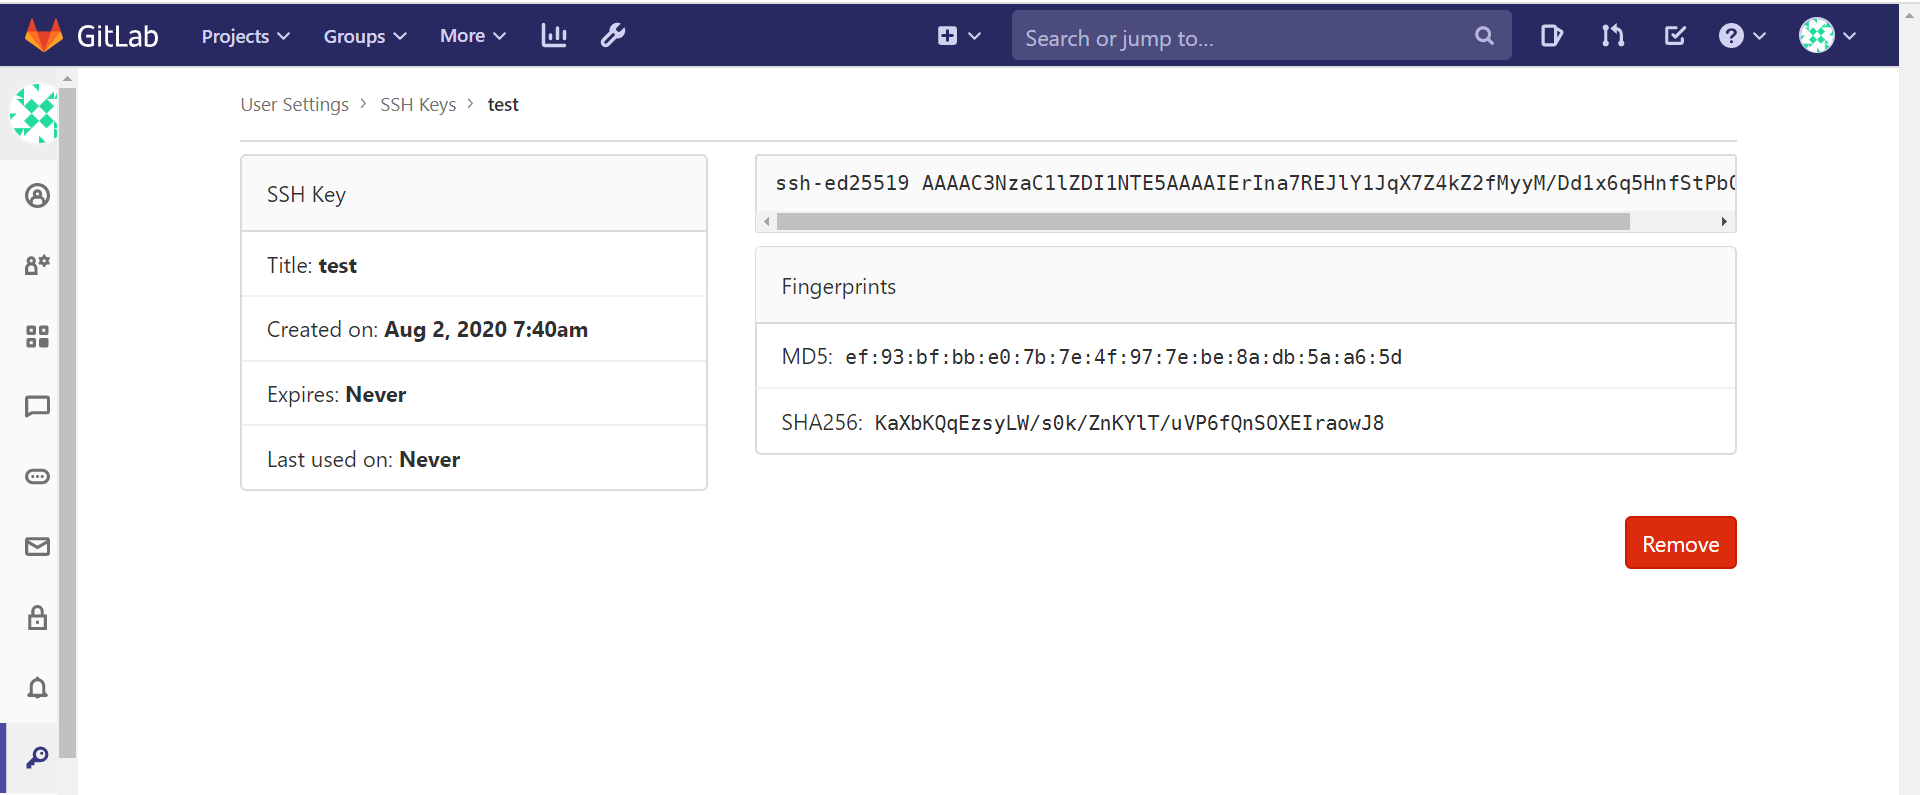
添加SSH KEY
[root@localhost ~]# ssh-keygen -t ed25519 -C "test"
Generating public/private ed25519 key pair.
Enter file in which to save the key (/root/.ssh/id_ed25519):
Created directory '/root/.ssh'.
Enter passphrase (empty for no passphrase):
Enter same passphrase again:
Your identification has been saved in /root/.ssh/id_ed25519.
Your public key has been saved in /root/.ssh/id_ed25519.pub.
The key fingerprint is:
SHA256:KaXbKQqEzsyLW/s0k/ZnKYlT/uVP6fQnSOXEIraowJ8 test
The key's randomart image is:
+--[ED25519 256]--+
|                 |
|                 |
|        .    .   |
| .     o .o . +  |
|. ..  o So o =   |
|=.  o..+... ...  |
| =o **o+o...+.   |
|...=o=E.+o +... .|
|oo..o..=. ..o .o |
+----[SHA256]-----+
[root@localhost ~]# cat .ssh/id_ed25519
id_ed25519      id_ed25519.pub
[root@localhost ~]# cat .ssh/id_ed25519.pub
ssh-ed25519 AAAAC3NzaC1lZDI1NTE5AAAAIErIna7REJlY1JqX7Z4kZ2fMyyM/Dd1x6q5HnfStPbQ2 test


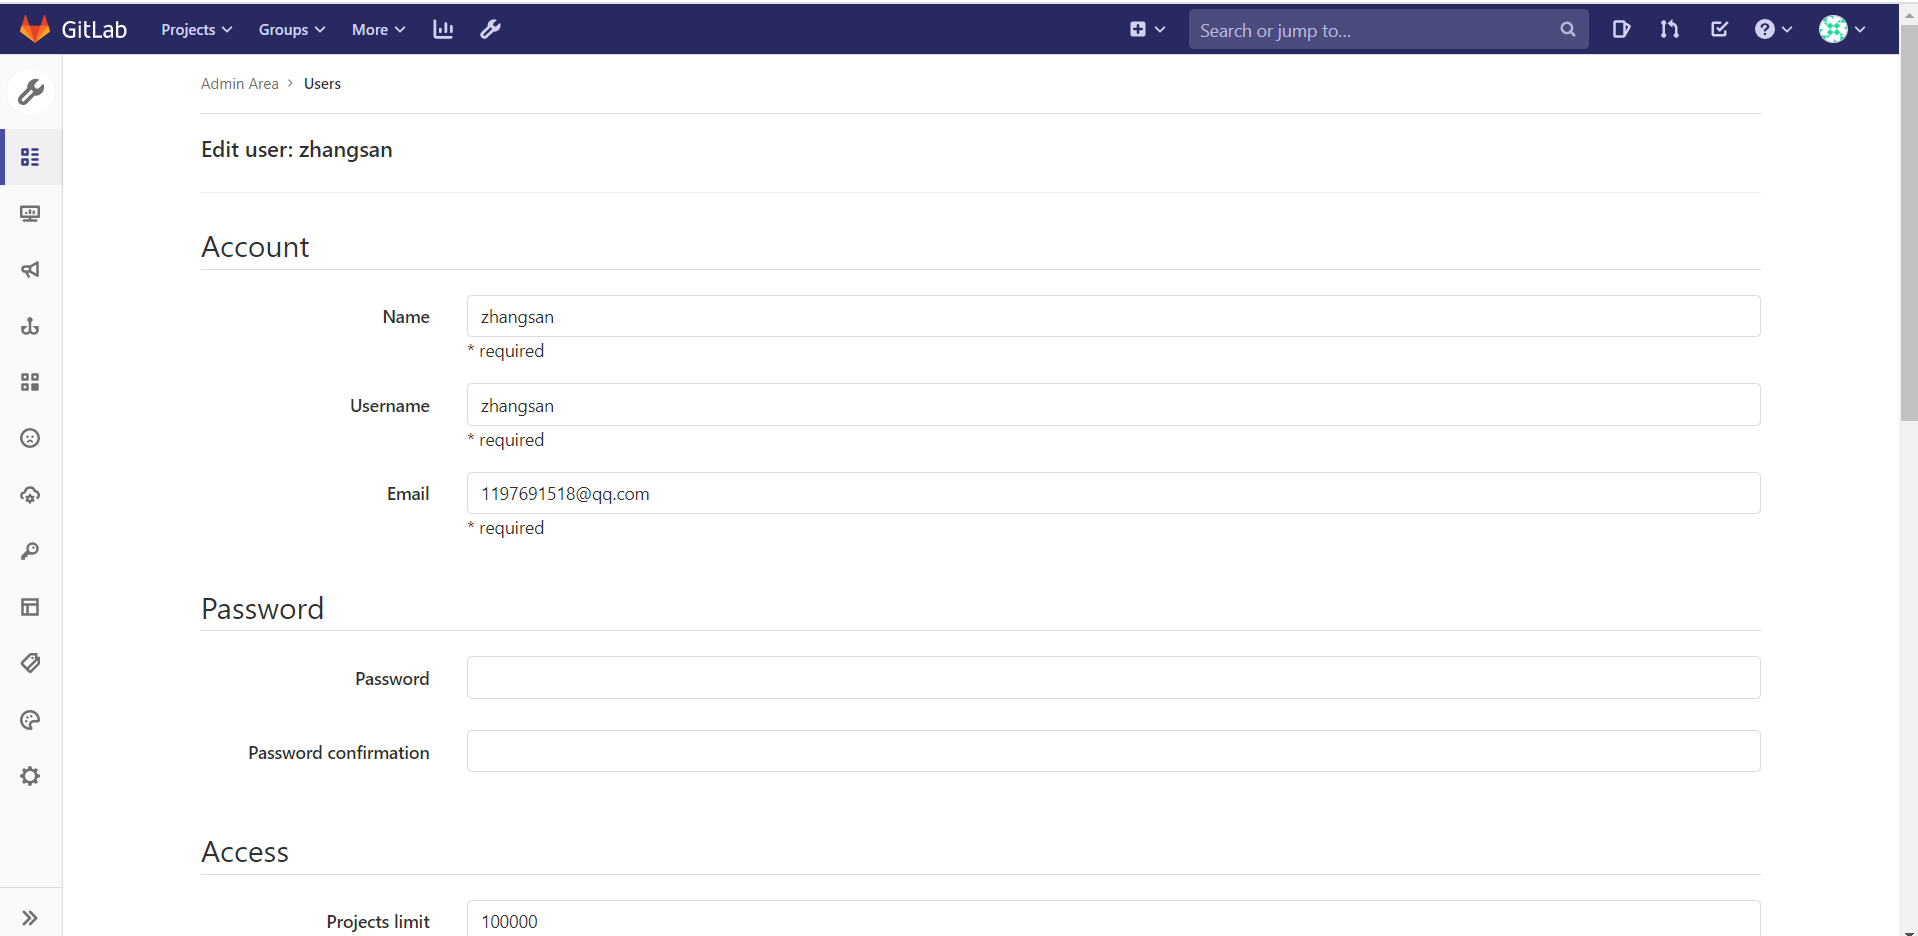
2. 用户管理
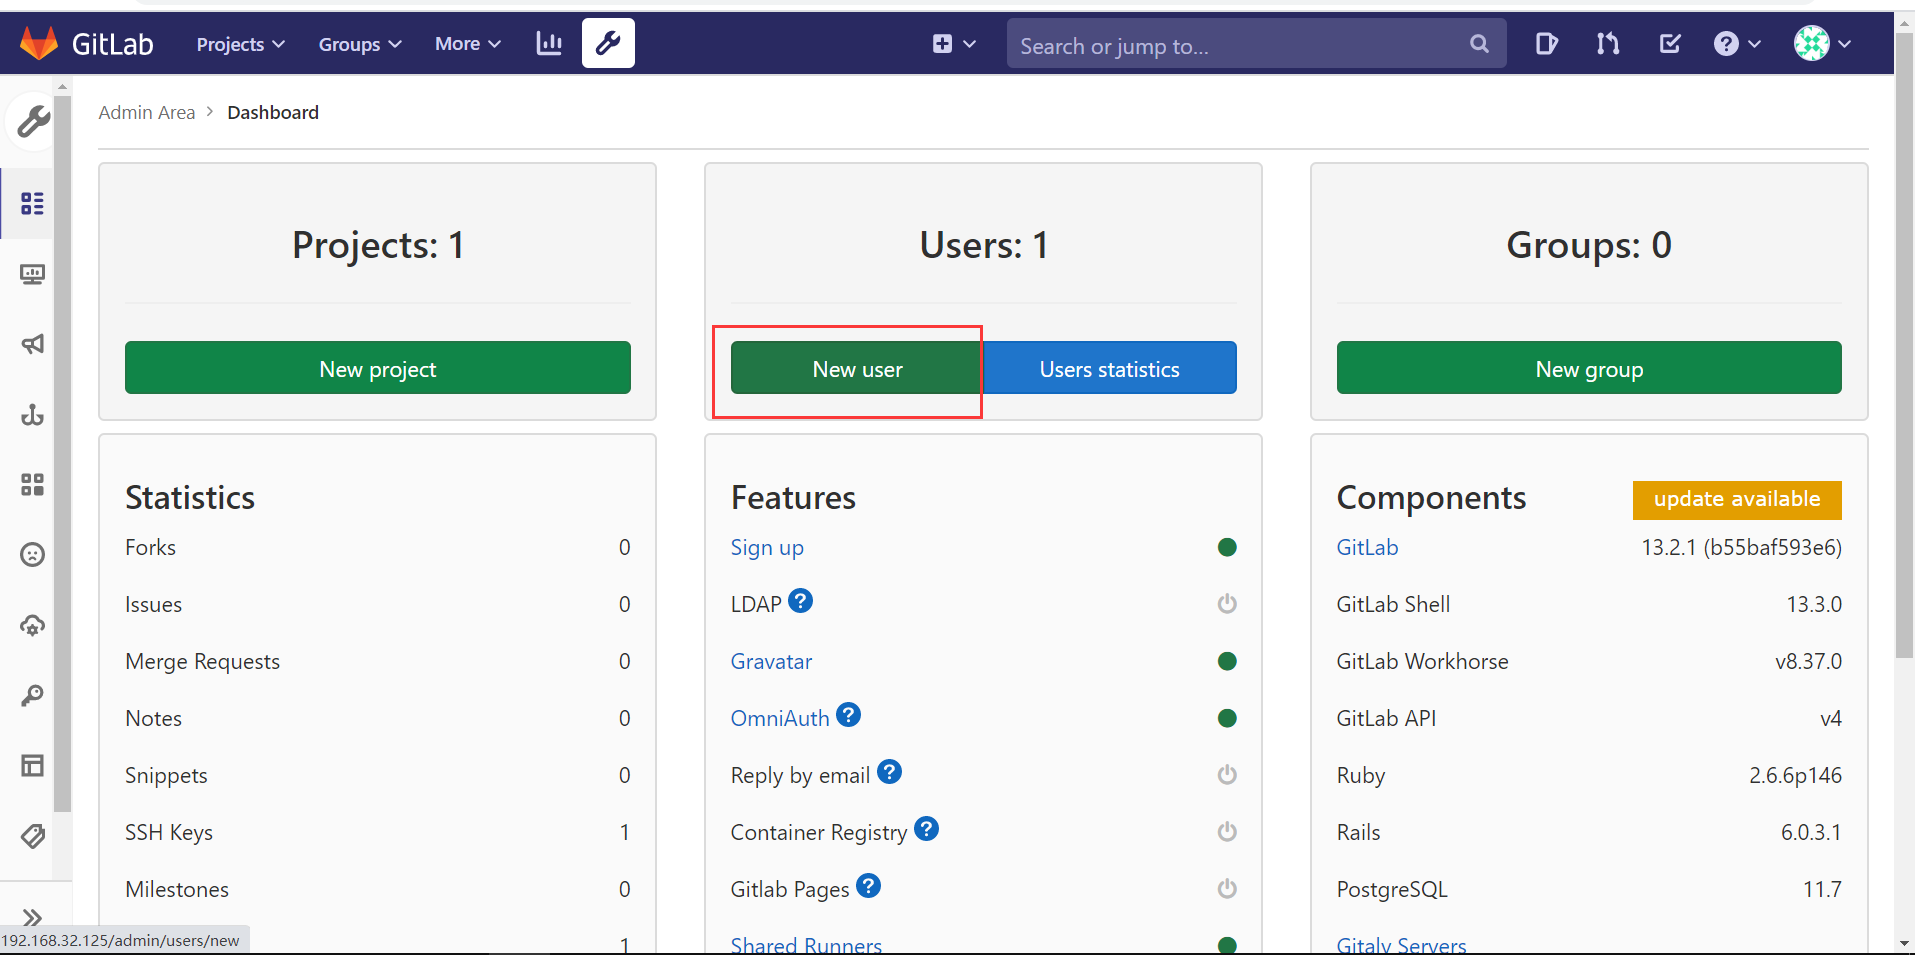
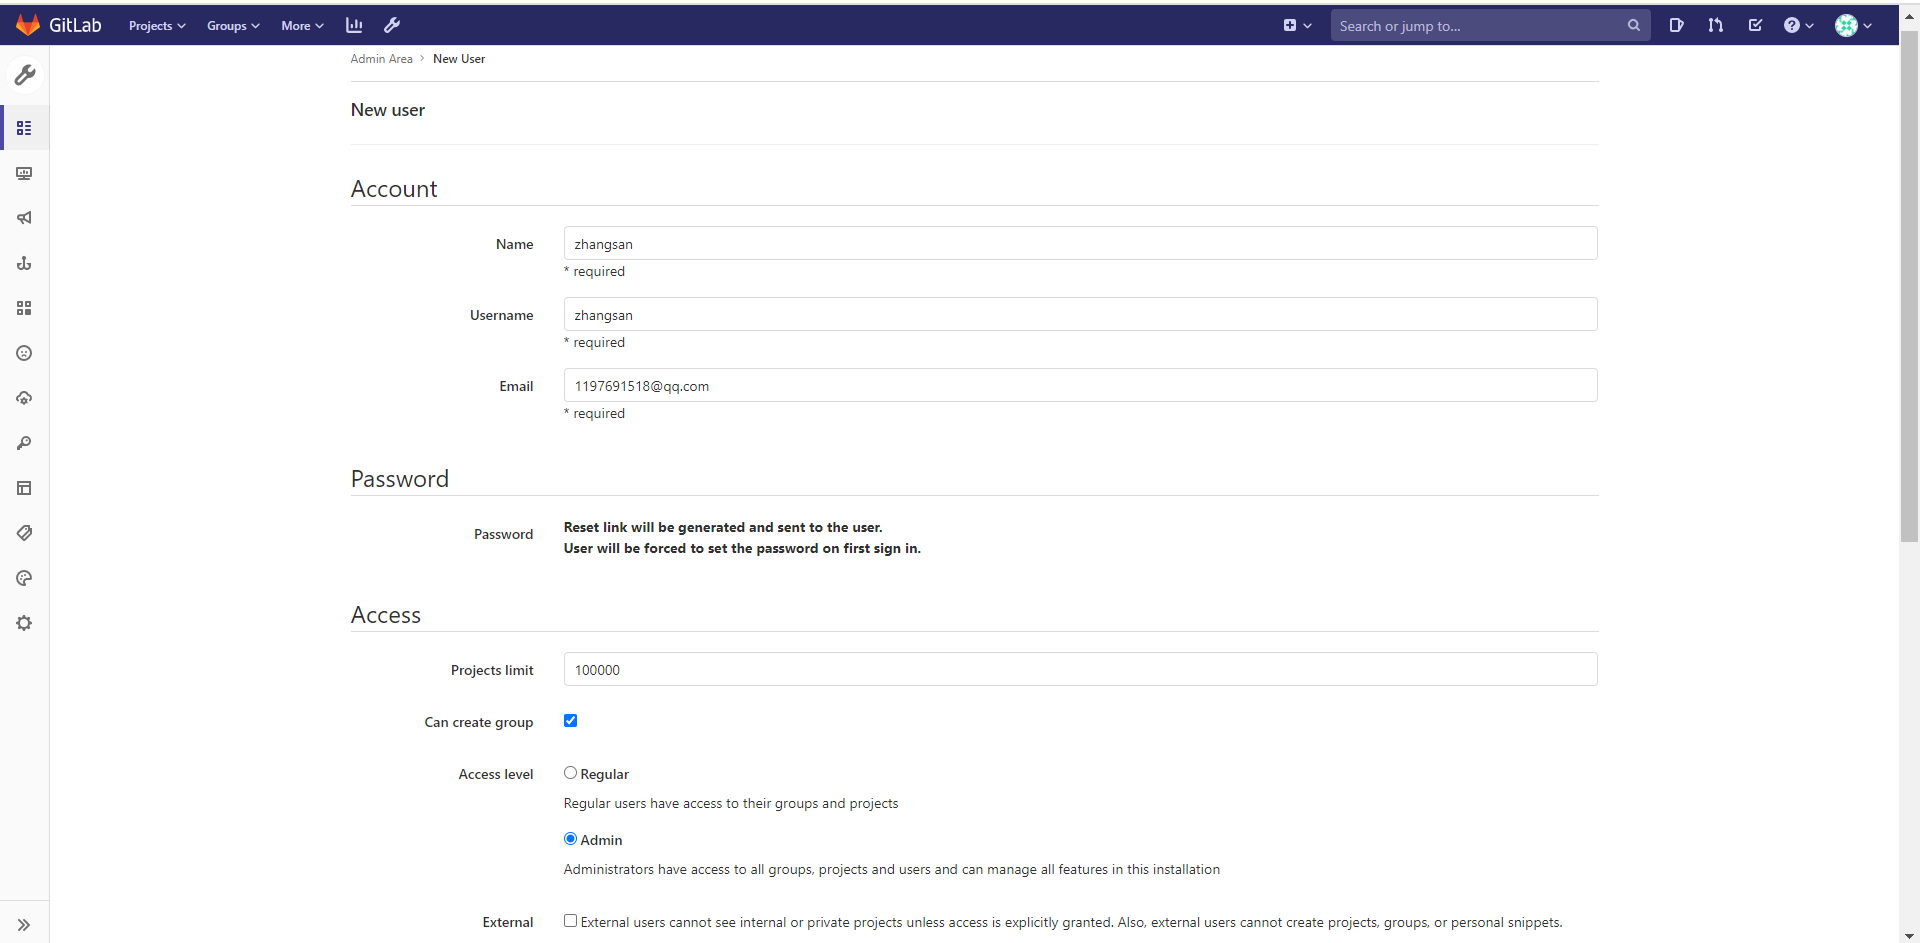
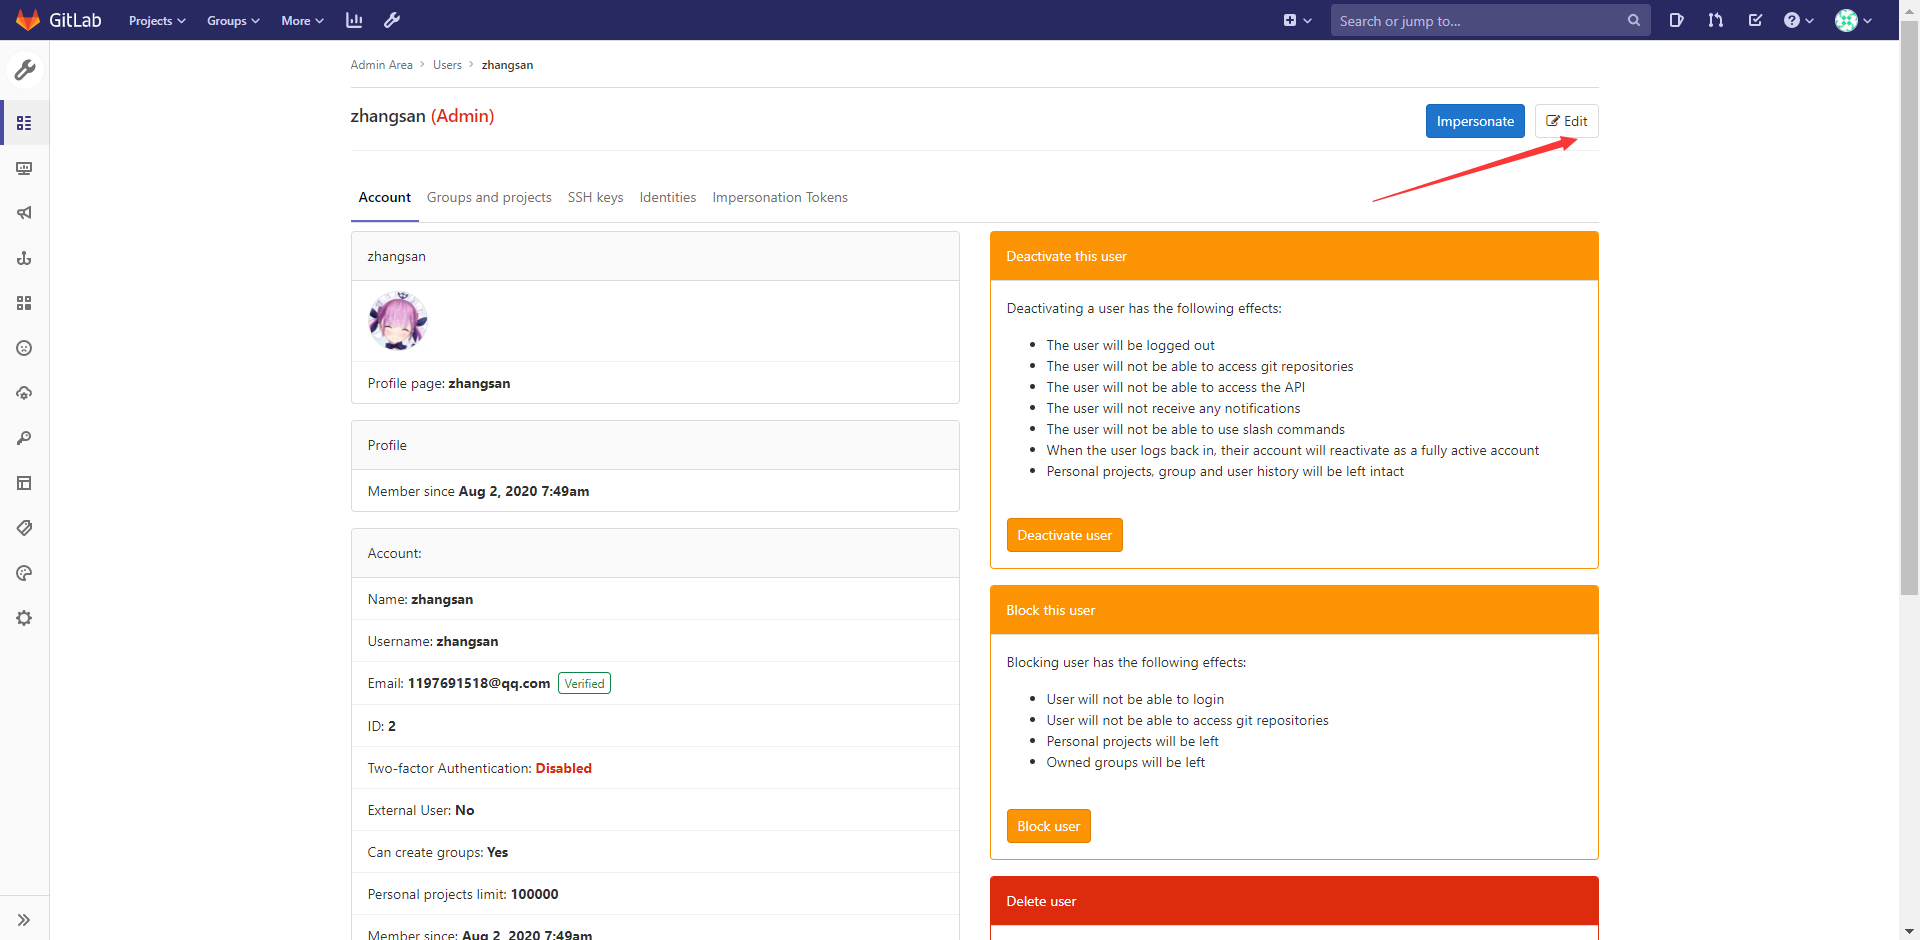
输入登录密码
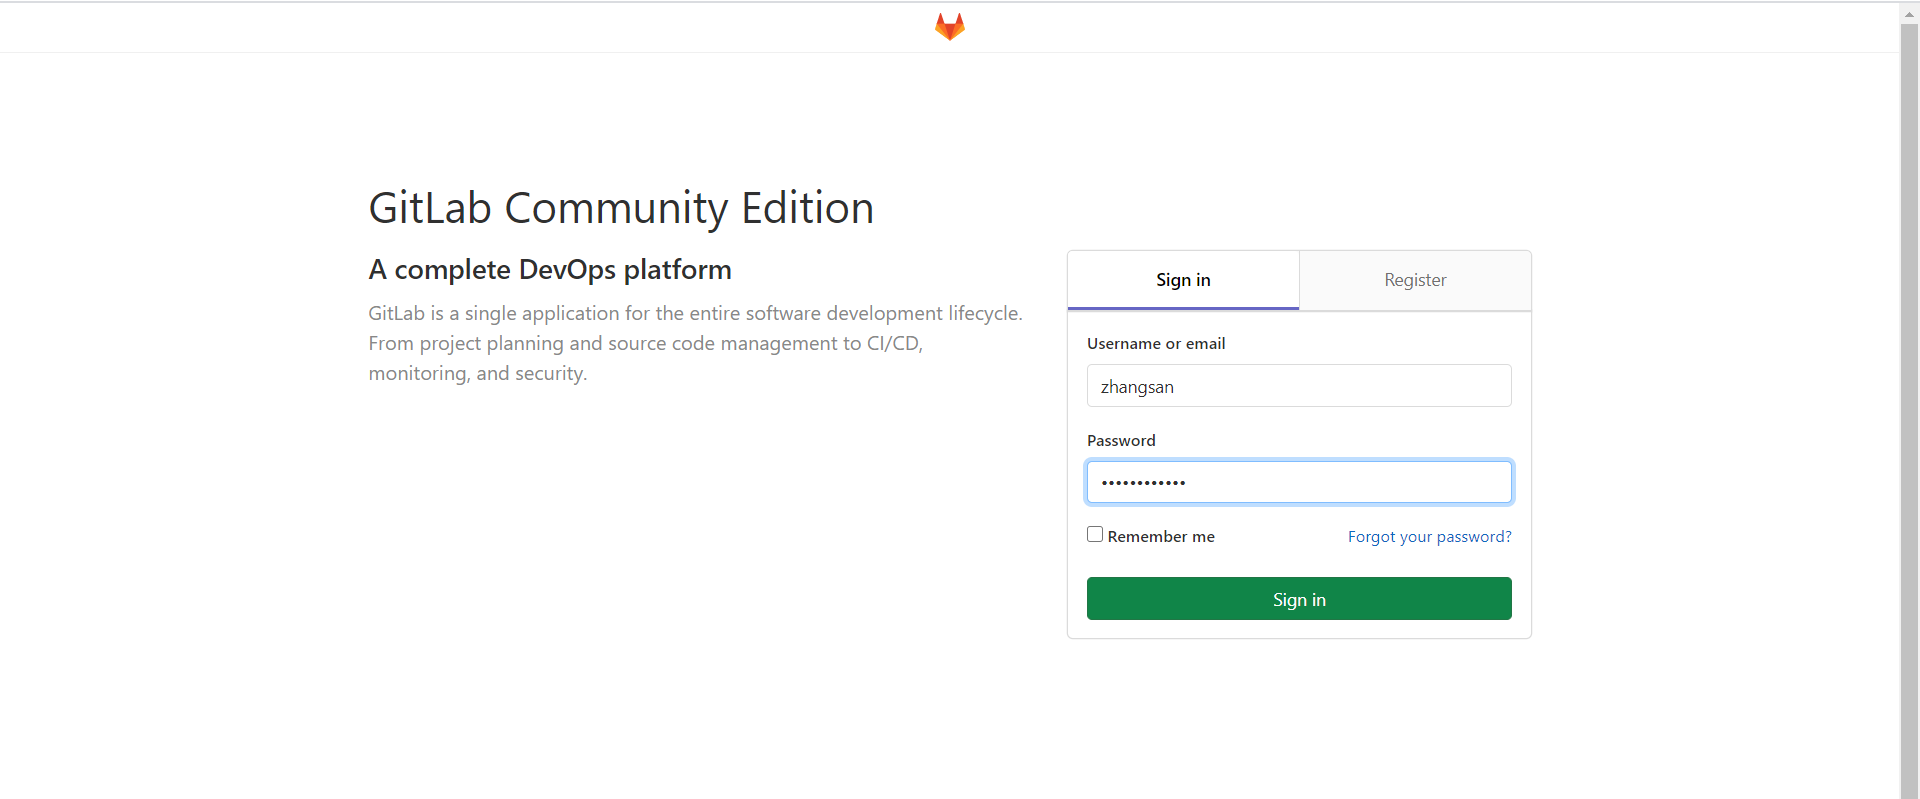
登录测试
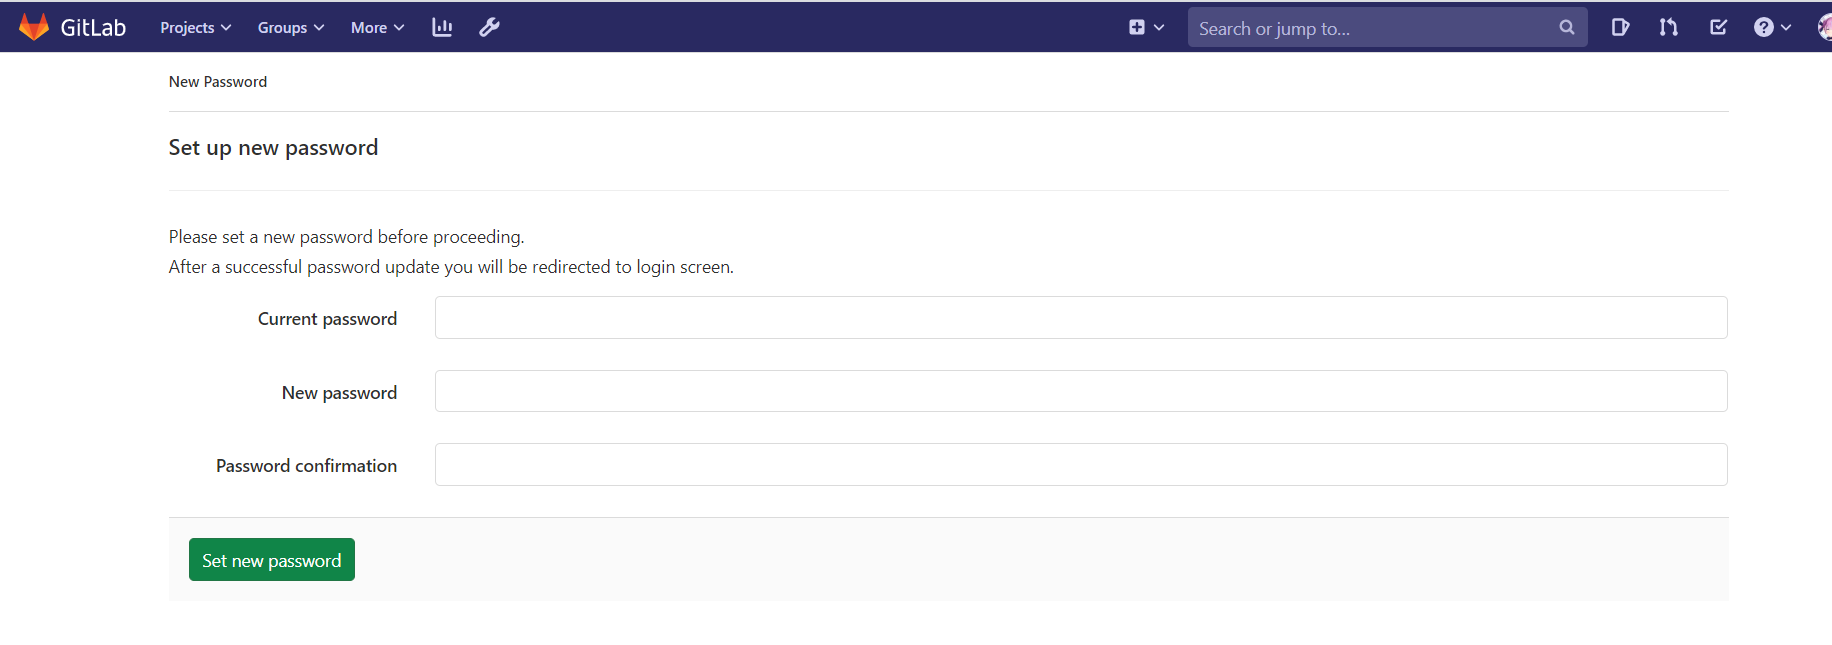
改密码之后就可以正常登录使用了
3. 组管理
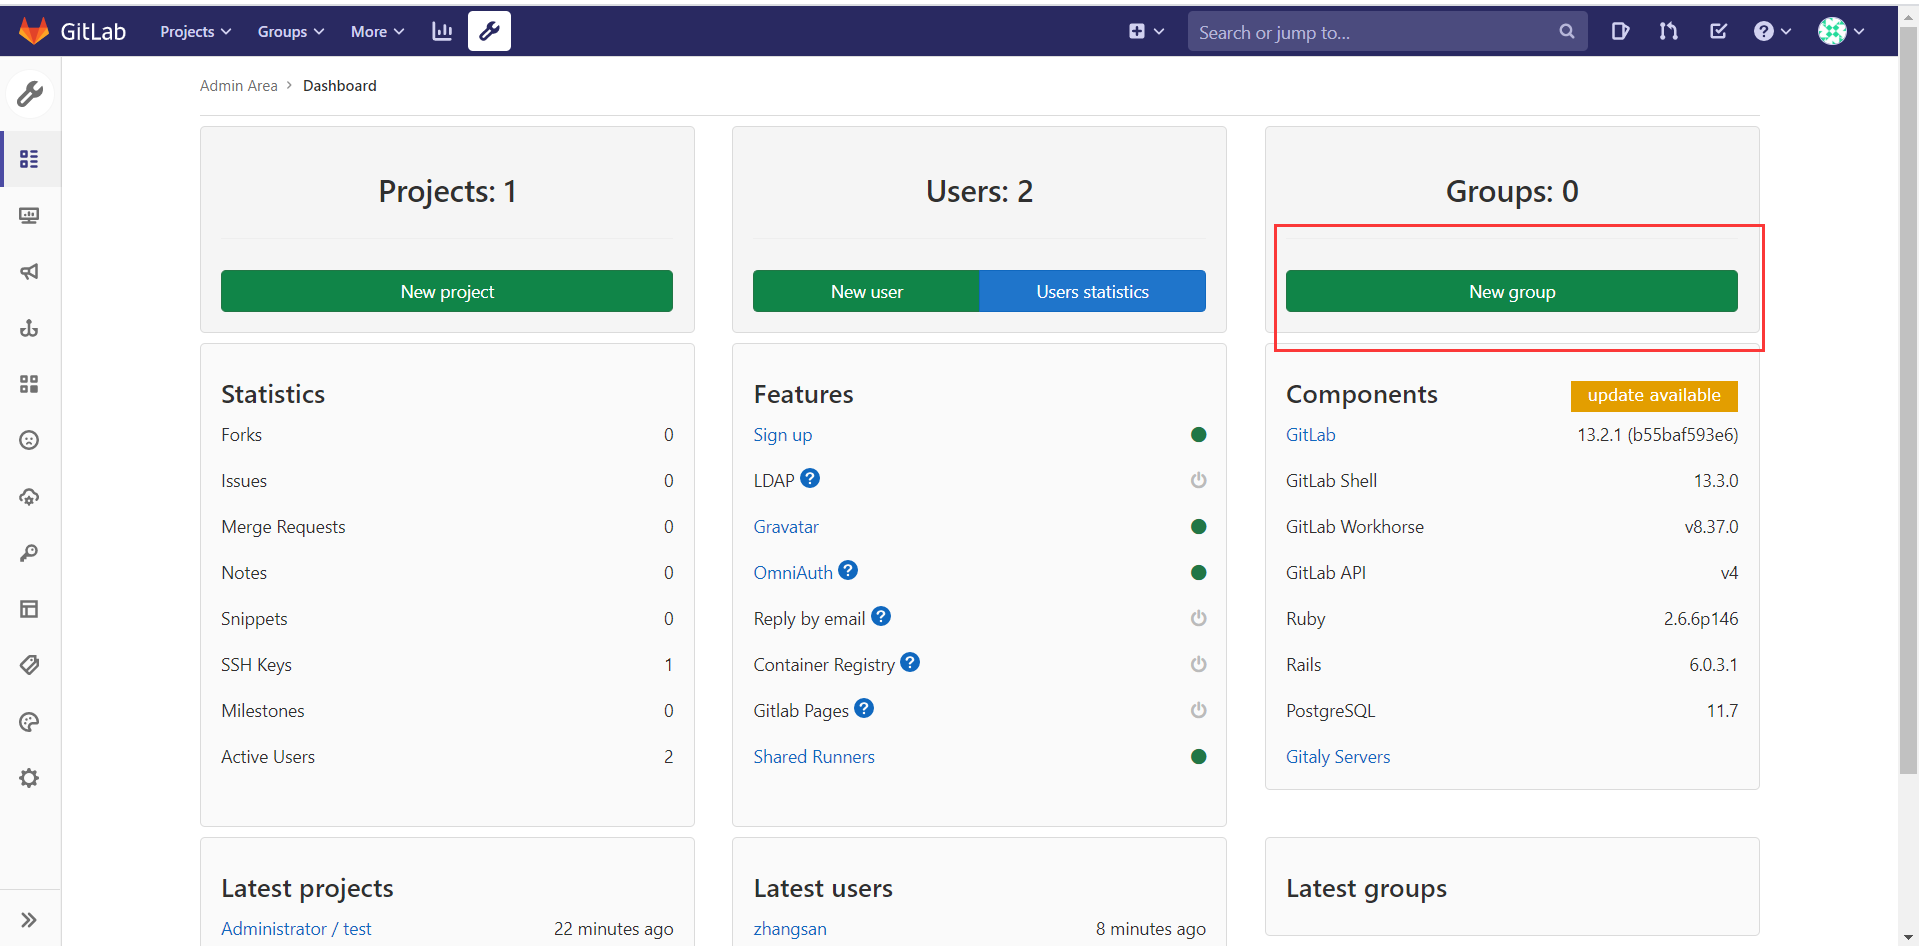
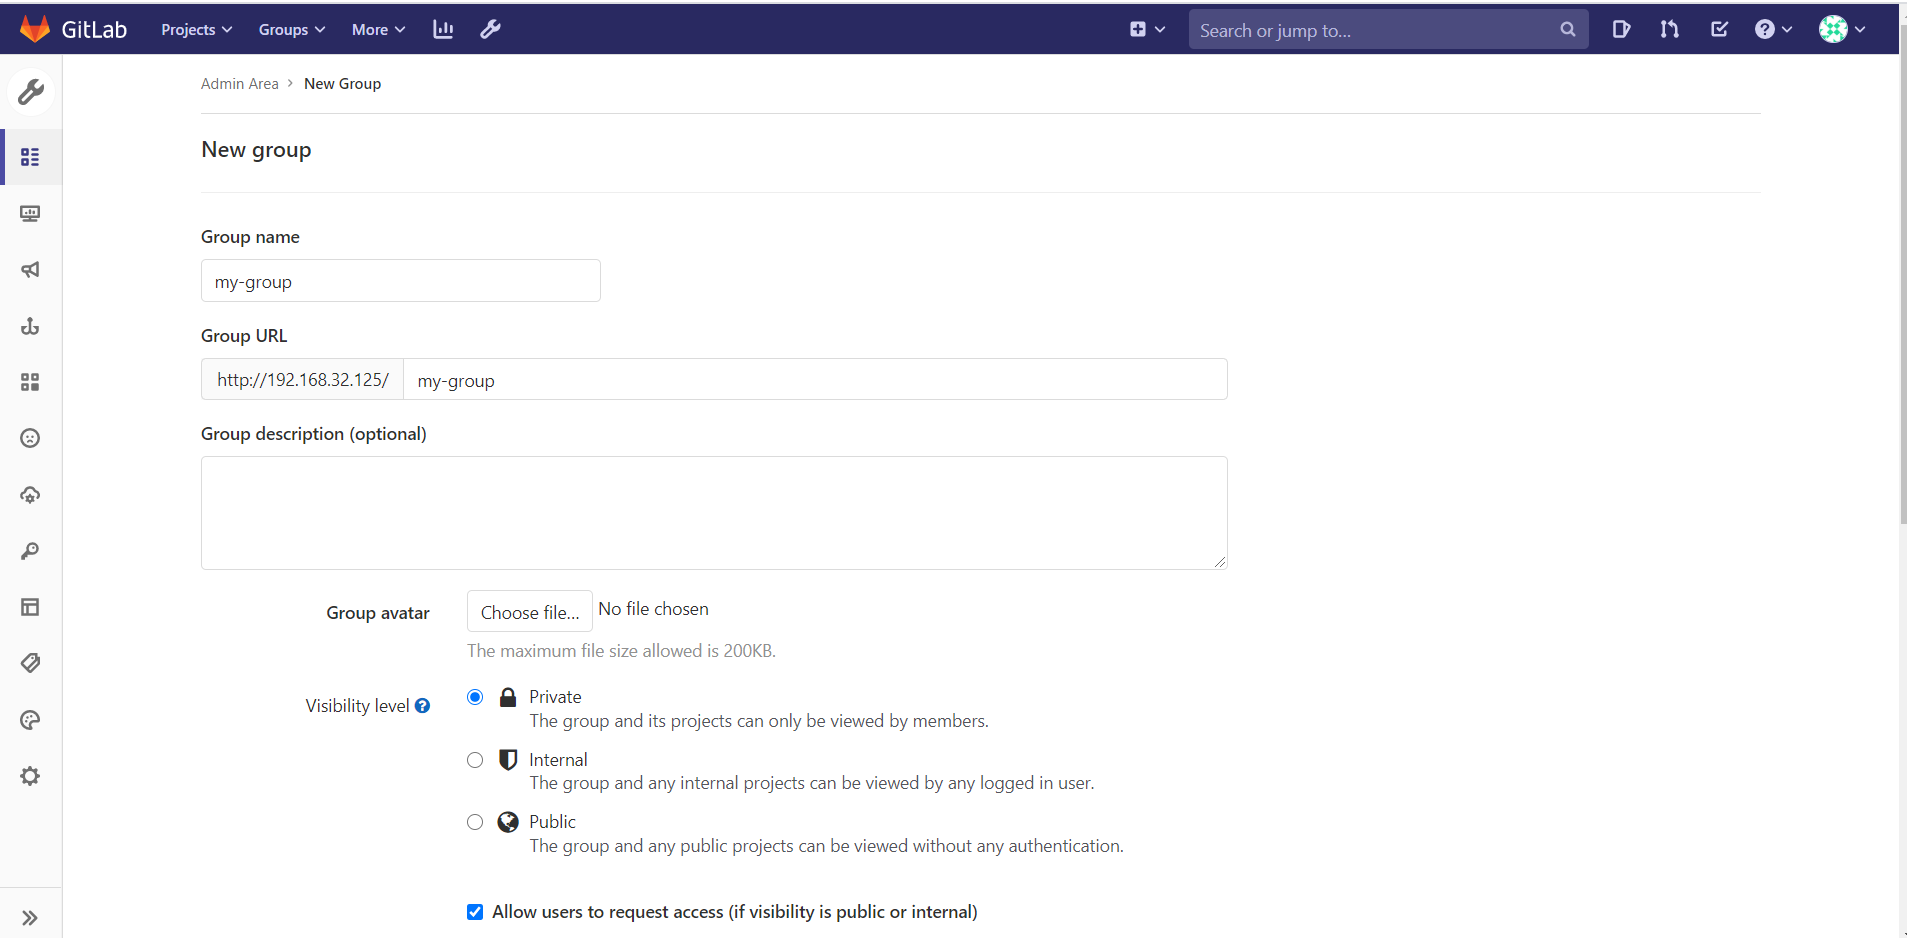
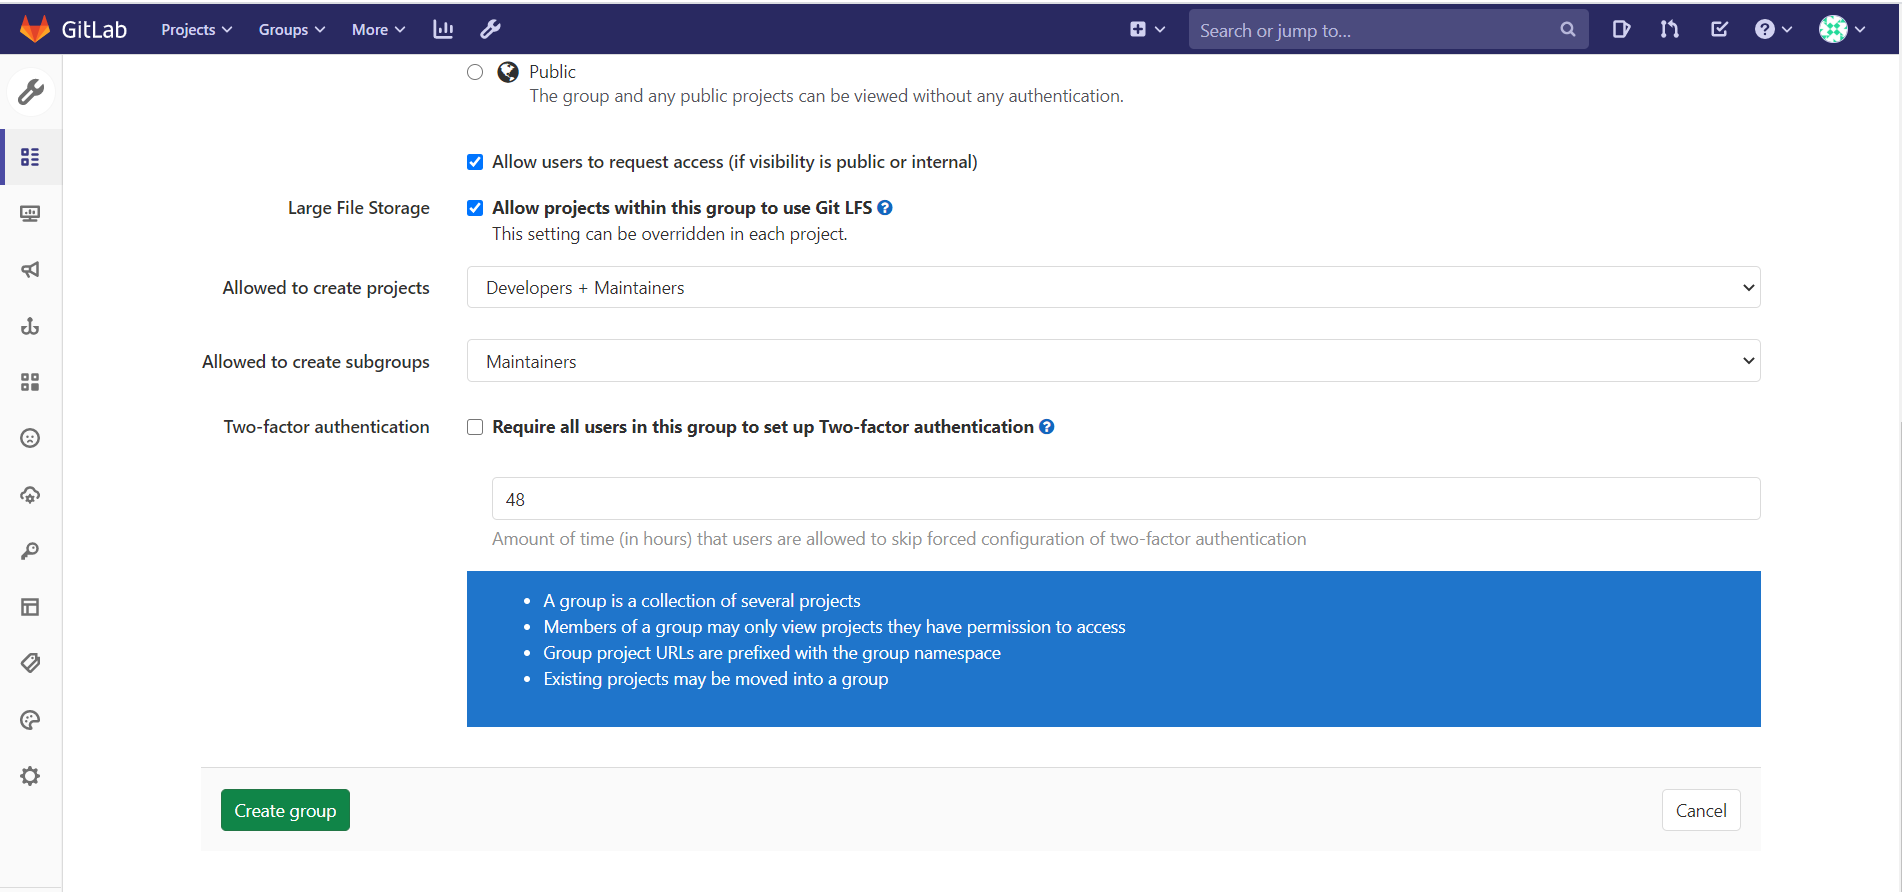
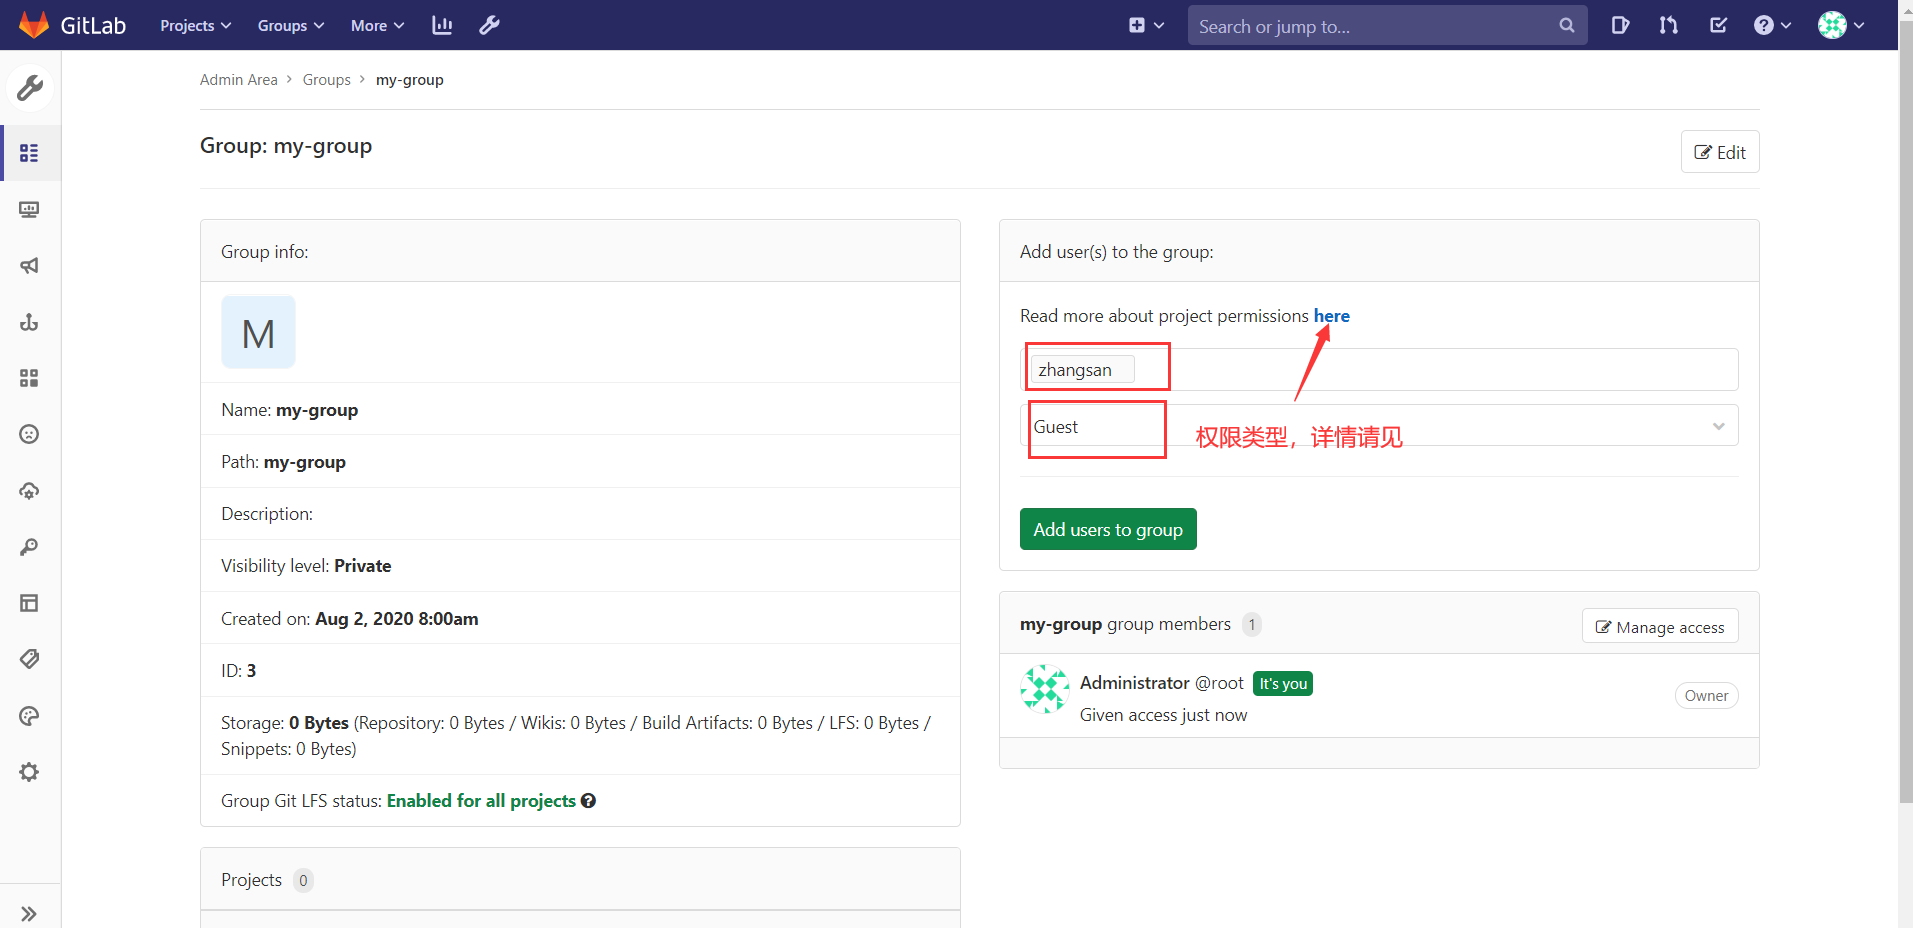
添加用户到组

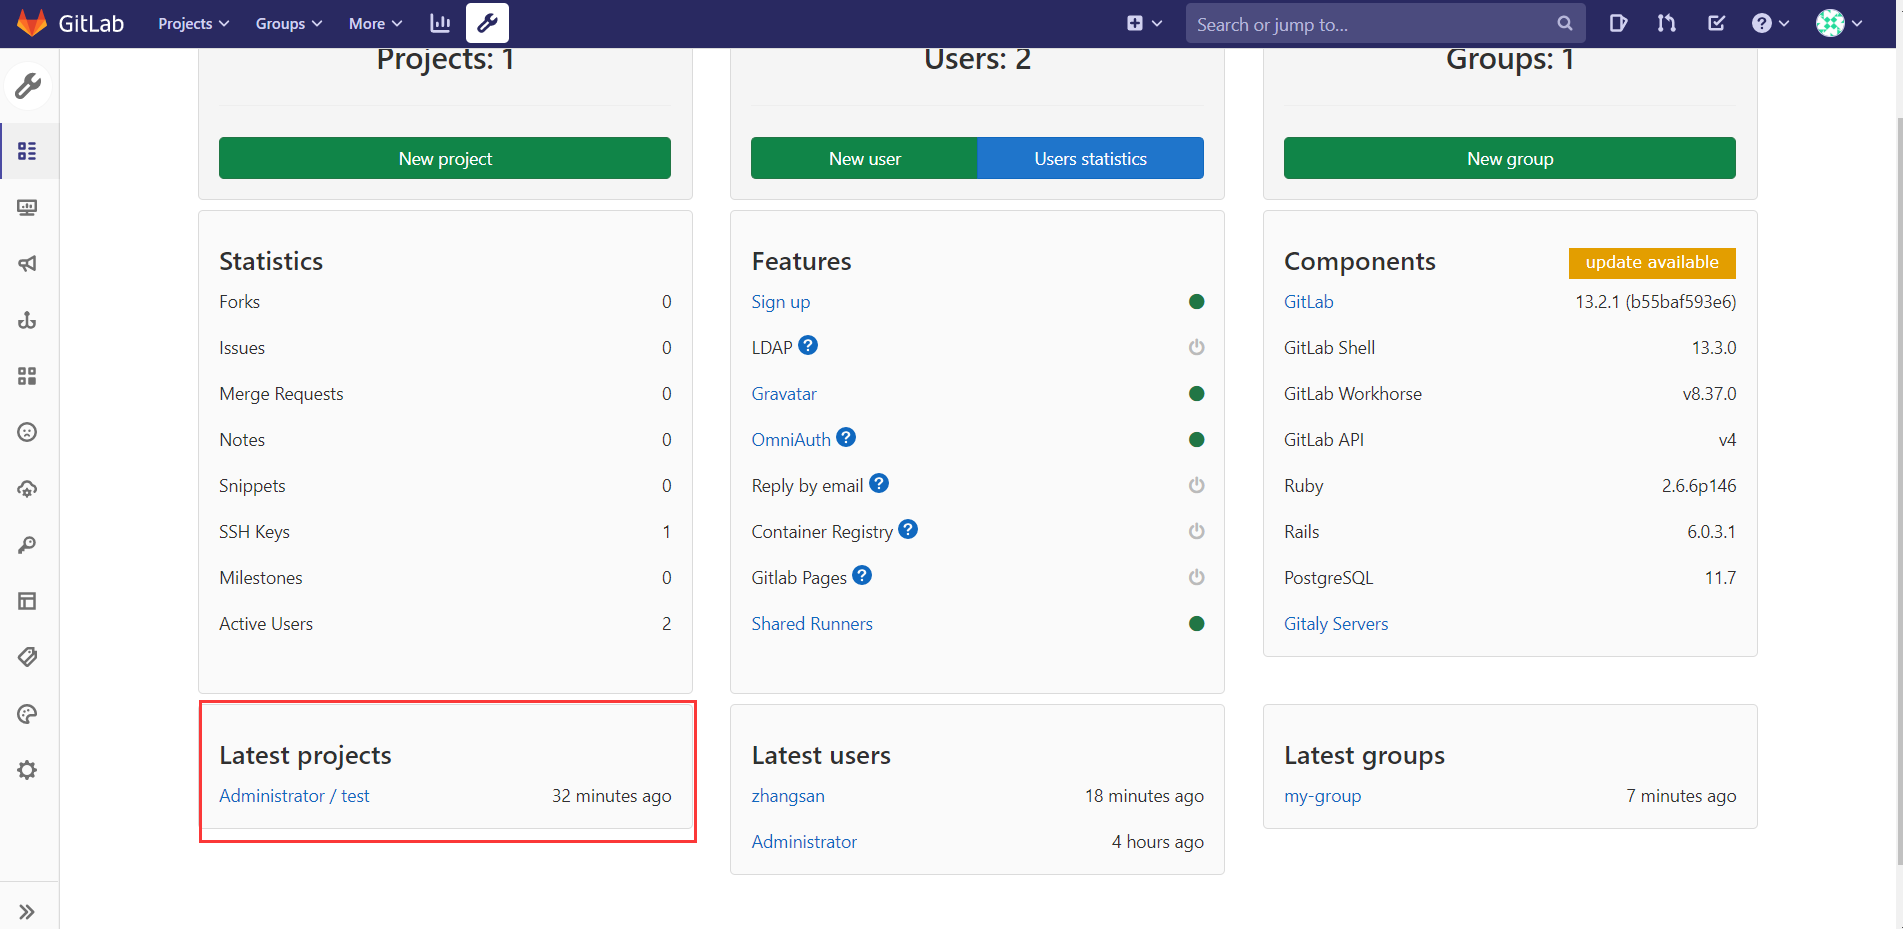
将一个组添加到项目中


克隆项目
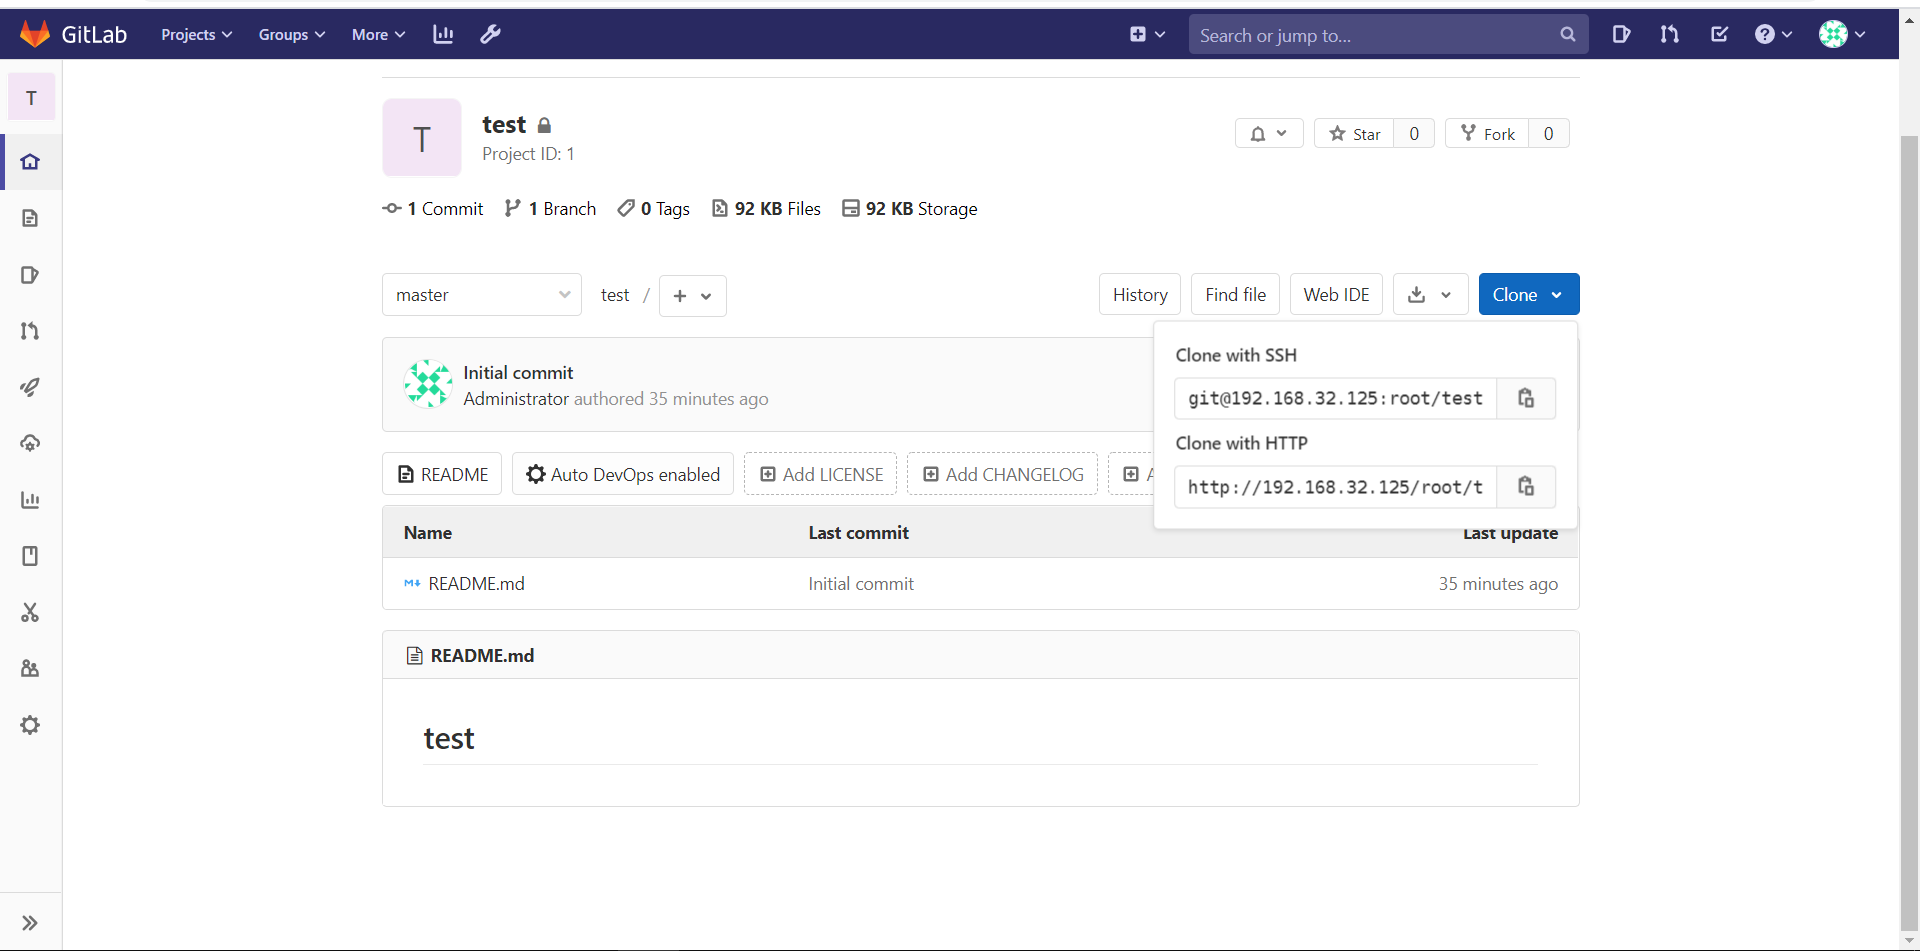
[root@localhost ~]# git clone git@192.168.32.125:root/test.git
Cloning into 'test'...
The authenticity of host '192.168.32.125 (192.168.32.125)' can't be established.
ECDSA key fingerprint is SHA256:frx90ADy/hsYsjrFg0CGVr1aMVpLECeXnXsTnerpZNg.
ECDSA key fingerprint is MD5:0f:89:af:a1:cb:02:5a:a5:f0:00:50:49:bc:53:97:cb.
Are you sure you want to continue connecting (yes/no)? yes
Warning: Permanently added '192.168.32.125' (ECDSA) to the list of known hosts.
remote: Enumerating objects: 3, done.
remote: Counting objects: 100% (3/3), done.
remote: Total 3 (delta 0), reused 0 (delta 0), pack-reused 0
Receiving objects: 100% (3/3), done.
[root@localhost ~]# ls
anaconda-ks.cfg  test


 浙公网安备 33010602011771号