【Spring Security】一、入门
1.Spring Security简介
  Spring Security的前身是Acegi Security,在被收纳为Spring 子项目后正式更名为 Spring Security。
  Spring Security 可以帮助开发者更便捷的完成  认证 + 授权
  认证:确认某主体在系统中是否合法、可用
  授权:即主体通过认证之后,是否允许执行某项操作的过程。
2.Spring Security项目
在Springboot中添加以下依赖
        <dependency>
            <groupId>org.springframework.boot</groupId>
            <artifactId>spring-boot-starter-security</artifactId>
        </dependency>
或者引入spring-security-web和spring-security-config
两个核心模块,此时声明最简单的hello路由
@RestController
@SpringBootApplication
public class Demo1Application {
    @GetMapping("/hello")
    public String hello(){
        return "hello";
    }

    public static void main(String[] args) {
        SpringApplication.run(Demo1Application.class, args);
    }

}
虽然没有进行任何配置,但是Springboot会自动进行配置,在WebSecurityConfigurerAdapter中配置默认运行状态。
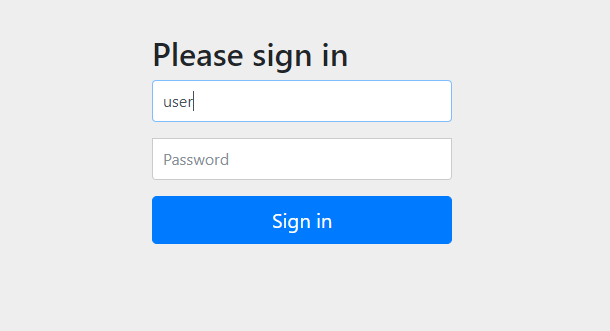
需要在进行HTTP表单验证之后才能访问URL资源
启动项目时就会默认在控制台输出密码
2020-08-12 21:45:34.951  INFO 6948 --- [  restartedMain] .s.s.UserDetailsServiceAutoConfiguration :
Using generated security password: da4d7e67-5311-46a0-b03a-4476f4ff157a
application.properties中自定义配置账户与密码
spring.security.user.name=user
spring.security.user.password=123
在Spring Security 4.x版本中默认的登录方式是HTTP验证,即用户名、密码在弹窗中完成,但是安全性差、无法携带cookie,
所以后来的默认配置是 HTTP表单认证。
3.表单认证
3.1.默认表单认证
查看WebSecurityConfigurerAdapter 中的configure方法
protected void configure(HttpSecurity http) throws Exception {
        this.logger.debug("Using default configure(HttpSecurity). If subclassed this will potentially override subclass configure(HttpSecurity).");
        ((HttpSecurity)((HttpSecurity)((AuthorizedUrl)http.
            authorizeRequests().
            anyRequest()).   //所有请求
            authenticated().and()).
            formLogin().and()). //允许进行表单登录进行身份验证
            httpBasic(); //允许用户使用http基本认证
}
3.2自定义表单验证
- 3.2.1 创建配置类 继承WebSecurityConfigurerAdapter类
- 3.2.2 使用@EnbableWebSecurity注解
- 3.2.3 重写configure(HttpSecurity http)方法
@EnableWebSecurity
public class WebSecurityConfig extends WebSecurityConfigurerAdapter {
    @Override
    protected void configure(HttpSecurity http) throws Exception {
    ((HttpSecurity)((HttpSecurity)((ExpressionUrlAuthorizationConfigurer.AuthorizedUrl)http.
        authorizeRequests().

        anyRequest()).   //所有请求  如果是外置的css 与 js 需要修改 否则静态资源也会被拦截
        authenticated().and()).
        formLogin().loginPage("/myLogin.html").permitAll().//自定义登陆页面  登录页不设限访问
            and()).
        csrf().disable();//关闭 跨站请求伪造防护功能
        }
}
   <form class="form"  action="myLogin.html" method="post">
	<input type="text" placeholder="用户名" id="username" name="username" >
	<input type="password" placeholder="密码" id="password" name="password">
	<button type="submit">登录</button>
  </form>
- 3.2.4 编写自定义登录页 myLogin.html
Spring Security 会为 myLogin.html 生成一个POST路由用于接受登录请求
表单其他配置项
- loginProcessingUrl 指定登录请求路径例如指定为 /login 则form表单中 action = "login"
- successHandler 指定登录成功的逻辑
- failureHandler 指定登陆失败的逻辑
3.3认识HttpSecurity对象
HttpSecurity对象其实对应着 Spring Security 命名空间配置方式中的XML文件标签,为特定的HTTP请求配置安全策略。
HttpSecurity 如果是使用Java默认的传统方式配置会相当复杂,所以被设计成了链式调用
每个方法执行完之后都会返回一个预期的上下文,便于连续调用。
HttpSecurity提供了很多方法,分别对应命名空间中的标签,例如
authorizeRequests-><intercept-url>
formLogin-><form-login>
httpBasic-><http-basic>
除非使用and()方法结束当前标签,上下文才会回到HttpSecurity。
<?xml version="1.0" encoding="UTF-8"?>
<bean:beans xmlns="http://www.springframework.org/schema/security"
    xmlns:bean="http://www.springframework.org/schema/beans" xmlns:xsi="http://www.w3.org/2001/XMLSchema-instance"
    xsi:schemaLocation="http://www.springframework.org/schema/beans
http://www.springframework.org/schema/beans/spring-beans.xsd
http://www.springframework.org/schema/security
http://www.springframework.org/schema/security/spring-security-4.1.xsd">

    <!--
    1、设置放行资源,如登录注册页面,静态资源css、js等等
        security="none" 设置此资源不被拦截.
    -->
    <http pattern="/login.html" security="none"></http>
    <http pattern="/loginerror.html" security="none"></http>
    <http pattern="/css/**" security="none"></http>
    <http pattern="/img/**" security="none"></http>
    <http pattern="/js/**" security="none"></http>
    <http pattern="/plugins/**" security="none"></http>

    <http>
        <!-- 2、拦截所有(除放行资源外) -->
        <intercept-url pattern="/**" access="hasRole('ROLE_USER')" />
        <!--
            3、登录表单设置
            1)login-page:指定登录页面;
            2)login-processing-url:指定登录请求路径;

            3)default-target-url:指定了成功进行身份验证和授权后默认呈现给用户的页面;
            4)always-use-default-target:指定了是否在身份验证通过后总是跳转到;
                                       default-target-url 属性指定的 URL。
            5)authentication-failure-url:指定了身份验证失败时跳转到的页面;
         -->
        <form-login login-page="/login.html"
                    login-processing-url="/login"
                    always-use-default-target="true"
                    default-target-url="/admin/index.html"
                    authentication-failure-url="/loginerror.html"

                     />
        <!--   4、注销设置
                  1)logout-url:指定注销的url;
                  2)logout-success-url:注销成功后登录返回的页面。
        -->
        <logout logout-url="/logout" logout-success-url="/login.html"/>
        <!--
            5、跨站请求设置(我们这里关闭)
               1)csrf disabled="true" 关闭 csrf ,如果不加会出现错误

               2)CSRF(Cross-site request forgery):跨站请求伪造,
                 也被称为“One Click Attack”或者 SessionRiding,
                 通常缩写为 CSRF 或者 XSRF,是一种对网站的恶意利用。
         -->
        <csrf disabled="true" />

        <!-- 6、iframe 框架结构展示 -->
        <headers>
            <frame-options policy="SAMEORIGIN" />
        </headers>
    </http>
     <!--
             认证管理器
             1)我们这里设置一个默认用户
      -->
    <authentication-manager>
        <authentication-provider>
            <user-service>
                <user authorities="ROLE_USER" name="admin" password="123456" />
            </user-service>
        </authentication-provider>
    </authentication-manager>
</bean:beans>
4.认证与授权
基于Spring Security提供默认的用户可能无法满足系统设计的需求。
与Shiro相同 Spring Security 也支持:
首先简单配置url与可以访问的角色
@EnableWebSecurity
public class WebSecurityConfig extends WebSecurityConfigurerAdapter {
    @Override
    protected void configure(HttpSecurity http) throws Exception {
        ((HttpSecurity)((HttpSecurity)((ExpressionUrlAuthorizationConfigurer.AuthorizedUrl)http.
                authorizeRequests().
                antMatchers("/admin/**").hasRole("ADMIN").
                antMatchers("/user/**").hasRole("USER").
                anyRequest()).   //所有请求  如果是内置的css 与 js 需要修改 否则静态资源也会被拦截
                authenticated().
                and()).
                formLogin().//自定义登陆页面  登录页不设限访问
                and()).
                csrf().disable();//关闭 跨站请求伪造防护功能
    }
}
1.内存中配置用户、角色信息
1.1 使用UserDetailsService接口
@Bean
    public UserDetailsService userDetailsService(){
        InMemoryUserDetailsManager im = new InMemoryUserDetailsManager();
        im.createUser(User.withUsername("user2").password("user2").roles("USER").build());
        im.createUser(User.withUsername("admin2").password("admin2").roles("ADMIN").build());
        return im;
    }
1.2 实现WebSecurityConfigurerAdapter
@EnableWebSecurity
public class WebSecurityConfig extends WebSecurityConfigurerAdapter {
    @Override
    protected void configure(AuthenticationManagerBuilder auth)throws Exception  {
        auth.inMemoryAuthentication().
                withUser("user").password("{noop}user").roles("USER").and().
                withUser("admin").password("{noop}admin").roles("ADMIN");
    }
}
2.在数据库中配置用户、角色信息
2.1使用默认数据库表
使用JdbcUserDetailsManager,与内存中存储用户UserDetailsService 没有区别。默认使用的数据库模型在
/org/springframework/security/core/userdetails/jdbc/users.ddl中
2.2使用自定义数据库表
自定义数据库表需要包含UserDetail中一系列在验证时会用到的信息,自定义实体实现UserDetails接口
package org.springframework.security.core.userdetails;

import java.io.Serializable;
import java.util.Collection;
import org.springframework.security.core.GrantedAuthority;

public interface UserDetails extends Serializable {
    Collection<? extends GrantedAuthority> getAuthorities();

    String getPassword();

    String getUsername();

    boolean isAccountNonExpired();

    boolean isAccountNonLocked();

    boolean isCredentialsNonExpired();

    boolean isEnabled();
}
实现UserDetailsService接口,重写loadUserByUsername方法,使用Dao操作返回 UserDetails 的实现类对象即可
public interface UserDetailsService {
    UserDetails loadUserByUsername(String var1) throws UsernameNotFoundException;
}

 浙公网安备 33010602011771号