mobiledet_cpu目标检测
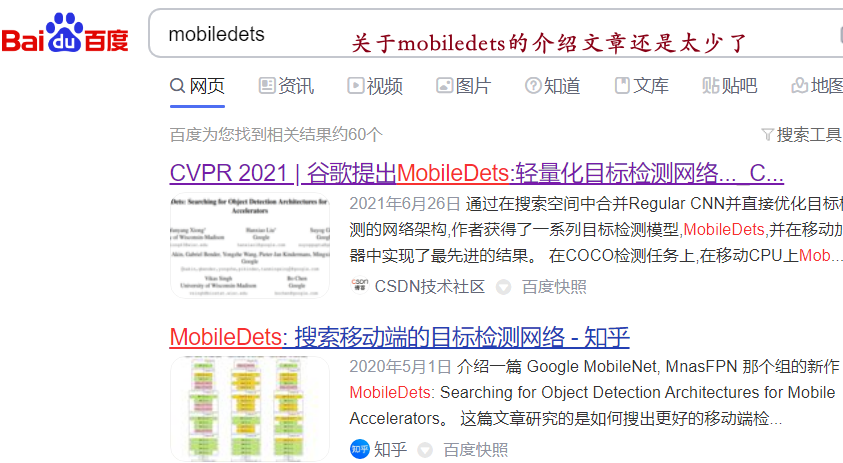
别看了,这玩意没有开源search code部分(没有架构搜索 只是个普通网络)
 ,
, 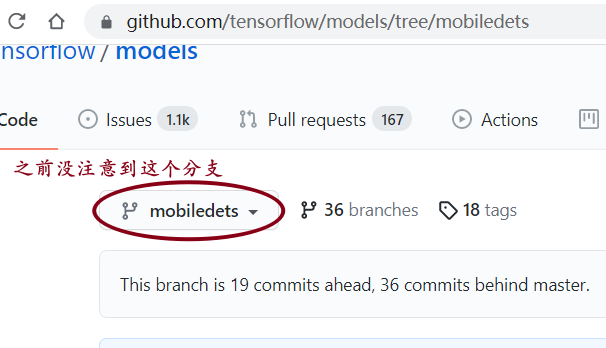
mobiledets原始论文,代码下载,训练模型下载:在object_detection\g3doc\tf1_detection_zoo.md找到ssd_mobiledet_cpu_coco。
在这个md文件中还能看到运行环境说明:

文件结构:
research
-object_detection
-coco_models
-ssdlite_mobiledet_cpu_320x320_coco_2020_05_19 #模型下载位置
-my_ssdlite_mobiledets
-image
-train #训练图片文件夹
-train_xml
-train_labels.csv
-train.record
-test
-test_xml
-test_labels.csv
-test.record
-mycoco.pytxt
-ssdlite_mobiledet_cpu_320x320_coco_sync_4x4.config
-generate_tfrecord.py
一、数据集制作(由image 经过xml和csv 得到.record和pbtxt文件)

①下载一些图片到image/train和image/test中,重命名1-100.jpg

import os
# https://blog.csdn.net/qxqsunshine/article/details/80140037
dir_name = r'C:\myprogram\compile\windows_v1.8.1\image\train'
files = os.listdir(dir_name)
for name in files:
    print(name)
img_len = len(files)
for i in range(img_len):
    oldfn = os.path.join(dir_name, files[i])
    newfn = os.path.join(dir_name, str(i) + '.jpg')
    os.rename(oldfn, newfn)
②使用LabelImg对图片标注 自定义了5个标签[leg,girl,cartoon,plane,cat],生成很多xml文件 放在train_xml和test_xml文件夹中。现把众多xml转换为一个csv文件:
import os
import glob
import pandas as pd
import xml.etree.ElementTree as ET


def xml_to_csv(path):
    xml_list = []
    for xml_file in glob.glob(path + '\\*.xml'):
        print(xml_file)
        tree = ET.parse(xml_file)
        root = tree.getroot()
        for member in root.findall('object'):
            value = (root.find('filename').text,
                     int(root.find('size')[0].text),
                     int(root.find('size')[1].text),
                     member[0].text,
                     int(member[4][0].text),
                     int(member[4][1].text),
                     int(member[4][2].text),
                     int(member[4][3].text)
                     )
            xml_list.append(value)
    column_name = ['filename', 'width', 'height', 'class', 'xmin', 'ymin', 'xmax', 'ymax']
    xml_df = pd.DataFrame(xml_list, columns=column_name)
    return xml_df


def main():
    print(os.getcwd())
    base_dir = r'C:\myprogram\compile\windows_v1.8.1\image'
    for folder in ['train_xml', 'test_xml']:
        image_path = os.path.join( base_dir, folder) # 这里就是需要访问的.xml的存放地址目录
        xml_df = xml_to_csv(image_path)

        # object_detection/images/train or test
        xml_df.to_csv((base_dir + folder + '_labels.csv'), index=None)
        print('Successfully converted xml to csv.')


main()
现在我把image文件夹由windows_v1.8.1烤到research中
③再一次转换 把图片和标注合在一起:image+labels.csv -->.record

from __future__ import division
from __future__ import print_function
from __future__ import absolute_import

import os
import io
import pandas as pd
import tensorflow.compat.v1 as tf

tf.disable_v2_behavior()

from PIL import Image
from object_detection.utils import dataset_util
from collections import namedtuple, OrderedDict

flags = tf.app.flags
flags.DEFINE_string('csv_input', '', 'Path to the CSV input')
flags.DEFINE_string('image_dir', '', 'Path to the image directory')
flags.DEFINE_string('output_path', '', 'Path to output TFRecord')
FLAGS = flags.FLAGS


def class_text_to_int(row_label):
    if row_label == 'cat':  # 这里需要自己修改,有多少个类就该多少个!!!!
        return 1
    elif row_label == 'girl':
        return 2
    elif row_label == 'plane':
        return 3
    elif row_label == 'cartoon':
        return 4
    elif row_label == 'leg':
        return 5
    else:
        return 0


def split(df, group):
    data = namedtuple('data', ['filename', 'object'])
    gb = df.groupby(group)
    return [data(filename, gb.get_group(x)) for filename, x in zip(gb.groups.keys(), gb.groups)]


def create_tf_example(group, path):
    with tf.gfile.GFile(os.path.join(path, '{}'.format(group.filename)), 'rb') as fid:
        encoded_jpg = fid.read()
    encoded_jpg_io = io.BytesIO(encoded_jpg)
    image = Image.open(encoded_jpg_io)
    width, height = image.size

    filename = group.filename.encode('utf8')
    image_format = b'jpg'
    xmins = []
    xmaxs = []
    ymins = []
    ymaxs = []
    classes_text = []
    classes = []

    for index, row in group.object.iterrows():
        xmins.append(row['xmin'] / width)
        xmaxs.append(row['xmax'] / width)
        ymins.append(row['ymin'] / height)
        ymaxs.append(row['ymax'] / height)
        classes_text.append(row['class'].encode('utf8'))
        classes.append(class_text_to_int(row['class']))

    tf_example = tf.train.Example(features=tf.train.Features(feature={
        'image/height': dataset_util.int64_feature(height),
        'image/width': dataset_util.int64_feature(width),
        'image/filename': dataset_util.bytes_feature(filename),
        'image/source_id': dataset_util.bytes_feature(filename),
        'image/encoded': dataset_util.bytes_feature(encoded_jpg),
        'image/format': dataset_util.bytes_feature(image_format),
        'image/object/bbox/xmin': dataset_util.float_list_feature(xmins),
        'image/object/bbox/xmax': dataset_util.float_list_feature(xmaxs),
        'image/object/bbox/ymin': dataset_util.float_list_feature(ymins),
        'image/object/bbox/ymax': dataset_util.float_list_feature(ymaxs),
        'image/object/class/text': dataset_util.bytes_list_feature(classes_text),
        'image/object/class/label': dataset_util.int64_list_feature(classes),
    }))
    return tf_example


def main(_):
    writer = tf.python_io.TFRecordWriter(FLAGS.output_path)
    path = os.path.join(os.getcwd(), FLAGS.image_dir)
    print(path)
    examples = pd.read_csv(FLAGS.csv_input)
    grouped = split(examples, 'filename')
    for group in grouped:
        tf_example = create_tf_example(group, path)
        writer.write(tf_example.SerializeToString())
    writer.close()
    output_path = os.path.join(os.getcwd(), FLAGS.output_path)
    print('Successfully created the TFRecords: {}'.format(output_path))


if __name__ == '__main__':
    tf.app.run()
注意修改部分
def class_text_to_int(row_label):
    if row_label == 'cat':  # 这里需要自己修改,有多少个类就该多少个!!!!
        return 1
    elif row_label == 'girl':
        return 2
    elif row_label == 'plane':
        return 3
    elif row_label == 'cartoon':
        return 4
    elif row_label == 'leg':
        return 5
    else:
        return 0
在research下分别为train和test执行
1  python generate_tfrecord.py  --csv_input=image/train_labels.csv  --image_dir=image/train --output_path=image/train.record
2  python generate_tfrecord.py  --csv_input=image/test_labels.csv   --image_dir=image/test  --output_path=image/test.record
④取出总标签文件并修改 copy object_detection\data\mscoco_label_map.pbtxt image\mycoco.pbtxt
item {
id: 1
name: 'cat'
}
仿照格式,有多少个类就追加多少个item。coco数据集有80个类别,我这儿只有5个。注意:id必须与generate_tfrecord.py中的id一致
二、修改训练文件
运行环境
(1)修改.config后执行
copy object_detection\samples\configs\ssdlite_mobiledet_cpu_320x320_coco_sync_4x4.config image\
修改image下的.config文件(注意修改位置): 有两个label_map_path ,分别在train_input_reader 和eval_config标签中
num_classes: 5 #原90
batch_size: 16   #原24 批次大小
otal_steps: 40000 #原400000 训练次数
warmup_steps: 200  #原2000
max_number_of_boxes: 20 #原100
sync_replicas: false  #原true
label_map_path: "C:\\myprogram\\tensor\\models-master\\research\\image\\mycoco.pbtxt"
input_path: "C:\\myprogram\\tensor\\models-master\\research\\image\\train.record"
label_map_path: "C:\\myprogram\\tensor\\models-mobiledets\\research\\image\\mycoco.pbtxt"
input_path: "C:\\myprogram\\tensor\\models-mobiledets\\research\\image\\test.record"
fine_tune_checkpoint: "C:\\myprogram\\tensor\\models-mobiledets\\research\\coco_models\\ssdlite_mobiledet_cpu_320x320_coco_2020_05_19\\model.ckpt"
from_detection_checkpoint: true    #可以修改的地方:是否进行finetune
fine_tune_checkpoint_type: "detection"
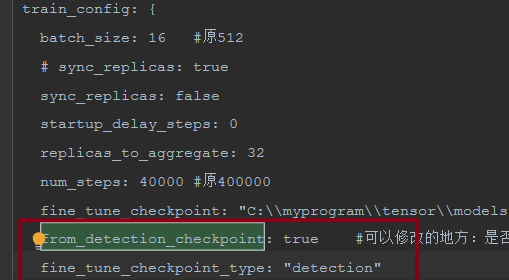

把下载模型文件名中的ssdlite_mobiledet_cpu_320x320_coco_2020_05_19\model.ckpt-400000改为model.ckpt,三个都要改。
最后训练执行:--model_dir 是模型文件暂时存放的目录(随意设定)
object_detection>python model_main.py   \
--logtostderr   \
--model_dir=../image/   \
--pipeline_config_path=../image/ssdlite_mobiledet_cpu_320x320_coco_sync_4x4.config
(2)解决报错
①【ModuleNotFoundError: No module named ‘object_detection’】很多文件都有from object_detection import…… 不可能把所有文件都弄到research文件夹下。
我一定是漏了什么配置,两种解决办法:
第一方案:
将models\research\object_detection\packages\tf1文件夹下的setup.py复制到models\research目录下,然后执行:
python setup.py build
python setup.py install
下载好多东西 等了十几分钟!
第二方案:
python安装目录下的lib\site-packages文件夹下建立一个tensorflow_model.pth文件,文件内容:
D:\TensoFlowObjectDetectionAPI\models-master\research
D:\TensoFlowObjectDetectionAPI\models-master\research\slim
②【site-packages\tensorflow_core\python\framework\ops.py:736 __array__
" array.".format(self.name))
NotImplementedError: Cannot convert a symbolic Tensor (cond_2/strided_slice:0) to a numpy array.】
解决: numpy版本过高,卸载后重新安装低版本pip install numpy=1.19.5 解决完后就正常执行了!
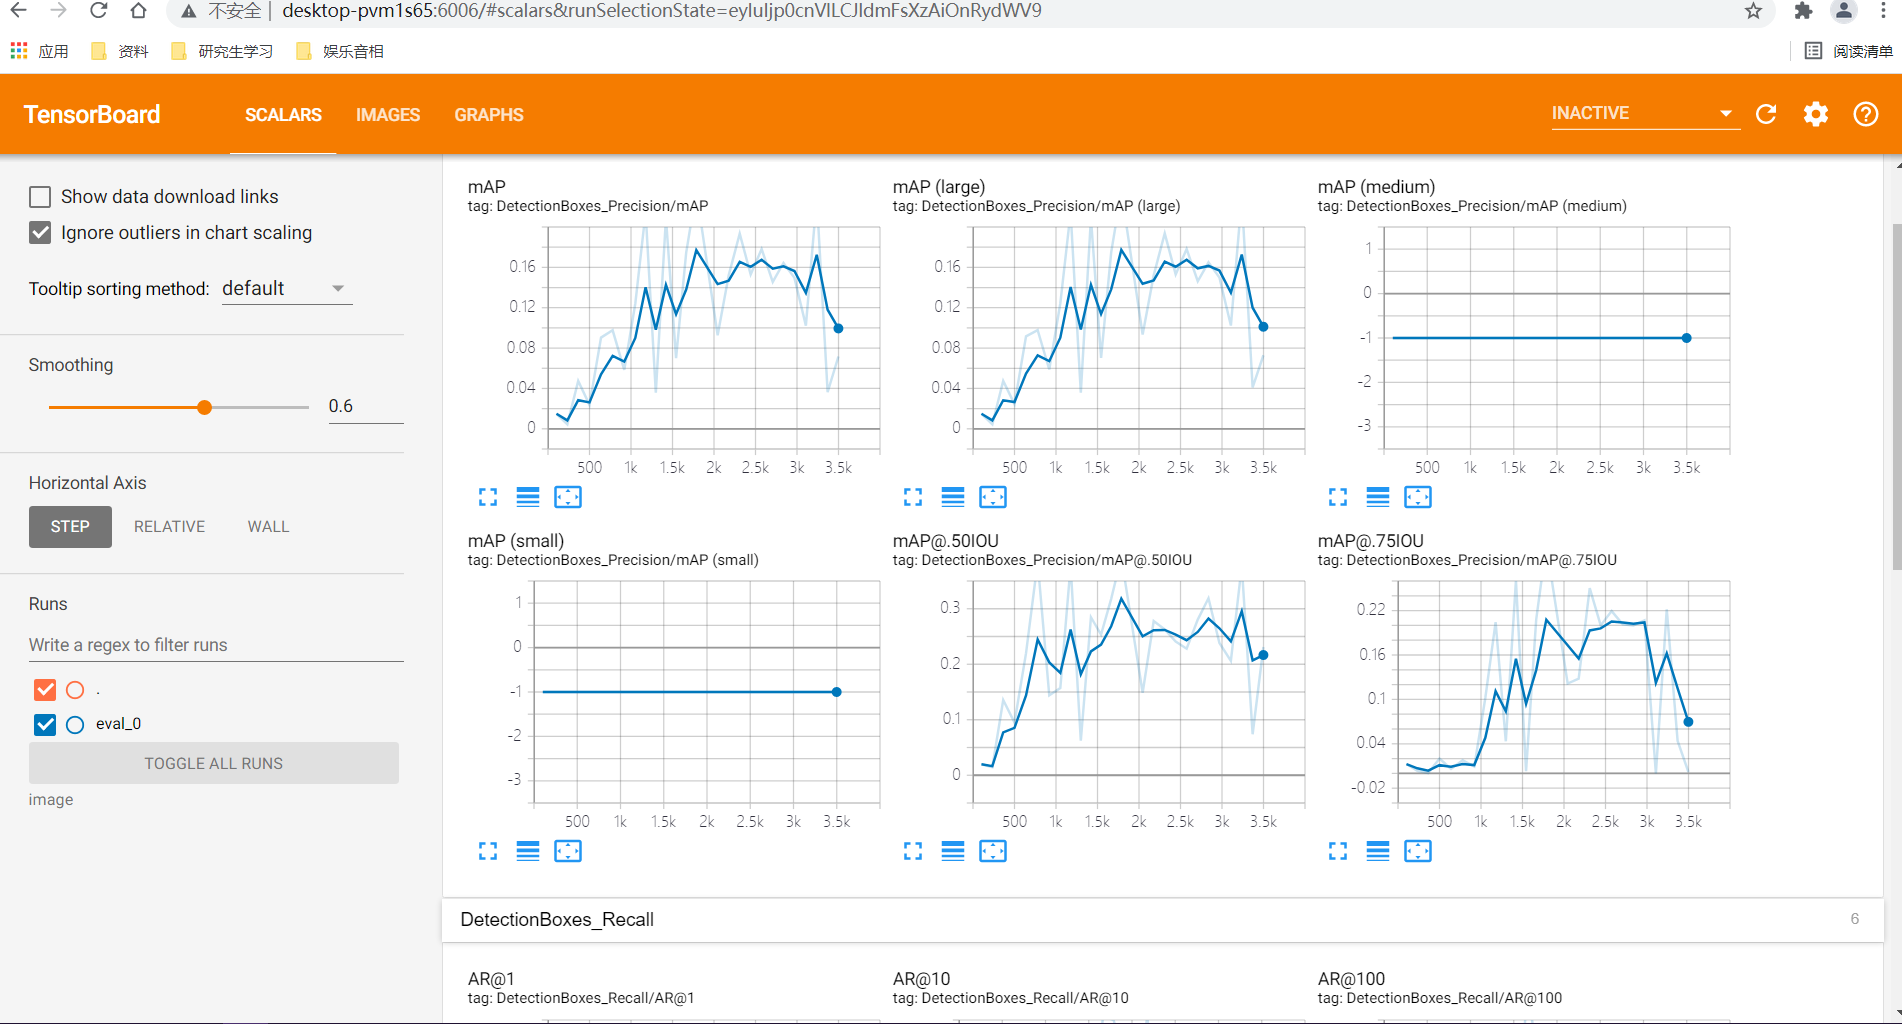
(3)打开tensorboard
research>tensorboard --logdir=image #打开http://localhost:6006/
三、模型保存、测试
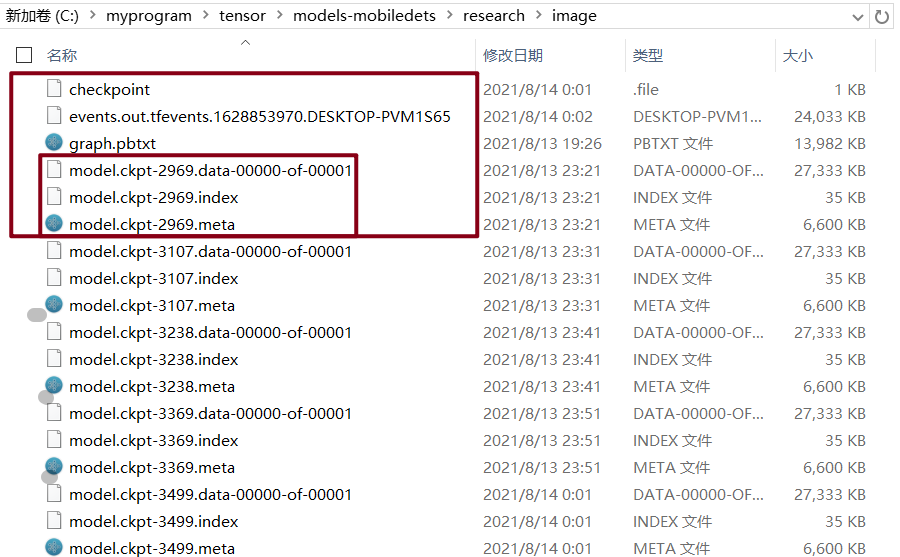
1)执行: output_directory是生成模型保存的位置(随意设定),本来设定运行4000setp的,还没训练结束就可以保存了。
object_detection>python export_inference_graph.py  \
--input_type image_tensor  \
--pipeline_config_path  ..\image\ssdlite_mobiledet_cpu_320x320_coco_sync_4x4.config  \
--trained_checkpoint_prefix  ..\image\model.ckpt-3369   \
--output_directory  ..\coco_models\my_ssdlite_mobiledets
2)tf1上测试:--checkpoint_dir的目录引用自训练时生成的checkpoint文件所在目录,也可以写保存了的..\coco_models\my_ssdlite_mobiledets;
--eval_dir是生成文件所在目录(随意设定)
research\object_detection> copy legacy\eval.py .\
python eval.py   \
--logtostderr  \
--pipeline_config_path=..\image\ssdlite_mobiledet_cpu_320x320_coco_sync_4x4.config  \
--checkpoint_dir=..\image\     \
--eval_dir=..\image\test\
2.1)tf2上用测试文件,测试可以参见上一篇,就是把下载的模型改为我这里训练好的模型。
该测试文件放在research下,修改文件中三处,然后直接运行即可!注意:运行改在tf2环境下,因为tf1中的tf.saved_model.load函数不太好用,你可以看看。
# -- coding: utf-8 --
import tensorflow as tf
import numpy as np
from PIL import Image
from object_detection.utils import visualization_utils as vis_util
from object_detection.utils import label_map_util
from PIL import Image
import os


def test(file, model, category_index):
    image_np = np.array(Image.open(file))
    input_tensor = tf.convert_to_tensor(image_np)  # 数据类型np转tensor
    input_tensor = input_tensor[tf.newaxis, ...]  # 因为只有一张图片 三维转四维
    output_dict = model.signatures['serving_default'](input_tensor)

    num_detections = int(output_dict.pop('num_detections'))
    output_dict = {key: value[0, :num_detections].numpy()
                   for key, value in output_dict.items()}
    output_dict['num_detections'] = num_detections
    output_dict['detection_classes'] = output_dict['detection_classes'].astype(np.int64)
    vis_util.visualize_boxes_and_labels_on_image_array(
        image_np,
        output_dict['detection_boxes'],
        output_dict['detection_classes'],
        output_dict['detection_scores'],
        category_index,
        instance_masks=output_dict.get('detection_masks_reframed', None),
        use_normalized_coordinates=True,
        line_thickness=8)
    Image.fromarray(image_np).show()


if __name__ == '__main__':
    model_dir = r"C:\myprogram\tensor\models-mobiledets\research\coco_models\my_ssdlite_mobiledets\saved_model"
    mypbtxt = os.path.join(r"C:\myprogram\tensor\models-mobiledets\research\image", "mycoco.pbtxt")
    model = tf.saved_model.load(model_dir)
    category_index = label_map_util.create_category_index_from_labelmap(mypbtxt, use_display_name=True)

    img_test_dir = r'C:\myprogram\tensor\models-mobiledets\research\image\test'
    for file in os.listdir(img_test_dir):
        print(file)
        test(os.path.join(img_test_dir, file), model, category_index)
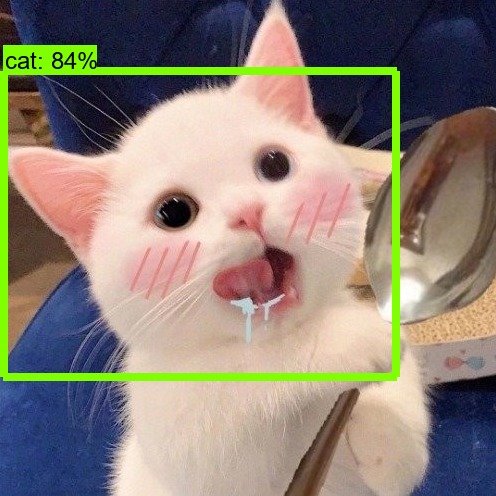
电脑比较拉了 样本也太少,训练五个小时的效果好差哦;训练集上还好 !
 ,
,
 ,
,
参考博客:
https://blog.csdn.net/qq_17854471/article/details/89786400 tensorflow使用object detection完成目标检测的实例——无数的坑超详细吐血整理
https://blog.csdn.net/qq_35975447/article/details/108295070 tensorflow/models-v1.12.0中使用ssd_mobiledet_cpu_coco
https://blog.csdn.net/asukasmallriver/article/details/78752178 Tensorflow训练自己的Object Detection模型并进行目标检测
2021-08-14 14:07:28


