
nexus3私服安装及配置
1. 安装Nexus3
- 禁用防火墙
systemctl stop firewalld
systemctl disable firewalld
- 拉取nexus镜像
docker pull sonatype/nexus3
- 配置外部挂在文件夹
mkdir -p /opt/nexus/data
chmod 777 /opt/nexus/data
- 安装
docker run -e INSTALL4J_ADD_VM_PARAMS="-Dstorage.diskCache.diskFreeSpaceLimit=2048" -d -p 8081:8081 --name nexus3 -v /opt/nexus/data/:/nexus-data sonatype/nexus3
- 查看容器日志
docker logs -f -t nexus3
或者直接上传nexus压缩包(nexus-3.37.3-02-unix.tar.gz)
- 上传并解压
tar -zxvf nexus-3.37.3-02-unix.tar.gz -C /opt/
- 创建软连接
ln -s /opt/nexus-3.37.3-02 /opt/nexus3
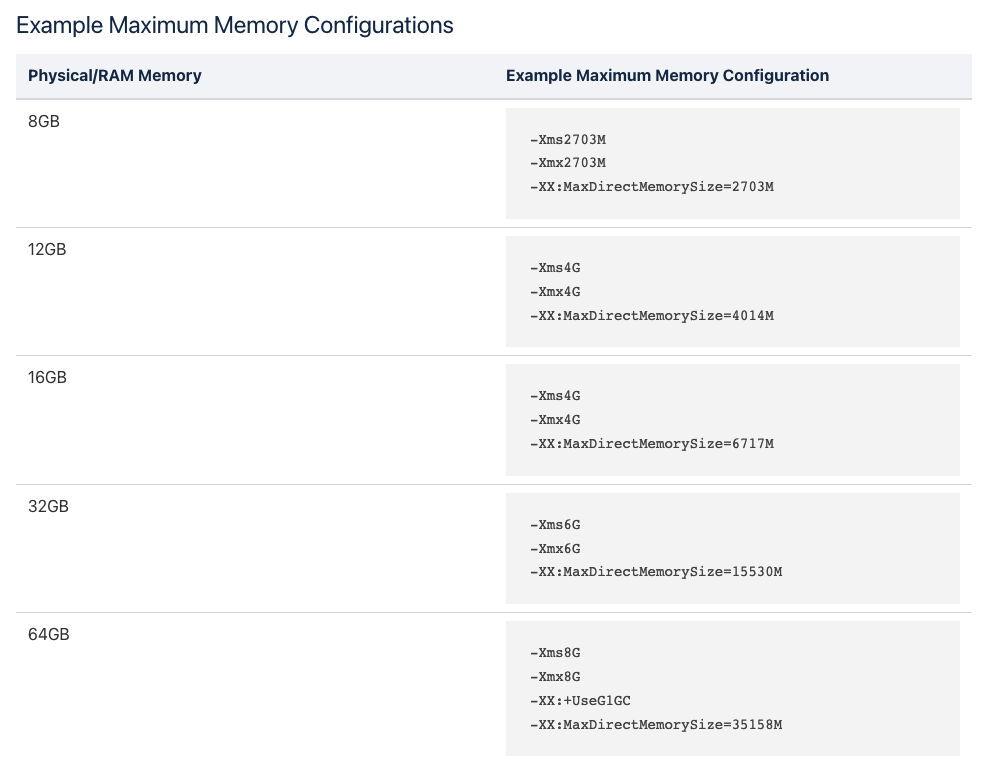
- 配置JVM堆栈信息
cd /opt/nexus3/bin/
vi nexus.vmoptions

-Xms4G
-Xmx4G
-XX:MaxDirectMemorySize=6717m
详细参加https://help.sonatype.com/repomanager3/installation-and-upgrades/configuring-the-runtime-environment
官方推荐配置如下图
- 启动nexus3
# 前台启动
bin/nexus run
# 后台启动
bin/nexus start
首次启动推荐使用nexus run,nexus需要初始化很多组件。便于观察。

2. 配置
访问ip:8081端口进入web ui页面。查看password密码
[root@maven ~]# cat /opt/sonatype-work/nexus3/admin.password
c3615332-a263-453a-b5c1-c8dc0f035685
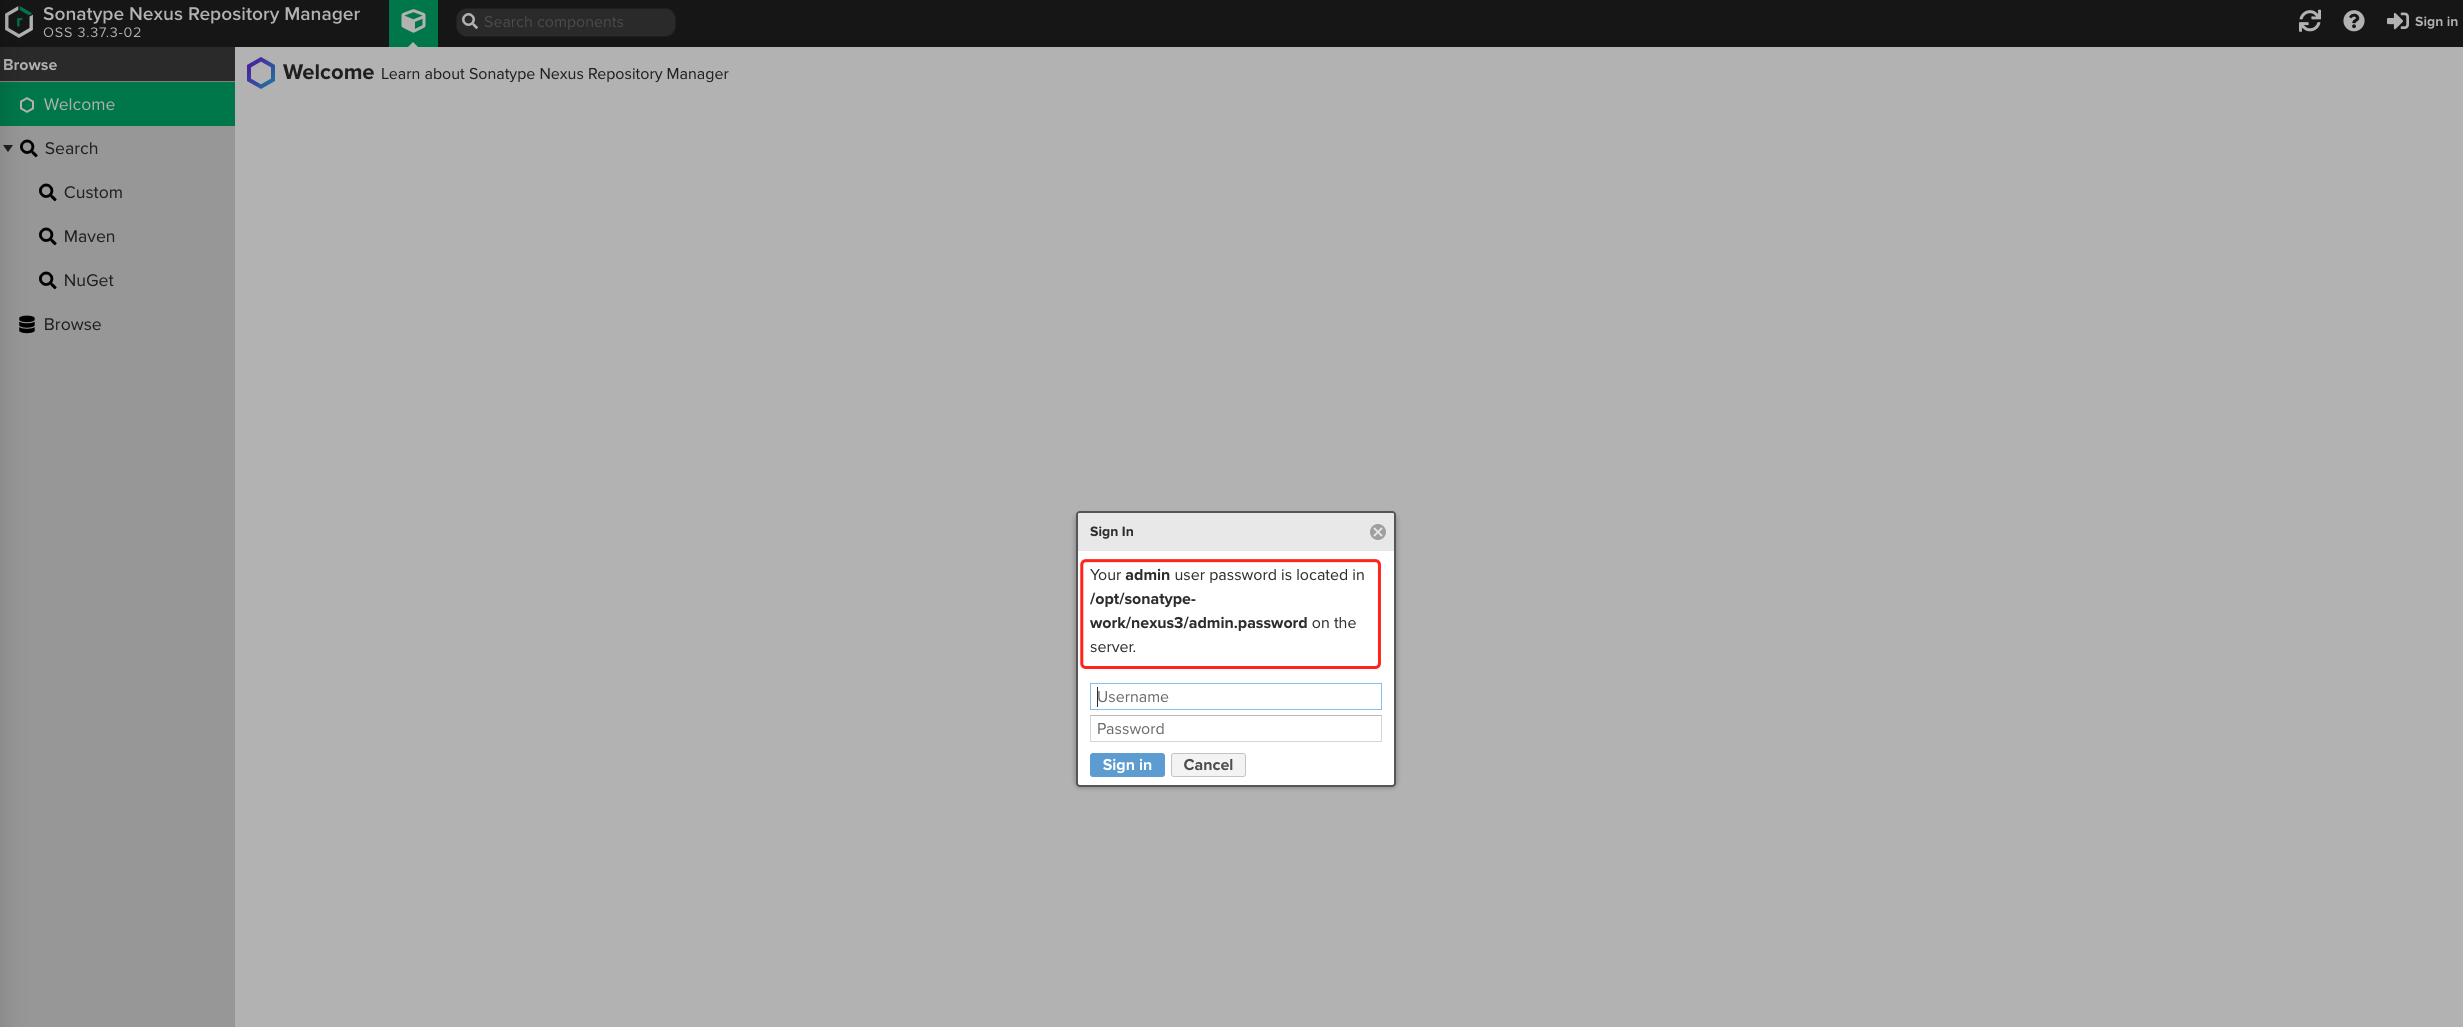
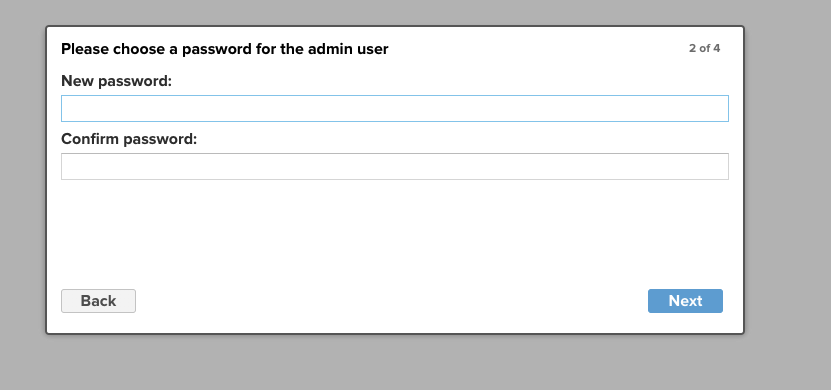
登录后重置密码
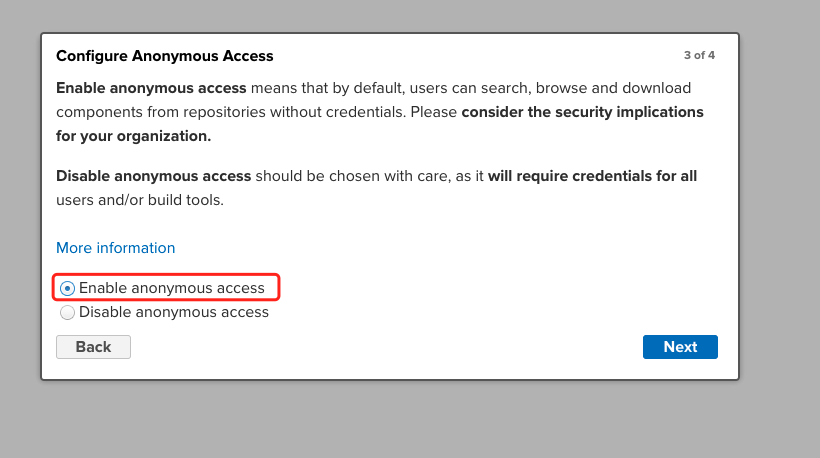
配置允许任何人访问
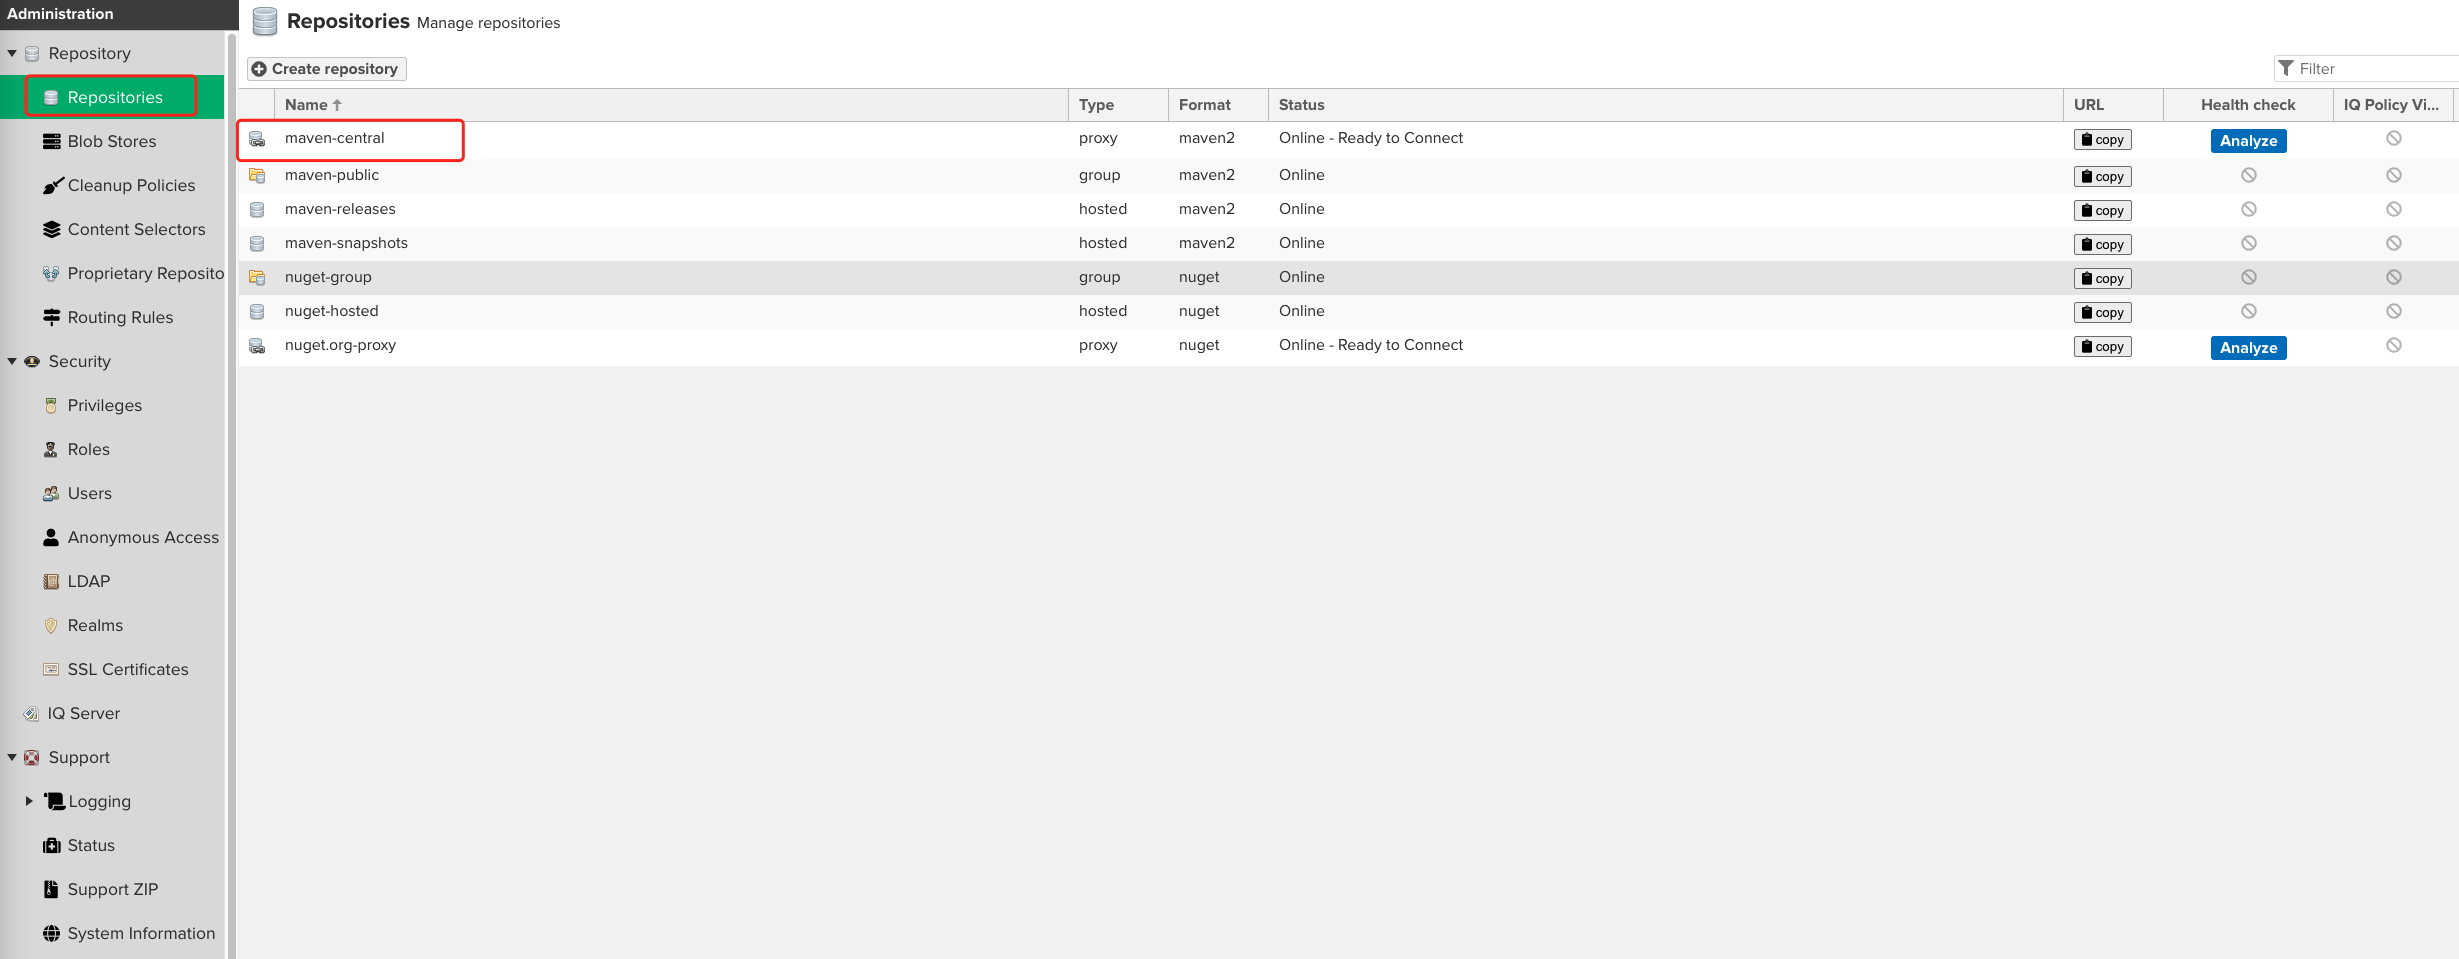
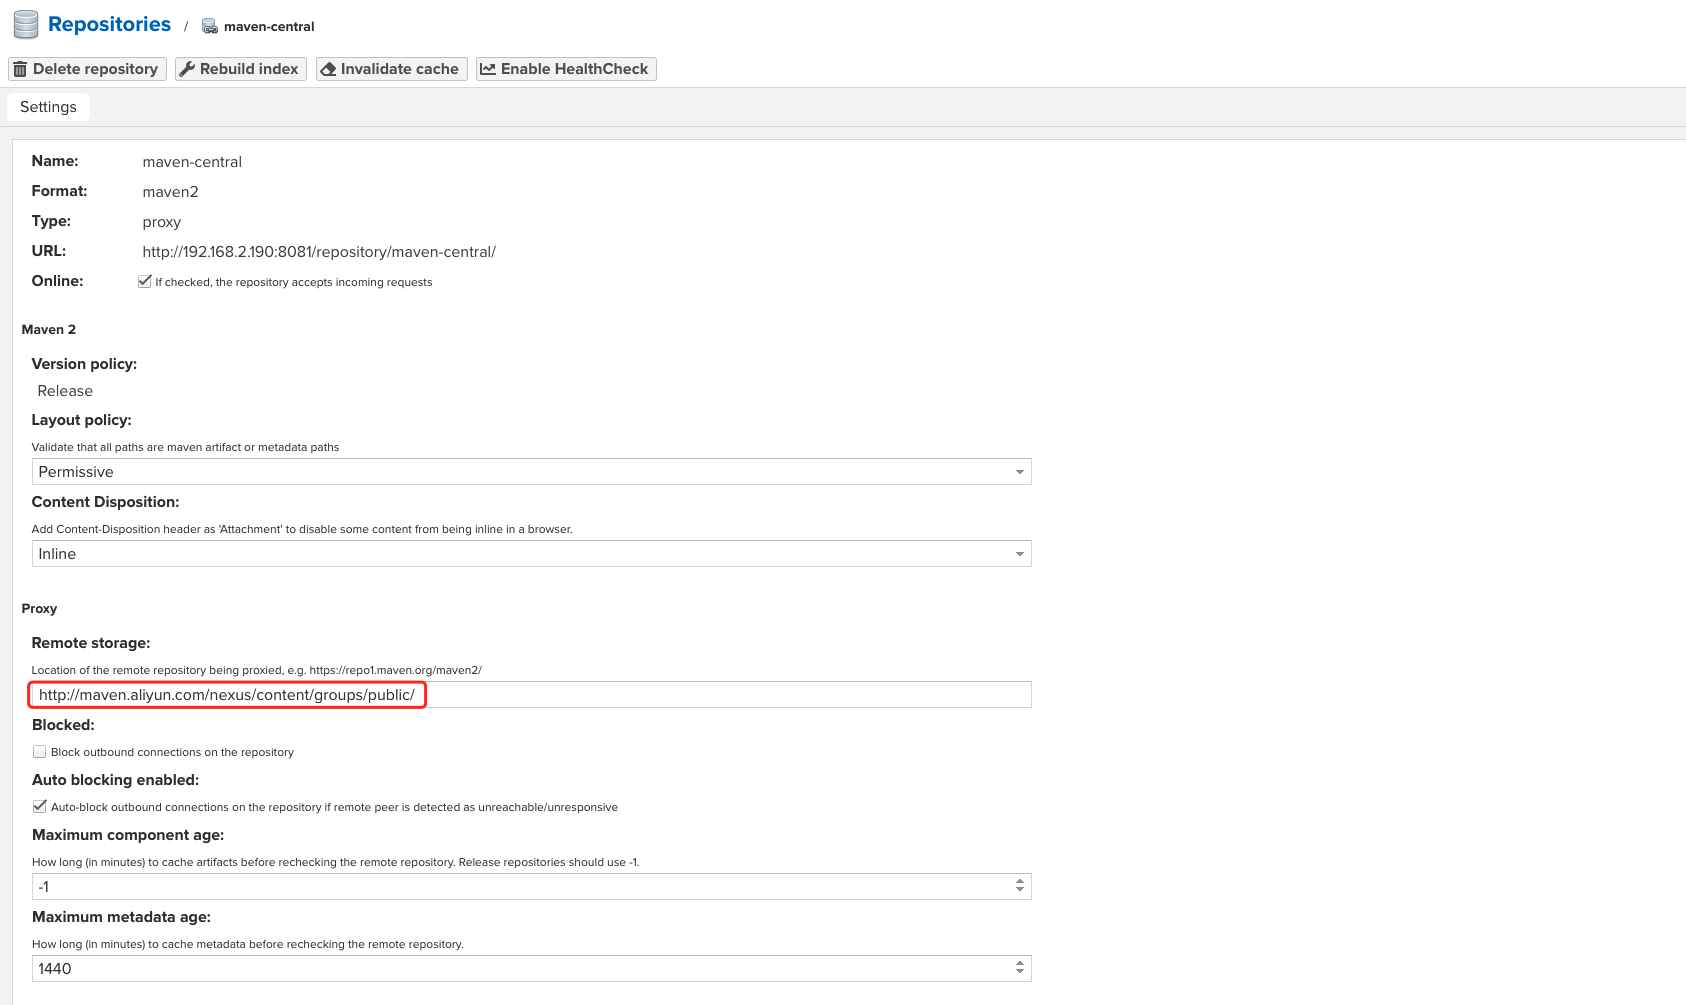
- 配置中心仓库为国内源。Repository-->maven-central。
在proxy中设置华为源地址https://mirrors.huaweicloud.com/repository/maven/
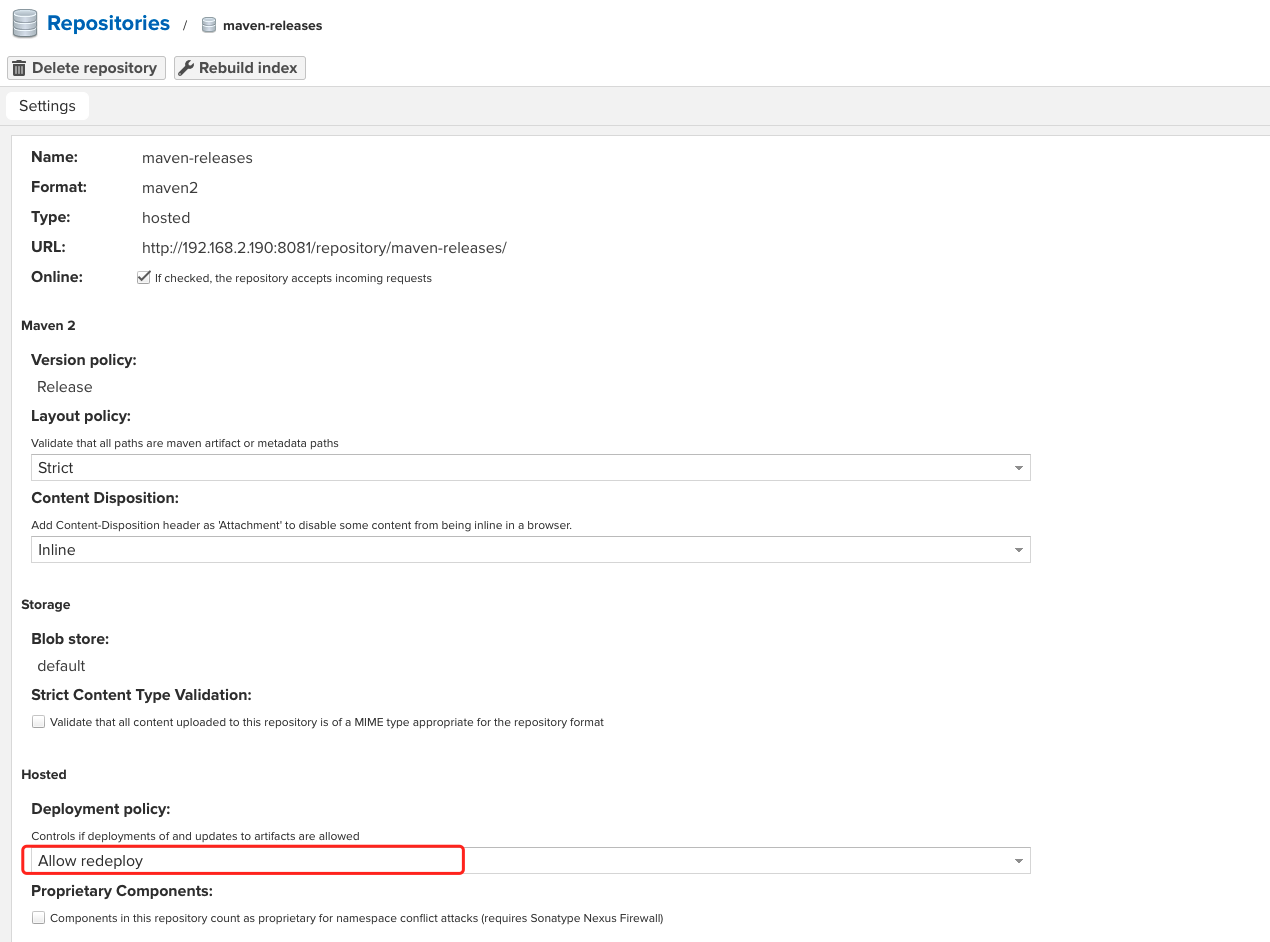
在maven-release中配置Dependency policy中,配置允许重推替包。
3. 本地maven配置
在本地maven安装目录下的conf--> settings.xml, 添加如下内容
    <server>
      <id>nexus-releases</id>
      <username>admin</username>
      <password>admin@123</password>
    </server>
	<server>
      <id>nexus-snapshots</id>
      <username>admin</username>
      <password>admin@123</password>
  </server>
  <mirror>
			<!--该镜像的唯一标识符。id用来区分不同的mirror元素。 -->
			<id>maven-public</id>
			<!--镜像名称 -->
			<name>maven-public</name>
			<!--*指的是访问任何仓库都使用我们的私服-->
			<mirrorOf>*</mirrorOf>
			<!--该镜像的URL。构建系统会优先考虑使用该URL,而非使用默认的服务器URL。 -->
			<url>http://192.168.147.101:8081/repository/maven-public/</url>
 </mirror>
<profile>
		<id>dev</id>
		<repositories>
		 <repository>
			<id>local-nexus</id>
			<url>http://192.168.147.101:8081/repository/maven-public/</url>
			<releases>
			  <enabled>true</enabled>
			</releases>
			<snapshots>
			  <enabled>true</enabled>
			</snapshots>
		  </repository>
		</repositories>
</profile>
<activeProfiles>
    <activeProfile>dev</activeProfile>
 </activeProfiles>
4.maven工程父pom配置
<!--dependencies下面-->
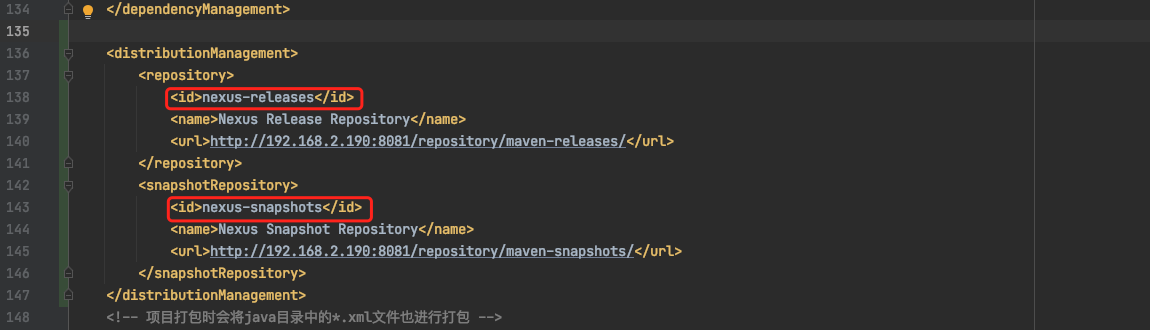
<distributionManagement>
<repository>
<id>nexus-releases</id>
<name>Nexus Release Repository</name>
<url>http://192.168.147.101:8081/repository/maven-releases/</url>
</repository>
<snapshotRepository>
<id>nexus-snapshots</id>
<name>Nexus Snapshot Repository</name>
<url>http://192.168.147.101:8081/repository/maven-snapshots/</url>
</snapshotRepository>
</distributionManagement>
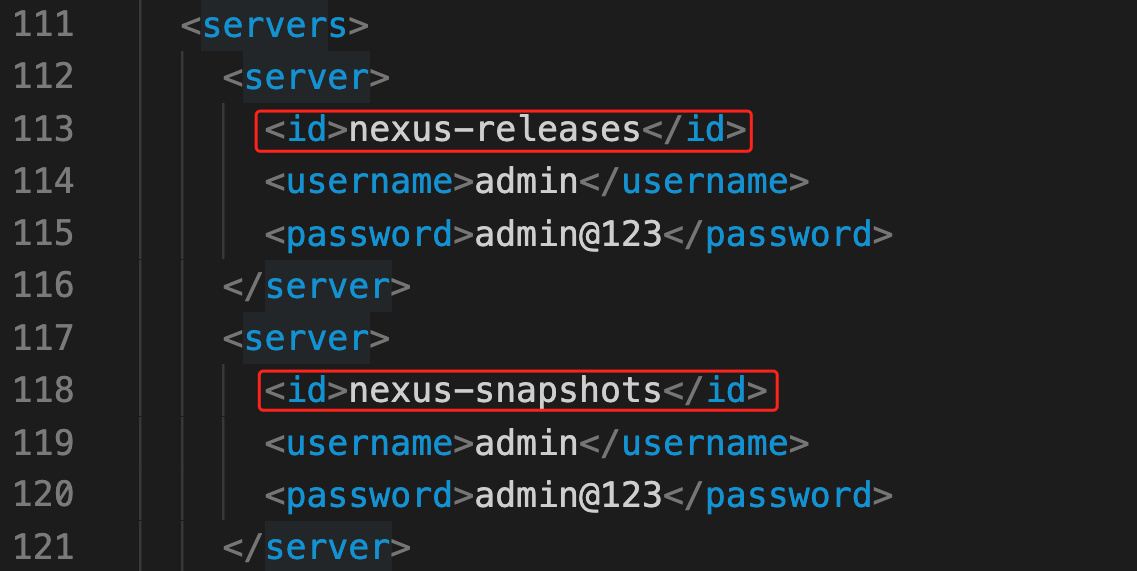
此处
下的id,需要和conf文件下pom文件server标签中id保持一致。
项目中父工程下的配置
maven安装包conf目录下settings.xml中的配置
5. 测试推包
在maven插件中,执行deploy操作。
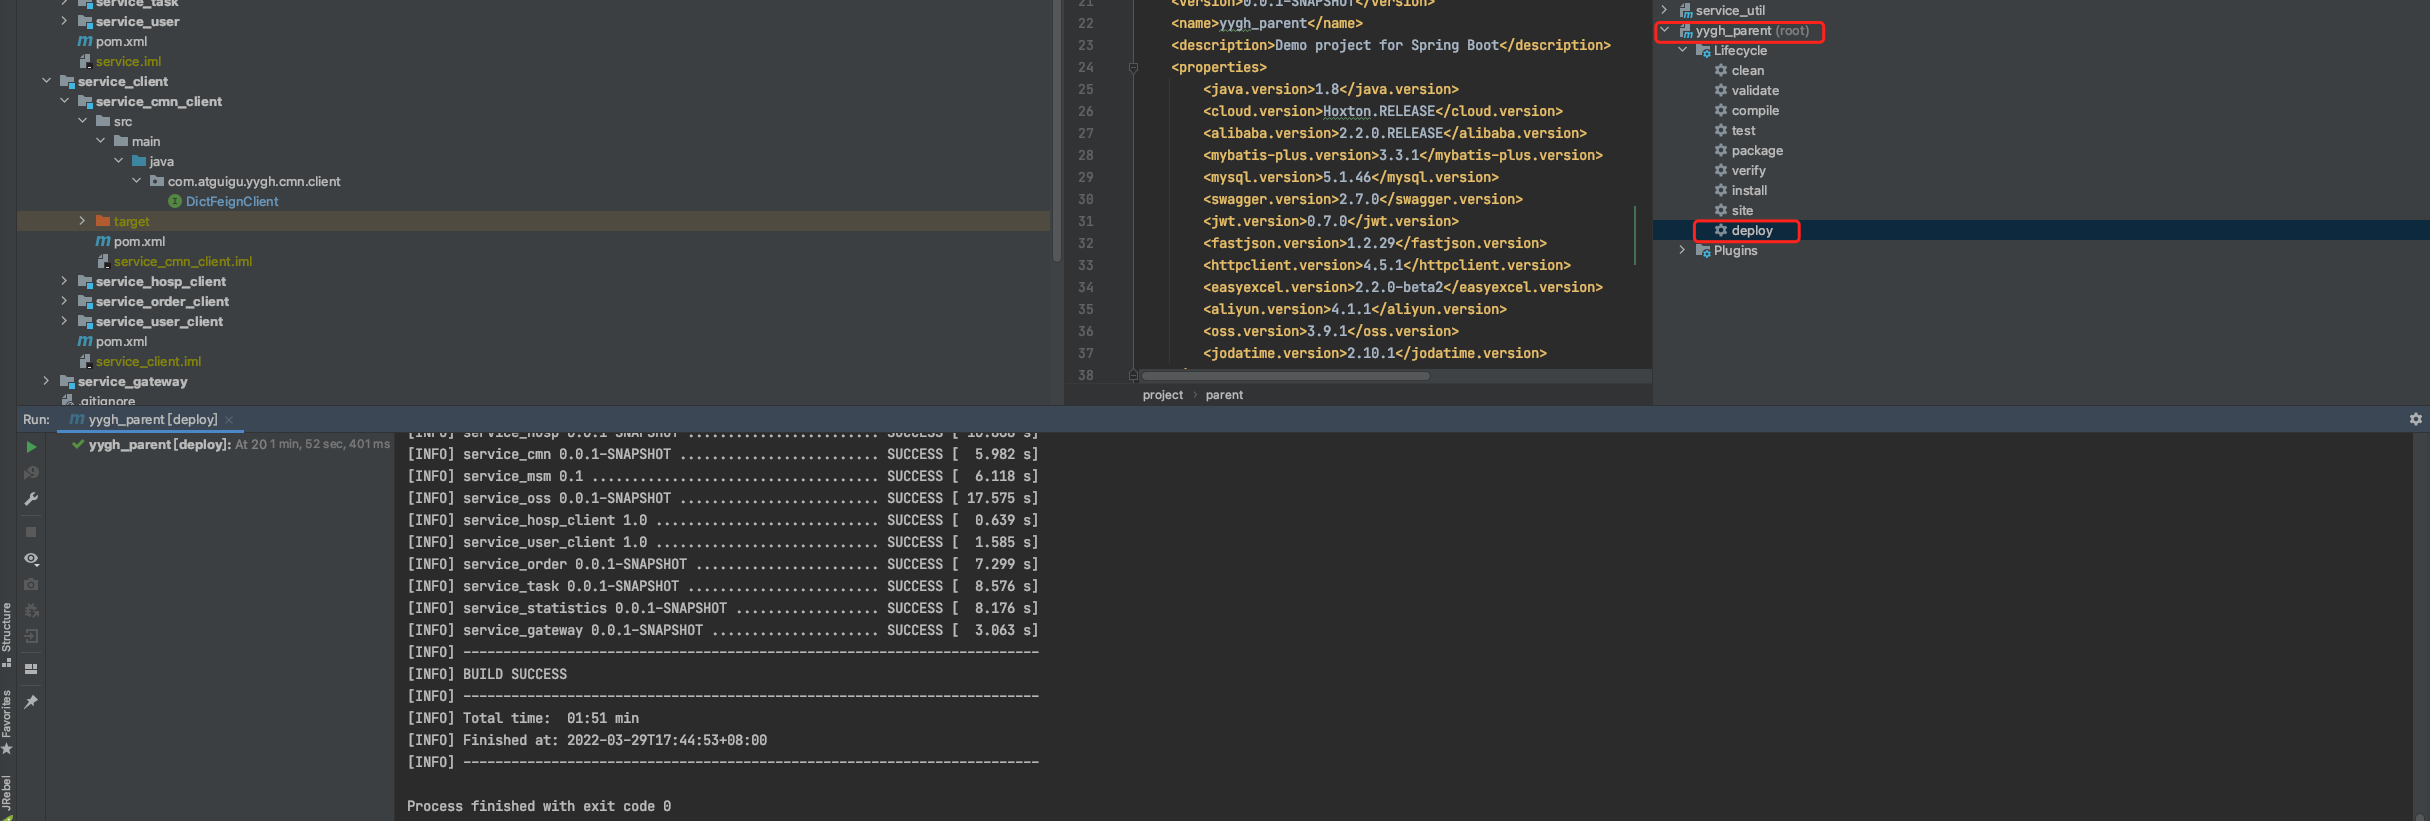
随后deploy完成后,可以在nexus中查看上传的包。
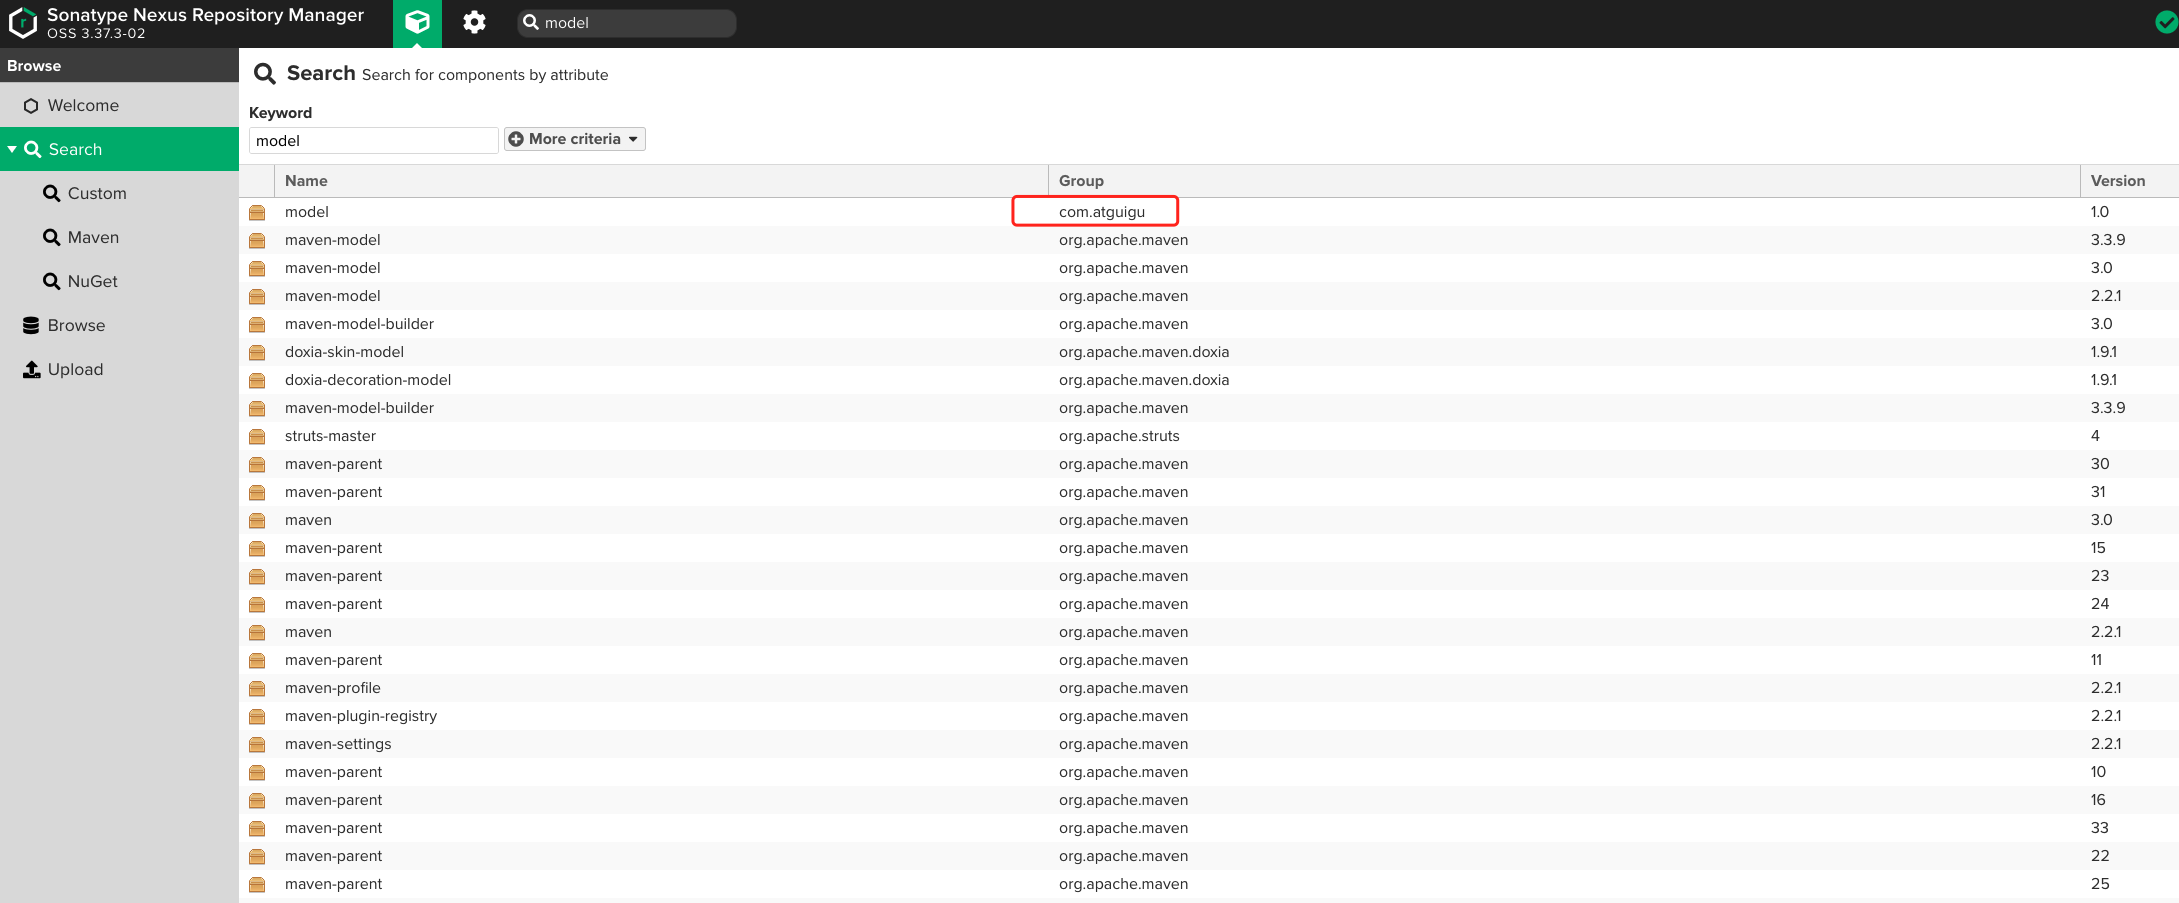
6. 测试引包
删除电脑本地仓库中的model包,在新创建的项目中引入私服上的model包。正常引入。
 <dependency>
            <groupId>com.atguigu</groupId>
            <artifactId>model</artifactId>
            <version>1.0</version>
 </dependency>


 浙公网安备 33010602011771号