

SpringBoot 入门
一、什么是springboot?
springboot是为了尽可能快的跑起来 Spring 应用程序并且尽可能减少你的配置文件
它默认配置了很多框架的使用方式,就像maven整合了所有的jar包,spring boot整合了所有的框架
二、springboot作用
SSM 项目需要以下过程 :
1、配置web.xml,加载spring和spring mvc
2、配置数据库连接、配置spring事务
3、配置加载配置文件的读取,开启注解
。。。
配置完成之后部署tomcat 调试
而springboot并不需要
三、springboot注意点
1.tomcat
springboot默认的端口号为8080
如果要更改端口号 需要在 src/main/resourses 下配置 application.properties 或 application.yml 名字不能更改
server.port=8089

2.pom.xml
<!--需要依赖父类-->
<parent>
    <groupId>org.springframework.boot</groupId>
    <artifactId>spring-boot-starter-parent</artifactId>
    <version>1.4.0.RELEASE</version>
</parent>
<properties>
    <java.version>1.7</java.version>
</properties>
<!--启动器-->
<dependencies>
    <dependency>
        <groupId>org.springframework.boot</groupId>
        <artifactId>spring-boot-starter-web</artifactId>
    </dependency>
    <dependency>
        <groupId>org.springframework.boot</groupId>
        <artifactId>spring-boot-starter-activemq</artifactId>
    </dependency>
    <dependency>
        <groupId>org.springframework</groupId>
        <artifactId>spring-web</artifactId>
        <version>4.3.6.RELEASE</version>
    </dependency>
</dependencies>
3.启动类
package cn.liuhuan.core;

import org.springframework.boot.SpringApplication;
import org.springframework.boot.autoconfigure.SpringBootApplication;

/**
 * 启动类
 * @SpringBootApplication
 *
 * @Configuration  用于定义一个配置类
 * @EnableAutoConfiguration   根据jar包自动配置项目
 * @ComponentScan    扫描包
 */
@SpringBootApplication
public class Application {
    public static void main(String[] args) {
        SpringApplication.run(Application.class,args);
    }
}
@SpringBootApplication是springBoot的核心注解注解, 是以下是三个注解的合体版
@Configuration 用于定义一个配置类
@EnableAutoConfiguration 根据jar包自动配置项目
@ComponentScan 扫描包
四、小Demo
接收方
  @JmsListener(destination = "yjy")
    public void readMessage(String text){
        System.out.println("接收到的消息是:"+text);
    }
发送方
  @Autowired
    private JmsMessagingTemplate jmsMessagingTemplate;

    /**
     * 发送消息 测试
     * @param text
     */
    @RequestMapping("/sendMap")
    public void sendMap(String text){
        //  发送到消息服务器  第一个参数 队列名称 第二个参数 :发送内容
        jmsMessagingTemplate.convertAndSend("yjy",text);
    }
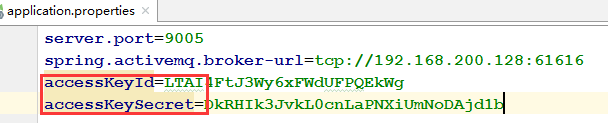
<2>在application.properties中需要将阿里云的 子用户账号密码放入
发送方 监听
@JmsListener(destination = "sms")
接收方
@RequestMapping("/sendSms")
public void sendSms(){
Map map = new HashMap<>();
map.put("mobile","17723002803");
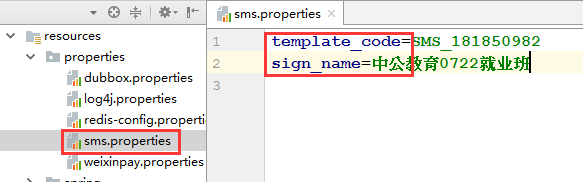
map.put("template_code","SMS_181850982"); // 自己的模板code
map.put("sign_name","中公教育0722就业班"); // 自己的签名管理
map.put("param","{'code':'980616'}");
jmsMessagingTemplate.convertAndSend("sms",map);
}
五、短信验证相关(阿里云www.alidayu.com)
pom.xml在以上依赖中 还需要加 :
<dependency>
    <groupId>com.aliyun</groupId>
    <artifactId>aliyun-java-sdk-dysmsapi</artifactId>
    <version>1.0.0-SNAPSHOT</version>
</dependency>
<dependency>
    <groupId>com.aliyun</groupId>
    <artifactId>aliyun-java-sdk-core</artifactId>
    <version>3.2.5</version>
</dependency>
实现类(发送方)
package cn.liuhuan.core.service;

import cn.liuhuan.core.dao.user.UserDao;
import cn.liuhuan.core.pojo.user.User;
import com.alibaba.dubbo.config.annotation.Service;
import com.alibaba.fastjson.JSON;
import org.apache.activemq.command.ActiveMQQueue;
import org.apache.activemq.command.ActiveMQTextMessage;
import org.springframework.beans.factory.annotation.Autowired;
import org.springframework.beans.factory.annotation.Value;
import org.springframework.data.redis.core.RedisTemplate;
import org.springframework.jms.core.JmsTemplate;
import org.springframework.jms.core.MessageCreator;

import javax.jms.JMSException;
import javax.jms.MapMessage;
import javax.jms.Message;
import javax.jms.Session;
import java.util.HashMap;
import java.util.Map;
import java.util.Random;
import java.util.concurrent.TimeUnit;

@Service
public class UserServiceImpl implements UserService {
    @Autowired
    private UserDao userDao;
    @Autowired
    private RedisTemplate redisTemplate;
    @Autowired
    private JmsTemplate jmsTemplate;
    @Autowired
    private ActiveMQQueue smsDestination;

    //从properties中获取到验证码发送的 common
    @Value("${template_code}")
    private String template_code;
    @Value("${sign_name}")
    private String sign_name;

    //发送验证码
    @Override
    public void sendCode(final String phone) {
        //1 生成一个随机为6位数字  作为验证码
        StringBuffer sb = new StringBuffer();
        for(int i=0;i<7;i++){   //获取随机验证码
            int s = new Random().nextInt(10);
            sb.append(s);
        }

        //2  手机号作为key  验证码作为值  保存道redis中  生存时间为10分钟
        redisTemplate.boundValueOps(phone).set(sb.toString(),60*10, TimeUnit.SECONDS);
        final String smscode=sb.toString();

        //3 将手机号 短信内容模板编号  签名封装成map消息发送给消息服务器
        jmsTemplate.send(smsDestination, new MessageCreator() {
            @Override
            public Message createMessage(Session session) throws JMSException {
                MapMessage message = session.createMapMessage();
                message.setString("mobile",phone);
                message.setString("template_code",template_code);
                message.setString("sign_name",sign_name);
                Map map=new HashMap();
                map.put("code",smscode);
                message.setString("param", JSON.toJSONString(map));
                return (Message)message;
            }
        });
    }

    //检查验证码 输入是否正确
    @Override
    public Boolean checkCode(String phone, String smscode) {
        if(phone==null||smscode==null||"".equals(phone)||"".equals(smscode)){
            return false;
        }
        // 根据手机号码到 redis 中获取刚才存的验证码
        String redisSmsCode = (String)redisTemplate.boundValueOps(phone).get();
        System.out.println("取得值为:"+redisSmsCode);
        // 判断页面传入的验证码 与 取出的验证码是否一致
        if(smscode.equals(redisSmsCode)){
            return true;
        }
        return false;
    }

    //添加
    @Override
    public void add(User user) {
        userDao.insertSelective(user);
    }
}
发送方
package cn.liuhuan.core.listener;

import cn.liuhuan.core.util.SmsUtil;
import com.aliyuncs.dysmsapi.model.v20170525.SendSmsResponse;
import org.springframework.beans.factory.annotation.Autowired;
import org.springframework.jms.annotation.JmsListener;
import org.springframework.stereotype.Component;

import java.util.Map;

/**
 * @author lijun
 * @date 2020/1/2 13:53
 */
@Component
public class SendSms {
    @Autowired
    private SmsUtil smsUtil;

    public void sendSms(Map<String,String> map){
        try{
            SendSmsResponse response=smsUtil.sendSms(
                    map.get("mobile"),
                    map.get("template_code"),//模板编号
                    map.get("sign_name"),//签名
                    map.get("param")  //短信内容
            );
            System.out.println("code"+response.getCode());
            System.out.println("Message"+response.getMessage());
            System.out.println("RequestId"+response.getRequestId());
            System.out.println("BizId"+response.getBizId());
        }catch (Exception e){
            e.printStackTrace();
        }

    }
}
控制层
package cn.liuhuan.core.controller;

import cn.liuhuan.core.entity.Result;
import cn.liuhuan.core.pojo.user.User;
import cn.liuhuan.core.service.UserService;
import com.alibaba.dubbo.config.annotation.Reference;
import com.alibaba.dubbo.config.annotation.Service;
import org.springframework.web.bind.annotation.RequestBody;
import org.springframework.web.bind.annotation.RequestMapping;
import org.springframework.web.bind.annotation.RestController;

import java.util.Date;

@RestController
@RequestMapping("/user")
public class UserController {
    @Reference
    private UserService userService;

    /**
     * 发送验证码
     * @param phone
     * @return
     */
    @RequestMapping("/sendCode")
    public Result sendCode(String phone){
        try{
            if(phone==null&&"".equals(phone)){
                return new Result(false,"请输入手机号码");
            }
            userService.sendCode(phone);
            return new Result(true,"验证码发送成功");
        }catch (Exception e){
            e.printStackTrace();
            return new Result(false,"验证码发送失败");
        }
    }

    /**
     * 添加注册
     * @param user
     * @param smscode
     * @return
     */
    @RequestMapping("/add")
    public Result add(@RequestBody User user, String smscode){
        try{
            //检查验证码是否正确
            Boolean isCheck = userService.checkCode(user.getPhone(), smscode);
            if(!isCheck){
                return new Result(false,"手机号或者验证码错误");
            }
            //添加数据
            user.setStatus("1");
            user.setCreated(new Date());
            user.setUpdated(new Date());
            user.setSourceType("1");
            //注册
            userService.add(user);
            return new Result(true,"用户注册成功");
        }catch (Exception e){
            e.printStackTrace();
            return new Result(false,"用户注册失败");
        }
    }
}
阿里云的短信发送模板
package cn.liuhuan.core.util;

import com.aliyuncs.DefaultAcsClient;
import com.aliyuncs.IAcsClient;
import com.aliyuncs.dysmsapi.model.v20170525.SendSmsRequest;
import com.aliyuncs.dysmsapi.model.v20170525.SendSmsResponse;
import com.aliyuncs.exceptions.ClientException;
import com.aliyuncs.profile.DefaultProfile;
import com.aliyuncs.profile.IClientProfile;
import org.springframework.beans.factory.annotation.Autowired;
import org.springframework.core.env.Environment;
import org.springframework.stereotype.Component;

@Component
public class SmsUtil {

    //产品名称:云通信短信API产品,开发者无需替换
    static final String product = "Dysmsapi";
    //产品域名,开发者无需替换
    static final String domain = "dysmsapi.aliyuncs.com";

    @Autowired
    private Environment env;

// TODO 此处需要替换成开发者自己的AK(在阿里云访问控制台寻找)

    /**
     * 发送短信
     * @param mobile 手机号
     * @param template_code 模板号
     * @param sign_name 签名
     * @param param 参数
     * @return
     * @throws ClientException
     */
    public SendSmsResponse sendSms(String mobile,String template_code,String sign_name,String param) throws ClientException {

        String accessKeyId =env.getProperty("accessKeyId");
        String accessKeySecret = env.getProperty("accessKeySecret");

//可自助调整超时时间
        System.setProperty("sun.net.client.defaultConnectTimeout", "10000");
        System.setProperty("sun.net.client.defaultReadTimeout", "10000");

//初始化acsClient,暂不支持region化
        IClientProfile profile = DefaultProfile.getProfile("cn-hangzhou", accessKeyId, accessKeySecret);
        DefaultProfile.addEndpoint("cn-hangzhou", "cn-hangzhou", product, domain);
        IAcsClient acsClient = new DefaultAcsClient(profile);

//组装请求对象-具体描述见控制台-文档部分内容
        SendSmsRequest request = new SendSmsRequest();
//必填:待发送手机号
        request.setPhoneNumbers(mobile);
//必填:短信签名-可在短信控制台中找到
        request.setSignName(sign_name);
//必填:短信模板-可在短信控制台中找到
        request.setTemplateCode(template_code);
//可选:模板中的变量替换JSON串,如模板内容为"亲爱的${name},您的验证码为${code}"时,此处的值为
        request.setTemplateParam(param);

//选填-上行短信扩展码(无特殊需求用户请忽略此字段)
//request.setSmsUpExtendCode("90997");

//可选:outId为提供给业务方扩展字段,最终在短信回执消息中将此值带回给调用者
        request.setOutId("yourOutId");

//hint 此处可能会抛出异常,注意catch
        SendSmsResponse sendSmsResponse = acsClient.getAcsResponse(request);

        return sendSmsResponse;
    }

}

