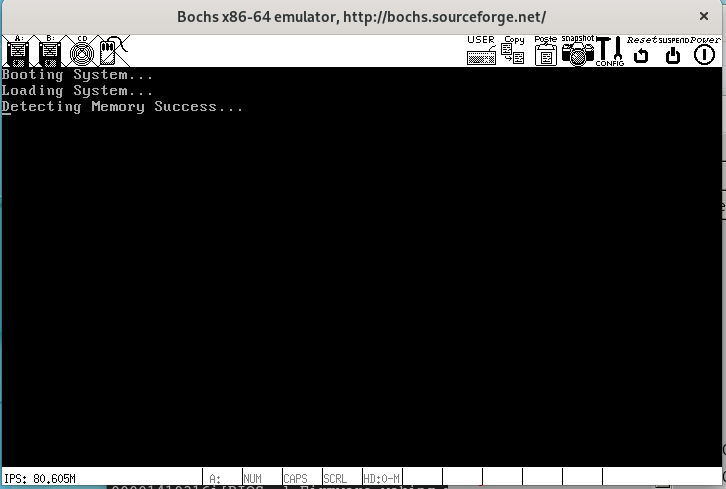
操作系统实现-进入内核
博客网址:www.shicoder.top
微信:18223081347
欢迎加群聊天 :452380935
这一次我们正式进入内核,编写相关的内核代码,也就是kernel代码
数据类型定义
因为我们在内核中会使用一些数据,因此先提前定义一些数据类型
#define EOF -1

#define NULL ((void *)0) // 空指针
#define EOS '\0' // 字符串结尾

#define bool _Bool
#define true 1
#define false 0

#define _packed __attribute__((packed)) // 用于定义特殊的结构体 不对齐

typedef unsigned int size_t;
typedef char int8;
typedef short int16;
typedef int int32;
typedef long long int64;
typedef unsigned char u8;
typedef unsigned short u16;
typedef unsigned int u32;
typedef unsigned long long u64;

typedef u32 time_t;
typedef u32 idx_t;
输入输出
我们知道,在操作系统启动的时候,刚开始都是黑乎乎的界面,然后光标闪烁等,那么这个是怎么实现的呢,一般这种都是通过向一些寄存器写入一些值和和获取一些值实现,因此就需要用一些输入输出函数
首先是四个函数
extern u8 inb(u16 port); // 输入1个字节 从port端口中读一个字节
extern u16 inw(u16 port); // 输入2个字节  从port端口中读2个字节

extern void outb(u16 port,u8 value); // 输出1个字节 将value值输入到port端口中
extern void outw(u16 port,u16 value); // 输出2个字节 将value值输入到port端口中
我们采用汇编实现
global inb ; 将inb导出
inb:
    ; 栈帧保存
    push ebp
    mov ebp, esp

    xor eax, eax ;清空
    mov edx, [ebp + 8] ;port [ebp + 8]就是传入进来的port
    in al, dx ;将dx所指向的端口,读取一个字放在al,也就是从port端口读一个字节

    jmp $+2 ;延迟
    jmp $+2 ;延迟
    jmp $+2 ;延迟

    leave ; 恢复栈帧
    ret
global outb ; 将outb导出
outb:
    ; 栈帧保存
    push ebp
    mov ebp, esp


    mov edx, [ebp + 8] ;port [ebp + 8]就是传入进来的port
    mov eax, [ebp + 12] ; value 参数入栈是从右往左 所以value地址更高
    out dx, al ;将al的8比特输出到dx的端口号

    jmp $+2 ;延迟
    jmp $+2 ;延迟
    jmp $+2 ;延迟

    leave ; 恢复栈帧
    ret

global inw ; 将inw导出
inw:
    ; 栈帧保存
    push ebp
    mov ebp, esp

    xor eax, eax ;清空
    mov edx, [ebp + 8] ;port [ebp + 8]就是传入进来的port
    in ax, dx ;将dx所指向的端口,读取2个字放在ax

    jmp $+2 ;延迟
    jmp $+2 ;延迟
    jmp $+2 ;延迟

    leave ; 恢复栈帧
    ret

global outw ; 将outw导出
outw:
    ; 栈帧保存
    push ebp
    mov ebp, esp


    mov edx, [ebp + 8] ;port [ebp + 8]就是传入进来的port
    mov eax, [ebp + 12] ; value 参数入栈是从右往左 所以value地址更高
    out dx, ax ;将ax的2个字输出到dx的端口号

    jmp $+2 ;延迟
    jmp $+2 ;延迟
    jmp $+2 ;延迟

    leave ; 恢复栈帧
    ret
我们在kernel中测试下获取光标的位置,相关的寄存器有以下几个
- CRT 地址寄存器 0x3D4
- CRT 数据寄存器 0x3D5
- CRT 光标位置 - 高位 0xE
- CRT 光标位置 - 低位 0xF
比如我们把光标高位位置给地址寄存器,那么就可以通过数据寄存器得到和设置光标位置的高位值
// - CRT 地址寄存器 0x3D4
// - CRT 数据寄存器 0x3D5
// - CRT 光标位置 - 高位 0xE
// - CRT 光标位置 - 低位 0xF

#define CRT_ADDR_REG 0x3d4
#define CRT_DATA_REG 0x3d5

#define CRT_CURSOR_H 0xe
#define CRT_CURSOR_L 0xf
void kernel_init()
{
    outb(CRT_ADDR_REG,CRT_CURSOR_H);
    u16 pos = inb(CRT_DATA_REG) << 8;
    outb(CRT_ADDR_REG,CRT_CURSOR_L);
    pos |= inb(CRT_DATA_REG); // 到这里,pos值为240,通过qemu也可以看到,光标在第4行,每行80字符
    u8 data = inb(CRT_DATA_REG);

    // 比如想把光标位置改为160
    outb(CRT_ADDR_REG,CRT_CURSOR_H);
    outb(CRT_DATA_REG,0);
    outb(CRT_ADDR_REG,CRT_CURSOR_L);
    outb(CRT_DATA_REG,160); // 到这里,就可以看到光标在第3行开始处
}

字符串函数实现
我们在C语言中,使用过很多字符串函数,比如
char *strcpy(char *dest, const char *src);
char *strcat(char *dest, const char *src);
size_t strlen(const char *str);
int strcmp(const char *lhs, const char *rhs);
char *strchr(const char *str, int ch);
char *strrchr(const char *str, int ch);
int memcmp(const void *lhs, const void *rhs, size_t count);
void *memset(void *dest, int ch, size_t count);
void *memcpy(void *dest, const void *src, size_t count);
void *memchr(const void *ptr, int ch, size_t count);
下面是其实现的代码
char *strcpy(char *dest, const char *src)
{
    char *ptr = dest;
    while (true)
    {
        *ptr++ = *src;
        if (*src++ == EOS)
            return dest;
    }
}

char *strcat(char *dest, const char *src)
{
    char *ptr = dest;
    while (*ptr != EOS)
    {
        ptr++;
    }
    while (true)
    {
        *ptr++ = *src;
        if (*src++ == EOS)
        {
            return dest;
        }
    }
}

size_t strlen(const char *str)
{
    char *ptr = (char *)str;
    while (*ptr != EOS)
    {
        ptr++;
    }
    return ptr - str;
}

int strcmp(const char *lhs, const char *rhs)
{
    while (*lhs == *rhs && *lhs != EOS && *rhs != EOS)
    {
        lhs++;
        rhs++;
    }
    return *lhs < *rhs ? -1 : *lhs > *rhs;
}

char *strchr(const char *str, int ch)
{
    char *ptr = (char *)str;
    while (true)
    {
        if (*ptr == ch)
        {
            return ptr;
        }
        if (*ptr++ == EOS)
        {
            return NULL;
        }
    }
}

char *strrchr(const char *str, int ch)
{
    char *last = NULL;
    char *ptr = (char *)str;
    while (true)
    {
        if (*ptr == ch)
        {
            last = ptr;
        }
        if (*ptr++ == EOS)
        {
            return last;
        }
    }
}

int memcmp(const void *lhs, const void *rhs, size_t count)
{
    char *lptr = (char *)lhs;
    char *rptr = (char *)rhs;
    while (*lptr == *rptr && count-- > 0)
    {
        lptr++;
        rptr++;
    }
    return *lptr < *rptr ? -1 : *lptr > *rptr;
}

void *memset(void *dest, int ch, size_t count)
{
    char *ptr = dest;
    while (count--)
    {
        *ptr++ = ch;
    }
    return dest;
}

void *memcpy(void *dest, const void *src, size_t count)
{
    char *ptr = dest;
    while (count--)
    {
        *ptr++ = *((char *)(src++));
    }
    return dest;
}

void *memchr(const void *str, int ch, size_t count)
{
    char *ptr = (char *)str;
    while (count--)
    {
        if (*ptr == ch)
        {
            return (void *)ptr;
        }
        ptr++;
    }
}
基础显卡驱动
我们知道比如在显示器显示hello,world\n,那么显示器就会先输出一句hello,world,然后换行,这一次就是实现这个操作,其实可以想下,换行,不就是设置一下光标位置嘛,那不就是第二个部分输入输出的样例吗,下面来实现吧,同时注意有以下寄存器
- CRT 地址寄存器 0x3D4
- CRT 数据寄存器 0x3D5
- CRT 光标位置 - 高位 0xE
- CRT 光标位置 - 低位 0xF
- CRT 显示开始位置 - 高位 0xC
- CRT 显示开始位置 - 低位 0xD
| 控制字符 | 八进制 | 十六进制 | 描述 |
|---|---|---|---|
| NUL | 0 | 0x00 | 在输入时忽略,不保存在输入缓冲中 |
| ENQ | 5 | 0x05 | 传送应答消息 |
| BEL | 7 | 0x07 | 从键盘发声响 |
| BS | 10 | 0x08 | 将光标移向左边一个字符位置处;若光标已经处在左边沿,则无动作 |
| HT | 11 | 0x09 | 将光标移到下一个制表位;若右侧已经没有制表位,则移到右边缘处 |
| LF | 12 | 0x0A | 此代码导致一个回车或换行操作 |
| VT | 13 | 0x0B | 作用如LF |
| FF | 14 | 0x0C | 作用如LF |
| CR | 15 | 0x0D | 将光标移到当前行的左边缘处 |
| SO | 16 | 0x0E | 使用由 SCS 控制序列设计的 G1 字符集 |
| SI | 17 | 0x0F | 选择 G0 字符集,由 ESC 序列选择 |
| XON | 21 | 0x11 | 使终端重新进行传输 |
| XOFF | 23 | 0x13 | 使中断除发送 XOFF 和 XON 以外,停止发送其它所有代码 |
| CAN | 30 | 0x18 | 如果在控制序列期间发送,则序列不会执行而立刻终止,同时会显示出错字符 |
| SUB | 32 | 0x1A | 作用同 CAN |
| ESC | 33 | 0x1B | 产生一个控制序列 |
| DEL | 177 | 0x7F | 在输入时忽略 不保存在输入缓冲中 |
#define CRT_ADDR_REG 0x3D4 // CRT(6845)索引寄存器
#define CRT_DATA_REG 0x3D5 // CRT(6845)数据寄存器

#define CRT_START_ADDR_H 0xC // 显示内存起始位置 - 高位
#define CRT_START_ADDR_L 0xD // 显示内存起始位置 - 低位
#define CRT_CURSOR_H 0xE     // 光标位置 - 高位
#define CRT_CURSOR_L 0xF     // 光标位置 - 低位

#define MEM_BASE 0xB8000              // 显卡内存起始位置
#define MEM_SIZE 0x4000               // 显卡内存大小
#define MEM_END (MEM_BASE + MEM_SIZE) // 显卡内存结束位置
#define WIDTH 80                      // 屏幕文本列数
#define HEIGHT 25                     // 屏幕文本行数
#define ROW_SIZE (WIDTH * 2)          // 每行字节数 一个字符由2个字节控制 ,一个是ascii,一个是样式
#define SCR_SIZE (ROW_SIZE * HEIGHT)  // 屏幕字节数

#define ASCII_NUL 0x00
#define ASCII_ENQ 0x05
#define ASCII_BEL 0x07 // \a
#define ASCII_BS 0x08  // \b
#define ASCII_HT 0x09  // \t
#define ASCII_LF 0x0A  // \n
#define ASCII_VT 0x0B  // \v
#define ASCII_FF 0x0C  // \f
#define ASCII_CR 0x0D  // \r
#define ASCII_DEL 0x7F

static u32 screen; // 记录当前显示器开始的内存位置
static u32 pos;    // 记录当前光标内存位置
static u32 x, y;   // 当前光标坐标

// 删除后,会在那里显示一个类似橡皮擦的样式光标
static u8 attr = 7;        // 字符样式
static u16 erase = 0x0720; // 空格 07是字符,20是样式

// 获得当前显示器的位置
static void get_screen()
{
    outb(CRT_ADDR_REG, CRT_START_ADDR_H); // 显示内存起始位置高地址
    screen = inb(CRT_DATA_REG) << 8;      // 显示内存起始位置值的高8位
    outb(CRT_ADDR_REG, CRT_START_ADDR_L); // 显示内存起始位置低地址
    screen |= inb(CRT_DATA_REG);          // 显示内存起始位置值的低8位

    screen <<= 1;       // screen *= 2 屏幕上每个位置是由2个字进行描述
    screen += MEM_BASE; // 真正的位置
}

// 设置显示器位置
static void set_screen()
{
    outb(CRT_ADDR_REG, CRT_START_ADDR_H);                  // 显示内存起始位置高地址
    outb(CRT_DATA_REG, ((screen - MEM_BASE) >> 9) & 0xff); // 因为screen获得时候,是左移1位,然后再移8位是高地址
    outb(CRT_ADDR_REG, CRT_START_ADDR_L);                  // 显示内存起始位置低地址
    outb(CRT_DATA_REG, ((screen - MEM_BASE) >> 1) & 0xff); // 因为screen获得时候,是左移1位
}

// 获得当前光标位置
static void get_cursor()
{
    outb(CRT_ADDR_REG, CRT_CURSOR_H); // 光标内存起始位置高地址
    pos = inb(CRT_DATA_REG) << 8;     // 光标内存起始位置值的高8位
    outb(CRT_ADDR_REG, CRT_CURSOR_L); // 光标内存起始位置低地址
    pos |= inb(CRT_DATA_REG);         // 光标内存起始位置值的低8位
    pos <<= 1;
    pos += MEM_BASE;

    // 获得光标的坐标
    get_screen();
    u32 delta = (pos - screen) >> 1;
    x = delta % WIDTH;
    y = delta / WIDTH;
}

// 设置当前光标位置
static void set_cursor()
{
    outb(CRT_ADDR_REG, CRT_CURSOR_H); // 光标内存起始位置高地址
    outb(CRT_DATA_REG, ((pos - MEM_BASE) >> 9) & 0xff);
    outb(CRT_ADDR_REG, CRT_CURSOR_L); // 光标内存起始位置低地址
    outb(CRT_DATA_REG, ((pos - MEM_BASE) >> 1) & 0xff);
}

void console_clear()
{
    screen = MEM_BASE;
    pos = MEM_BASE;
    x = y = 0;
    set_cursor();
    set_screen();

    // 清空 让屏幕全为空格
    u16 *ptr = (u16 *)MEM_BASE;
    while (ptr < (u16 *)MEM_END)
    {
        *ptr++ = erase;
    }
}

void console_init()
{

    // 相当于screen为第二行开始的地方,意思就是我们只能从显示器第二行开始看,第一行就看不到了
    // screen = 80 * 2 + MEM_BASE;
    // set_screen();
    // get_screen();
    // 比如设置光标为124, 第一行的后半截,124/2=62
    // pos = 124 + MEM_BASE;
    // set_cursor();

    console_clear();
}
// 超过屏幕显示大小,向上滚屏,也就是把最上面一行去掉
static void scroll_up()
{
    if (screen + SCR_SIZE + ROW_SIZE < MEM_END)
    {
        u32 *ptr = (u32 *)(screen + SCR_SIZE);
        for (size_t i = 0; i < WIDTH; i++)
        {
            *ptr++ = erase;
        }
        screen += ROW_SIZE;
        pos += ROW_SIZE;
    }
    // 超过,感觉是直接重头开始
    else
    {
        memcpy((void *)MEM_BASE, (void *)screen, SCR_SIZE);
        pos -= (screen - MEM_BASE);
        screen = MEM_BASE;
    }
    set_screen();
}
static void command_lf()
{
    if (y + 1 < HEIGHT)
    {
        y++;
        pos += ROW_SIZE;
        return;
    }
    scroll_up();
}

static void command_bs()
{
    if (x)
    {
        x--;
        pos -= 2;
        *(u16 *)pos = erase;
    }
}

static void command_cr()
{
    pos -= (x << 1);
    x = 0;
}

static void command_del()
{

    *(u16 *)pos = erase;
}

void console_write(char *buf, u32 count)
{
    char ch;
    while (count--)
    {
        ch = *buf++;
        switch (ch)
        {
        case ASCII_NUL:
            break;
        case ASCII_ENQ:
            break;
        case ASCII_BEL: // \a
            break;
        case ASCII_BS: // \b
            command_bs();
            break;
        case ASCII_HT: // \t
            break;
        case ASCII_LF: // \n
            command_lf();
            command_cr();
            break;
        case ASCII_VT: // \v
            break;
        case ASCII_FF: // \f
            command_lf();
            break;
        case ASCII_CR: // \r
            command_cr();
            break;
        case ASCII_DEL:
            command_del();
            break;
        default:
            if (x >= WIDTH)
            {
                x -= WIDTH;
                pos -= ROW_SIZE;
                command_lf();
            }
            *((char *)pos) = ch;
            pos++;
            *((char *)pos) = attr;
            pos++;

            x++;
            break;
        }
    }
    set_cursor();
}
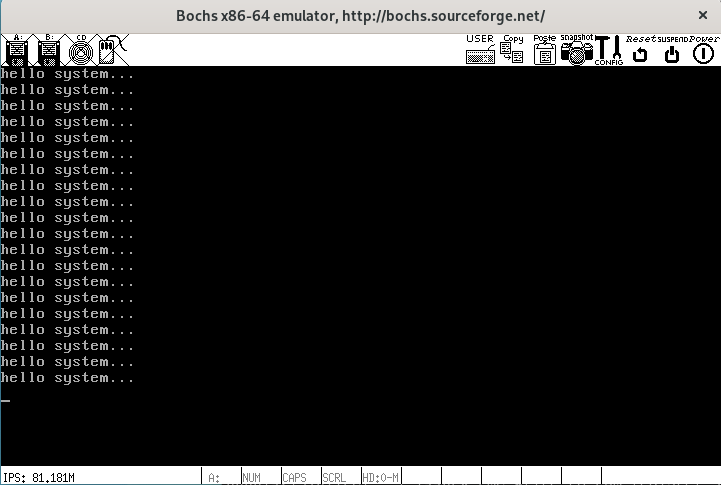
下面简单测试下吧,kernel主函数如下
char message[] = "hello system...\n";
void kernel_init()
{
    console_init();
    u32 count = 20;
    while (count--)
    {
        console_write(message, sizeof(message) - 1);
    }
}

可以看到打印了20次,且每次都换行了,成功啦


