pyenv、ipython、jupyter的安装使用
1. 安装 pyenv
参考文档:https://github.com/pyenv/pyenv-installer
1.1. 在线安装方法
yum install git -y
# pyenv 在安装python的时候是就地编译的,需要下面的依赖,需要提前安装一下。
yum install gcc make patch gdbm-devel openssl-devel sqlite-devel readline-devel zlib-devel bzip2-devel -y
id python
useradd python
id python
echo "python" | passwd python --stdin
su - python
curl -L https://github.com/pyenv/pyenv-installer/raw/master/bin/pyenv-installer | bash
echo 'export PATH="/home/python/.pyenv/bin:$PATH"' >> ~/.bash_profile
echo 'eval "$(pyenv init -)"'  >> ~/.bash_profile
echo 'eval "$(pyenv virtualenv-init -)"' >> ~/.bash_profile
tail -3  ~/.bash_profile
source ~/.bash_profile
which pyenv

# 说明:
eval "$(pyenv init -)"  # 初始化pyenv
eval "$(pyenv virtualenv-init -)"   # 初始化虚拟化插件
安装过程中设置环境变量的提示
[python@linux-node1 ~]$ curl -L https://github.com/pyenv/pyenv-installer/raw/master/
% Total % Received % Xferd Average Speed Time Time Time Current
Dload Upload Total Spent Left Speed
100 148 100 148 0 0 116 0 0:00:01 0:00:01 --:--:-- 116
100 2194 100 2194 0 0 1313 0 0:00:01 0:00:01 --:--:-- 1313
Cloning into '/home/python/.pyenv'...
......................
WARNING: seems you still have not added 'pyenv' to the load path.
# Load pyenv automatically by adding
# the following to ~/.bash_profile:
export PATH="/home/python/.pyenv/bin:$PATH"
eval "$(pyenv init -)"
eval "$(pyenv virtualenv-init -)"
1.2. 离线安装方法
主要的操作就是在github上clone项目的目录
su - python
git clone https://github.com/pyenv/pyenv.git ~/.pyenv
git clone https://github.com/pyenv/pyenv-virtualenv.git ~/.pyenv/plugins/pyenv-virtualenv
git clone https://github.com/pyenv/pyenv-update.git ~/.pyenv/plugins/pyenv-update
git clone https://github.com/pyenv/pyenv-which-ext.git ~/.pyenv/plugins/pyenv-which-ext
配置环境变量(注意家目录是哪一个)
vim ~/.bash_profile
export PATH="/home/python/.pyenv/bin:$PATH"
eval "$(pyenv init -)"
eval "$(pyenv virtualenv-init -)"

source  ~/.bash_profile
2. pyenv 命令帮助
[root@linux-node1 ~]# su - python
Last login: Tue Sep 11 22:31:33 CST 2018 on pts/0
[python@linux-node1 ~]$
[python@linux-node1 ~]$ pyenv
pyenv 1.2.7
Usage: pyenv <command> [<args>]
Some useful pyenv commands are:
commands List all available pyenv commands
local Set or show the local application-specific Python version
global Set or show the global Python version
shell Set or show the shell-specific Python version
install Install a Python version using python-build
uninstall Uninstall a specific Python version
rehash Rehash pyenv shims (run this after installing executables)
version Show the current Python version and its origin
versions List all Python versions available to pyenv
which Display the full path to an executable
whence List all Python versions that contain the given executable
See `pyenv help <command>' for information on a specific command.
For full documentation, see: https://github.com/pyenv/pyenv#readme
[python@linux-node1 ~]$
3. 通过pyenv安装多版本的python
3.1. 默认pyenv使用的是系统默认的python版本
[python@centos7-scm ~]$python -V
Python 2.7.5
我们可以通过下面的方法来安装多版本的python环境
3.2. isntall
查看帮助
pyenv help install
列出所有可用的版本
pyenv install --list
方法1:在线安装指定的版本
pyenv install 3.5.3 -v
pyenv versions   # 查看当前所处的pyhton环境
方法2:使用缓存方式更快地安装(离线安装)
mkdir ~/.pyenv/cache
cd ~/.pyenv/cache
rz 将下面的包拷贝到上面的路径中
Python-3.5.3.tar.xz  Python-3.5.3.tgz   # 由于在安装的时候,默认选择的包不固定,所以这里我们直接将所有的包都拷贝到 ~/.pyenv/cache

执行安装命令
pyenv install 3.5.3 -v
pyenv versions    # 查看当前所处的pyhton环境
[python@centos7-scm ~]$pyenv versions
* system (set by /home/python/.pyenv/version)  # 前面有星号 '*' 的是当前使用的版本
  3.5.3   # 这个是刚刚安装的版本
4. pyenv的python版本管理控制
提示:
因为pyenv安装的时候只是安装在用户的家目录中,所以pyenv的版本控制(global、local、shell)都是针对同一个用户的
4.1. pyenv global(全局设置)
pyenv global 3.5.3  # 设置全局的python版本(慎用,会影响所有受pyenv控制的python环境)
pyenv version  # 查看当前的pyhton环境
pyenv versions  # 查看所有安装的pyhton版本
python -V  # 查看当前的pyhton版本
[python@linux-node1 ~]$ pyenv local 3.5.3
[python@linux-node1 ~]$ pyenv version
3.5.3 (set by /home/python/.python-version)
[python@linux-node1 ~]$ pyenv versions
  system
* 3.5.3 (set by /home/python/.python-version)
[python@linux-node1 ~]$ python -V
Python 3.5.3
[python@linux-node1 ~]$
4.2. pyenv local(本地设置--基于目录的设置,并且是子目录继承父目录的设置,最实用)
工作中要使用pyenv设置本地的python环境
pyenv local 3.5.3  # 设置本地的python版本
pyenv version  # 查看当前的pyhton环境
pyenv versions  # 查看所有安装的pyhton版本
python -V  # 查看当前的pyhton版本
使用 local 设置后,python的版本是和目录绑定的,并且子目录继承父目录的python版本。
[python@linux-node1 ~]$ pwd
/home/python
[python@linux-node1 ~]$
[python@linux-node1 ~]$ tree
.
├── scm
│?? └── test
└── test
3 directories, 0 files
[python@linux-node1 ~]$
[python@linux-node1 ~]$ python -V
Python 2.7.5
[python@linux-node1 ~]$ cd scm/
[python@linux-node1 scm]$ python -V
Python 3.5.3
[python@linux-node1 scm]$ cd test/
[python@linux-node1 test]$ python -V
Python 3.5.3
[python@linux-node1 test]$ cd ~/test/
[python@linux-node1 test]$ python -V
Python 2.7.5
[python@linux-node1 test]$ pwd
/home/python/test
[python@linux-node1 test]$ pyenv local 3.6.3
[python@linux-node1 test]$ python -V
Python 3.6.3
[python@linux-node1 test]$
4.3. pyenv shell(基于会话的设置)
pyenv shell 3.5.3  # 设置当前会话的python版本(只会影响pyenv控制的当前会话的python环境,影响面太小,会话断开就会回到system的环境,不常使用)
pyenv version  # 查看当前的pyhton环境
pyenv versions  # 查看所有安装的pyhton版本
python -V  # 查看当前的pyhton版本
5. Virtuaenv 虚拟环境的安装使用
为什么要使用虚拟环境?因为刚才使用的python环境都是一个公共的空间,如果有多个项目使用不同的py“”thon版本开发,或者使用不同的python版本部署运行,或者使用同样的版本开发的但不同项目使用了不同版本的库,等等这些问题都会带来冲突,最好的解决办法就是每一个项目独立运行自己的"独立小环境"中。
5.1. 创建一个虚拟环境
pyenv virtualenv 3.5.3 scm353
5.2. 查看python虚拟环境,会有一个 scm353
[python@centos7-scm ~]$pyenv versions
* system (set by /home/python/.pyenv/version)
  3.5.3
  3.5.3/envs/scm353
  scm353
实际上是复制了一个单独的版本,并创建了一个软连接文件指向一该版本
[python@centos7-scm ~]$ll /home/python/.pyenv/versions
total 0
drwxr-xr-x 7 python python 68 Dec 25 21:58 3.5.3
lrwxrwxrwx 1 python python 46 Dec 25 22:12 scm353 -> /home/python/.pyenv/versions/3.5.3/envs/scm353
[python@centos7-scm ~]$ll /home/python/.pyenv/versions/3.5.3/envs/scm353
total 4
drwxrwxr-x 2 python python 186 Dec 25 22:27 bin
drwxrwxr-x 2 python python   6 Dec 25 22:27 include
drwxrwxr-x 3 python python  23 Dec 25 22:27 lib
lrwxrwxrwx 1 python python   3 Dec 25 22:27 lib64 -> lib
-rw-rw-r-- 1 python python  99 Dec 25 22:27 pyvenv.cfg
[python@centos7-scm ~]$
5.3. 切换到指定的项目目录下,执行命令 pyenv local mag353 设定python虚拟环境版本
[python@linux-node1 test]$ python -V
Python 3.6.3
[python@linux-node1 test]$ pyenv local scm353
(scm353) [python@linux-node1 test]$
(scm353) [python@linux-node1 test]$ python -V
Python 3.5.3
(scm353) [python@linux-node1 test]$
(scm353) [python@linux-node1 test]$ cd
[python@linux-node1 ~]$
[python@linux-node1 ~]$ cd -
/home/python/test
(scm353) [python@linux-node1 test]$
5.4. 删除指定的虚拟环境
pyenv uninstall scm353
5.5. 导出包
虚拟环境的好处就在于和其他项目运环境隔离,每一个独立的环境都可以使用pip命令导出已经安装好的包,在另一个环境中安装这些包。
pip freeze > requirement
5.6. 在新的虚拟环境中安装上面的包
可以在不同版本的环境中安装
pip install -r requirement
6. 关于虚拟环境的说明
实际上虚拟环境就是在原来的环境中独立出一个小的环境,以后使用该环境的项目中使用的所有包组都是安装在这个小的环境中的site-packages目录中,这样就实现了环境的隔离。
1 没有虚拟环境的时候,所有的包组都是安装在下面的目录中
/home/python/.pyenv/versions/3.5.3/lib/python3.5/site-packages/
2 安装有虚拟环境,使用某个虚拟环境的项目的所有的包组都是安装在下面的目录中
/home/python/.pyenv/versions/3.5.3/envs/scm353/lib/python3.5/site-packages/
7. ipython 增强的交互式Python命令行工具
7.1. 提示:
ipython的安装需要切换到安装了pip命令的虚拟环境的目录中去,系统默认的python环境没有安装pip命令
[python@centos7-scm ~]$pip install ipython
pyenv: pip: command not found

The `pip' command exists in these Python versions:
  3.5.3
  3.5.3/envs/scm353
  scm353

[python@centos7-scm ~]$pyenv version
system (set by /home/python/.pyenv/version)
[python@centos7-scm ~]$
7.2. 配置pip的国内镜像
安装Ipython使用到的是pip包管理器,由于网络原因需要配置一下国内的镜像
su - python
mkdir ~/.pip
cat > ~/.pip/pip.conf << EOF
[global]
index-url=https://mirrors.aliyun.com/pypi/simple/
trusted-host=mirrors.aliyun.com
EOF
验证是否可以使用配置的镜像安装的方法:在不同的虚拟环境中,安装redis包,使用pip list看看效果。
pip -V
pip install pkgname  # 是以后经常要使用的安装python包的命令
windows系统 windows下pip的配置文件在~/pip/pip.ini,内容同上
7.3. 安装ipython
cd test  #
pip install ipython  # 安装ipython
ipython   # 启动Ipython
pip install --upgrade pip   # 最后可能会有更新的提示,建议操作一下,否则后面会经常有提示
出现下面的问题需要更新一下 pip

演示
[python@centos7-scm ~]$cd test
(scm353) [python@centos7-scm test]$pip install ipython
Collecting ipython
  Downloading https://mirrors.aliyun.com/pypi/packages/f0/b4/a9ea018c73a84ee6280b2e94a1a6af8d63e45903eac2da0640fa63bca4db/ipython-7.2.0-py3-none-any.whl (765kB)
    100% |████████████████████████████████| 768kB 183kB/s
......
You are using pip version 9.0.1, however version 18.1 is available.
You should consider upgrading via the 'pip install --upgrade pip' command.
(scm353) [python@centos7-scm test]$
(scm353) [python@centos7-scm test]$ipython
Python 3.5.3 (default, Dec 25 2018, 10:48:30)
Type 'copyright', 'credits' or 'license' for more information
IPython 7.2.0 -- An enhanced Interactive Python. Type '?' for help.

In [1]:

In [1]:
8. jupyter 的安装使用
jupyter 是基于WEB 的交互式笔记本,其中可以非常方便地使用python,安装Jupyter的时候会自动安装ipython的
8.1. 安装Jupyter
su - python
pip install jupyter
8.2. 常用命令
su - python
jupyter notebook --help
jupyter notebook password
输入密码
jupyter notebook password
jupyter notebook   # 默认是监听在 127.0.0.1 上的8888端口
netstat -lntup

jupyter notebook --ip=0.0.0.0 --port=8888  # 指定监听所有地址(0.0.0.0)
8.3. 启动jupyter (注意关闭防火墙)
(mag353) [python@linux-node1 scm]$ jupyter notebook --ip=0.0.0.0 --port=8888
[I 07:08:18.080 NotebookApp] Serving notebooks from local directory: /home/python/scm
[I 07:08:18.080 NotebookApp] The Jupyter Notebook is running at:
[I 07:08:18.080 NotebookApp] http://(linux-node1.example.com or 127.0.0.1):8888/
[I 07:08:18.080 NotebookApp] Use Control-C to stop this server and shut down all kernels (twice to skip confirmation).
[W 07:08:18.081 NotebookApp] No web browser found: could not locate runnable browser.

[I 07:08:32.264 NotebookApp] 302 GET / (192.168.56.2) 1.87ms
[I 07:08:46.938 NotebookApp] Creating new notebook in
[I 07:08:46.965 NotebookApp] Writing notebook-signing key to /home/python/.local/share/jupyter/notebook_secret
[I 07:08:48.735 NotebookApp] Kernel started: 95013ea0-ff49-473e-9001-34b0847e7859
[I 07:08:49.998 NotebookApp] Adapting to protocol v5.1 for kernel 95013ea0-ff49-473e-9001-34b0847e7859
[I 07:10:48.600 NotebookApp] Saving file at /Untitled.ipynb
[I 07:11:06.071 NotebookApp] Saving file at /Untitled.ipynb
[I 07:11:09.719 NotebookApp] Saving file at /Untitled.ipynb
[I 07:12:22.409 NotebookApp] Saving file at /Untitled.ipynb
[I 07:12:47.911 NotebookApp] Saving file at /Untitled.ipynb
[I 07:13:26.105 NotebookApp] Saving file at /Untitled.ipynb
[I 07:14:28.230 NotebookApp] Saving file at /Untitled.ipynb
[I 07:14:37.027 NotebookApp] Starting buffering for 95013ea0-ff49-473e-9001-34b0847e7859:7820a0037d2c467081d28217dbb54482
[I 07:14:40.873 NotebookApp] Adapting to protocol v5.1 for kernel 95013ea0-ff49-473e-9001-34b0847e7859
[I 07:15:07.229 NotebookApp] Adapting to protocol v5.1 for kernel 95013ea0-ff49-473e-9001-34b0847e7859
[I 07:17:07.181 NotebookApp] Saving file at /Untitled.ipynb
[I 07:17:29.435 NotebookApp] Saving file at /Untitled.ipynb
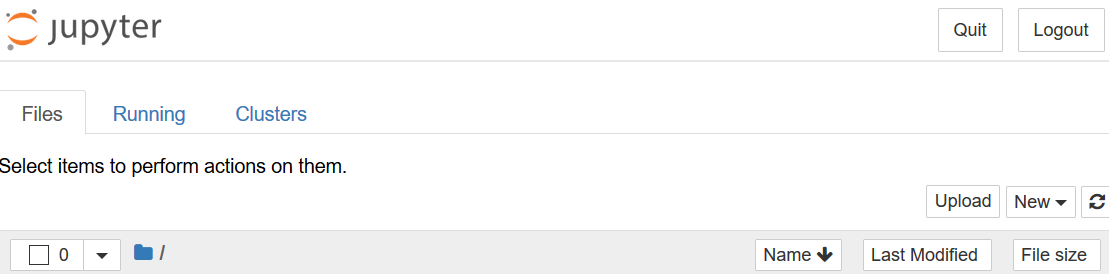
8.4. 浏览器访问
http://192.168.27.100:8888
输入上面设置的密码


 浙公网安备 33010602011771号