smarty 总结和分析
虽然smarty现在已经废弃不用,但是它的原理我们需要了解一下,这也是TP框架的一部分原理,它把前后端分离开,这样前端只需要写静态网页,后端只需要处理数据库和php文件就可以了,phpcms的思路也大抵相同。
smarty里面的核心文件是./project/libs/Smarty.class.php
//这个是Smarty.class.php的思路,其实完整的很复杂
<?php
class  Smarty
{
    $ldemilter = "{";     //左分隔符
    $rdemilter ="}";    //右分隔符

    $attr = array( );    //用来存储变量的关联数组

    //向模板里面注册变量
    function assign($key,$value)
    {
        $this->attr[$key] = $value;
    }

    //显示模板的方法(实现前后端分离)
    function display($url)
    {
        //1.获取静态模板的内容
        $str =file_get_contents($url);
        //2.根据正则匹配str里面出现的所有{}里面的内容
        //{$a} -> <?php echo $attr[$a]  ?>
        //3.将替换好的页面保存成临时文件
        //首先新建一个 文件
        touch("./test.php");
        //将内容保存在里面
        file_put_contents();
        //4.将临时文件拿到当前页面显示
        include("./test.php");
    }

}
然后有一个配置文件:init.inc.php
<?php

define("ROOT",str_replace("\\","/",dirname(__FILE__)).'/'); //常量ROOT中指定项目根目录

//echo str_replace("\\","/",dirname(__FILE__)).'/'; //获取当前文件所在的位置

require ROOT.'libs/Smarty.class.php'; //加载Smarty类文件
$smarty = new Smarty(); //实例化Smarty对象


define("CSS_PATH","/project/css/");
define("JS_PATH","/project/js/");

//$smarty -> auto_literal = false; //就可以让定界符号使用空格
$smarty->setTemplateDir(ROOT.'templates/'); //设置所有模板文件存放位置
//$smarty->addTemplateDir(ROOT.'templates2/'); //添加一个模板文件夹
$smarty->setCompileDir(ROOT.'templates_c/'); //设置编译过的模板存放的目录
$smarty->addPluginsDir(ROOT.'plugins/'); //设置为模板扩充插件存放目录
$smarty->setCacheDir(ROOT.'cache/'); //设置缓存文件存放目录
$smarty->setConfigDir(ROOT.'configs/'); //设置模板配置文件存放目录

$smarty->caching = false; //设置Smarty缓存开关功能
$smarty->cache_lifetime = 60*60*24; //设置缓存模板有效时间一天

$smarty->left_delimiter = '<{'; //设置模板语言中的左结束符
$smarty->right_delimiter = '}>'; //设置模板语言中的右结束符


?>
所以我们在使用php是先引用init.inc.php文件(注意:我们在访问的是php文件,显示的才是html文件,访问的和显示的文件不同)
现在我们在main文件里建一个php文件:text.php,我们访问text.php来显示text.html.
<?php
//首先先引用init.inc.php,init.inc.php已经造好对象,所以不需再造对象了
include("../init.inc.php");

$arr = array(
    array("n001","汉族"),
    array("n002","回族"),
    array("n003","苗族")
);

$sex = false;
//注册变量
$smarty->assign("s",$sex);

$smarty->assign("arr",array(1,2,3,4,5));

$smarty->assign("shuzu",$arr);

$smarty->assign("name",11);

//显示模板
$smarty->display("test.html");
现在再建个text.html用来显示。
<!DOCTYPE html PUBLIC "-//W3C//DTD XHTML 1.0 Transitional//EN" "http://www.w3.org/TR/xhtml1/DTD/xhtml1-transitional.dtd">
<html xmlns="http://www.w3.org/1999/xhtml">
<head>
<meta http-equiv="Content-Type" content="text/html; charset=utf-8" />
<title>无标题文档</title>
</head>

<body>

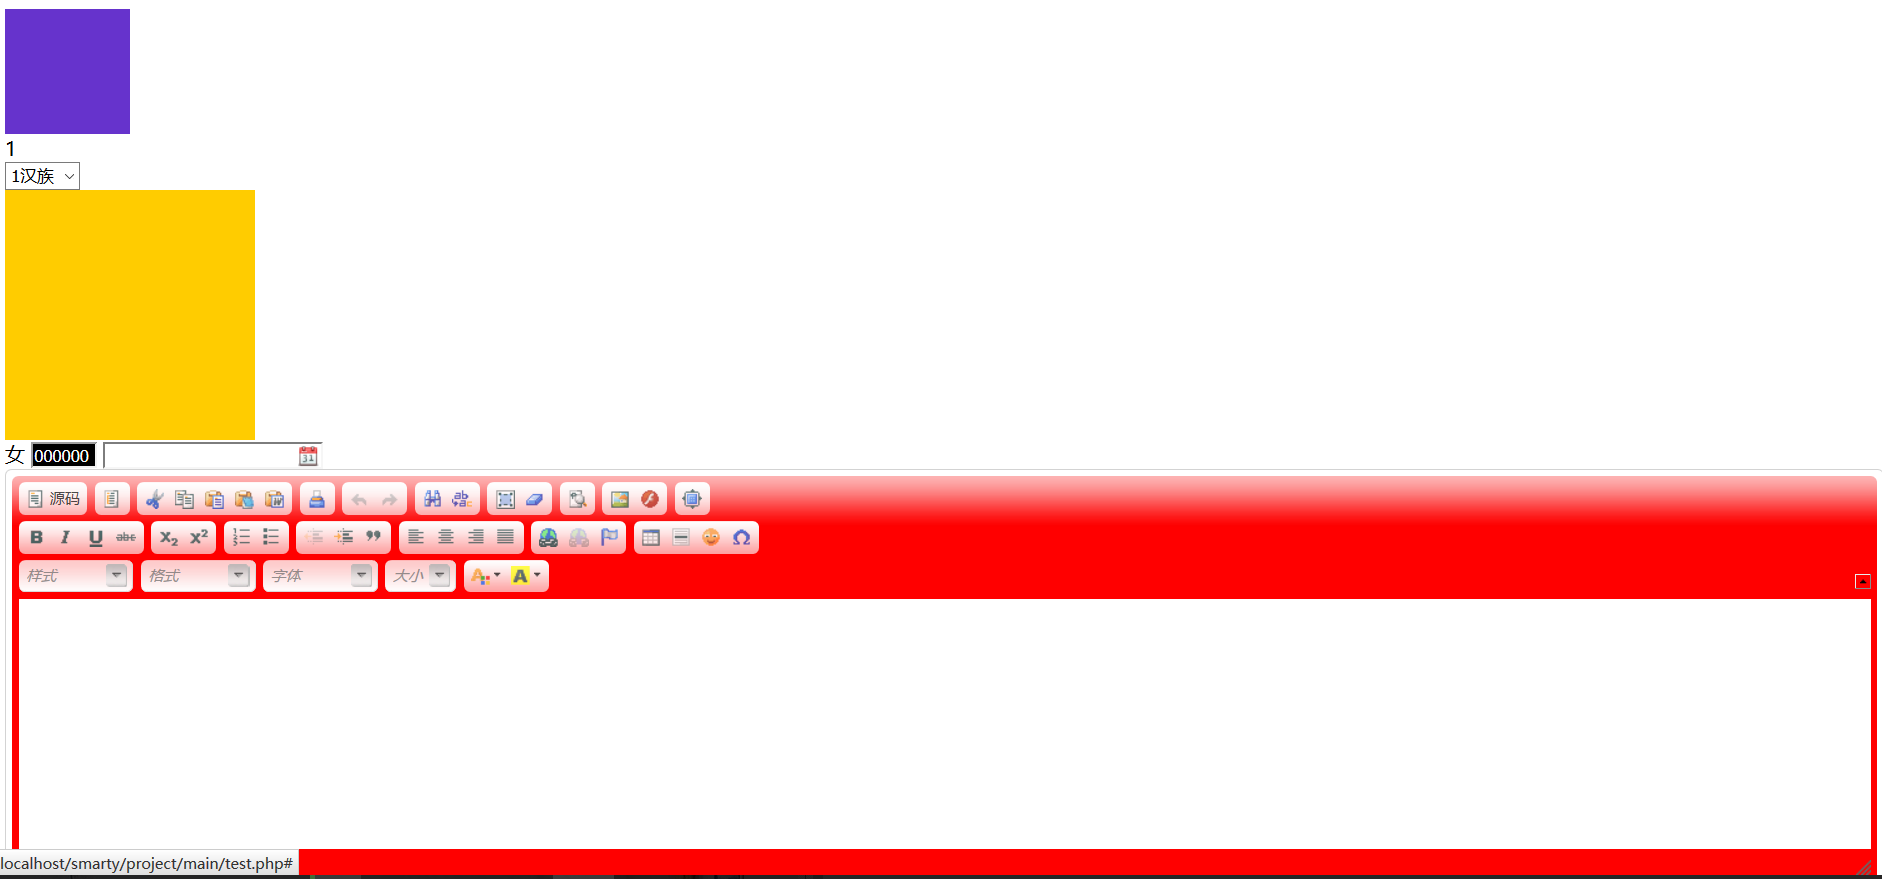
<{if $name eq 11}>
<div style="width:100px; height:100px; background-color:#63C"></div>
<{else}>
<div style="width:100px; height:100px; background-color:#F00"></div>
<{/if}>

<div><{$arr[0]}></div>

<select>
    <{foreach $shuzu as $v}>
    <option value="<{$v[0]}>"><{$v@first}><{$v[1]}></option>
    <{/foreach}>
</select>

<{lianjie}>
<div style="width:200px; height:200px; background-color:#FC0"></div>
<{/lianjie}>

<{sex sex=$s}>
<{color name='color'}>
<{date name='date' time=1}>
<{textarea name='uid' toolbar='full' color='red'}>
<{/textarea}>


</body>
</html>
效果截图:

知识点总结
1.配置文件加载
<{config_load  file='文件名.conf' section='块'}>  //file找哪个配置文件,section找哪个块元素
例如:<{config_load  file='test.conf'}>
  调用配置文件
<{#元素名#}>
例如:<div style="background-color:<{#color#}>"><div>
2.配置文件的块
例如:[one]
  color = green
   [two]
  color = red
3.<{$smarty.now}>   //当前时间的时间戳
  <{$smarty.const.常量}>  //访问php常量
  date_format    //格式化日期      <{$smarty.now|date_format:"%Y-%m-%d %H:%M:%S"}>


