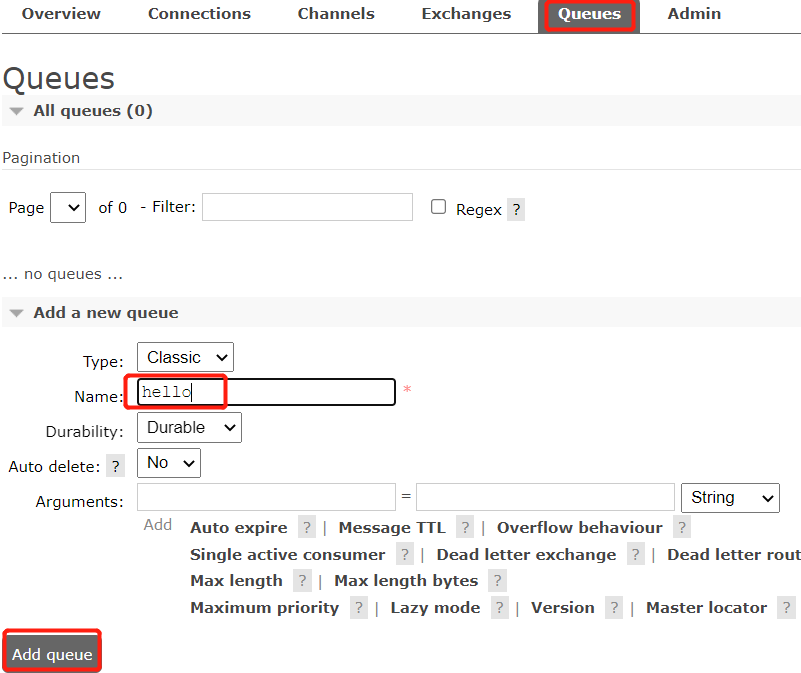
1. 新建队列
2. 新增POM.xml配置文件
    <parent>
        <groupId>org.springframework.boot</groupId>
        <artifactId>spring-boot-starter-parent</artifactId>
        <version>2.6.0</version>
        <relativePath />
    </parent>

    <dependencies>
        <dependency>
            <groupId>org.springframework.boot</groupId>
            <artifactId>spring-boot-starter-web</artifactId>
        </dependency>
        <dependency>
            <groupId>org.springframework.boot</groupId>
            <artifactId>spring-boot-starter-amqp</artifactId>
        </dependency>
        <dependency>
            <groupId>org.springframework.boot</groupId>
            <artifactId>spring-boot-starter-test</artifactId>
            <scope>test</scope>
        </dependency>
    </dependencies>
3. 配置application.yml文件
spring:
  rabbitmq:
    host: 127.0.0.1
    username: guest
    password: guest
    virtualHost: /
  profiles:
    active: dev
server:
  port: 8080
4. 编写application启动类
@SpringBootApplication
public class BlogCodeApplication {

    public static void main(String[] args) throws Exception {
        SpringApplication.run(BlogCodeApplication.class, args);
    }
}
5. 编写生产者
@Component
public class RabbitSender {

    private RabbitTemplate rabbitTemplate;

    public RabbitSender(RabbitTemplate rabbitTemplate) {
        this.rabbitTemplate = rabbitTemplate;
    }

    /**
     * 不显式声明交换机时并且发送消息不指定交换机,则默认使用Direct,
     * 并且声明队列时,不显式绑定队列与交换机,则队列以队列名为routing-key
     * 绑定到默认的direct交换机,
     * 发送消息不指定交换机时,则将消息发到默认的direct交换机
     */
    public void send() {
        String msg = "Hello World!";
        this.rabbitTemplate.convertAndSend("hello", msg);
        System.out.println("发送消息" + msg + "至队列hello");
    }
}
6. 编写测试类并运行
@SpringBootTest
public class RabbitTest {

    @Autowired
    private RabbitSender rabbitSender;

    @Test
    public void testSender() {
        rabbitSender.send();
    }
}
7. 消息已发送至队列

欢迎关注公众号算法小生或沈健的技术博客

