
Hive-02 DDL| DML
1. Hive数据类型
基本数据类型
|
Hive数据类型 |
Java数据类型 |
长度 |
例子 |
|
TINYINT |
byte |
1byte有符号整数 |
20 |
|
SMALINT |
short |
2byte有符号整数 |
20 |
|
INT |
int |
4byte有符号整数 |
20 |
|
BIGINT |
long |
8byte有符号整数 |
20 |
|
BOOLEAN |
boolean |
布尔类型,true或者false |
TRUE FALSE |
|
FLOAT |
float |
单精度浮点数 |
3.14159 |
|
DOUBLE |
double |
双精度浮点数 |
3.14159 |
|
STRING |
string |
字符系列。可以指定字符集。可以使用单引号或者双引号。 |
‘now is the time’ “for all good men” |
|
TIMESTAMP |
|
时间类型 |
|
|
BINARY |
|
字节数组 |
|
对于Hive的String类型相当于数据库的varchar类型,该类型是一个可变的字符串,不过它不能声明其中最多能存储多少个字符,理论上它可以存储2GB的字符数。
集合数据类型
|
数据类型 |
描述 |
语法示例 |
|
STRUCT |
和c语言中的struct类似,都可以通过“点”符号访问元素内容。例如,如果某个列的数据类型是STRUCT{first STRING, last STRING},那么第1个元素可以通过字段.first来引用。 |
struct() 例如struct<street:string, city:string> |
|
MAP |
MAP是一组键-值对元组集合,使用数组表示法可以访问数据。例如,如果某个列的数据类型是MAP,其中键->值对是’first’->’John’和’last’->’Doe’,那么可以通过字段名[‘last’]获取最后一个元素 |
map() 例如map<string, int> |
|
ARRAY |
数组是一组具有相同类型和名称的变量的集合。这些变量称为数组的元素,每个数组元素都有一个编号,编号从零开始。例如,数组值为[‘John’, ‘Doe’],那么第2个元素可以通过数组名[1]进行引用。 |
Array() 例如array<string> |
Hive有三种复杂数据类型ARRAY、MAP 和 STRUCT。
ARRAY和MAP与Java中的Array和Map类似,而STRUCT与C语言中的Struct类似,它封装了一个命名字段集合,复杂数据类型允许任意层次的嵌套。

用JSON格式来表示其数据结构。在Hive下访问的格式为
{
    "name": "kris",
    "friends": ["shero" , "alex"] ,       //列表Array,
    "children": {                      //键值Map,
        "lili": 18 ,
        "yan": 19
    }
    "address": {                      //结构Struct,
        "street": "chaoyang",
        "city": "beijing"
    }
}

注意:MAP,STRUCT和ARRAY里的元素间关系都可以用同一个字符表示,这里用“_”。

Hive上创建测试表test
create table test(
name string,
friends array<string>,
children map<string, int>,
address struct<street:string, city:string>
)
row format delimited fields terminated by ','
collection items terminated by '_'
map keys terminated by ':'
lines terminated by '\n';


字段解释:
row format delimited fields terminated by ','  -- 列分隔符
collection items terminated by '_'      --MAP STRUCT 和 ARRAY 的分隔符(数据分割符号)
map keys terminated by ':'            -- MAP中的key与value的分隔符
lines terminated by '\n';                -- 行分隔符

hive> load data local inpath '/var/lib/hadoop-hdfs/test.txt' into table test;


访问三种集合列里的数据,以下分别是ARRAY,MAP,STRUCT的访问方式
select * from test;
name       friends                    children                   address
kris    ["shero","alex"]    {"lili":18,"yan":19}    {"street":"chaoyang","city":"beijing"}

select friends[1],children['lili'],address.city from test where name="kris";
    alex    18    beijing
类型转换
Hive的原子数据类型是可以进行隐式转换的,类似于Java的类型转换,例如某表达式使用INT类型,TINYINT会自动转换为INT类型,但是Hive不会进行反向转化,例如,某表达式使用TINYINT类型,INT不会自
动转换为TINYINT类型,它会返回错误,除非使用CAST操作。
1)隐式类型转换规则如下
(1)任何整数类型都可以隐式地转换为一个范围更广的类型,如TINYINT可以转换成INT,INT可以转换成BIGINT。
(2)所有整数类型、FLOAT和STRING类型都可以隐式地转换成DOUBLE。
(3)TINYINT、SMALLINT、INT都可以转换为FLOAT。
(4)BOOLEAN类型不可以转换为任何其它的类型。
2)可以使用CAST操作显示进行数据类型转换
例如CAST('1' AS INT)将把字符串'1' 转换成整数1;如果强制类型转换失败,如执行CAST('X' AS INT),表达式返回空值 NULL。

0: jdbc:hive2://hadoop101:10000> select '1'+2, cast('1'as int) + 2;
+------+------+--+
| _c0  | _c1  |
+------+------+--+
| 3.0  | 3    |
对于Hive的String类型相当于数据库的varchar类型,该类型是一个可变的字符串,不过它不能声明其中最多能存储多少个字符,理论上它可以存储2GB的字符数。
2. DDL数据定义
创建数据库
创建一个数据库,数据库在HDFS上的默认存储路径是/user/hive/warehouse/*.db。
修改
用户可以使用ALTER DATABASE命令为某个数据库的DBPROPERTIES设置键-值对属性值,来描述这个数据库的属性信息。数据库的其他元数据信息都是不可更改的,包括数据库名和数据库所在的目录位置。
① 创建数据库
 create database if not exists db_hive;  避免要创建的数据库已经存在错误,增加if not exists判断。(标准写法)
 create database if not exists db_hive2 location '/db_hive2.db'; 指定数据库在HDFS上存放的位置

② 修改数据库
 alter database db_hive set dbproperties('createtime'='20190215'); //为某个数据库设置键值对属性值,来描述数据库的属性信息。

③ 查看数据库|
 切换数据库 use xx;
 显示数据库
  show databases; //show databases like 'db_hive';
 查看数据库详情
  desc database db_hive;
  desc database extended db_hive;  显示数据库详细信息; 也可以去掉extended即显示数据库信息;
db_name comment location        owner_name      owner_type      parameters
db_hive         hdfs://hadoop101:9000/user/hive/warehouse/db_hive.db    kris    USER    {createtime=20190215}

④ 删除数据库
drop database db_hive2;
drop database if exists db_hive2;
drop database db_hive cascade;  ##若数据库不为空,则强制删除用cascade;
创建表
建表语法
CREATE [EXTERNAL] TABLE [IF NOT EXISTS] table_name
[(col_name data_type [COMMENT col_comment], ...)]
[COMMENT table_comment]
[PARTITIONED BY (col_name data_type [COMMENT col_comment], ...)]
[CLUSTERED BY (col_name, col_name, ...)
[SORTED BY (col_name [ASC|DESC], ...)] INTO num_buckets BUCKETS]
[ROW FORMAT row_format]
[STORED AS file_format]
[LOCATION hdfs_path]
[TBLPROPERTIES (property_name=property_value, ...)]
[AS select_statement]


字段解释说明
(1)CREATE TABLE 创建一个指定名字的表。如果相同名字的表已经存在,则抛出异常;用户可以用 IF NOT EXISTS 选项来忽略这个异常。
(2)EXTERNAL关键字可以让用户创建一个外部表,在建表的同时可以指定一个指向实际数据的路径(LOCATION),在删除表的时候,内部表的元数据和数据会被一起删除,而外部表只删除元数据,不删除数据。
(3)COMMENT:为表和列添加注释。
(4)PARTITIONED BY创建分区表
(5)CLUSTERED BY创建分桶表
(6)SORTED BY不常用,对桶中的一个或多个列另外排序
(7)ROW FORMAT
DELIMITED [FIELDS TERMINATED BY char] [COLLECTION ITEMS TERMINATED BY char]
        [MAP KEYS TERMINATED BY char] [LINES TERMINATED BY char]
   | SERDE serde_name [WITH SERDEPROPERTIES (property_name=property_value, property_name=property_value, ...)]
用户在建表的时候可以自定义SerDe或者使用自带的SerDe。如果没有指定ROW FORMAT 或者ROW FORMAT DELIMITED,将会使用自带的SerDe。在建表的时候,用户还需要为表指定列,用户在指定表的列的同时也会指定自定义的SerDe,Hive通过SerDe确定表的具体的列的数据。
SerDe是Serialize/Deserilize的简称, hive使用Serde进行行对象的序列与反序列化。
(8)STORED AS指定存储文件类型
常用的存储文件类型:SEQUENCEFILE(二进制序列文件)、TEXTFILE(文本)、RCFILE(列式存储格式文件)
如果文件数据是纯文本,可以使用STORED AS TEXTFILE。如果数据需要压缩,使用 STORED AS SEQUENCEFILE。
(9)LOCATION :指定表在HDFS上的存储位置。
(10)AS:后跟查询语句,根据查询结果创建表。
(11)LIKE允许用户复制现有的表结构,但是不复制数据。
hive (default)> create table if not exists student2(
              > id int, name string)
              > row format delimited fields terminated by '\t'
              > stored as textfile
              > location '/user/hive/warehouse/student2';
OK
管理表| 外部表
管理表,有时也被称为内部表。因为这种表,Hive会(或多或少地)控制着数据的生命周期。Hive默认情况下会将这些表的数据存储在由配置项hive.metastore.warehouse.dir(例如,/user/hive/warehouse)所定
义的目录的子目录下。 当我们删除一个管理表时,Hive也会删除这个表中数据。管理表不适合和其他工具共享数据。
外部表,因为表是外部表,Hive并非认为其完全拥有这份数据。删除该表并不会删除掉这份数据,不过描述表的元数据信息会被删除掉。
管理部和内部表的使用场景:
每天将收集到的网站日志定期流入HDFS文本文件。在外部表(原始日志表)的基础上做大量的统计分析,用到的中间表、结果表使用内部表存储,数据通过SELECT+INSERT进入内部表。
内部表数据可进可出 元数据+hdfs
外部表元数据---HDFS,只包含元数据; 不会删hdfs数据
① 普通创建表
create table if not exists student3 as select id, name from student; //创建表并导入数据
create table if not exists student4 like student; //根据已经存在的表机构创建表
desc formatted student2; #查询表的类型;查看格式化数据

② 外部表
hive (default)> dfs -mkdir /student;
hive (default)> dfs -put /opt/module/datas/student.txt /student;
hive (default)> create external table stu_external(  //创建外部表
    id int,
    name string)
 row format delimited fields terminated by '\t'
 location '/student';

 select * from stu_external;
 desc formatted stu_external;
 drop table stu_external;
    外部表删除后,hdfs中的数据还在,但是metadata中stu_external的元数据已被删除

 ③ 内部表和外部表的互相转换
  desc formatted student2;  //查看表的类型
alter table student2 set tblproperties('EXTERNAL'='TRUE');  //将student2变成外部表alter table student2 set tblproperties('EXTERNAL'='FALSE'); //将student2变成内部表
  ('EXTERNAL'='TRUE')和('EXTERNAL'='FALSE') 为固定写法,区分大小写。
分区表
分区表实际上就是对应一个HDFS文件系统上独立的文件夹,该文件夹下是该分区所有的数据文件。Hive中的分区就是分目录,把一个大的数据集根据业务需要分割成小的数据集。在查询时通过WHERE子句
中的表达式选择查询所需要的指定的分区,这样的查询效率会提高很多。
① 创建分区表
hive (default)> create table dept_partition(
              > deptno int, dname string, loc string)
              > partitioned by (month string)
              > row format delimited fields terminated by '\t';

加载数据
hive (default)> load data local inpath '/opt/module/datas/dept.txt' into table default.dept_partition partition(month='201709');
Loading data to table default.dept_partition partition (month=201709)
Partition default.dept_partition{month=201709} stats: [numFiles=1, numRows=0, totalSize=71, rawDataSize=0]
OK
load data local inpath '/opt/module/datas/dept.txt' into table default.dept_partition partition(month='201708');
load data local inpath '/opt/module/datas/dept.txt' into table default.dept_partition partition(month='201707');
② 单分区查询
 select * from dept_partition where month='201708';
+------------------------+-----------------------+---------------------+-----------------------+--+
| dept_partition.deptno  | dept_partition.dname  | dept_partition.loc  | dept_partition.month  |
+------------------------+-----------------------+---------------------+-----------------------+--+
| 10                     | ACCOUNTING            | 1700                | 201708                |
| 20                     | RESEARCH              | 1800                | 201708                |
| 30                     | SALES                 | 1900                | 201708                |
| 40                     | OPERATIONS            | 1700                | 201708                |
+------------------------+-----------------------+---------------------+-----------------------+--
多分区联合查询
 select * from dept_partition where month='201707'
 union
 select * from dept_partition where month='201708'
 union
 select * from dept_partition where month='201709';

③ 增加分区| 增加单个、增加多个分区
 alter table dept_partition add partition(month='201705') partition(month='201704');

④ 删除分区| 单个、删多个用,连接
 alter table dept_partition drop partition(month='201705'), partition(month='201706');

⑤ 查看分区有多少分区
 show partitions dept_partition;
+---------------+--+
|   partition   |
+---------------+--+
| month=201707  |
| month=201708  |
| month=201709  |
+---------------+--+

⑥ 查看分区表结构
 desc formatted dept_partition;

⑦ 创建二级分区  如果一个月的日志数据量很大,如何将数据拆分?
hive (default)> create table dept_partition2(
deptno int, dname string, loc string)
partitioned by (month string, day string)
row format delimited fields terminated by '\t';
  加载数据到二级分区
    load data local inpath '/opt/module/datas/dept.txt' into table default.dept_partition2 partition(month='201709', day='13');
   select * from dept_partition2 where month='201709' and day='13'; 查看分区数据
把数据直接上传到分区目录上,让分区表和数据产生关联的三种方式
方式一:上传数据后修复
 dfs -mkdir -p /user/hive/warehouse/dept_partition2/month=201709/day=12;
 dfs -put /opt/module/datas/dept.txt /user/hive/warehouse/dept_partition2/month=201709/day=12;
 msck repair table dept_partition2;  //执行修复命令
 select * from dept_partition2 where month='201709' and day='12';
 alter table dept_partition2 drop partition(month='201709', day='11'); 删除

 方式二:上传数据后添加分区
  dfs -mkdir -p /user/hive/warehouse/dept_partition2/month=201709/day=11;  不能加引号
  dfs -put /opt/module/datas/dept.txt /user/hive/warehouse/dept_partition2/month=201709/day=11;
  alter table dept_partition2 add partition(month='201709', day='11');  //执行添加分区
  select * from dept_partition2 where month='201709' and day='11';

方式三:创建文件夹后load数据到分区
  dfs -mkdir -p /user/hive/warehouse/dept_partition2/month='201709'/day='10';
  load data local inpath '/opt/module/datas/dept.txt' into table dept_partition2 partition(month='201709',day='10');
  select * from dept_partition2 where month='201709' and day='10';
动态分区调整
关系型数据库中,对分区表Insert数据时候,数据库自动会根据分区字段的值,将数据插入到相应的分区中,Hive中也提供了类似的机制,即动态分区(Dynamic Partition),只不过,使用Hive的动态分区,需要进
行相应的配置。
开启动态分区参数设置
(1)开启动态分区功能(默认true,开启)
hive.exec.dynamic.partition=true
(2)设置为非严格模式(动态分区的模式,默认strict,表示必须指定至少一个分区为静态分区,nonstrict模式表示允许所有的分区字段都可以使用动态分区。)
hive.exec.dynamic.partition.mode=nonstrict
(3)在所有执行MR的节点上,最大一共可以创建多少个动态分区。默认1000
hive.exec.max.dynamic.partitions=1000
(4)在每个执行MR的节点上,最大可以创建多少个动态分区。该参数需要根据实际的数据来设定。比如:源数据中包含了一年的数据,即day字段有365个值,那么该参数就需要设置成大于365,如果使用默认
值100,则会报错。
hive.exec.max.dynamic.partitions.pernode=100
(5)整个MR Job中,最大可以创建多少个HDFS文件。默认100000
hive.exec.max.created.files=100000
(6)当有空分区生成时,是否抛出异常。一般不需要设置。默认false
hive.error.on.empty.partition=false
将dept表中的数据按照地区(loc字段),插入到目标表dept_partition的相应分区中。
(1)创建目标分区表
create table dept_partition_dy(id int, name string)
partitioned by (loc int)
row format delimited fields terminated by '\t';

(2)设置动态分区
set hive.exec.dynamic.partition.mode = nonstrict;
insert into table dept_partition_dy partition(loc) select deptno, dname, loc from dept;

(3)查看目标分区表的分区情况
show partitions dept_partition;

目标分区表是如何匹配到分区字段的?
分桶表
分区提供一个隔离数据和优化查询的便利方式。不过,并非所有的数据集都可形成合理的分区。对于一张表或者分区,Hive 可以进一步组织成桶,也就是更为细粒度的数据范围划分。
分桶是将数据集分解成更容易管理的若干部分的另一个技术。
分区针对的是数据的存储路径;分桶针对的是数据文件。
开启支持分桶
set hive.enforce.bucketing=true;
默认false,设置为true后,mr运行时会根据bucket的个数自动分配reduce task个数。一次作业产生的桶(文件数量)和reduce task个数一致。
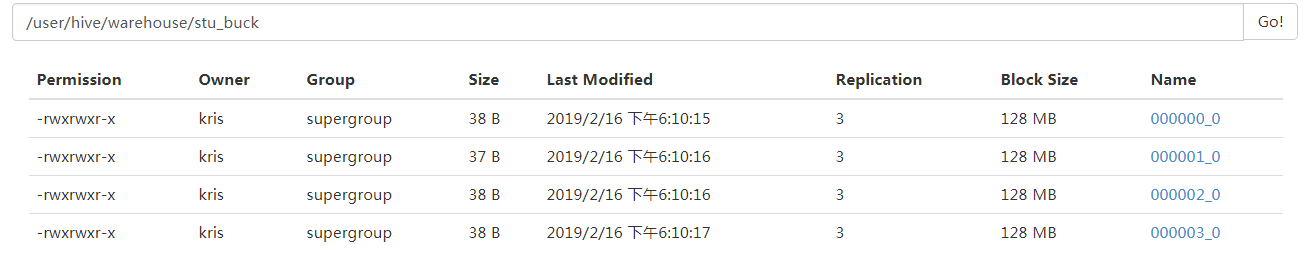
创建分桶表
create table stu_buck(id int, name string)
clustered by(id) into 4 buckets
row format delimited fields terminated by '\t';
查看表结构
hive (default)> desc formatted stu_buck;
Num Buckets: 4
导入数据到分桶表中,load的方式
hive (default)> load data local inpath '/opt/module/datas/student.txt' into table stu_buck;
查看创建的分桶表中是并没有分成4个桶;没有经过mapreduce
方式二:
创建分桶表时,数据通过子查询的方式导入
(1)先建一个普通的stu表
create table stu(id int, name string)
row format delimited fields terminated by '\t';
(2)向普通的stu表中导入数据
load data local inpath '/opt/module/datas/student.txt' into table stu;
(3)清空stu_buck表中数据
truncate table stu_buck;
select * from stu_buck;
(4)导入数据到分桶表,通过子查询的方式
insert into table stu_buck select id, name from stu;
发现还是只有一个分桶; 因为数据量太小了;
(5)需要设置一个属性;再来一遍!
hive (default)> set hive.enforce.bucketing=true;
hive (default)> set mapreduce.job.reduces=-1;
hive (default)> truncate table stu_buck;
hive (default)> insert into table stu_buck select id, name from stu; //insert方式将数据导入分桶表。
查询分桶的数据
select * from stu_buck; //从结果中看到分成了4个桶;
+--------------+----------------+--+
| stu_buck.id | stu_buck.name |
+--------------+----------------+--+
| 1016 | ss16 |
| 1012 | ss12 |
| 1008 | ss8 |
| 1004 | ss4 |
| 1009 | ss9 |
| 1005 | ss5 |
| 1001 | ss1 |
| 1013 | ss13 |
| 1010 | ss10 |
| 1002 | ss2 |
| 1006 | ss6 |
| 1014 | ss14 |
| 1003 | ss3 |
| 1011 | ss11 |
| 1007 | ss7 |
| 1015 | ss15 |
+--------------+----------------+--+
16 rows selected (0.09 seconds)
分桶规则:
根据结果可知:Hive的分桶采用对分桶字段的值进行哈希,然后除以桶的个数求余的方式决定该条记录存放在哪个桶当中
分桶表操作需要注意的事项:
- (1)reduce的个数设置为-1,让Job自行决定需要用多少个reduce或者将reduce的个数设置为大于等于分桶表的桶数
- (2)从hdfs中load数据到分桶表中,避免本地文件找不到问题
- (3)不要使用本地模式
修改表
重命名表
 jdbc:hive2://hadoop101:10000> alter table teacher rename to new_teacher;
添加列
 0: jdbc:hive2://hadoop101:10000> alter table dept_partition add columns(deptdesc string);
更新列
 0: jdbc:hive2://hadoop101:10000> alter table dept_partition change column deptdesc desc int;
No rows affected (0.112 seconds)
0: jdbc:hive2://hadoop101:10000> desc dept_partition;
替换列
0: jdbc:hive2://hadoop101:10000> alter table dept_partition replace columns(deptid int, name string, loc string);
删除表
0: jdbc:hive2://hadoop101:10000> drop table new_teacher;
3. DML数据操作
数据导入
① 向表中装载数据(Load)| 从本地 or HDFS到 Hive
hive> load data [local] inpath '数据的path' [overwrite] into table student [partition (partcol1=val1,…)];
(1)load data:表示加载数据
(2)local:表示从本地加载数据到hive表;否则从HDFS加载数据到hive表
(3)inpath:表示加载数据的路径
(4)overwrite:表示覆盖表中已有数据,否则表示追加
(5)into table:表示加载到哪张表
(6)student:表示具体的表
(7)partition:表示上传到指定分区
向表中装载数据:
从本地到hive
 create table student(id int, name string) row format delimited fields terminated by '\t';
 load data local inpath '/opt/module/datas/student.txt' into table default.student;  加载本地文件到hive

从HDFS到hive
0: jdbc:hive2://hadoop101:10000> dfs -mkdir -p /user/kris/hive;
0: jdbc:hive2://hadoop101:10000> dfs -put /opt/module/datas/student.txt /user/kris/hive;
 load data inpath '/user/kris/hive/student.txt' into table default.student; //移动hdfs上的文件;加载HDFS上的数据

 load data inpath '/user/kris/hive/student.txt' overwrite into table default.student; //加载数据覆盖表中已有的数据
② 通过查询语句向表中插入数据Insert
 create table student(id int, name string) partitioned by (month string) row format delimited fields terminated by '\t'; 创建一张分区表
 insert into table student partition(month='201902') values (1, "kris"), (2, "egon"); 插入数据

  根据单张表查询结果来插入insert into是追加数据的方式插入表或分区,原有数据不会被删除;
              insert overwrite是会覆盖表或分区中已有数据;

 insert overwrite table student partition(month="201905") select id,name from student where month='201902'; 在原本基础上追加
 select * from student;
+-------------+---------------+----------------+--+
| student.id  | student.name  | student.month  |
+-------------+---------------+----------------+--+
| 1           | kris          | 201902         |
| 2           | egon          | 201902         |
| 1           | kris          | 201905         |
| 2           | egon          | 201905         |
+-------------+---------------+----------------+--+
  多表(多分区)插入模式(根据多张表查询结果插入)
hive (default)> from student
         > insert overwrite table student partition(month="201904")
              > select id, name where month="201905"
              > insert overwrite table student partition(month="201903")
              > select id, name where month="201905";
0: jdbc:hive2://hadoop101:10000> select * from student;
+-------------+---------------+----------------+--+
| student.id  | student.name  | student.month  |
+-------------+---------------+----------------+--+
| 1           | kris          | 201902         |
| 2           | egon          | 201902         |
| 1           | kris          | 201903         |
| 2           | egon          | 201903         |
| 1           | kris          | 201904         |
| 2           | egon          | 201904         |
| 1           | kris          | 201905         |
| 2           | egon          | 201905         |
+-------------+---------------+----------------+-
③ 查询语句中创建并加载数据 AS Select
create table if not exists student3 as select id, name from student;
create table if not exists student4 like student;
④ 创建表时通过Location指定加载数据路径
create external table if not exists stu(id int, name string) row format delimited fields terminated by '\t' location '/student';
⑤ Import数据到指定Hive表中;
要先使用export导出后,才能将数据import导入
  export table student to '/hive_data/student';
  import table student from '/hive_data/student';

create table student22(
id int, name string)
partitioned by (month string)
row format delimited fields terminated by '\t';

import table student22 partition(month='201904') from  //student22必须要有分区才能导入成功
 '/user/hive/warehouse/export/student';
数据导出(Impala都不支持)
① Insert导出
  将输出文件导出到本地/opt/module/datas/export/student中;
0: jdbc:hive2://hadoop101:10000> insert overwrite local directory '/opt/module/datas/export/student' select * from student;
  结果格式化导出到本地
hive (default)> insert overwrite local directory '/opt/module/datas/export/student1'
              > ROW FORMAT DELIMITED FIELDS TERMINATED BY '\t' select * from student;
    结果导出到HDFS;只能用overwrite,不能用into
hive (default)> insert overwrite directory '/user/kris/student2'
              > row format delimited fields terminated by '\t'
              > select * from student;
② Hadoop命令导出到本地
hive (default)> dfs -get /user/hive/warehouse/student/month=201902/000000_0 /opt/module/datas/export/student3.txt;
[kris@hadoop101 export]$ cat student3.txt
1       kris
2       egon
[kris@hadoop101 export]$ pwd
/opt/module/datas/export
③ Shell命令导出到本地
[kris@hadoop101 hive]$ bin/hive -e 'select * from default.student;' > /opt/module/datas/export/student4.txt
④ Export导出到HDFS上
hive (default)> export table default.student to '/user/hive/warehouse/export/student';
⑤ Sqoop导出(导入)
https://www.cnblogs.com/shengyang17/p/10512510.html
Hive表导出成csv文件
hive -e "
set hive.cli.print.header=true;
select * from student where sex = 'male';
" | sed 's/[\t]/,/g'  > /opt/module/student.csv
清除表中数据(Truncate)
注意:Truncate只能删除管理表,不能删除外部表中数据
hive (default)> truncate table student;


【推荐】国内首个AI IDE,深度理解中文开发场景,立即下载体验Trae
【推荐】编程新体验,更懂你的AI,立即体验豆包MarsCode编程助手
【推荐】抖音旗下AI助手豆包,你的智能百科全书,全免费不限次数
【推荐】轻量又高性能的 SSH 工具 IShell:AI 加持,快人一步
· AI与.NET技术实操系列:向量存储与相似性搜索在 .NET 中的实现
· 基于Microsoft.Extensions.AI核心库实现RAG应用
· Linux系列:如何用heaptrack跟踪.NET程序的非托管内存泄露
· 开发者必知的日志记录最佳实践
· SQL Server 2025 AI相关能力初探
· winform 绘制太阳,地球,月球 运作规律
· 震惊!C++程序真的从main开始吗?99%的程序员都答错了
· 【硬核科普】Trae如何「偷看」你的代码?零基础破解AI编程运行原理
· AI与.NET技术实操系列(五):向量存储与相似性搜索在 .NET 中的实现
· 超详细:普通电脑也行Windows部署deepseek R1训练数据并当服务器共享给他人