

.netcore3.1添加swagger及JWT Authorize 验证
首先引入Microsoft.AspNetCore.Authentication.JwtBearer nuget包
在startup中加入jwt配置。这里ValidIssuer和ValidAudience和secret 最好配置一下,我这里写死了。
1 2 3 4 5 6 7 8 9 10 11 12 13 14 15 16 17 18 19 20 21 22 23 24 25 26 27 28 29 30 31 32 33 34 35 36 37 38 39 40 41 42 43 44 45 46 47 48 49 50 51 52 53 54 55 56 57 58 59 60 61 62 63 64 65 | public static void AddSwagger(this IServiceCollection services) { services.AddSwaggerGen(c => { c.SwaggerDoc("v1", new OpenApiInfo { Title = "Cabinet.Core.API 接口文档——Netcore 3.1", Version = "v1", Description = "Cabinet.Core.API HTTP API V1", }); #region Jwt //开启权限小锁 c.OperationFilter<AddResponseHeadersFilter>(); c.OperationFilter<AppendAuthorizeToSummaryOperationFilter>(); //在header中添加token,传递到后台 //Swagger响应头# //这里需要Nuget引用Swashbuckle.AspNetCore.Filters,oauth2需要写死,SecurityRequirementsOperationFilter中默认securitySchemaName = "oauth2"; //未添加该配置时,Bearer一直无法加入到JWT发起的Http请求的头部,无论怎么请求都会是401; c.OperationFilter<SecurityRequirementsOperationFilter>(); c.AddSecurityDefinition("oauth2", new OpenApiSecurityScheme { Description = "JWT授权(数据将在请求头中进行传递)直接在下面框中输入Bearer {token}(注意两者之间是一个空格) \"", Name = "Authorization",//jwt默认的参数名称 In = ParameterLocation.Header,//jwt默认存放Authorization信息的位置(请求头中) Type = SecuritySchemeType.ApiKey }); #endregion //xml注释 var basePath = PlatformServices.Default.Application.ApplicationBasePath; var xmlPath = Path.Combine(basePath, "Cabinet.Core.API.xml"); c.IncludeXmlComments(xmlPath, true); }); #region 添加验证服务 // 添加验证服务 services.AddAuthentication(x => { x.DefaultAuthenticateScheme = JwtBearerDefaults.AuthenticationScheme; x.DefaultChallengeScheme = JwtBearerDefaults.AuthenticationScheme; }).AddJwtBearer(o => { o.TokenValidationParameters = new TokenValidationParameters { // 是否开启签名认证 ValidateIssuerSigningKey = true, IssuerSigningKey = new SymmetricSecurityKey(Encoding.ASCII.GetBytes("111111111111111111111111111111111111111111111111111")), // 发行人验证,这里要和token类中Claim类型的发行人保持一致 ValidateIssuer = true, ValidIssuer = "API",//发行人 // 接收人验证 ValidateAudience = true, ValidAudience = "User",//订阅人 ValidateLifetime = true, ClockSkew = TimeSpan.Zero, }; }); #endregion } |
再来一个获取Token的接口
1 2 3 4 5 6 7 8 9 10 11 12 13 14 15 16 17 18 19 20 21 22 23 24 25 26 27 28 29 30 31 32 33 34 | [AllowAnonymous] [HttpGet,Route("/GetToken")] public ActionResult<string> GetToken() { //DateTime utc = DateTime.UtcNow; var claims = new List<Claim> { new Claim(JwtRegisteredClaimNames.Jti,"1"),//编号 new Claim(JwtRegisteredClaimNames.Iat, $"{new DateTimeOffset(DateTime.Now).ToUnixTimeSeconds()}"),//签发时间 new Claim(JwtRegisteredClaimNames.Nbf,$"{new DateTimeOffset(DateTime.Now).ToUnixTimeSeconds()}"),//生效时间 // 过期时间 100秒 new Claim(JwtRegisteredClaimNames.Exp,$"{new DateTimeOffset(DateTime.Now.AddSeconds(100)).ToUnixTimeSeconds()}"), new Claim(JwtRegisteredClaimNames.Iss,"API"), // 签发者 new Claim(JwtRegisteredClaimNames.Aud,"User") // 接收者 }; // 密钥 var key = new SymmetricSecurityKey(Encoding.UTF8.GetBytes("111111111111111111111111111111111111111111111111111")); var creds = new SigningCredentials(key, SecurityAlgorithms.HmacSha256); var tokenHandler = new JwtSecurityTokenHandler(); JwtSecurityToken jwt = new JwtSecurityToken( claims: claims,// 声明的集合 //expires: .AddSeconds(36), // token的有效时间 signingCredentials: creds ); var handler = new JwtSecurityTokenHandler(); // 生成 jwt字符串 var strJWT = handler.WriteToken(jwt); return Ok(strJWT); } |
在startup管道中启用授权app.UseAuthentication();
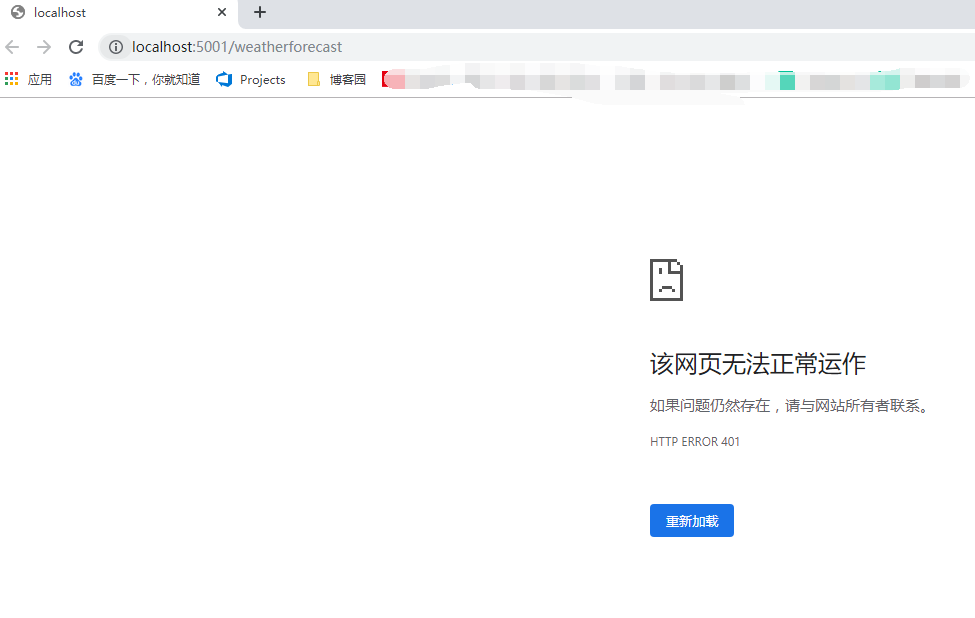
运行一下,访问天气接口,发现访问不了,因为加了[Authorize]特性后需要认证,如下图,出现401没有权限的标志。

访问swagger主页出现一个Authorize的标志,点击可以输入jwt的验证字符。
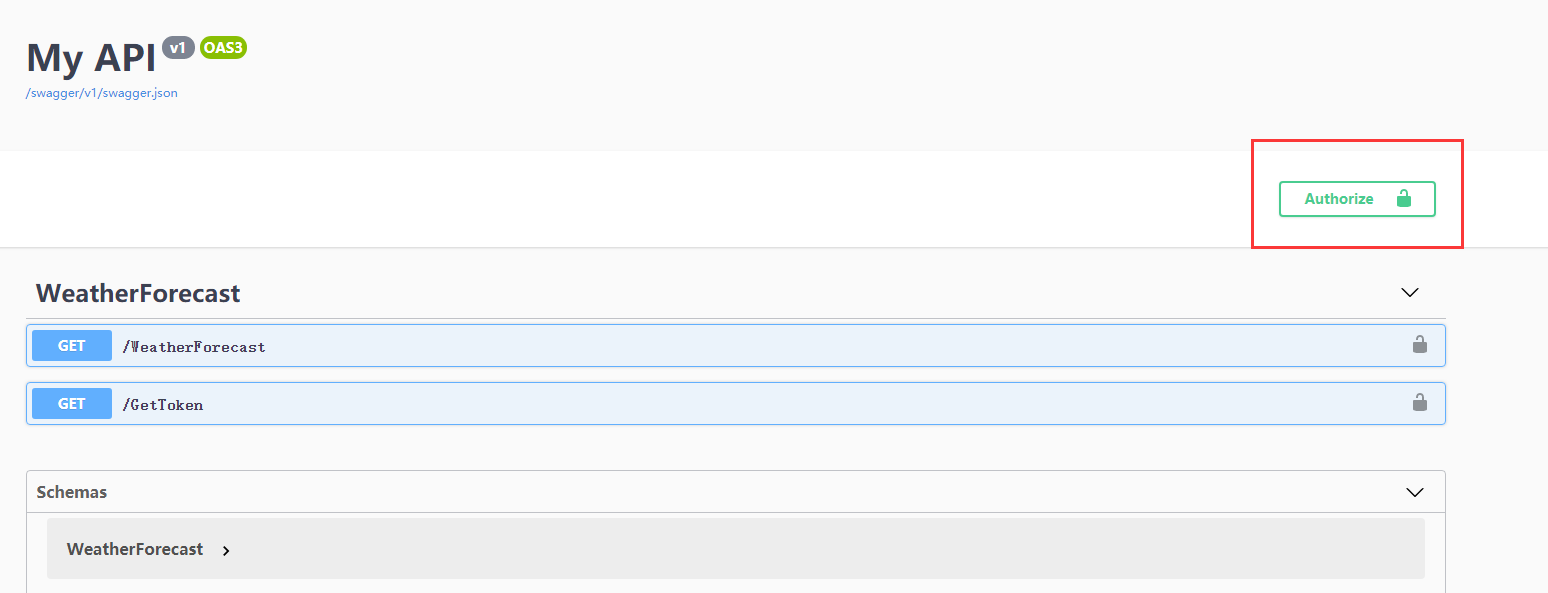
运行获取weatherforecast接口,运行结果还是401,因为我们在接口添加了【Authorize】后接口需要一个认证

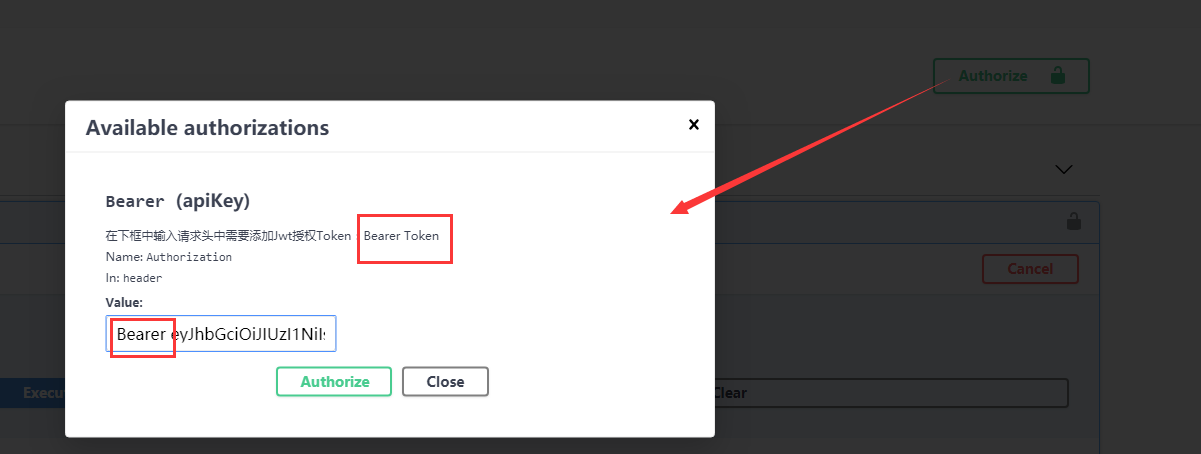
现在去拿一下token,运行GetToken,获取Token字符串,

将字符串添加到swagger提供的Authorize认证框里面,粘贴token之前要写上Bearer加一个空格,再粘上token.点击Authorize,完成。
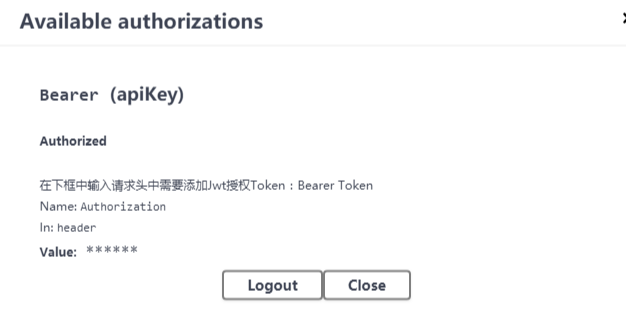
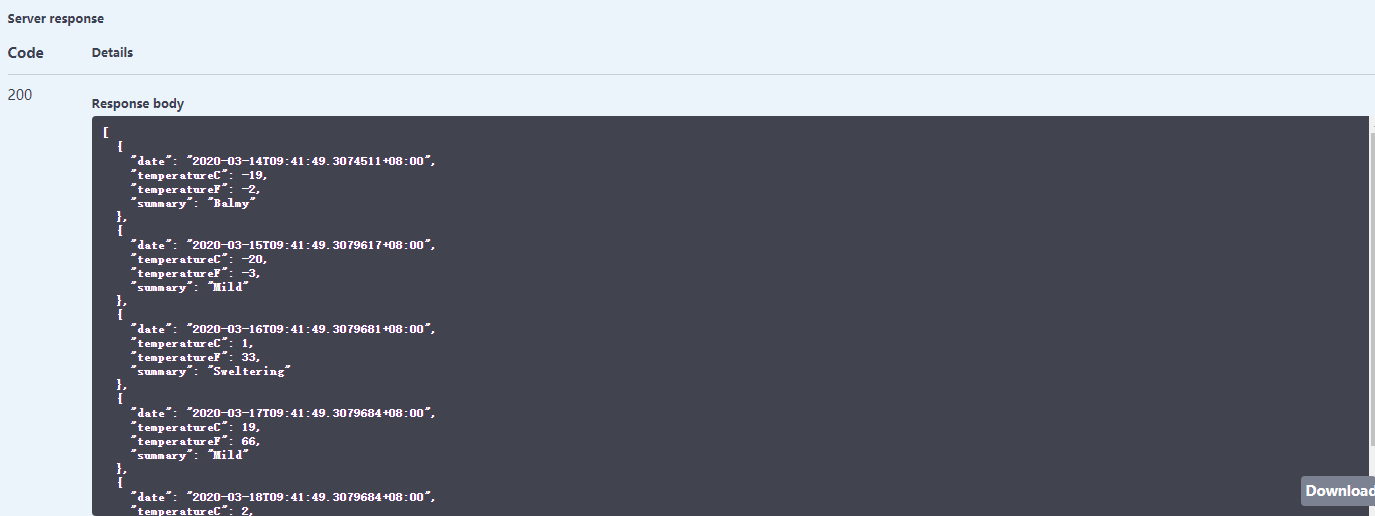
再次运行获取天气接口
分类:
.NET CORE


【推荐】国内首个AI IDE,深度理解中文开发场景,立即下载体验Trae
【推荐】编程新体验,更懂你的AI,立即体验豆包MarsCode编程助手
【推荐】抖音旗下AI助手豆包,你的智能百科全书,全免费不限次数
【推荐】轻量又高性能的 SSH 工具 IShell:AI 加持,快人一步
· Linux系列:如何用heaptrack跟踪.NET程序的非托管内存泄露
· 开发者必知的日志记录最佳实践
· SQL Server 2025 AI相关能力初探
· Linux系列:如何用 C#调用 C方法造成内存泄露
· AI与.NET技术实操系列(二):开始使用ML.NET
· 被坑几百块钱后,我竟然真的恢复了删除的微信聊天记录!
· 没有Manus邀请码?试试免邀请码的MGX或者开源的OpenManus吧
· 【自荐】一款简洁、开源的在线白板工具 Drawnix
· 园子的第一款AI主题卫衣上架——"HELLO! HOW CAN I ASSIST YOU TODAY
· Docker 太简单,K8s 太复杂?w7panel 让容器管理更轻松!