NGINX专题-(2)配置Nginx正、反向代理重写路由策略
引用1:https://www.cnblogs.com/yudis/articles/6676705.html
引用2:https://blog.csdn.net/medwardm/article/details/71455212
引用3:https://www.cnblogs.com/yudis/articles/6676705.html
引用4:https://www.cnblogs.com/me115/p/5698787.html
正向代理(Proxy):让局域网内的用户 访问外网,外网不能访问局域网,不支持https。
正向代理的服务器块配置:
server {
    listen      8080;
    server_name localhost;
    charset     utf-8;
    client_max_body_size 75M;

    location / {
        resolver 10.0.144.1;
        proxy_pass $scheme://$http_host$request_uri;
        proxy_buffers 256 4k;
        proxy_max_temp_file_size 0k;
    }
}
反向代理(Reverse Proxy):是指以代理服务器来接受internet上的连接请求,然后将请求转发给内部网络上的服务器,并将从服务器上得到的结果返回给internet上请求连接的客户端,此时代理服务器对外就表现为一个服务器。用Nginx作为反向代理,客户点发送请求,nginx把请求头伪装起来让服务器不知道是客户端还是nginx发起的服务。
Nginx反向代理的优势:
1.跨域请求资源
2.集中站点资源,用一个端口跑多个应用,用location对多个URL做反向代理
以下是我在CentOS下nginx反向代理配置的文件/etc/nginx/nginx.conf
# For more information on configuration, see:
#   * Official English Documentation: http://nginx.org/en/docs/
#   * Official Russian Documentation: http://nginx.org/ru/docs/

#这里是centOS系统,默认用户是nginx,ubuntu中是www-data用户。
user              nginx;
worker_processes  1;

error_log  /var/log/nginx/error.log;
#error_log  /var/log/nginx/error.log  notice;
#error_log  /var/log/nginx/error.log  info;

pid        /var/run/nginx.pid;

worker_rlimit_nofile 65535;
events {
    use epoll;
    worker_connections  65535;
}


http {
    include       /etc/nginx/mime.types;
    default_type  application/octet-stream;
    sendfile on;
    keepalive_timeout 65;
    gzip on;
    client_max_body_size 50m; #缓冲区代理缓冲用户端请求的最大字节数,可以理解为保存到本地再传给用户
    client_body_buffer_size 256k;
    client_header_timeout 3m;
    client_body_timeout 3m;
    send_timeout 3m;

    #以下段落中proxy_read_timeout设置过小出现504访问错误
    proxy_connect_timeout 300s; #nginx跟后端服务器连接超时时间(代理连接超时)
    proxy_read_timeout 300s; #连接成功后,后端服务器响应时间(代理接收超时)
    proxy_send_timeout 300s;
    proxy_buffer_size 64k; #设置代理服务器(nginx)保存用户头信息的缓冲区大小
    proxy_buffers 4 32k; #proxy_buffers缓冲区,网页平均在32k以下的话,这样设置
    proxy_busy_buffers_size 64k; #高负荷下缓冲大小(proxy_buffers*2)
    proxy_temp_file_write_size 64k; #设定缓存文件夹大小,大于这个值,将从upstream服务器传递请求,而不缓冲到磁盘
    proxy_ignore_client_abort on; #不允许代理端主动关闭连接

    #纪录真实IP可以将$remote_addr改为$HTTP_X_REAL_IP
    #log_format  access  '$HTTP_X_REAL_IP - $remote_user [$time_local] "$request" '
    #                  '$status $body_bytes_sent "$http_referer" '
    #                  '"$http_user_agent" "$http_x_forwarded_for"';
    #access_log  /var/log/nginx/access.log  access;

    log_format  main  '$remote_addr - $remote_user [$time_local] "$request" '
                      '$status $body_bytes_sent "$http_referer" '
                      '"$http_user_agent" "$http_x_forwarded_for"';

    access_log  /var/log/nginx/access.log  main;

    #tcp_nopush     on;

    # Load config files from the /etc/nginx/conf.d directory
    # The default server is in conf.d/default.conf
    include /etc/nginx/conf.d/*.conf;

}
nginx缓冲区优化:
如果没配置下面这段,访问时候偶尔会出现504 gateway timeout:
proxy_connect_timeout 300s;
proxy_read_timeout 300s;
proxy_send_timeout 300s;
proxy_buffer_size 64k;
proxy_buffers 4 32k;
proxy_busy_buffers_size 64k;
proxy_temp_file_write_size 64k;
proxy_ignore_client_abort on;
把proxy_read_timeout 这个参数设置成1ms的时候,每次访问都出现504。
proxy_buffer_size:
后端服务器的相应头会放到proxy_buffer_size当中,这个大小默认等于proxy_buffers当中的设置单个缓冲区的大小。 proxy_buffer_size只是响应头的缓冲区,没有必要也跟着设置太大。 proxy_buffer_size最好单独设置,一般设置个4k就够了。
proxy_buffers:
proxy_buffers的缓冲区大小一般会设置的比较大,以应付大网页。 proxy_buffers当中单个缓冲区的大小是由系统的内存页面大小决定的,Linux系统中一般为4k。 proxy_buffers由缓冲区数量和缓冲区大小组成的。总的大小为number*size。
若某些请求的响应过大,则超过_buffers的部分将被缓冲到硬盘(缓冲目录由_temp_path指令指定), 当然这将会使读取响应的速度减慢, 影响用户体验. 可以使用proxy_max_temp_file_size指令关闭磁盘缓冲.
proxy_busy_buffers_size:
proxy_busy_buffers_size不是独立的空间,他是proxy_buffers和proxy_buffer_size的一部分。nginx会在没有完全读完后端响应的时候就开始向客户端传送数据,所以它会划出一部分缓冲区来专门向客户端传送数据(这部分的大小是由proxy_busy_buffers_size来控制的,建议为proxy_buffers中单个缓冲区大小的2倍),然后它继续从后端取数据,缓冲区满了之后就写到磁盘的临时文件中。
proxy_max_temp_file_size和proxy_temp_file_write_size:
临时文件由proxy_max_temp_file_size和proxy_temp_file_write_size这两个指令决定。 proxy_temp_file_write_size是一次访问能写入的临时文件的大小,默认是proxy_buffer_size和proxy_buffers中设置的缓冲区大小的2倍,Linux下一般是8k。
proxy_max_temp_file_size指定当响应内容大于proxy_buffers指定的缓冲区时, 写入硬盘的临时文件的大小. 如果超过了这个值, Nginx将与Proxy服务器同步的传递内容, 而不再缓冲到硬盘. 设置为0时, 则直接关闭硬盘缓冲.
在此文件夹下,就可以建立一些代理配置文件:
常用服务器配置:
服务器有关配置一般存放在/etc/nginx/conf.d/下。
因为在/etc/nginx/nginx.conf文件中定义了include /etc/nginx/conf.d/*.confl;
1.日志格式:
log_format main '$time_iso8601|$remote_addr|$remote_user|$request_method|$uri|'
          '$status|$request_time|$request_length|$body_bytes_sent|$bytes_sent|'
          '$connection|$http_x_forwarded_for|$upstream_addr|$upstream_status|'
          '$upstream_response_time|$args|$http_referer|$http_user_agent';
access_log  logs/access.log  main;
要想能记录真实IP,需要修改日志格式,将$remote_addr改为$HTTP_X_REAL_IP :
log_format access '$HTTP_X_REAL_IP - $remote_user [$time_local] "$request" '
'$status $body_bytes_sent "$http_referer" '
'"$http_user_agent" $HTTP_X_Forwarded_For';

access_log logs/access.log access;
默认的日志格式如下:
#log_format main '$remote_addr - $remote_user [$time_local] "$request" '
# '$status $body_bytes_sent "$http_referer" '
# '"$http_user_agent" "$http_x_forwarded_for"';

#access_log logs/access.log main;
2.客户端IP设置:
proxy_set_header Host $host:$server_port;
proxy_set_header X-Real-IP $remote_addr;
proxy_set_header X-Forwarded-For $proxy_add_x_forwarded_for;
3.全局变量设置:
$args #这个变量等于请求行中的参数。
$content_length #请求头中的Content-length字段。
$content_type #请求头中的Content-Type字段。
$document_root #当前请求在root指令中指定的值。
$host #请求主机头字段,否则为服务器名称。
$http_user_agent #客户端agent信息
$http_cookie #客户端cookie信息
$limit_rate #这个变量可以限制连接速率。
$request_body_file #客户端请求主体信息的临时文件名。
$request_method #客户端请求的动作,通常为GET或POST。
$remote_addr #客户端的IP地址。
$remote_port #客户端的端口。
$remote_user #已经经过Auth Basic Module验证的用户名。
$request_filename #当前请求的文件路径,由root或alias指令与URI请求生成。
$query_string #与$args相同。
$scheme #HTTP方法(如http,https)。
$server_protocol #请求使用的协议,通常是HTTP/1.0或HTTP/1.1。
$server_addr #服务器地址,在完成一次系统调用后可以确定这个值。
$server_name #服务器名称。
$server_port #请求到达服务器的端口号。
$request_uri #包含请求参数的原始URI,不包含主机名,如:”/foo/bar.php?arg=baz”。
$uri #不带请求参数的当前URI,$uri不包含主机名,如”/foo/bar.html”。
$document_uri #与$uri相同。
4.Rewrite规则
语法:rewrite 正则 替换 标志位
flag标记(rewrite指令的最后一项参数):
1.last last是终止当前location的rewrite检测,但会继续重试location匹配并处理区块中的rewrite规则。
2.break break是终止当前location的rewrite检测,而且不再进行location匹配。
3.redirect 返回302临时重定向,浏览器地址会显示跳转后的URL地址。
4.permanent 返回301永久重定向,浏览器地址会显示跳转后的URL地址。
location ~ ^/(a|bb|ccc)/ {
    rewrite ^/([a-z]+)/(.*)$ http://106.185.48.229/$2?$1;
}
当客户端访问路径为/a/开头或/bb/开头或/ccc/开头时,将路径替换为http://106.185.48.229/后段路径?a或bb或ccc。即用括号括起来的参数为后面的 $1 $2 变量。
内部重写:
当需要在同一个域内重写时:比如将url中/invoice/345232.pdf重写成/invoice.php?id=345232:
rewrite ^/invoice/(\d+).pdf$ /invoice.php?id=$1 break;
这种重写对浏览器和搜索引擎是透明的。
外部重定向:
在不通域之间变化内容,或给搜索引擎一个信号,表示页面已被移走了。
比如你想要将以/fr开头的请求重定向到http://yourshop.fr:
rewrite ^/fr/(.*)$ http://yourshop.fr/$1 permanent;
-
5.反向代理的路由策略
location [=|~|~*|^~] /uri/ {…}语法:
= 开头表示精确匹配,不支持正则。
^~ 开头表示uri以某个常规字符串开头,不支持正则,理解为匹配url路径即可。
~和~* 开头表示区分大小写的和不区分大小写的正则匹配。
!~和!~* 开头表示区分大小写不匹配及不区分大小写不匹配的正则匹配。
/ 通用匹配,任何请求都会匹配,通常放着配置的最后。
匹配优先级:
= > ^~ > ~, ~* > 空
全匹配 > 路径匹配 > 正则匹配 > 字符串匹配
# 默认匹配
location / {
    try_files $uri $uri.html @demoapp;
}
location @demoapp {
    include uwsgi_params;
    uwsgi_pass unix:/var/www/demoapp/demoapp_uwsgi.sock;
}
# 字符串匹配--简单反向代理
location /cnblogs {
    proxy_set_header Host $host:$server_port;

    proxy_set_header X-Real-IP $remote_addr;
    proxy_set_header X-Forwarded-For $proxy_add_x_forwarded_for;
    proxy_pass http://cnblogs.com/;

}
#字符串匹配-重定向报文代理
location /my/ {proxy_redirect / /my/;
proxy_set_header Host $host:$server_port;
proxy_pass http://10.0.144.50/
}#字符串匹配--匹配静态页面location /readme { default_type "text/html"; root /var/www/demoapp; try_files $uri $uri.html; } location /static { alias /home/www/static; access_log off; } # 路径匹配,此时proxy_pass的结束 / 决定是否带上匹配的路径 location ^~ /333/ { proxy_pass http://106.185.48.229/; } # 正则匹配,此时proxy_pass不能带结束 / location ~ ^/(xxx|yyy)/ { proxy_pass http://106.185.48.229; } # 字符串匹配,此时proxy_pass的结束 / 决定是否带上匹配得路径 location /zzz/ { proxy_pass http://106.185.48.229/; }
注:不带/表示带上匹配路径。
nginx常用代理配置
1. 最简反向代理配置
在http节点下,使用upstream配置服务地址,使用server的location配置代理映射。
upstream my_server {
    server 10.0.144.50:8080;
    keepalive 2000;
}
server {
    listen      8080;
    server_name 10.0.144.196;
    charset     utf-8;
    client_max_body_size 75M;
    location /my/ {
        proxy_set_header Host $host:$server_port;
        proxy_pass http://my_server/;
    }
}
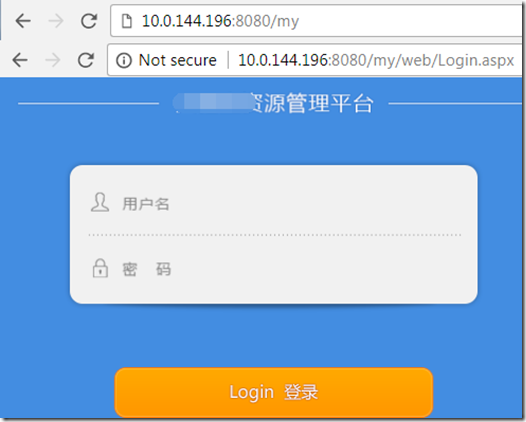
访问nginx地址http://10.0.144.196:8080/my的请求会被转发到my_server服务地址http://10.0.144.50:8080/my。这是因为proxy_pass参数中如果不包含url的路径,则会将location的pattern识别的路径作为绝对路径。
此时访问/my/由于没有登录,服务器会返回重定向报文时(http code为301或302)并跳转到/web/Login.aspx。但重定向的页面没有带上/my前缀,因而Nginx找不到http://10.0.144.196:8080/web/Login.aspx页面。这就需要重定向报文代理。
2. 重定向报文代理
即便配置了nginx代理,当服务返回重定向报文时(http code为301或302),会将重定向的目标url地址放入http response报文的header的location字段内。用户浏览器收到重定向报文时,会解析出该字段并作跳转。此时新的请求报文将直接发送给服务地址,而非nginx地址。为了能让nginx拦截此类请求,必须修改重定向报文的location信息。
upstream my_server {
    server 10.0.144.50;
    keepalive 2000;
}
server {
    listen      8080;
    server_name localhost;
    charset     utf-8;
    client_max_body_size 75M;
    location /my/ {
        proxy_redirect / /my/;
        proxy_set_header Host $host:$server_port;
        proxy_pass http://my_server/;
    }
}
使用proxy_redirect可以修改重定向报文的location字段,例子中会将所有的根路径下的url代理到nginx的/my/路径下返回给用户。比如服务返回的重定向报文的location原始值为/login,那么经过nginx代理后,用户收到的报文的location字段为/my/login。此时,浏览器将会跳转到nginx的/my/login地址进行访问。
需要注意的是,服务返回的重定向报文的location字段有时会填写绝对路径(包含服务的ip/域名和端口),有时候会填写相对路径,此时需要根据实际情况进行甄别。
location /my/ {
    proxy_pass http://my_server;
    proxy_set_header Host $host:$server_port;

    proxy_redirect http://my_server/ http://$host:$server_port/my/;
}
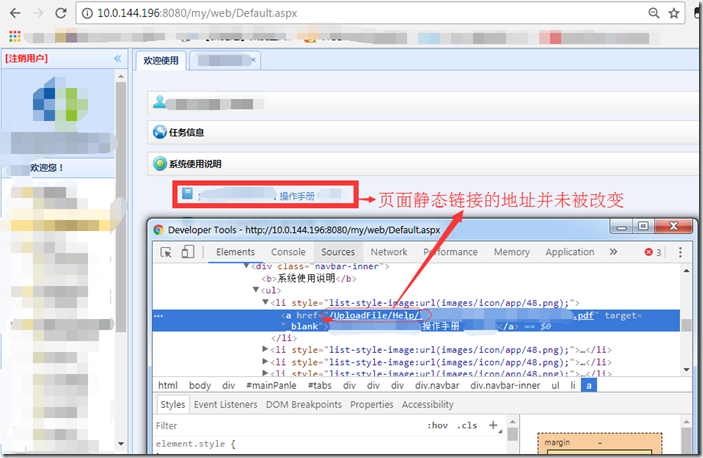
但此方法还是造成了页面静态链接的内容为被改变:理论上,下图中连接应该是/my/UploadFile/Help/xx.pdf
要解决此问题,就要用到报文数据替换。
3. 报文数据替换
针对http响应报文内写死了服务地址或web绝对路径。
一般的web页面会包含如下类似路径:
/public:用于静态页面资源,如js脚本/public/js,样式表/public/css,图片/public/img等。
/static:和/public类似。
/api:用于后台服务API接口。
/login:用于登录验证。
其他。
对于这样的服务,可能的代理配置如下:
location /my/ {
    proxy_pass http://my_server/;
    proxy_set_header Host $host:$server_port;

    proxy_redirect / /my/;
}
location /login/ {
    proxy_pass http://my_server/public;
    proxy_set_header Host $host:$server_port;
}
location /public/ {
    proxy_pass http://my_server/public;
    proxy_set_header Host $host:$server_port;
}
location /api/ {
    proxy_pass http://my_server/api;
    proxy_set_header Host $host:$server_port;
}
比如刚刚的页面中我使用如下配置可以成功浏览到/UploadFile路径下的pdf文件:
upstream my_server {
    server 10.0.144.50;
    keepalive 2000;
}
server {
    listen      8080;
    server_name localhost;
    charset     utf-8;
    client_max_body_size 75M;
    location /my/ {
        proxy_redirect / /my/;
        proxy_set_header Host $host:$server_port;
        proxy_pass http://my_server/;
    }
    location /UploadFile/ {
        proxy_set_header Host $host:$server_port;
        proxy_pass http://my_server;
    }
}
由于web页面或静态资源内写死了类似的绝对路径,那么对于用户来说,通过页面内的链接进行跳转时,都会请求到nginx服务对应的路径上。一旦存在另一个被nginx代理的服务也包含类似的路径,那么访问nginx的同一个路径的请求究竟转发给哪一个服务?
要解决这个问题,必须在用户收到报文前,将报文的数据中包含的绝对路径都添加统一的前缀,如对my_server服务添加前缀为:/my/public,/my/api,/my/login等,对other_server服务添加前缀成:/other/public, /other/api等这样nginx代理配置则可以简化为:
upstream my_server {
    server 10.0.144.50;
    keepalive 2000;
}
upstream other_server {
    server 10.0.144.150:8080;
    keepalive 2000;
}
location /my/ {
    proxy_pass http://my_server/;
    proxy_set_header Host $host:$server_port;

    proxy_redirect / /my/;
    sub_filter 'href="/' 'href="/my/';
    sub_filter 'src="/' 'src="/my/';

    sub_filter_types text/html;
    sub_filter_once  off;
}
location /other/ {
    proxy_pass http://other_server/;
    proxy_set_header Host $host:$server_port;

    proxy_redirect / /other/;
}
可见/UploadFile已经被添加了/my前缀
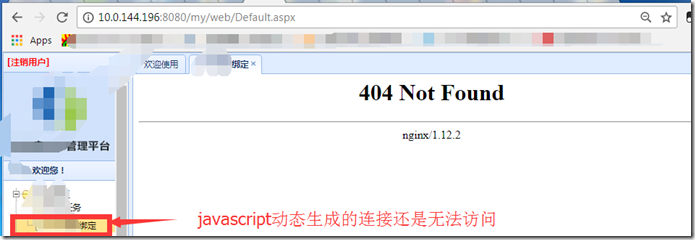
页面的静态连接已经可以访问,但动态连接依然无法访问:
因此继续对js和css代码执行修改:
upstream my_server {
    server 10.0.144.50;
    keepalive 2000;
}
location /my/ {
    proxy_pass http://my_server/;
    proxy_set_header Host $host:$server_port;

    proxy_redirect / /my/;
    sub_filter '"/' '"/my/';
    sub_filter "'/" "'/my/";
    sub_filter 'href="/' 'href="/my/';
    sub_filter 'src="/' 'src="/my/';

    sub_filter_types text/html text/javascript text/css;
    sub_filter_once  off;
}
在这里新增了替换的sub_filter 语句将/改成/my,并改变sub_filter_types,增加javascript和css文件类型。
结果如下:
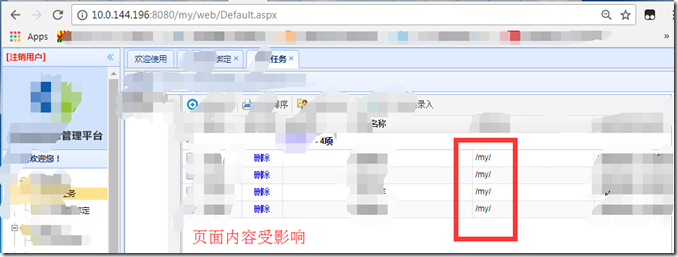
但页面内容有受影响(页面有带有/的内容都被修改为/my/了):
因此只能采取手动修改的方案:
upstream my_server {
    server 10.0.144.50;
    keepalive 2000;
}
location /my/ {
    proxy_pass http://my_server/;
    proxy_set_header Host $host:$server_port;

    proxy_redirect / /my/;
    sub_filter '"/ut/' '"/my/ut/';
    sub_filter "'/ut/" "'/my/ut/";
    sub_filter '"/UploadFile/' '"/my/UploadFile/';
    sub_filter "'/UploadFile/" "'/my/UploadFile/";
    sub_filter '"/PPReport/' '"/my/PPReport/';
    sub_filter "'/PPReport/" "'/my/PPReport/";
    sub_filter '"/web/' '"/my/';
    sub_filter "'/web/" "'/my/";
    sub_filter 'href="/' 'href="/my/';
    sub_filter 'src="/' 'src="/my/';

    sub_filter_types text/html text/javascript text/css;
    sub_filter_once  off;
}
这里将所有referer为http://my_server/my/开头的访问中,所有页面文件的细分文件夹都添加/my前缀。
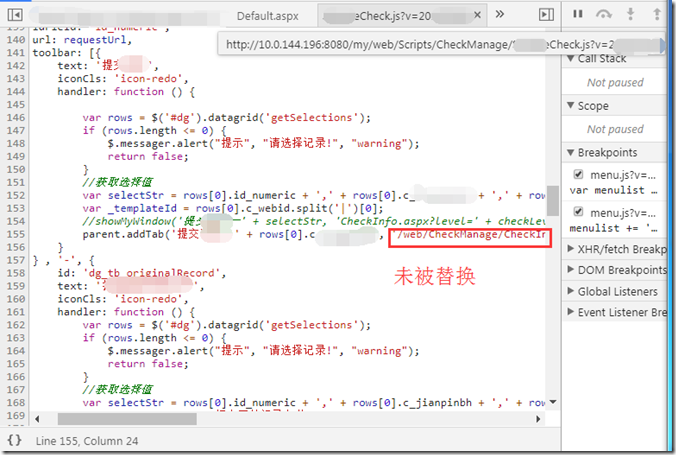
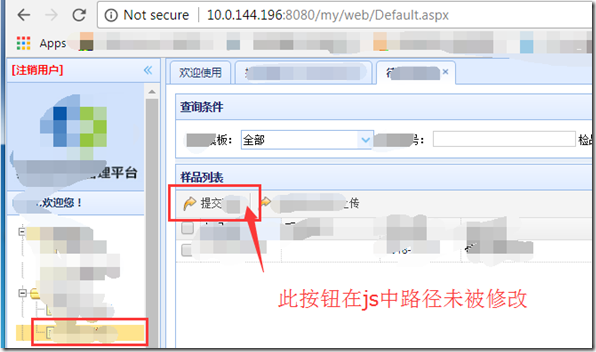
还是发现有js中的/web没被替换
这可能是由于请求的javascript没有被刚刚的类型匹配。
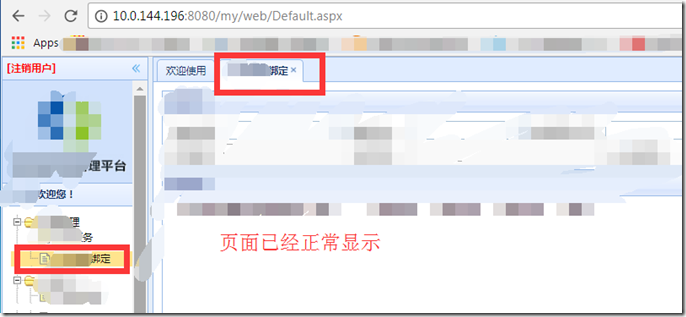
最终解决方法是将sub_filter_types设置为*,即任意类型文件都进行修改,结果页面可以完全显示了。
upstream my_server {
    server 10.0.144.50;
    keepalive 2000;
}
location /my/ {
    proxy_pass http://my_server/;
    proxy_set_header Host $host:$server_port;

    proxy_redirect / /my/;
    sub_filter '"/ut/' '"/my/ut/';
    sub_filter "'/ut/" "'/my/ut/";
    sub_filter '"/UploadFile/' '"/my/UploadFile/';
    sub_filter "'/UploadFile/" "'/my/UploadFile/";
    sub_filter '"/PPReport/' '"/my/PPReport/';
    sub_filter "'/PPReport/" "'/my/PPReport/";
    sub_filter '"/web/' '"/my/web/';
    sub_filter "'/web/" "'/my/web/";
    sub_filter 'href="/' 'href="/my/';
    sub_filter 'src="/' 'src="/my/';

    sub_filter_types *;
    sub_filter_once  off;
}
4.解决Cookie路径问题:
首先,我加入了另一个路径/hc来代理10.0.144.189:8080,但此网站的登录Cookie设置的路径为绝对路径/ldcs-webapp,因此,登录后Cookie不能正常工作。
nginx配置文件如下:
upstream hc_server {
    server 10.0.144.189:8080;
    keepalive 2000;
}
server {
    listen      8080;
    server_name localhost;
    charset     utf-8;
    client_max_body_size 75M;

    location /hc/ {
    proxy_redirect / /hc/;
    proxy_pass http://hc_server/;
    proxy_set_header Host $host:$server_port;
    sub_filter '"/ldcs-webapp/' '"/hc/ldcs-webapp/';
    sub_filter "'/ldcs-webapp/" "'/hc/ldcs-webapp/";
    sub_filter '"/ldcs-webapp' '"/hc/ldcs-webapp';
    sub_filter "'/ldcs-webapp" "'/hc/ldcs-webapp";
    sub_filter_types *;
    sub_filter_once  off;
   }
}
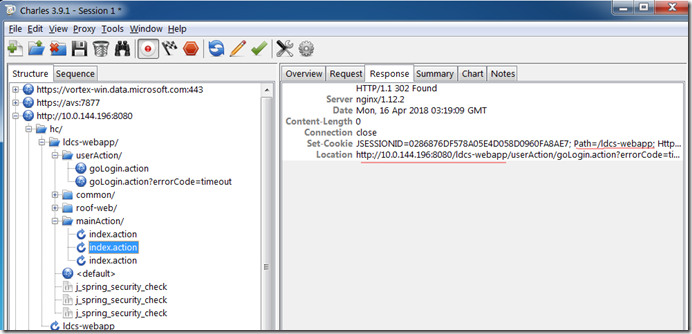
但调试时发现回复头部中的Location字段没有被成功重写:http://10.0.144.196:8080/ldcs-webapp/us。。。
还有Set-Cookie字段中Path路径设置不正确Path=/ldcs-webapp;
首先进行头部字段重写,利用proxy_redirect方法,然后再使用proxy_cookie_path重设Cookie路径:
upstream hc_server {
    server 10.0.144.189:8080;
    keepalive 2000;
}
server {
    listen      8080;
    server_name localhost;
    charset     utf-8;
    client_max_body_size 75M;

    location /hc/ {
    proxy_redirect / /hc/;
    proxy_redirect http://10.0.144.196:8080/ldcs-webapp/ http://10.0.144.196:8080/hc/ldcs-webapp/;
    proxy_pass http://hc_server/;
    proxy_set_header Host $host:$server_port;
    proxy_cookie_path /ldcs-webapp /hc/ldcs-webapp;
    sub_filter '"/ldcs-webapp/' '"/hc/ldcs-webapp/';
    sub_filter "'/ldcs-webapp/" "'/hc/ldcs-webapp/";
    sub_filter '"/ldcs-webapp' '"/hc/ldcs-webapp';
    sub_filter "'/ldcs-webapp" "'/hc/ldcs-webapp";
    sub_filter 'http://10.0.144.196:8080/ldcs-webapp/' 'http://10.0.144.196:8080/hc/ldcs-webapp/';
    sub_filter_types *;
    sub_filter_once  off;
   }
}
最终可以成功登录了,但内部弹出页面还有一定问题。
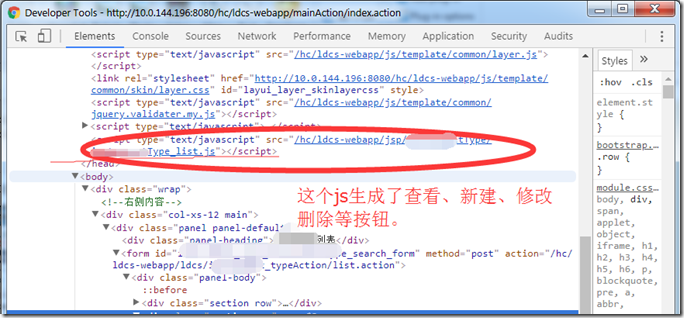
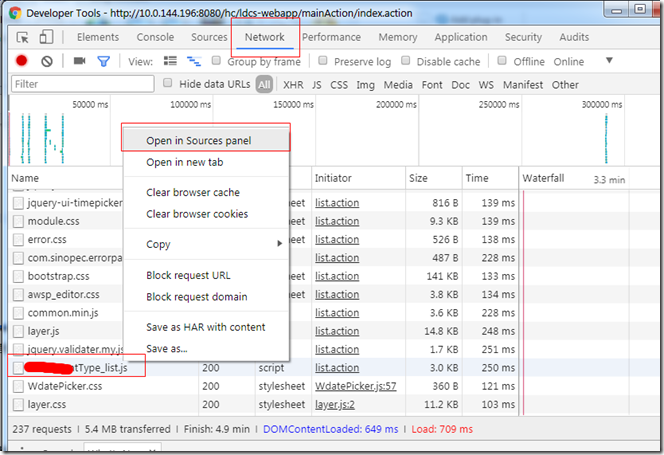
然后查找到该js文件:
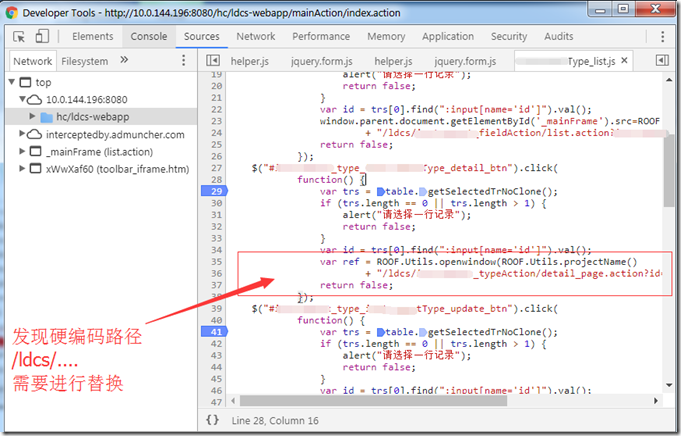
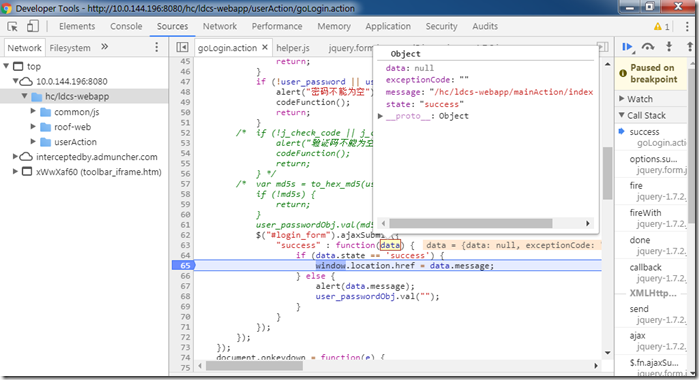
在JS的调试过程中,发现硬编码路径,根据原始页面提供的经验路径,
可得到新路径为http://10.0.144.196:8080/hc/ldcs-webapp/ldcs/…也就是在/ldcs前加上ldcs-webapp路径。
新的配置文件如下:
upstream hc_server {
    server 10.0.144.189:8080;
    keepalive 2000;
}
server {
    listen      8080;
    server_name localhost;
    charset     utf-8;
    client_max_body_size 75M;

    location /hc/ {
    proxy_redirect / /hc/;
    proxy_redirect http://10.0.144.196:8080/ldcs-webapp/ http://10.0.144.196:8080/hc/ldcs-webapp/;
    proxy_pass http://hc_server/;
    proxy_set_header Host $host:$server_port;
    proxy_cookie_path /ldcs-webapp /hc/ldcs-webapp;
    sub_filter '"/ldcs-webapp/' '"/hc/ldcs-webapp/';
    sub_filter "'/ldcs-webapp/" "'/hc/ldcs-webapp/";
    sub_filter '"/ldcs-webapp' '"/hc/ldcs-webapp';
    sub_filter "'/ldcs-webapp" "'/hc/ldcs-webapp";
    sub_filter '"/ldcs/' '"/ldcs-webapp/ldcs/';
    sub_filter "'/ldcs/" "'/ldcs-webapp/ldcs/";
    sub_filter 'http://10.0.144.196:8080/ldcs-webapp/' 'http://10.0.144.196:8080/hc/ldcs-webapp/';
    sub_filter_types *;
    sub_filter_once  off;
   }
}
现在已经能正常访问了:
调试注意事项:
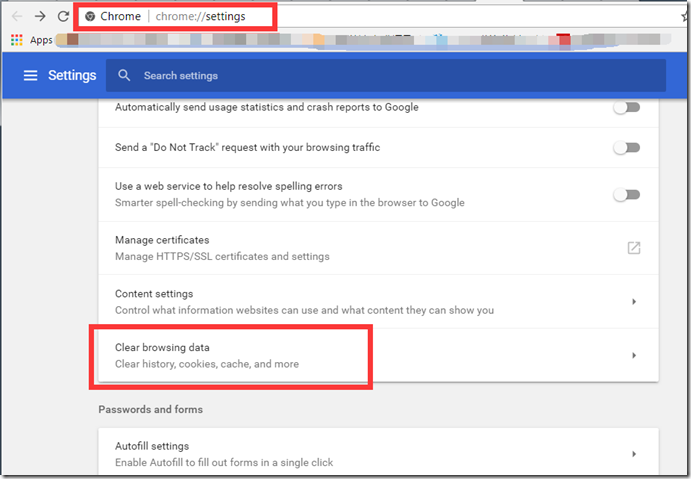
1.及时清除浏览器缓存:
2.Chrome调试可以点击Ctrl+Shift+J打开,javascript分段调试,点击文件行号可以设置断点,快捷键F8-Pause/Continue,F9-Step over,F10-Step Into, F11-Step out;
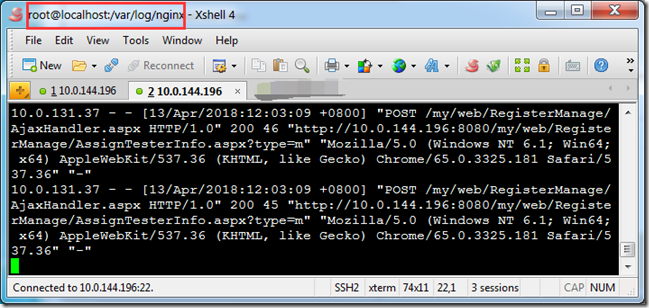
3.查看nginx日志有助于定位错误,尤其是访问的地址和referer字段:
tail –f /var/log/nginx/access.log


