CSS边框作图
原文
简书原文:https://www.jianshu.com/p/537a878304f2
大纲
1、border-style的值
2、利用border作图——基本图形
3、利用border作图——特殊图形
1、border-style的值
<!DOCTYPE html>
<html>
<head>
<meta http-equiv="Content-Type" content="text/html; charset=UTF-8" />
<title>inline-block</title>
<style>
*{
    margin: 0;
    padding: 0;
}
div{
    margin:100px auto;
}
</style>
<link rel="stylesheet" href="styles.css" type="text/css"/>
</head>
<body>
<div>
</div>
</body>
</html>
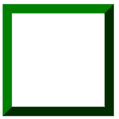
div{
    width:100px;
    height:100px;
    border:20px green;
    border-style:solid;
}
不同的border-style的值获得的效果是不同的
1.1、solid:定义实线
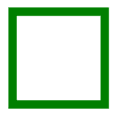
1.2、double:定义双线,双线的宽度等于 border-width 的值

1.3、dotted:定义点状边框,在大多数浏览器中呈现为实线

1.4、dashed:定义虚线,在大多数浏览器中呈现为实线

1.5、groove:定义 3D 凹槽边框,其效果取决于 border-color 的值
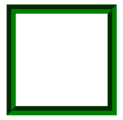
1.6、ridge:定义 3D 垄状边框,其效果取决于 border-color 的值
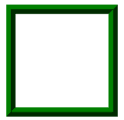
1.7、inset:定义 3D inset 边框,其效果取决于 border-color 的值
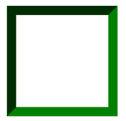
1.8、outset:定义 3D outset 边框,其效果取决于 border-color 的值
2、利用border作图——基本图形
基本的html文件,基本图形在这个html中的div上创造
<!DOCTYPE html>
<html>
<head>
<meta http-equiv="Content-Type" content="text/html; charset=UTF-8" />
<title>inline-block</title>
<style>
*{
    margin: 0;
    padding: 0;
}
div{
    margin:100px auto;
}
</style>
<link rel="stylesheet" href="styles.css" type="text/css"/>
</head>
<body>
<div>
</div>
</body>
</html>
2.1、给不同的边框设置不同的颜色
div{
    width:100px;
    height:100px;
    border-top:100px solid red;
    border-bottom:100px solid orange;
    border-left:100px solid green;
    border-right:100px solid blue;
}

2.2、将DIV的宽高设置为0
div{
    width:0;
    height:0;
    border-top:100px solid red;
    border-bottom:100px solid orange;
    border-left:100px solid green;
    border-right:100px solid blue;
}

2.3、梯形
div{
    width:100px;
    height:0;
    font-size:0;
    line-height:0;
    overflow:hidden;
    border-bottom:100px solid orange;
    border-left:100px dashed transparent;
    border-right:100px dashed transparent;
}

2.4、三角形
/*
    切记高度和宽度都要设置为0,通过边框的width来控制三角形的大小
    通过调整不同方向的边框显示颜色和邻近的边框的透明可以得到不同方向上的等腰三角形
    或者
    可以设置两个邻近边框,一个显示颜色一个不显示颜色从而形成不同方向上的直角三角形
*/
/*等腰三角形*/
div{
    width:0;
    height:0;
    font-size:0;
    line-height:0;
    overflow:hidden;
    border-bottom:100px solid orange;
    border-left:100px dashed transparent;
    border-right:100px dashed transparent;
}
/*直角三角形*/
div{
    width:0;
    height:0;
    font-size:0;
    line-height:0;
    overflow:hidden;
    border-bottom:100px solid orange;
    border-left:100px dashed transparent;
}

3、利用border作图——特殊图形
3.1、叠加三角形
<div class=box>
    <span class="arrow_1"></span>
    <span class="arrow_2"></span>
</div>
<!--
    设置不同方向的两个三角形从而叠加出不同方向的三角形箭头
-->
.box{
    position:relative;
}
.box span{
    width:0;
    height:0;
    font-size:0;
    line-height:0;
    overflow:hidden;
    position:absolute;
}
span.arrow_1{
    border-top:20px solid #beceeb;
    border-left:20px dashed transparent;
    border-right:20px dashed transparent;
    left:80px;
    bottom:-20px;
    z-index:1;
}
span.arrow_2{
    border-top:20px solid #ffffff;
    border-left:20px dashed transparent;
    border-right:20px dashed transparent;
    left:80px;
    bottom:-13px;
    z-index:2;
}

3.2、叠加两个相反方向的三角形
<div class="triangle-updown">
</div>
.triangle-updown {
    width: 0;
    height: 0;
    border-left: 50px solid transparent;
    border-right: 50px solid transparent;
    border-bottom: 100px solid #669;
    position: relative;
    margin-bottom: 50px
}
.triangle-updown:after {
    content: " ";
    width: 0;
    height: 0;
    border-left: 50px solid transparent;
    border-right: 50px solid transparent;
    border-top: 100px solid #669;
    position: absolute;
    top: 50px;
    left: -50px;
}

3.3、利用椭圆形的叠加形成心形
.heart {
    width: 160px;
    height: 200px;
    position: relative
}

.heart:before {
    content: " ";
    border: 0 solid transparent;
    -moz-border-radius: 100px;
    -webkit-border-radius: 100px;
    border-radius: 100px 100px 0 0;
    width: 80px;
    height: 120px;
    background: #669;
    -moz-transform: rotate(-45deg);
    -ms-transform: rotate(-45deg);
    -o-transform: rotate(-45deg);
    -webkit-transform: rotate(-45deg);
    position: absolute;
    left: 20px;
}

.heart:after {
    content: " ";
    border: 0 solid transparent;
    -moz-border-radius: 100px;
    -webkit-border-radius: 100px;
    border-radius: 100px 100px 0 0;
    width: 80px;
    height: 120px;
    background: #669;
    -moz-transform: rotate(45deg);
    -ms-transform: rotate(45deg);
    -o-transform: rotate(45deg);
    -webkit-transform: rotate(45deg);
    position: absolute;
    left: 48px;
    top: 0px;
}

3.4、椭圆提示泡
.oval-pop {
    width: 200px;
    height: 100px;
    background: #669;
    -moz-border-radius: 100px / 50px;
    -webkit-border-radius: 100px / 50px;
    border-radius: 100px / 50px;
    margin-bottom: 50px;
    position: relative
}

.oval-pop:after {
    content: "";
    border: 0 solid transparent;
    border-bottom: 30px solid #669;
    -moz-border-radius: 0 0 0 200px;
    -webkit-border-radius: 0 0 0 200px;
    border-radius: 0 0 0 200px;
    width: 50px;
    height: 50px;
    position: relative;
    margin-top: 20px;
    -webkit-transform: rotate(-90deg);
    -moz-transform: rotate(-90deg);
    -ms-transform: rotate(-90deg);
    -o-transform: rotate(-90deg);
    position: absolute;
    top: 50px;
    left: 20px
}

3.5、对话框1
<div class=box>
    <span class="arrow_1"></span>
    <span class="arrow_2"></span>
    hellos
</div>
.box{
    width:300px;
    padding:30px 20px;
    border:5px solid #beceeb;
    position:relative;
}
.box span{
    width:0;
    height:0;
    font-size:0;
    line-height:0;
    overflow:hidden;
    position:absolute;
}
span.arrow_1{
    border-top:20px solid #beceeb;
    border-left:20px dashed transparent;
    border-right:20px dashed transparent;
    left:80px;
    bottom:-20px;
    z-index:1;
}
span.arrow_2{
    border-top:20px solid #ffffff;
    border-left:20px dashed transparent;
    border-right:20px dashed transparent;
    left:80px;
    bottom:-13px;
    z-index:2;
}

3.6、对话框2——伪类
<div class=box>
    <span>hellos</span>
</div>
.box{
    width:300px;
    padding:30px 20px;
    border:5px solid #beceeb;
    position:relative;
}
.box:after,.box:before{
    content:'';
    width:0;
    height:0;
    font-size:0;
    line-height:0;
    overflow:hidden;
    position:absolute;
}
.box:after{
    border-top:20px solid #beceeb;
    border-left:20px dashed transparent;
    border-right:20px dashed transparent;
    left:80px;
    bottom:-20px;
    z-index:1;
}
.box:before{
    border-top:20px solid #ffffff;
    border-left:20px dashed transparent;
    border-right:20px dashed transparent;
    left:80px;
    bottom:-13px;
    z-index:2;
}

参考网址
https://www.cnblogs.com/wanghuih/p/5836635.html
http://www.cnblogs.com/pigtail/archive/2013/02/17/2914119.html
https://www.w3cplus.com/css/create-shapes-with-css


