


js client使用paho-mqtt,官网地址:http://www.eclipse.org/paho/,参考http://www.eclipse.org/paho/clients/js/官网给出例子Getting Started,写出下面简单的测试代码。
<!DOCTYPE html>
<html>
<head>
<meta charset="utf-8">
<title>Centos7 mosquitto test</title>
<script src="jquery-3.2.1.min.js"></script>
<script src="paho-mqtt-min.js"></script>
<script type="text/javascript">
var hostname = "csxyz.xyz";      //主机IP  106.14.181.32    此域名已不是我在使用了(2019-6-16注)
var hostPort = 9001;             //port
var sub_count = 0;
var client;
function MQTTconnect() {
	client = new Paho.MQTT.Client(hostname, hostPort, "test");
	client.onMessageArrived = onMessageArrived;
	client.connect({onSuccess:onConnect});
    console.log("Host="+ hostname + ", port=" + hostPort);
};
// called when the client connects
function onConnect() {
  console.log("onConnect succeeds");
//  client.subscribe('topic');
  client.subscribe('#');    //订阅所有主题
}
// called when a message arrives
function onMessageArrived(message) {
	var topic = message.destinationName;
	var payload = message.payloadString;
	console.log("onMessageArrived:" + payload);
	sub_count++;
   $('#sub_count').val('收到订阅' + sub_count + '条');
   $('#sub_message').prepend('<li>' + topic + ' = ' + payload + '</li>');
}
function button_onclick(){
	var topic = $('#topicsend').val();
	var text = $('#textsend').val();
	if(topic=='' || text=='')
	{
		alert("noTopic or noText");
		return;
	}
	var message = new Paho.MQTT.Message(text);
	message.destinationName = topic;
	message.qos=0;
	client.send(message);
};
$(document).ready(function() {
    MQTTconnect();
});
</script>
</head>

<body>
<h1>mosquitto pub</h1>
topic:<input type='text' id='topicsend' size="60"/> <br>
text :<input type='text' id='textsend' size="60"/>
<input type='button' value="send" id='btn' onclick="button_onclick()"/>
</br>
<h1>mosquitto sub</h1>
<input type='text' id='sub_count' disabled />
<ul id='sub_message' ></ul>
</body>
</html>
html在本地运行,测试结果:
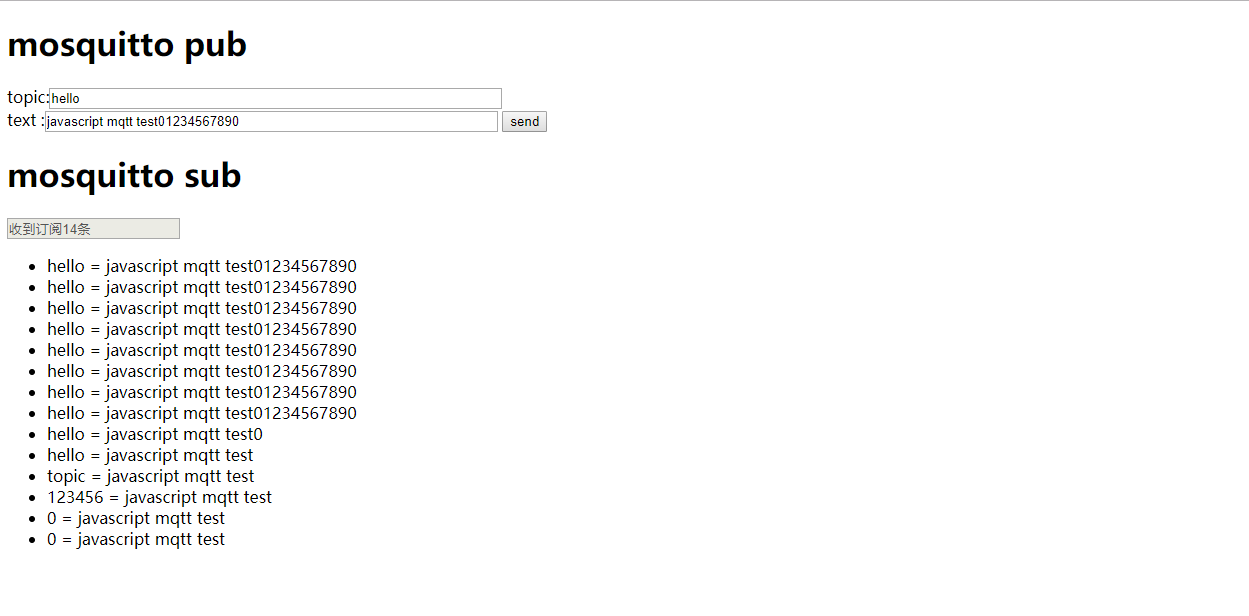
在censtos的apache空间根目录下创建文件夹iot,将index.html和需要包含的js文件拷贝过去,可以得到上面的结果。注意,文件上传的时候是在root用户下,需要增加可执行权限,否则运行会报错的。
