转自:https://www.cnblogs.com/du-hong/p/11697592.html
简介
前边通过宏哥的讲解和分享想必小伙伴们和童鞋们都已经见过testng框架生成的测试报告,是不是它的样子和长相实在是不敢让大家伙恭维。那么今天宏哥就当一回美容师,由宏哥来给它美美容;当一回外科医生,做一名整形医生。由宏哥来主刀,给它整整形。让她变得丰满、美丽、可爱一些。
本来面貌
执行完测试用例之后,会在项目的test-output(默认目录)下生成测试报告
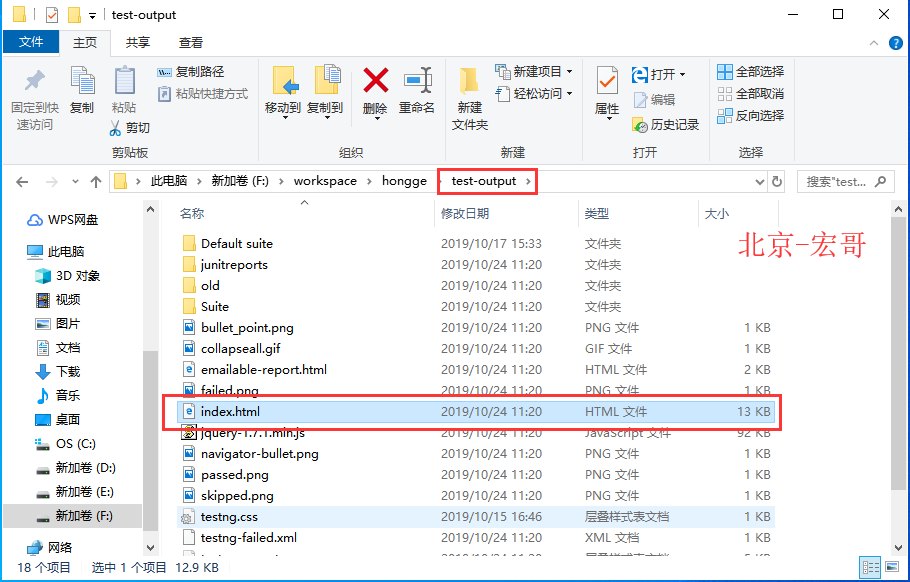
打开index.html文件,测试结果摘要,包括:套件名、测试用例成功数、测试用例失败数、测试用例忽略数和testng.xml文件
简略测试报告
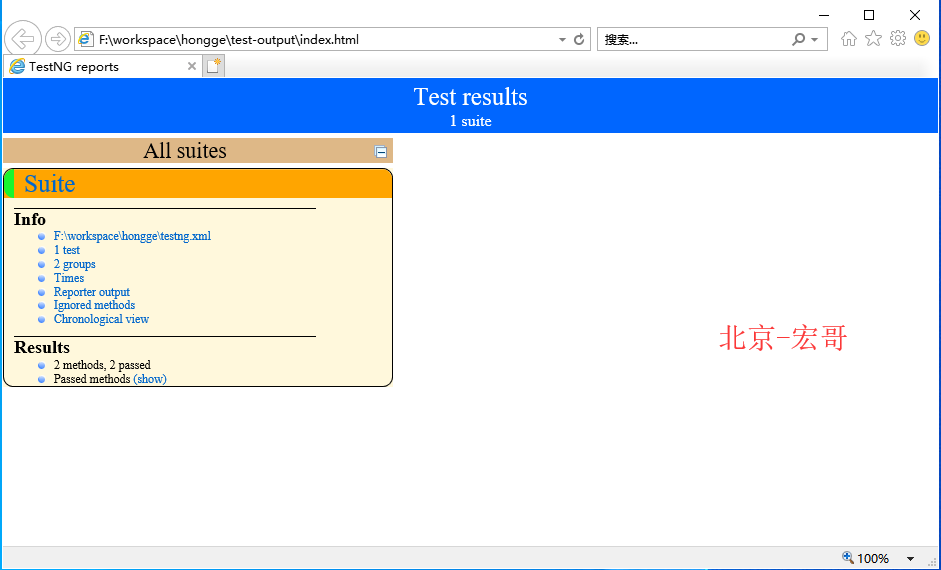
详细测试报告
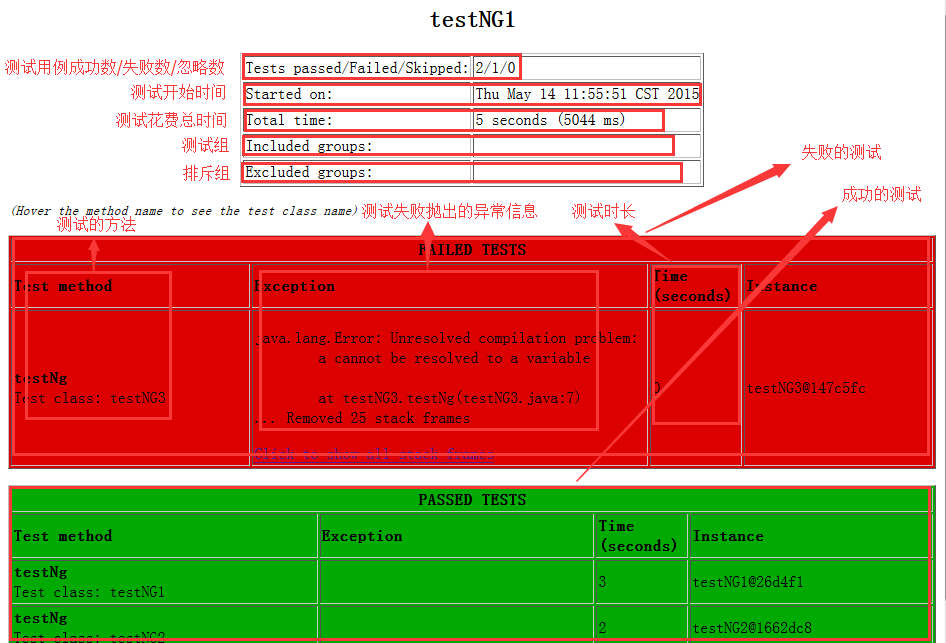
测试用例都成功的话,测试结果以绿底标志:

测试用例有失败的话,测试结果以红底标志:

点击"Link"链接,可以查看testng.xml文件的内容:

详细的测试结果介绍:
套餐一(普通会员)
ReportNG 是一个配合TestNG运行case后自动帮你在test-output文件内生成一个相对较为美观的测试报告!
ReportNG 里面Log 是不支持中文的,我改过ReportNG.jar源码,具体方法看最下面,也可以找我直接要jar!
话不多说直接上
1、首先从GitHub拉取ReportNG源码,地址:https://github.com/dwdyer/reportng,下载好后解压。
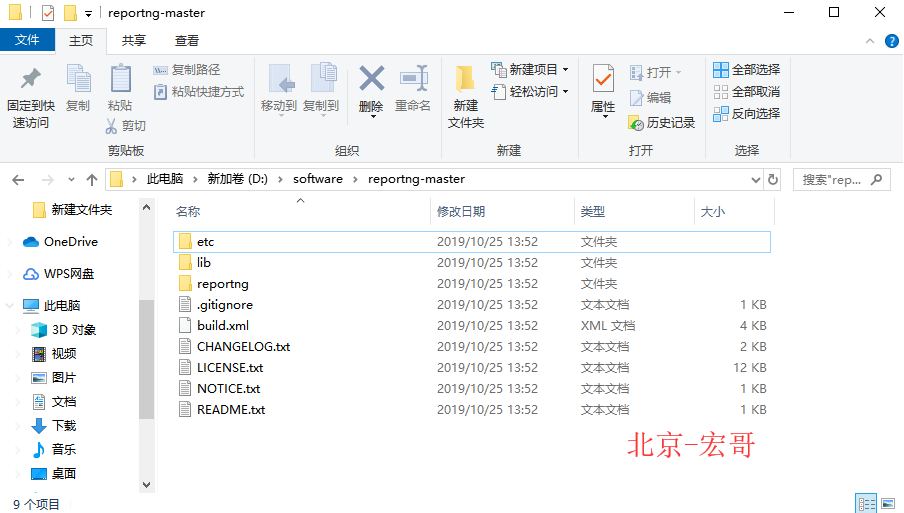
2、导入到编辑器如Eclipse,注意:import的时候请选择以Maven项目import,请选择reportng-master目录下的reportng文件,作为新的project
(1)点击File->import
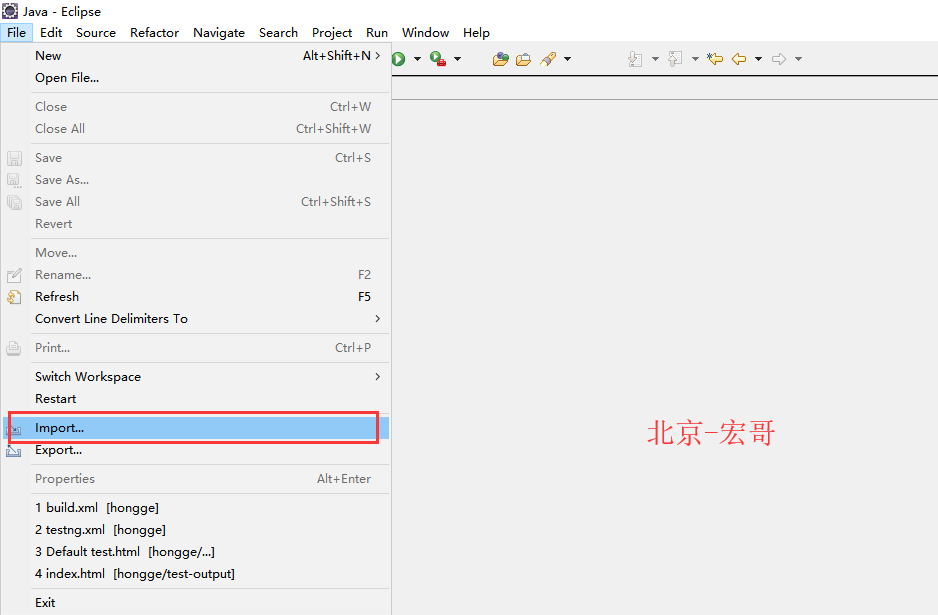
(2)选择Existing Maven Projects,点击Next

(3)选择解压好的ReportNG项目,点击Finish
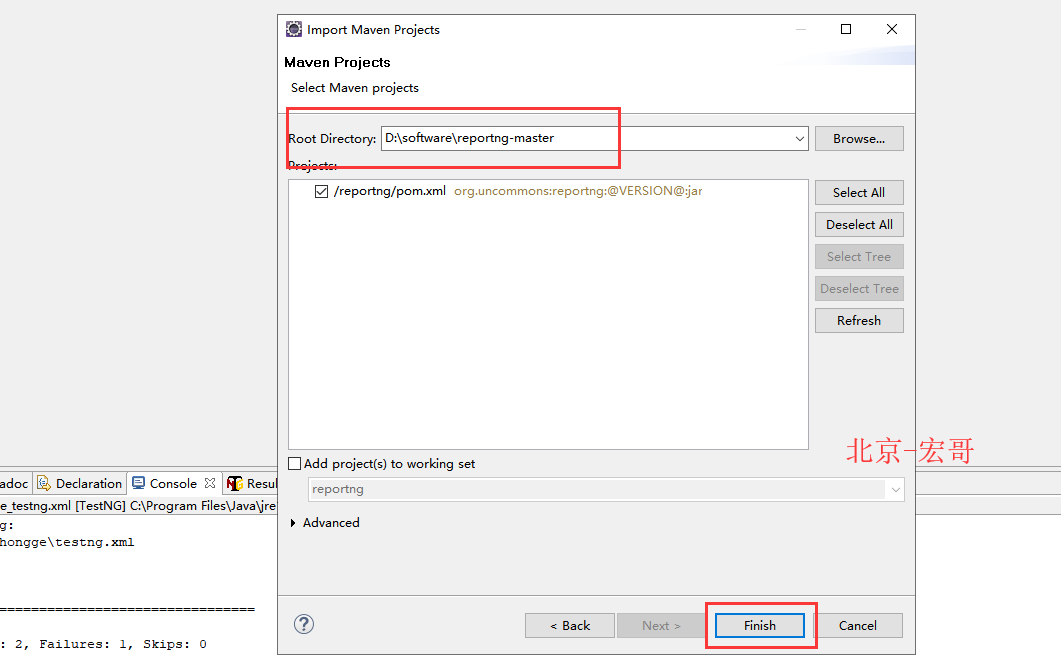
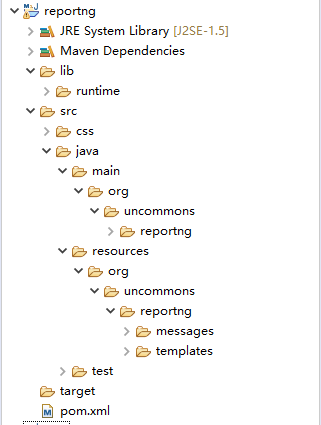
(4)导入后的项目如图所示,导入后切记忙于修改源代码,就算你把代码改烂了也改不对,而且会报乱七八糟的错误,让你怀疑人生
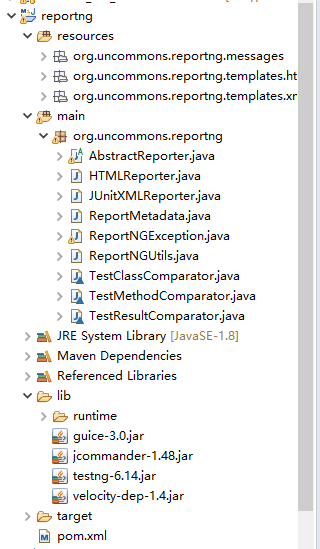
(5)项目导入后,修改项目成如下图所示目录,且添加相应jar包到lib
3、修改原代码
(1)报告中乱码的解决办法,修改AbstractReporter中的generateFile这个方法中的代码如下
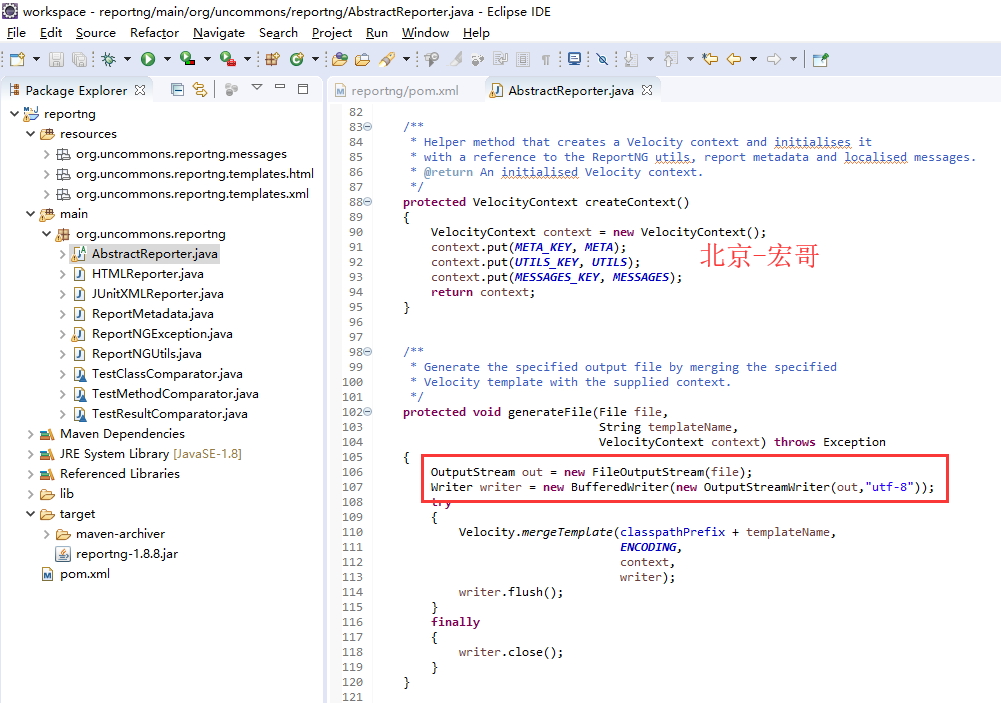
参考代码:
 OutputStream out = new FileOutputStream(file);
 Writer writer = new BufferedWriter(new OutputStreamWriter(out,"utf-8"));
或者这样也可以:
 OutputStream out = new FileOutputStream(file);
 Writer writer = new BufferedWriter(new OutputStreamWriter(out,ENCODING));
(2)修改测试报告名称,修改ReportMetadata中DEFAULT_TITLE
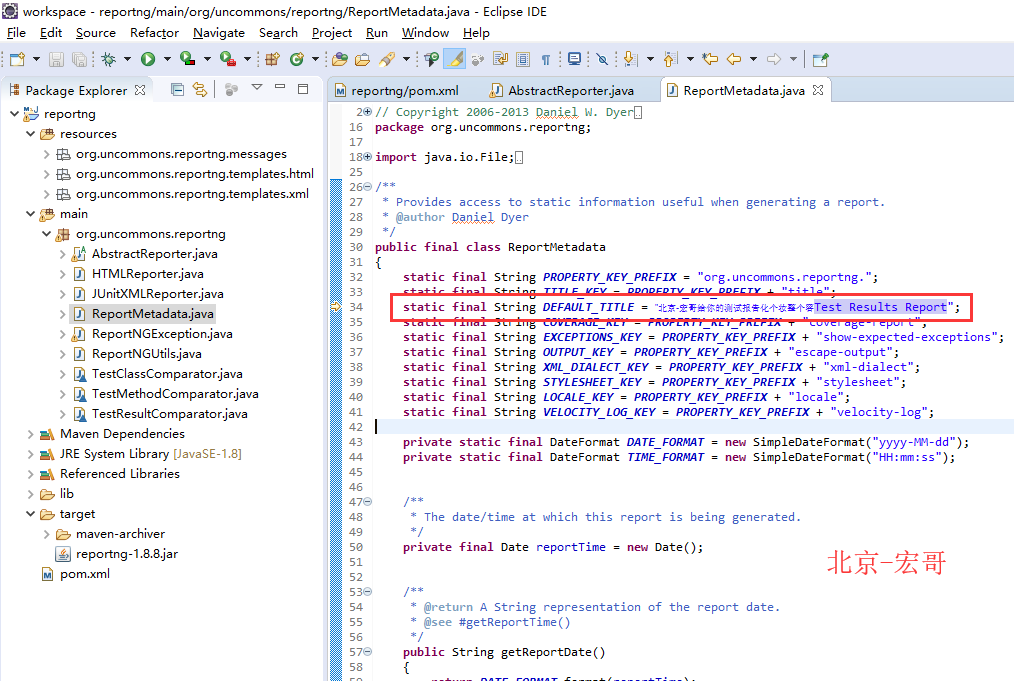
(3)修改默认generatedBy,修改reportng.properties中的generatedBy

(4)修改默认日期显示,修改ReportMetadata.java中的DATE_FORMAT,TIME_FORMAT

(5)修改pom.xml
<?xml version="1.0" encoding="UTF-8"?>
  <project xmlns="http://maven.apache.org/POM/4.0.0"
           xmlns:xsi="http://www.w3.org/2001/XMLSchema-instance"
           xsi:schemaLocation="http://maven.apache.org/POM/4.0.0 http://maven.apache.org/xsd/maven-4.0.0.xsd">
      <modelVersion>4.0.0</modelVersion>

      <groupId>reportng</groupId>
      <artifactId>reportng</artifactId>
      <version>1.8.8</version>
     <dependencies>
         <dependency>
             <groupId>org.apache.httpcomponents</groupId>
             <artifactId>httpclient</artifactId>
             <version>4.3.6</version>
         </dependency>

         <dependency>
            <groupId>org.apache.velocity</groupId>
            <artifactId>velocity-engine-core</artifactId>
            <version>2.0</version>
        </dependency>

         <dependency>
             <groupId>org.testng</groupId>
             <artifactId>testng</artifactId>
             <version>6.9.6</version>
         </dependency>

         <dependency>
             <groupId>org.uncommons</groupId>
             <artifactId>reportng</artifactId>
             <version>1.1.4</version>
             <scope>test</scope>
             <exclusions>
                 <exclusion>
                     <groupId>org.testng</groupId>
                     <artifactId>testng</artifactId>
                 </exclusion>
             </exclusions>
         </dependency>

         <dependency>
             <groupId>com.google.inject</groupId>
             <artifactId>guice</artifactId>
             <version>3.0</version>
             <!--<scope>test</scope>-->
         </dependency>
     </dependencies>

     <build>
         <plugins>
             <plugin>
                 <groupId>org.apache.maven.plugins</groupId>
                 <artifactId>maven-surefire-plugin</artifactId>
                 <version>2.18.1</version>
                 <configuration>
                     <properties>
                         <property>
                             <name>usedefaultlisteners</name>
                             <value>false</value>
                         </property>
                         <property>
                             <name>listener</name>
                             <value>org.uncommons.reportng.HTMLReporter, org.uncommons.reportng.JUnitXMLReporter</value>
                         </property>
                     </properties>
                    <!--  <suiteXmlFiles>
                         <suiteXmlFile>testng.xml</suiteXmlFile>
                     </suiteXmlFiles> -->
                     <workingDirectory>target/</workingDirectory>
                 </configuration>
             </plugin>
         </plugins>
     </build>
     <properties>
         <project.build.sourceEncoding>UTF-8</project.build.sourceEncoding>
     </properties>
 </project>
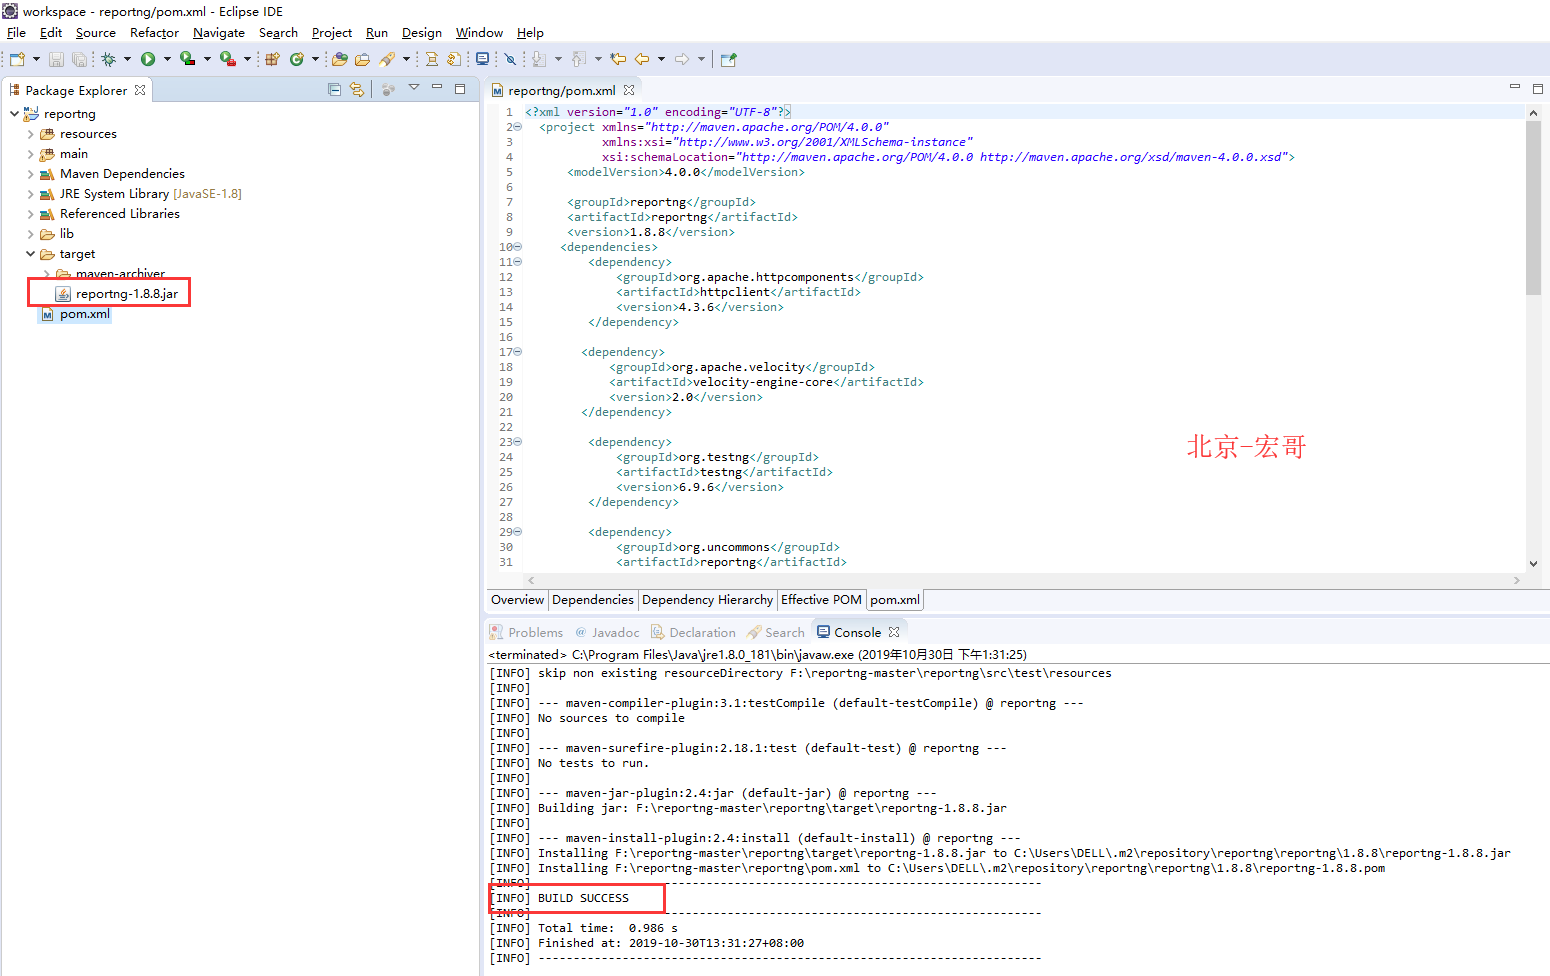
4.打包,pom.xml右击选择Run As->Maven install,

5.控制台显示BUILD SUCCESS,则构建成功,刷新当前项目,在target目录下会生成一个jar文件:reportng-1.8.8.jar
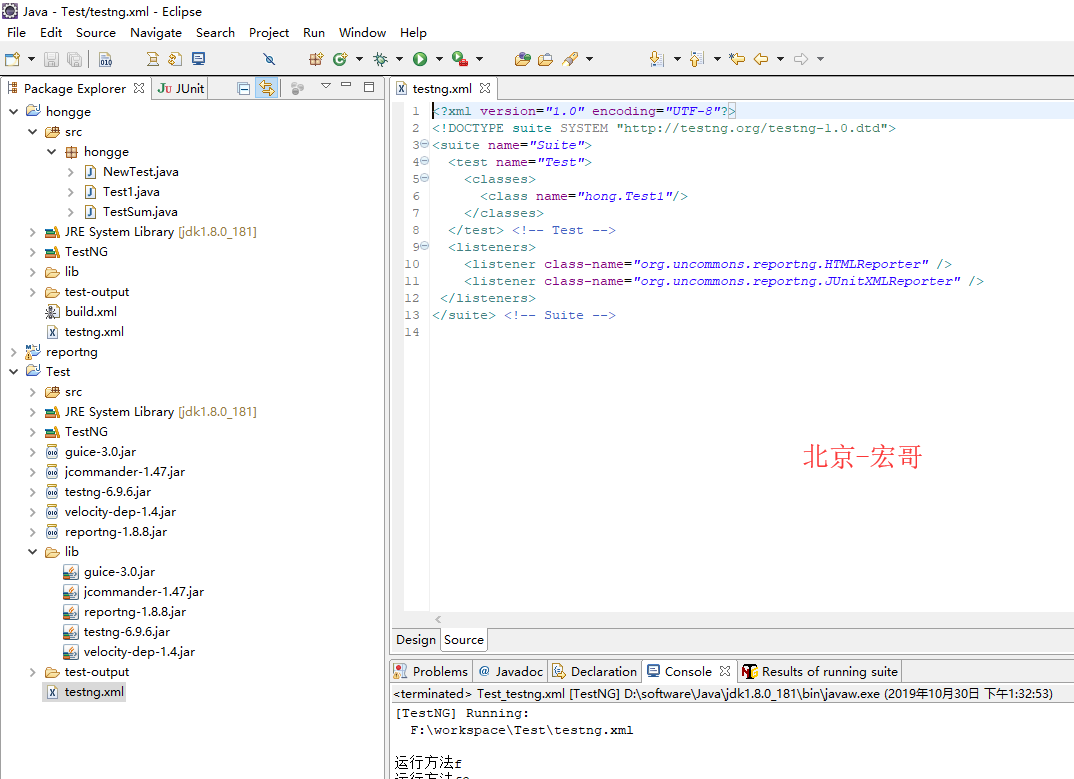
6.测试,新建一个测试项目(大家请随意),导入相应jar包,选择运行testng.xml,记得添加
- <listeners>
- <listener class-name="org.uncommons.reportng.HTMLReporter" />
- <listener class-name="org.uncommons.reportng.JUnitXMLReporter" />
- </listeners>
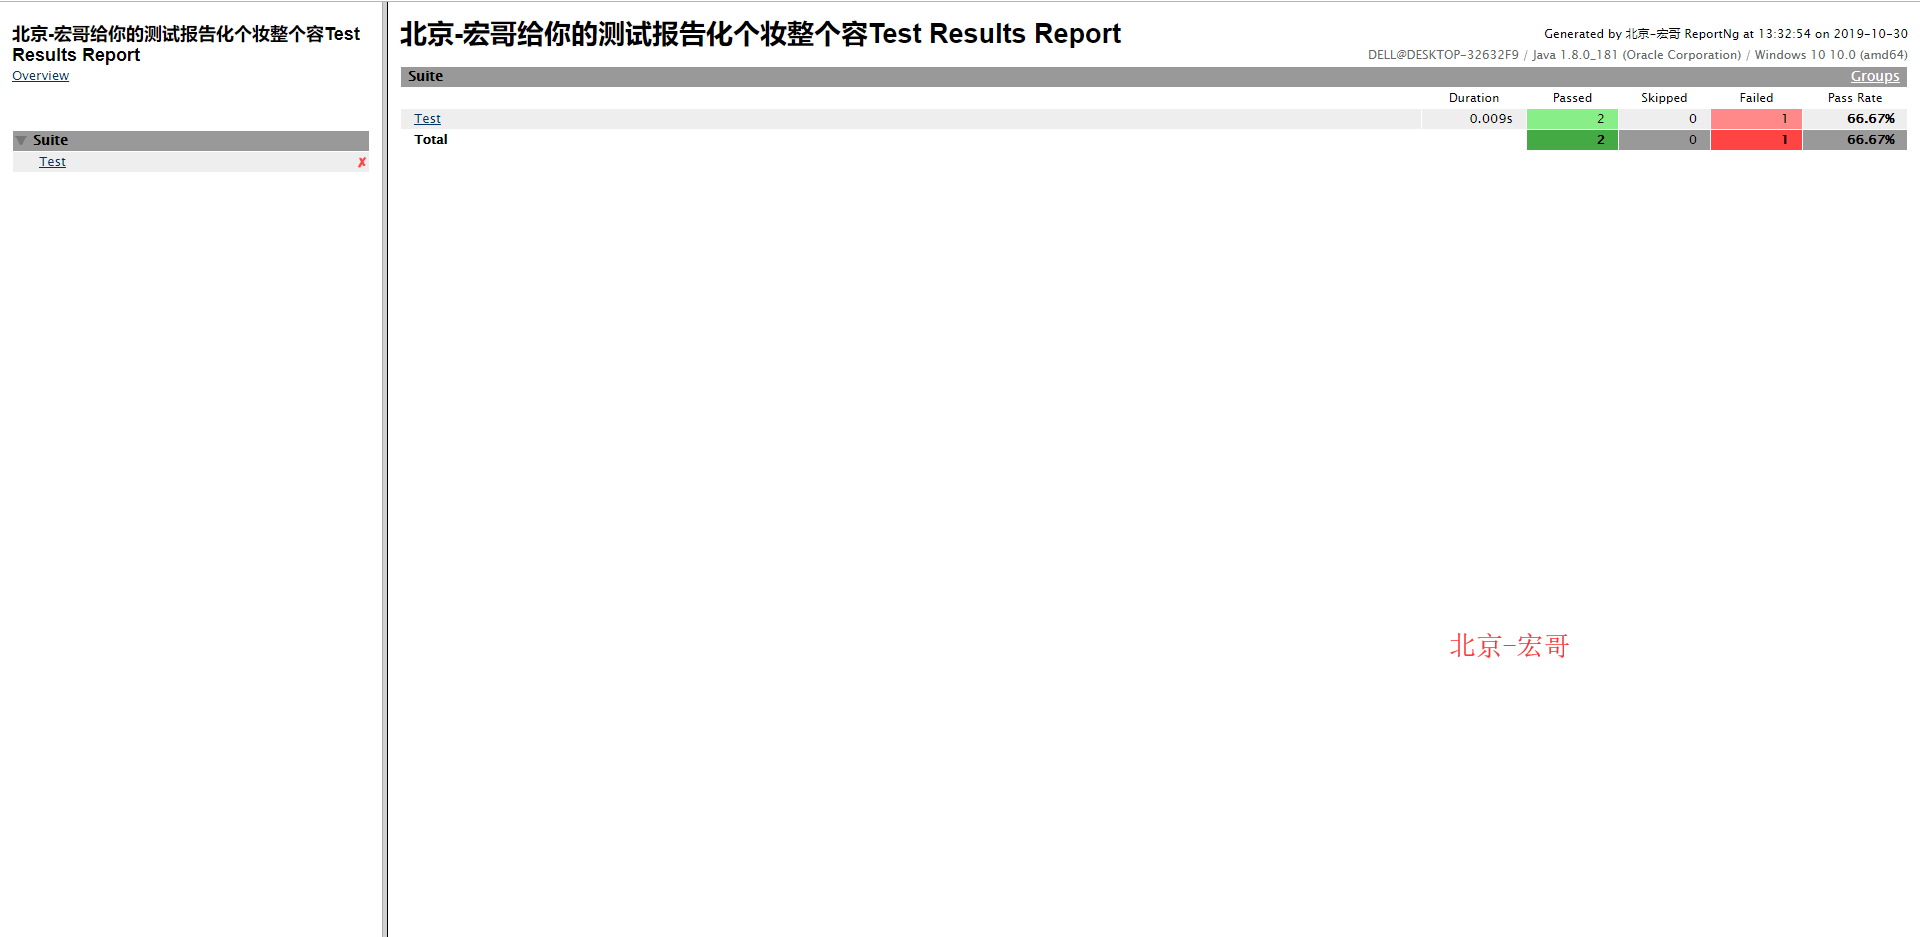
7.报告展示,修改后的jar包已上传到群共享,需要的小伙伴可以加群自己下载哦。
套餐二(VIP会员)
testng-xslt
testNG自带生成的测试报告不太美观,可以使用testng-xslt进行美化,步骤如下:
1、官网下载testng-xslt包,http://testng-xslt.googlecode.com/files/testng-xslt-1.1.zip
亲测现在google可能访问不了,可到我的网盘里下载,链接: https://pan.baidu.com/s/1HC52IgKBRd9agQ1B8HyfVg 提取码: ferk
2、解压后的文件目录如下图所示:
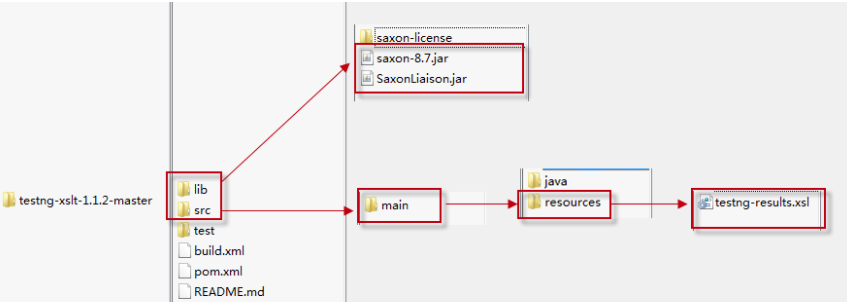
3、复制testng-results.xsl(testng-xslt-1.1\src\main\resources)文件到test-output目录下
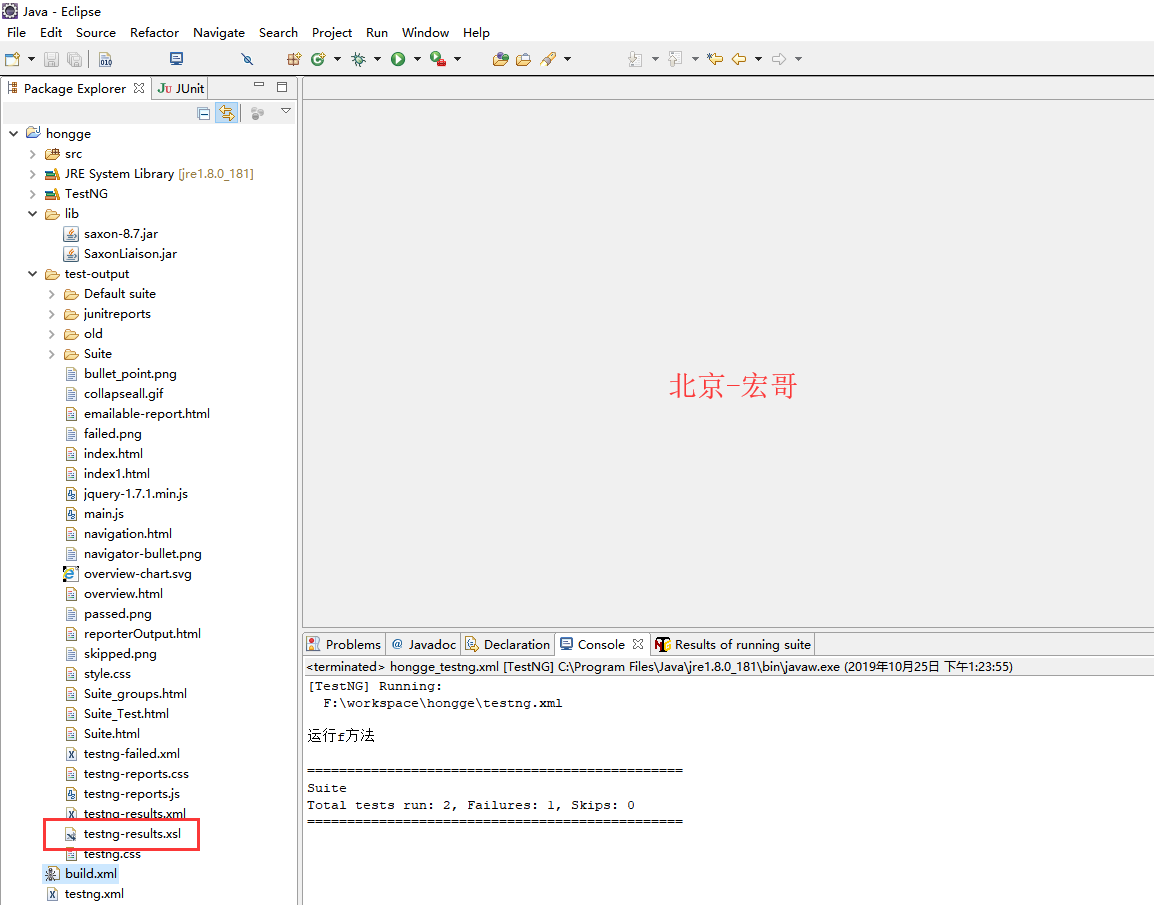
4、解压文件testng-xslt-1.1.2,把 lib 文件下的saxon-8.7.jar 和 SaxonLiason.jar 拷贝到项目的lib文件夹(若没有则新建)下,并导入到项目中(lib文件夹的路径必须放在test-output下,不然后面会影响生成构建文件)
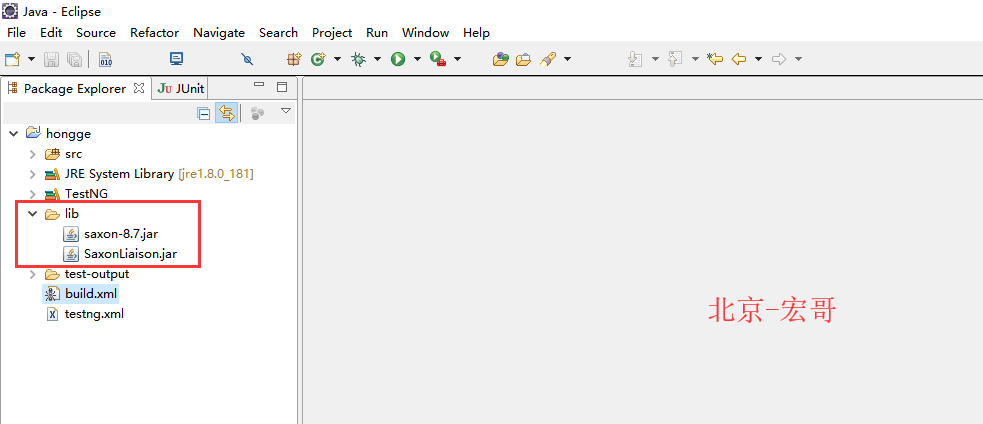
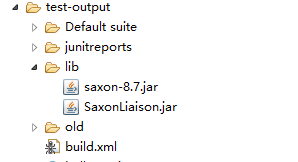
5、安装ant,http://mirror.bit.edu.cn/apache/ant/binaries/apache-ant-1.9.4-bin.zip
Ant 下载安装配置使用教程
一、Ant 简介
1、Apache Ant 是一个Java库和命令行工具,其任务是将构建文件中描述的进程作为目标和扩展点相互依赖。Ant提供了许多内置任务,允许编译,组装,测试和运行Java应用程序。
2、Ant是用Java编写的。Ant的用户可以开发自己的包含Ant任务和类型的“antlibs”,并提供大量现成的商业或开源“antlibs”。
3、类似于 Maven ,统一构建的项目管理工具。
二、下载
1、当前最新版: http://mirror.bit.edu.cn/apache//ant/binaries/apache-ant-1.10.5-bin.zip
2、历史版本下载: https://archive.apache.org/dist/ant/binaries/
三、安装
1、解压 apache-ant-1.10.5-bin.zip
2、目录结构如下:

3、配置 ANT_HOME , Path , classpath
ANT_HOME = F:\soft\ant-1.10.5
Path = %ANT_HOME%\bin;
classpath = %ANT_HOME%\lib;

4、类似于 MAVEN_HOME , JAVA_HOME 的配置。
四、测试
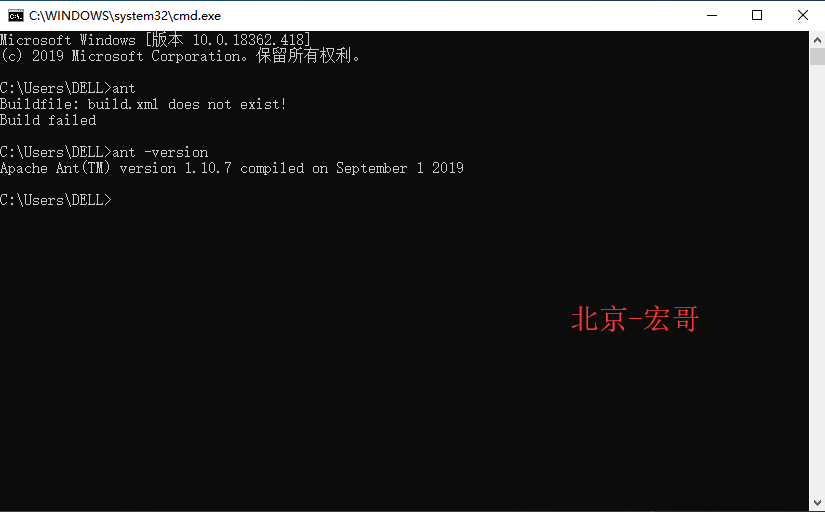
1、 Win + R ---> cmd ---> 输入 ant , 出现 如下:
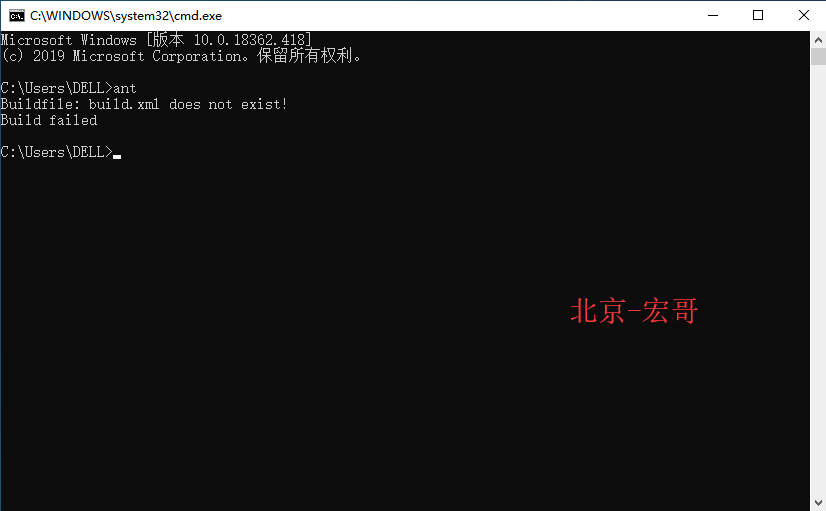
2、查看 ant 版本 : ant -version
6、在project目录下,新建build.xml文件,内容如下:
<project name="hongge" basedir="." >
    <property name="lib.dir" value="lib" />
    <path id="test.classpath" >
         <!-- adding the saxon jar to your classpath -->
        <fileset dir="${lib.dir}" includes="*.jar" />
    </path>
    <target name="transform" >
        <!-- 需要根据自己的环境进行配置(将E:/workspace/testNG/替换成你自己project的目录) -->
        <xslt in="F:/workspace/hongge/test-output/testng-results.xml" style="F:/workspace/hongge/test-output/testng-results.xsl"
  out="F:/workspace/hongge/test-output/index1.html" >
             <!-- 需要根据自己的环境进行配置(将E:/workspace/testNG/替换成你自己project的目录) -->
            <param name="testNgXslt.outputDir" expression="F:/workspace/hongge/test-output/" />
            <classpath refid="test.classpath" />
        </xslt>
    </target>
</project>
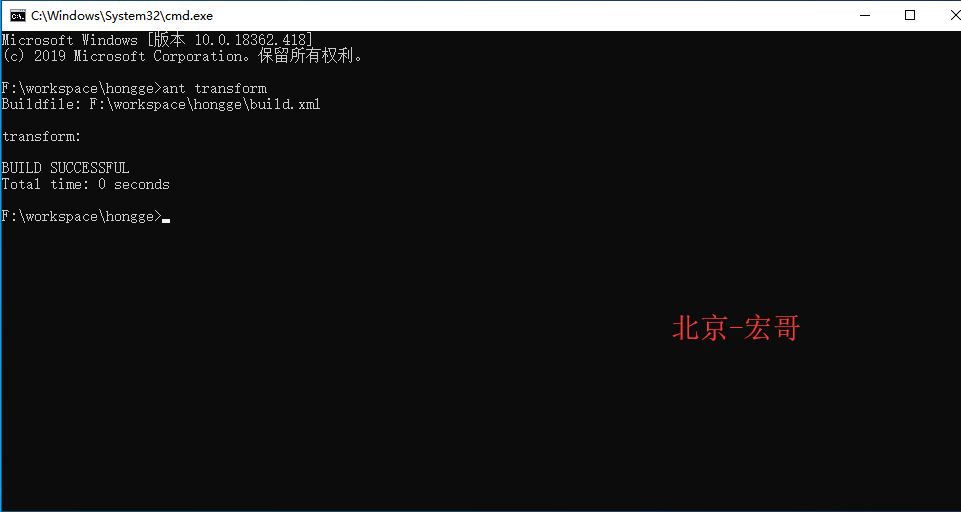
7、在cmd里,切换到project的目录,执行ant transform:
8、到配置的路径下,打开生成的文件index1.html,以图形化的界面展示测试结果:

小结



 浙公网安备 33010602011771号