


----------------------------------------------------uniapp-----------------------------------------------------------------------
----------------------------------------------------uniapp-----------------------------------------------------------------------
----------------------------------------------------uniapp-----------------------------------------------------------------------
uniapp开发中:
1、获取url中的参数this.$route.query或this.$mp.query
this.$route.query:H5、app平台
this.$mp.query:小程序平台
data() {
      return {
        loadingShow:true,
        product_id: 0, // 券包id
        promo_code: 0, // promo_code
        preview: {}, // 券包信息
        product: {}, // 券包商品内容
      };
    },

          <text class="coupon-title">{{product.name}}</text>
其他平台可以使用
data() {
      return {
        loadingShow:true,
        product_id: 0, // 券包id
        promo_code: 0, // promo_code
        preview: {}, // 券包信息
        product: {}, // 券包商品内容
      };
    },

          <text class="coupon-title">{{this.product.name}}</text>
记得适配小程序时,this都去除。
3,在打包的时候出现:
This is probably not a problem with npm. There is likely additional logging output above.
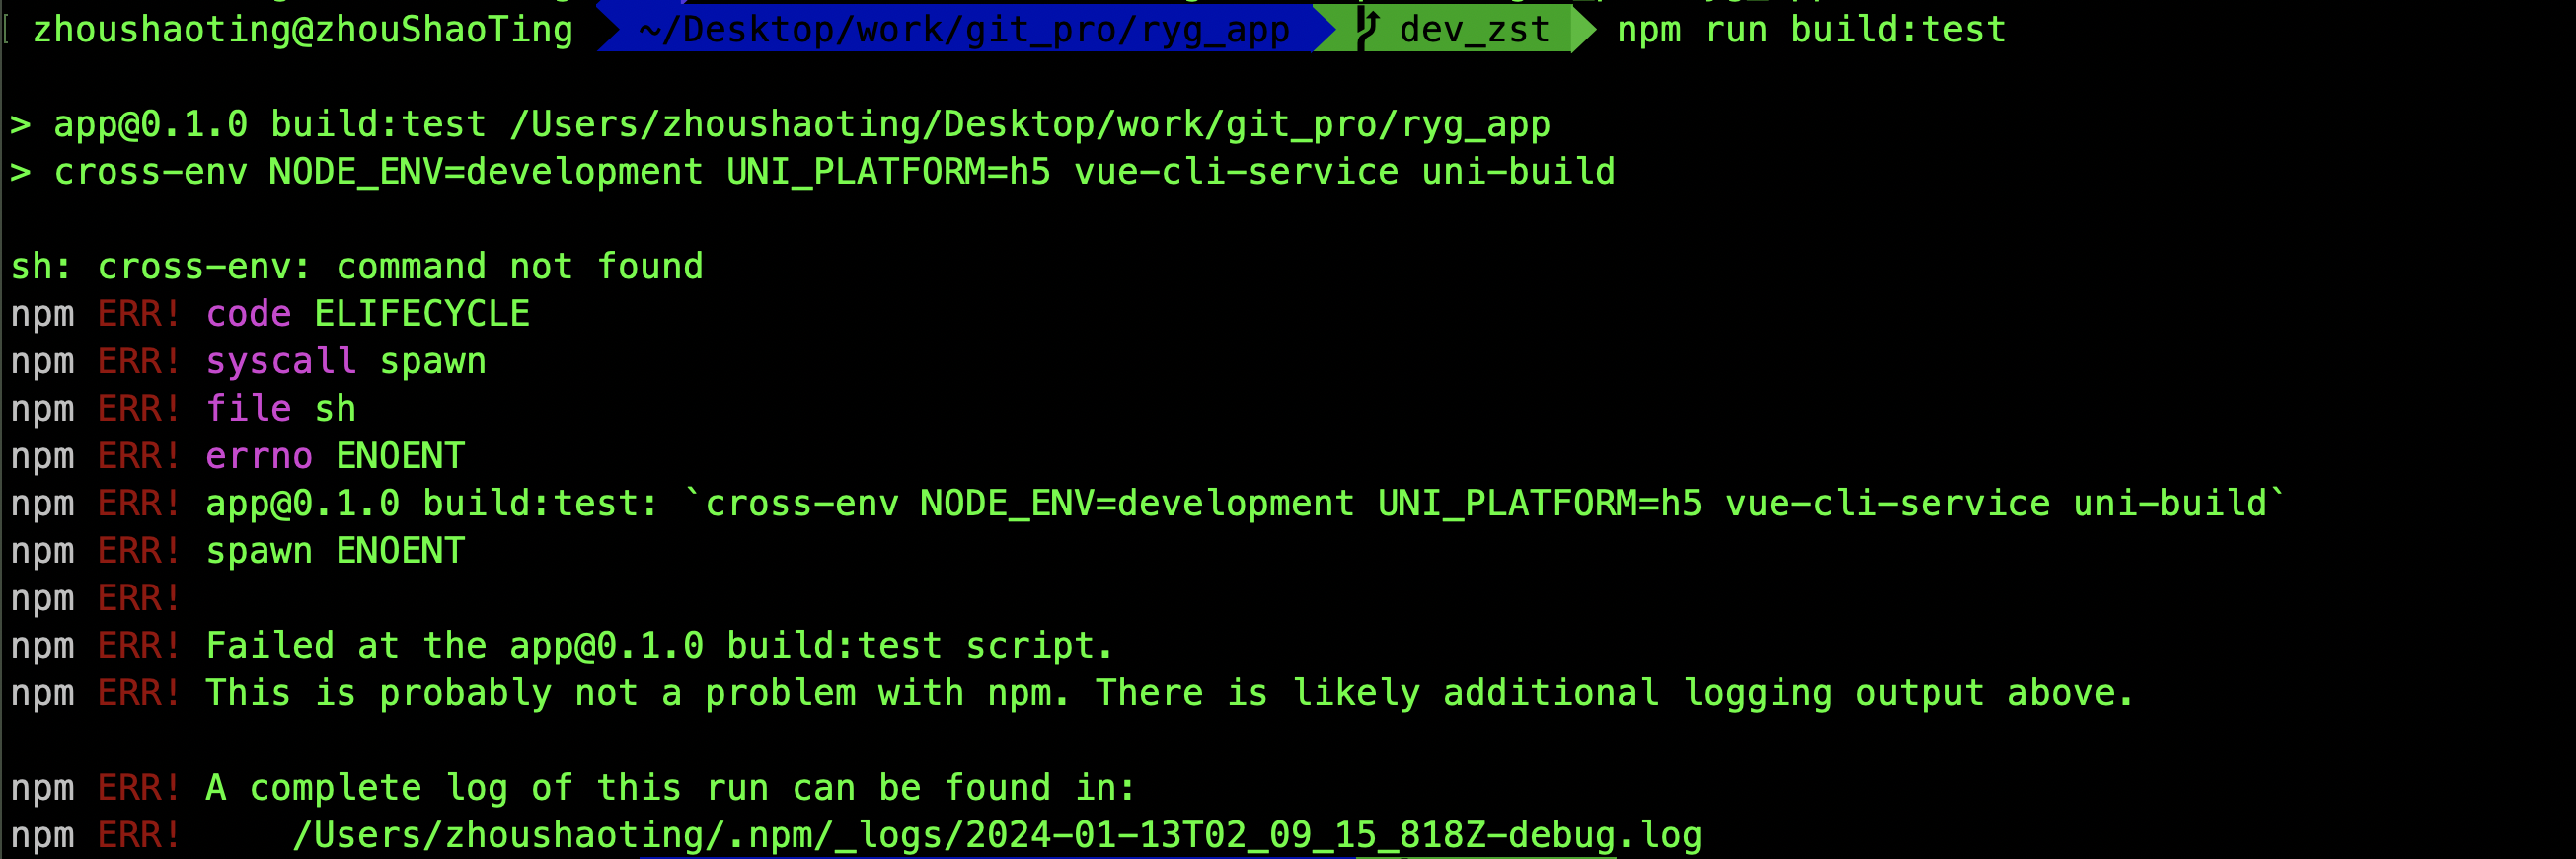
可以使用:

https://segmentfault.com/a/1190000042780467
4、打包出现 Error:EACCESS: promission denied.
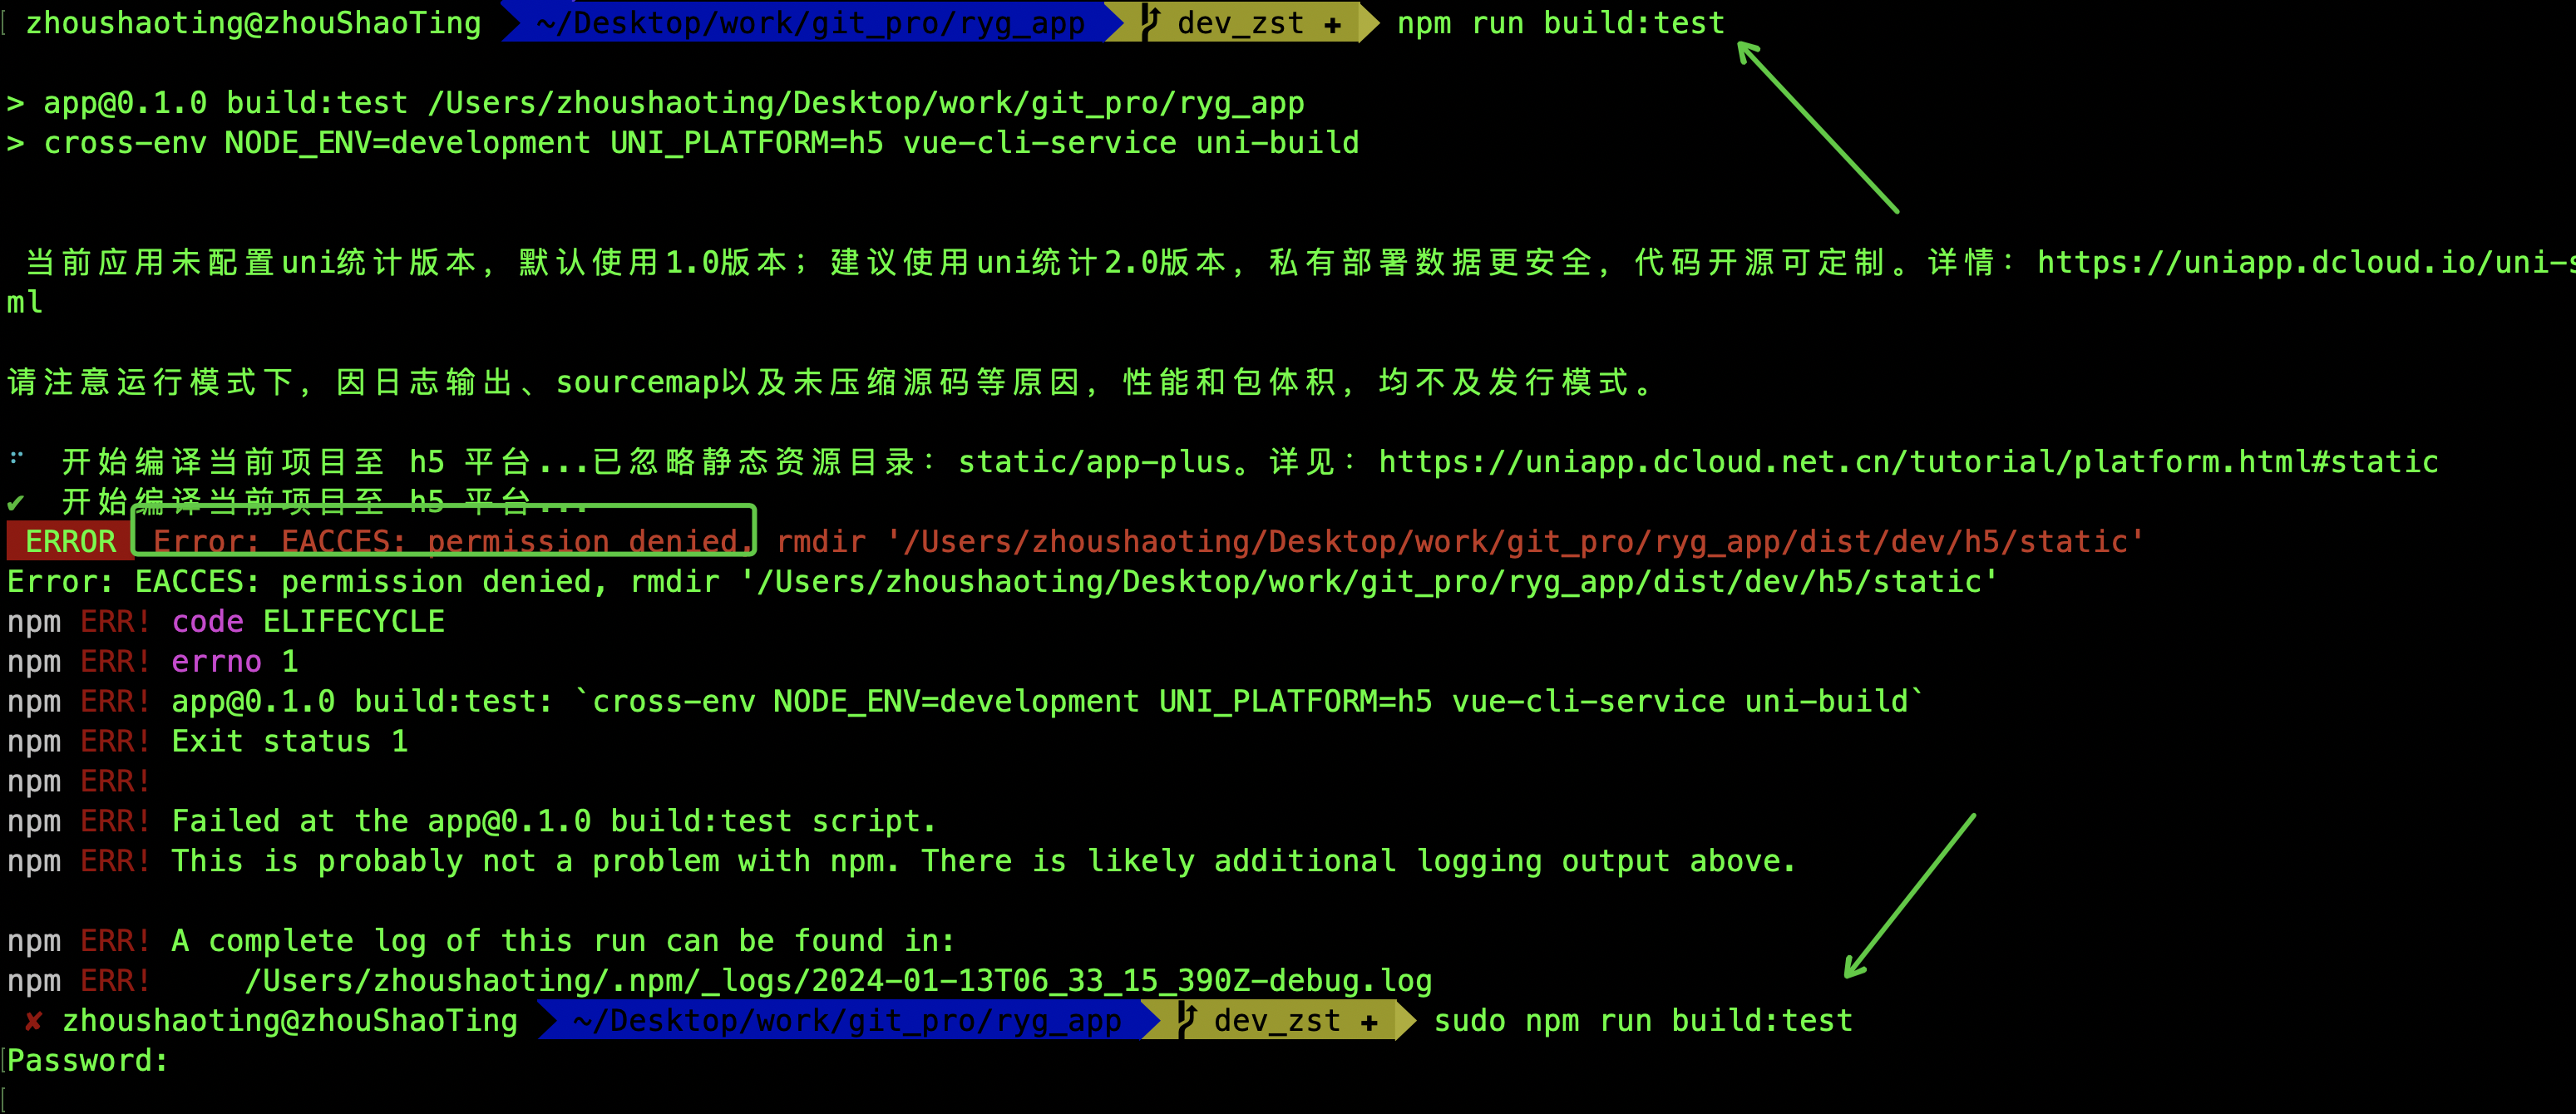
权限不够,sudo即可
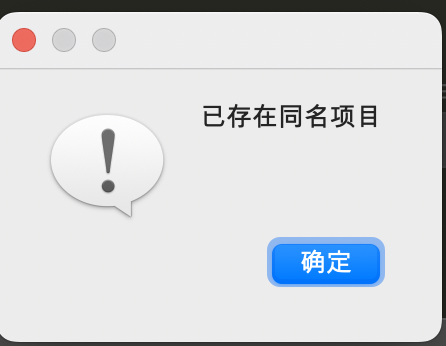
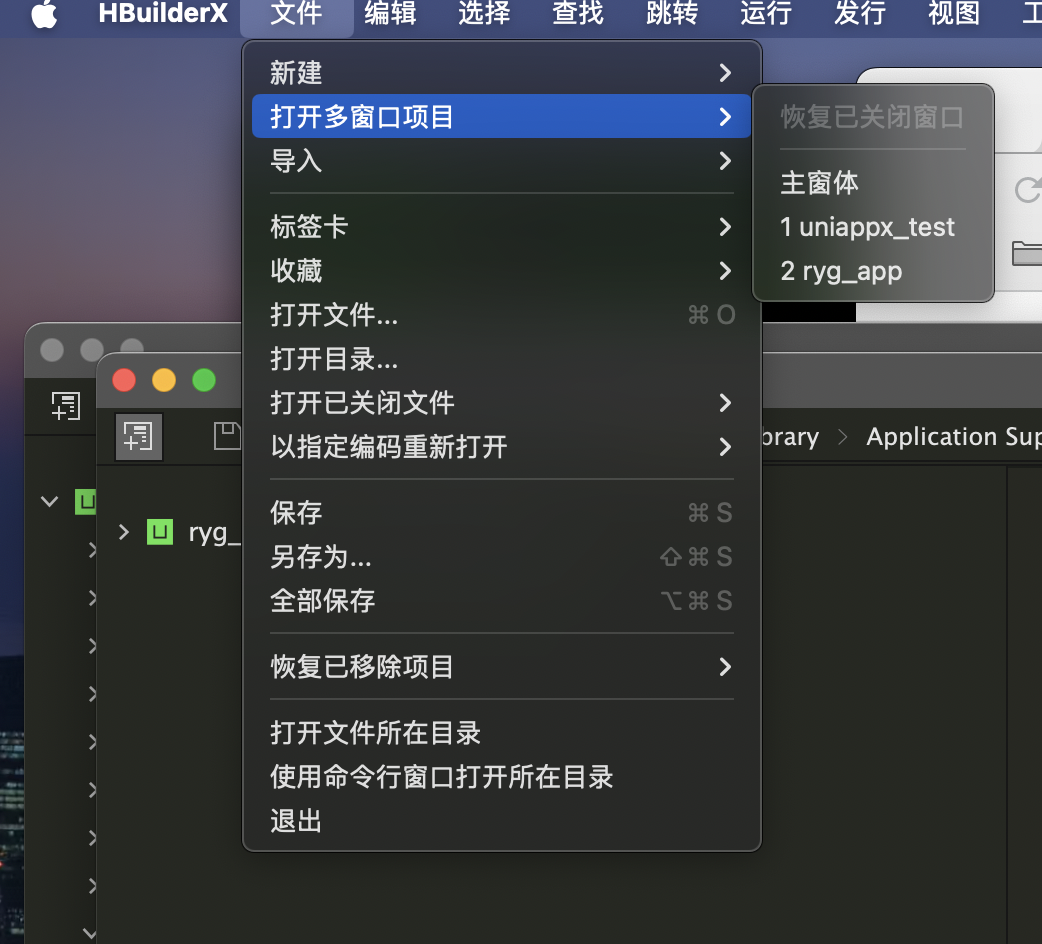
5、mac 的HBuilderX因为自己的胡乱操作,导致打开ide什么也不显示,导入项目显示“已存在同名项目”。
需要点击 【文件】 【打开多窗口项目】 选择你需要的项目进入即可。 ps:这奇葩操作
6、uniapp下载图片
      savepicture() {
        let downLoadUrl = 'https:图片.png';
        // #ifdef MP-WEIXIN
        var self = this
        this.task = uni.downloadFile({
          url: downLoadUrl,
          success: (res) => {
            self.imageSrc = res.tempFilePath;
            uni.saveImageToPhotosAlbum({  // 仅仅针对小程序
              filePath: self.imageSrc,
              success: function() {
                uni.showToast({
                  title: '图片已保存到相册'
                });
              }
            })
          },
          fail: (err) => {
            console.log('downloadFile fail, err is:', err)
          }
        });
        // #endif

        // #ifdef H5
        uni.downloadFile({
          url: downLoadUrl, //仅为示例,并非真实的资源
          success: (res) => {
            console.log(res)
            if (res.statusCode === 200) {
              uni.showToast({
                title: '图片已保存到相册'
              });
              var oA = document.createElement("a");
              oA.download = ''; // 设置下载的文件名,默认是'下载'
              oA.href = res.tempFilePath; //临时路径再保存到本地
              document.body.appendChild(oA);
              oA.click();
              oA.remove(); // 下载之后把创建的元素删除
            }
          }
        });
        // #endif
      }
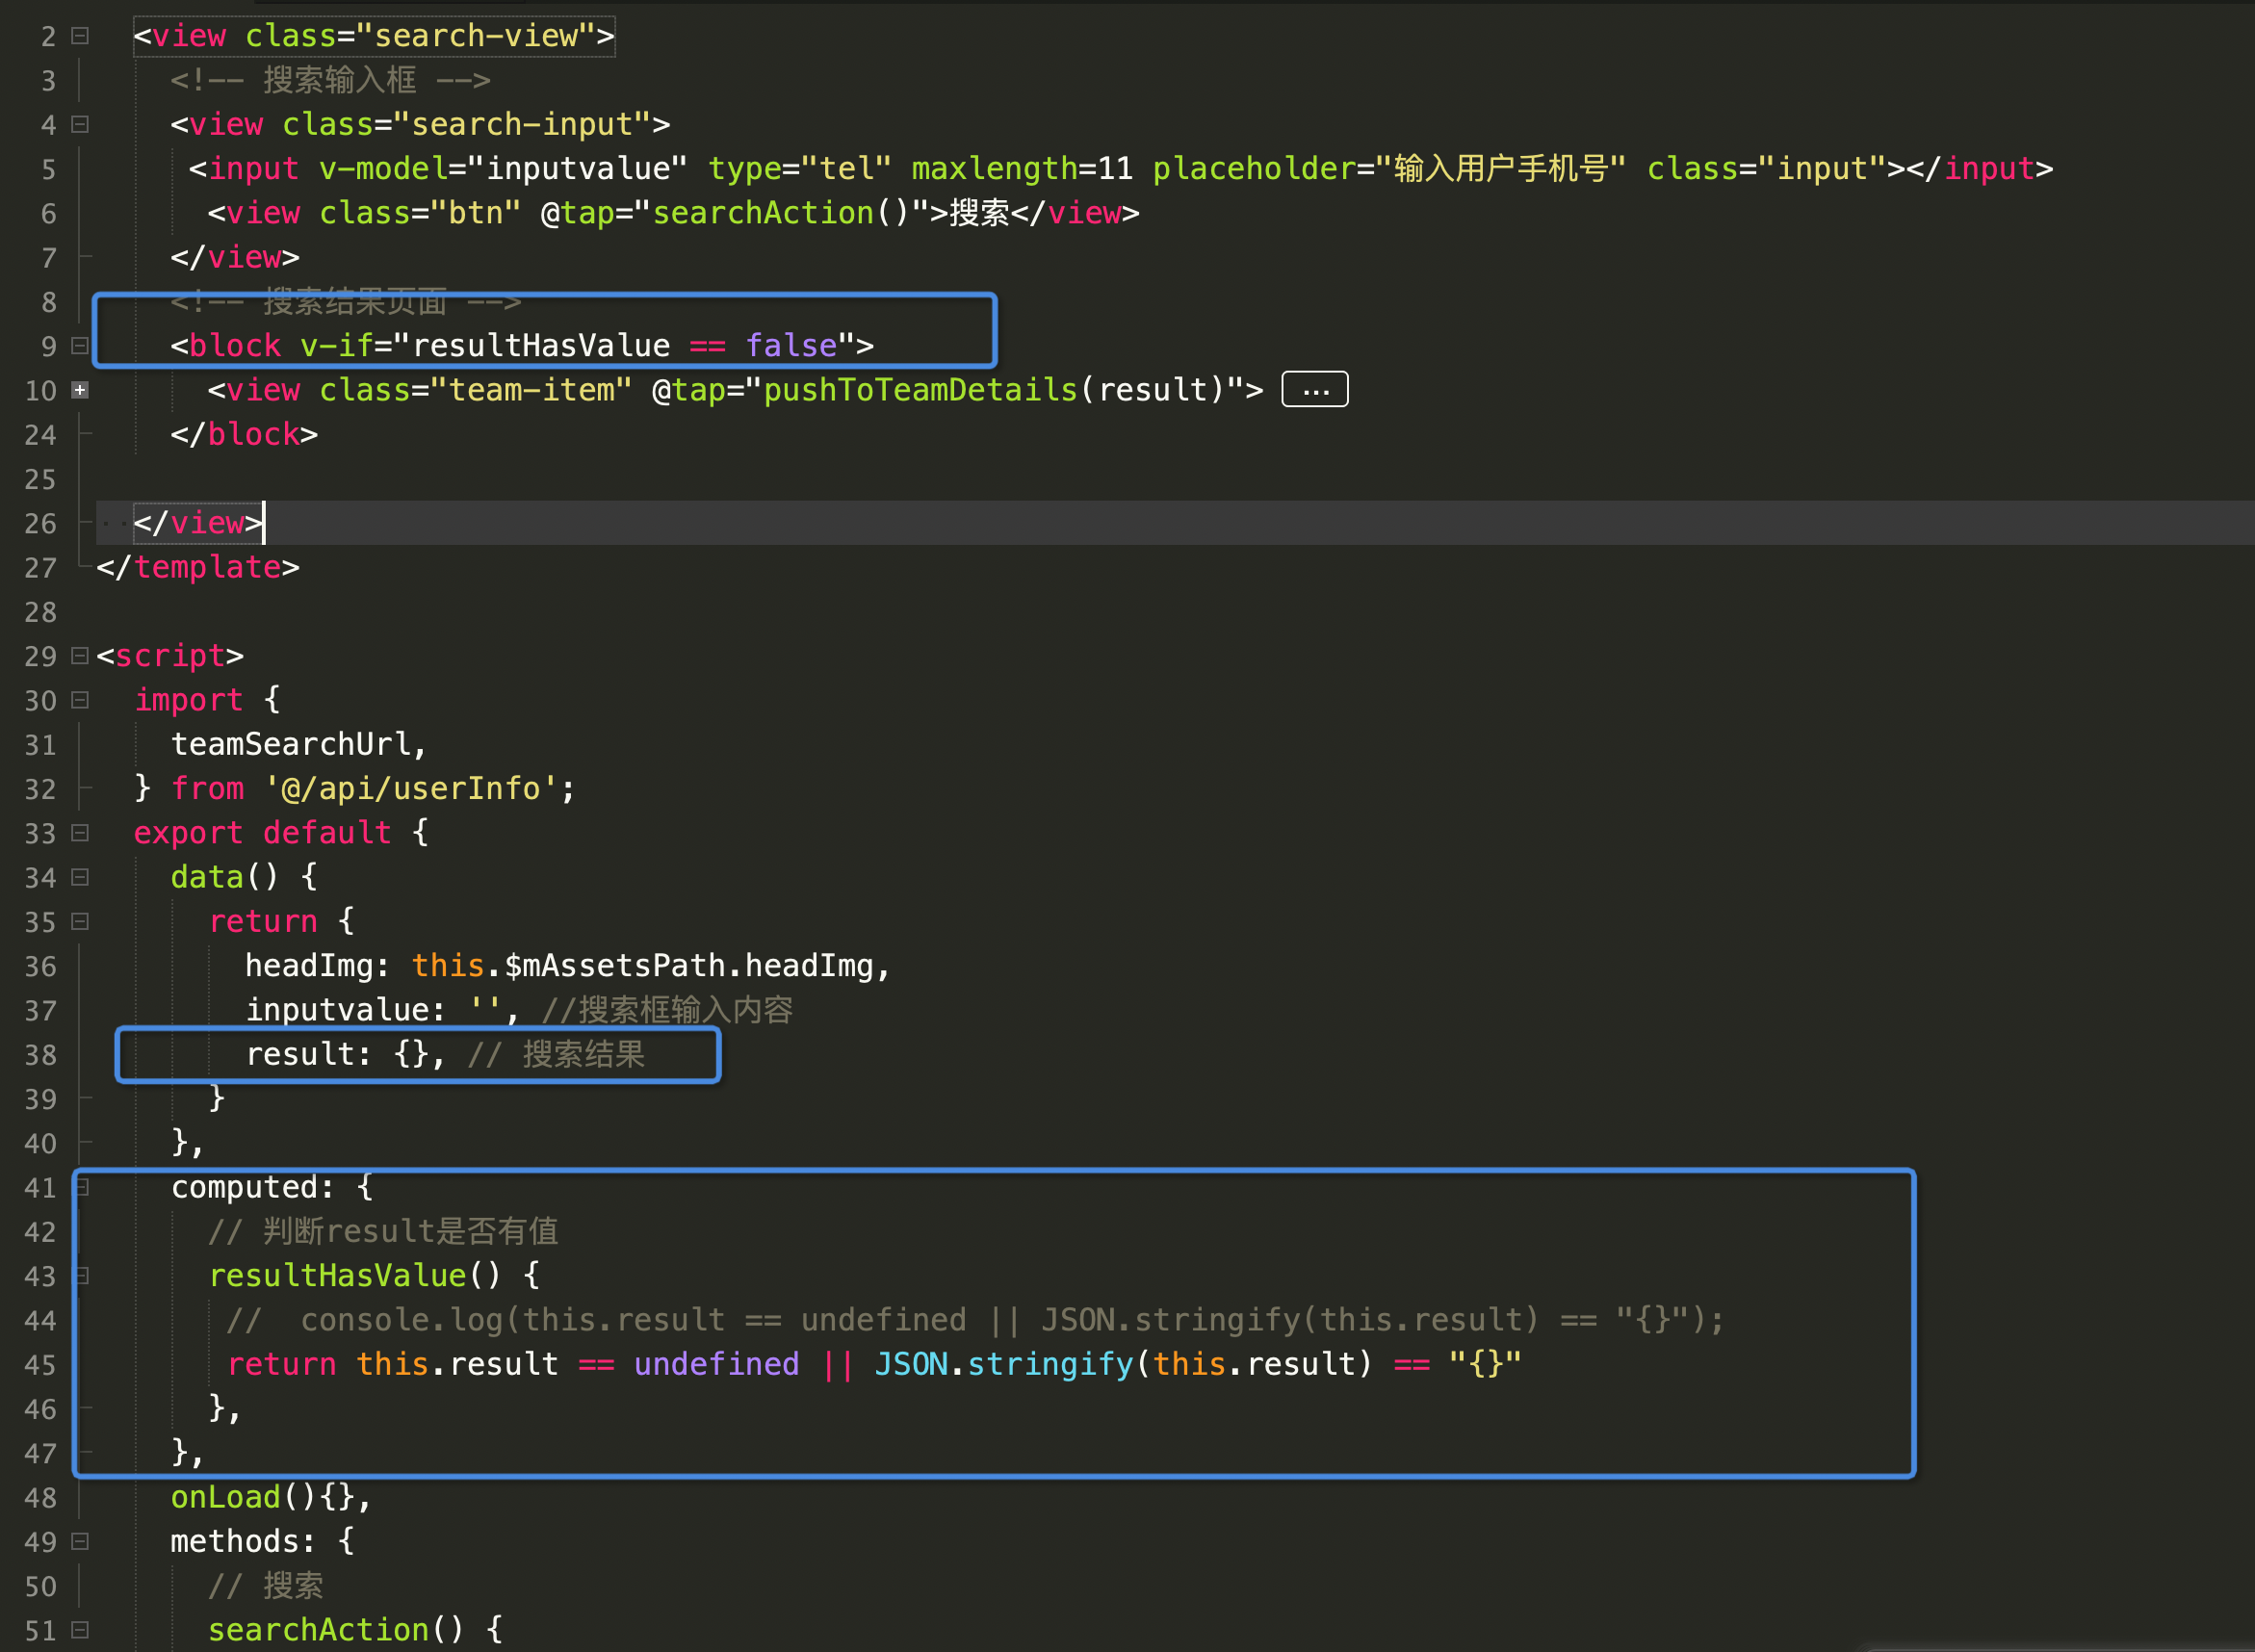
7、判断map是否为空使用
this.result == undefined || JSON.stringify(this.result) == "{}"
8.调用之前某个路由的方法、或者改变state等、或者判断前一个路由是什么。
如
        this.$http.post(`${teamSetPoint}`, {
          point_rate: val,
          member_id: this.item.member_id,
        }).then(r => {
          uni.showToast({
            title: '设置成功',
            icon: 'success',
            duration: 2000
          });
          this.inputvalue = val;
          const pages = getCurrentPages(); //获取页面栈

          const beforePage = pages[pages.length - 2]; //前一个页面
          // 如果上一个页面是team-search
          if(beforePage.route == 'pages/user/team/team-search'){
            console.log('team-search');
             beforePage.$vm.result.point_rate = val;
          }else{
          // 如果上一个页面是 team 同时直接turn
            console.log('team');
            beforePage.$vm.teamList[this.index].point_rate = val;
            return;
          }

          // 如果上上一个页面是team
          const beforePage1 = pages[pages.length - 3]; //前前一个页面
          if(beforePage1.route == 'pages/user/team/team'){
            console.log('team2');
            beforePage1.$vm.teamList[this.index].point_rate = val;
          }

        }).catch((err) => {
          console.log(err);
        });
主要就是
          const pages = getCurrentPages(); //获取页面栈
          const beforePage = pages[pages.length - 2]; //前一个页面
          beforePage.$vm.方法
          beforePage.route
----------------------------------------------------web-----------------------------------------------------------------------
----------------------------------------------------web-----------------------------------------------------------------------
----------------------------------------------------web-----------------------------------------------------------------------
----------------------------------------------------web-----------------------------------------------------------------------
1.使用eslint代码检查时,常见的的错误:
1.1 Expected indentation of 0 spaces but found 1

前面的空格个数不对.应该不能有空格.


1.2 Strings must use singlequote
必须使用单引号

1.3The template root requires exactly one element

<template>标签下必须有个根标签


2.
There are multiple modules with names that only differ in casing.
This can lead to unexpected behavior when compiling on a filesystem with other case-semantic.
Use equal casing. Compare these module identifiers:.....

使用了关键字或者保留字.修改即可.
3.使用VScode的打开浏览器插件,无法打开浏览器:
新安装了个open in browser,使用时无法使用,无法打开,在VSCode的设置里面搜索 open-in-browser.default,在出现的界面中填写浏览器即可。如

4.vue ui无反应。
https://blog.csdn.net/qq_21859119/article/details/105309423
5.vue中引入echarts 报错“export ‘default‘ (imported as ‘echarts‘) was not found in ‘echarts‘
https://www.cnblogs.com/cyhsmile/p/14098269.html
6. This may cause things to work incorrectly. Make sure to use the same version

需要 删除node_models 文件夹和 package-lock.json 文件重新 npm install. 写RN只需要删除node_models 文件夹.........
7.React数组变化之后,视图没有更新
https://www.cnblogs.com/xzsty/p/13044931.html
8.npm rebuild node-sass出错
在启动hexo博客时,清了下hexo clean,出现“ERROR Plugin load failed: hexo-renderer-scss”,按照它的信息
npm rebuild node-sas 但是还是失败,报一样的错误,按照网上的说法: 先卸载该包再安装也不行. 换淘宝源也不行.
最后直接 删除package-lock.json,yarn.lock,node_modules
再次npm install好了.

9.升级了下npm和node,博客在发布时失败,按照网上的卸载hexo,又安装hexo,发现npm install hexo-cli -g 失败,需要:
npm install -g cnpm --registry=https://registry.npm.taobao.org
cnpm install hexo-cli -g
https://www.cnblogs.com/qq597585136/p/6964599.html
10. 清除npm的淘宝镜像。
https://segmentfault.com/q/1010000004596263?utm_source=sf-similar-question
我删除后安装有时成功,有时失败。。。。。。
如果在npm install时,还是有问题,就直接修改为:
终端运行 npm config edit 修改下下面的配置

ELECTRON_MIRROR=https://npm.taobao.org/mirrors/electron/
registry=https://registry.npm.taobao.org/
11、在使用taro开发H5的时候遇到tips。

如果你需要使用固定的尺寸的话,可以使用大写的PX作为单位即可。

taro中使用图片资源,可以采用:
a、
b、

c、
12、使用taro组件的时候,尽量都引入,否则有可能在微信小程序端可以使用,在H5页面却无法使用,因为有些组件在小程序端是自带的,而其他端是需要引入的。
13、出现 npm ERR! request to https://registry.npm.taobao.org/create-wasm-app failed, reason: certificate has expired

淘宝镜像过期
1、查看npm当前镜像:
npm config list
2、清空缓存:
npm cache clean --force
3、更换源:
npm config set registry https://registry.npmmirror.com
