

2022.5.27 IOC创建对象的方式
4、IOC创建对象的方式
创建一个普通的maven项目
User.java

 1 package com.xing.pojo;
 2
 3 public class User {
 4     private String name;
 5
 6     //有参构造
 7     public User(String name){
 8         this.name = name;
 9     }
10     public String getName() {
11         return name;
12     }
13
14     public void setName(String name) {
15         this.name = name;
16     }
17
18     public void show(){
19         System.out.println("name:"+name);
20     }
21 }
test
 1 import com.xing.pojo.User;
 2 import org.springframework.context.ApplicationContext;
 3 import org.springframework.context.support.ClassPathXmlApplicationContext;
 4
 5 public class MyTest {
 6     public static void main(String[] args) {
 7         ApplicationContext context = new ClassPathXmlApplicationContext("beans.xml");
 8         User user = (User) context.getBean("user");
 9
10         user.show();
11     }
12 }
1、使用无参构造创建对象,默认!
2、假设我们要使用有参构造创建对象。
1. 下标赋值
 1 <?xml version="1.0" encoding="UTF-8"?>
 2 <beans xmlns="http://www.springframework.org/schema/beans"
 3        xmlns:xsi="http://www.w3.org/2001/XMLSchema-instance"
 4        xsi:schemaLocation="http://www.springframework.org/schema/beans
 5         https://www.springframework.org/schema/beans/spring-beans.xsd">
 6
 7 <!--第一种方式调用有参构造 下标赋值-->
 8     <bean id="user" class="com.xing.pojo.User">
 9 <!--    调用有参构造      下标为0,表示第一个参数-->
10         <constructor-arg index="0" value="小明"/>
11     </bean>
12
13
14 </beans>
2.通过类型创建
 1 <?xml version="1.0" encoding="UTF-8"?>
 2 <beans xmlns="http://www.springframework.org/schema/beans"
 3        xmlns:xsi="http://www.w3.org/2001/XMLSchema-instance"
 4        xsi:schemaLocation="http://www.springframework.org/schema/beans
 5         https://www.springframework.org/schema/beans/spring-beans.xsd">
 6
 7 <!--不建议使用-->
 8     <bean id="user" class="com.xing.pojo.User">
 9 <!--                     参数类型-->
10         <constructor-arg type="java.lang.String" value="小明"/>
11     </bean>
12
13 </beans>
3.通过参数名
 1 <?xml version="1.0" encoding="UTF-8"?>
 2 <beans xmlns="http://www.springframework.org/schema/beans"
 3        xmlns:xsi="http://www.w3.org/2001/XMLSchema-instance"
 4        xsi:schemaLocation="http://www.springframework.org/schema/beans
 5         https://www.springframework.org/schema/beans/spring-beans.xsd">
 6
 7     <bean id="user" class="com.xing.pojo.User">
 8 <!--                        参数名-->
 9         <constructor-arg name="name" value="小明"/>
10     </bean>
11
12
13 </beans>
test输出

5、Spring配置
5.1、别名(一般没用)
 1 <?xml version="1.0" encoding="UTF-8"?>
 2 <beans xmlns="http://www.springframework.org/schema/beans"
 3        xmlns:xsi="http://www.w3.org/2001/XMLSchema-instance"
 4        xsi:schemaLocation="http://www.springframework.org/schema/beans
 5         https://www.springframework.org/schema/beans/spring-beans.xsd">
 6
 7     <bean id="user" class="com.xing.pojo.User">
 8         <constructor-arg name="name" value="小明"/>
 9     </bean>
10
11 <!--    给bean id起一个别名-->
12     <alias name="user" alias="user2"/>
13
14 </beans>
test
 1 import com.xing.pojo.User;
 2 import org.springframework.context.ApplicationContext;
 3 import org.springframework.context.support.ClassPathXmlApplicationContext;
 4
 5 public class MyTest {
 6     public static void main(String[] args) {
 7         ApplicationContext context = new ClassPathXmlApplicationContext("beans.xml");
 8         //                                通过别名获取
 9         User user = (User) context.getBean("user2");
10
11         user.show();
12     }
13 }
5.2、Bean的配置
 1 <?xml version="1.0" encoding="UTF-8"?>
 2 <beans xmlns="http://www.springframework.org/schema/beans"
 3        xmlns:xsi="http://www.w3.org/2001/XMLSchema-instance"
 4        xsi:schemaLocation="http://www.springframework.org/schema/beans
 5         https://www.springframework.org/schema/beans/spring-beans.xsd">
 6
 7 <!--    id : bean 的唯一标识符,也就是相当于我们学的对象名(把bean当做一个类型)
 8         class : bean对象所对应的全限定名:包名+类型
 9         name : bean别名,而且name可以同时取多个别名
10 -->
11     <bean id="user" class="com.xing.pojo.User" name="u1,u2">
12         <constructor-arg name="name" value="小明"/>
13     </bean>
14
15
16 </beans>
test
 1 import com.xing.pojo.User;
 2 import org.springframework.context.ApplicationContext;
 3 import org.springframework.context.support.ClassPathXmlApplicationContext;
 4
 5 public class MyTest {
 6     public static void main(String[] args) {
 7         ApplicationContext context = new ClassPathXmlApplicationContext("beans.xml");
 8         //                                通过别名获取
 9         User user = (User) context.getBean("u2");
10
11         user.show();
12     }
13 }
5.3、import
这个import,一般用于团队开发使用,他可以将多个配置文件,导入合并为一个
假设,现在项目中有多个人开发,这三个人复制不同的类开发,不同的类需要注册在不同的bean中,我们可以利用import将所有人的beans.xml合并为一个总的!
-
张三
-
李四
-
王五
-
applicationContext.xml
使用的时候,直接使用总的配置就可以了
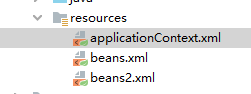
applicationContext.xml
1 <?xml version="1.0" encoding="UTF-8"?>
2 <beans xmlns="http://www.springframework.org/schema/beans"
3        xmlns:xsi="http://www.w3.org/2001/XMLSchema-instance"
4        xsi:schemaLocation="http://www.springframework.org/schema/beans
5         https://www.springframework.org/schema/beans/spring-beans.xsd">
6
7     <import resource="beans.xml"/>
8     <import resource="beans2.xml"/>
9 </beans>
test
 1 import com.xing.pojo.User;
 2 import org.springframework.context.ApplicationContext;
 3 import org.springframework.context.support.ClassPathXmlApplicationContext;
 4
 5 public class MyTest {
 6     public static void main(String[] args) {
 7         ApplicationContext context = new ClassPathXmlApplicationContext("applicationContext.xml");//总的配置
 8         User user = (User) context.getBean("u2");
 9
10         user.show();
11     }
12 }
6、依赖注入
6.1、构造器注入
前面已经说过了
6.2、Set方式注入【重点】
依赖: bean对象的创建依赖于容器!
注入: bean对象中的所有属性,由容器来注入!
环境搭建
创建一个普通的maven项目
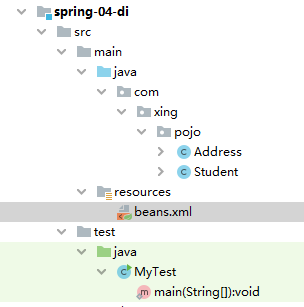
Address
 1 package com.xing.pojo;
 2
 3 public class Address {
 4     private String address;
 5
 6     public String getAddress() {
 7         return address;
 8     }
 9
10     public void setAddress(String address) {
11         this.address = address;
12     }
13
14     @Override
15     public String toString() {
16         return "Address{" +
17                 "address='" + address + '\'' +
18                 '}';
19     }
20 }
Student
 1 package com.xing.pojo;
 2
 3 import java.util.*;
 4
 5 public class Student {
 6     private String name;
 7     private Address address;
 8     private String[] books;
 9     private List<String> hobbys;
10     private Map<String,String> card;
11     private Set<String> games;
12     private String wife;
13     private Properties info;
14
15     public String getName() {
16         return name;
17     }
18
19     public void setName(String name) {
20         this.name = name;
21     }
22
23     public Address getAddress() {
24         return address;
25     }
26
27     public void setAddress(Address address) {
28         this.address = address;
29     }
30
31     public String[] getBooks() {
32         return books;
33     }
34
35     public void setBooks(String[] books) {
36         this.books = books;
37     }
38
39     public List<String> getHobbys() {
40         return hobbys;
41     }
42
43     public void setHobbys(List<String> hobbys) {
44         this.hobbys = hobbys;
45     }
46
47     public Map<String, String> getCard() {
48         return card;
49     }
50
51     public void setCard(Map<String, String> card) {
52         this.card = card;
53     }
54
55     public Set<String> getGames() {
56         return games;
57     }
58
59     public void setGames(Set<String> games) {
60         this.games = games;
61     }
62
63     public String getWife() {
64         return wife;
65     }
66
67     public void setWife(String wife) {
68         this.wife = wife;
69     }
70
71     public Properties getInfo() {
72         return info;
73     }
74
75     public void setInfo(Properties info) {
76         this.info = info;
77     }
78
79     @Override
80     public String toString() {
81         return "Student{" +
82                 "name='" + name + '\'' +
83                 ", address=" + address +
84                 ", books=" + Arrays.toString(books) +
85                 ", hobbys=" + hobbys +
86                 ", card=" + card +
87                 ", games=" + games +
88                 ", wife='" + wife + '\'' +
89                 ", info=" + info +
90                 '}';
91     }
92 }
beans.xml
 1 <?xml version="1.0" encoding="UTF-8"?>
 2 <beans xmlns="http://www.springframework.org/schema/beans"
 3        xmlns:xsi="http://www.w3.org/2001/XMLSchema-instance"
 4        xsi:schemaLocation="http://www.springframework.org/schema/beans
 5         https://www.springframework.org/schema/beans/spring-beans.xsd">
 6
 7     <bean id="ar" class="com.xing.pojo.Address">
 8         <property name="address" value="北京"/>
 9     </bean>
10
11     <bean id="student" class="com.xing.pojo.Student">
12         <!--第一种:普通值注入,通过value    -->
13         <property name="name" value="小明"/>
14
15         <!--第二种:bean注入,通过ref    -->
16         <property name="address" ref="ar"/>
17
18         <!--数组注入-->
19         <property name="books">
20             <array>
21                 <value>红楼梦</value>
22                 <value>水浒传</value>
23                 <value>西游记</value>
24             </array>
25         </property>
26
27        <!--List-->
28         <property name="hobbys">
29         <list>
30             <value>听歌</value>
31             <value>敲代码</value>
32             <value>看电影</value>
33         </list>
34         </property>
35
36         <!--Map-->
37         <property name="card">
38             <map>
39                 <entry key="身份证" value="111111222222223333"/>
40                 <entry key="银行卡" value="1321231312312313123"/>
41             </map>
42         </property>
43
44         <!--Set-->
45         <property name="games">
46             <set>
47                 <value>LoL</value>
48                 <value>coc</value>
49                 <value>BOB</value>
50             </set>
51         </property>
52
53         <!--null-->
54         <property name="wife">
55             <null/>
56         </property>
57
58         <!--Properties  key=value-->
59         <property name="info">
60             <props>
61                 <prop key="学号">2017984130305</prop>
62                 <prop key="性别">男</prop>
63                 <prop key="username">root</prop>
64                 <prop key="password">123456</prop>
65             </props>
66         </property>
67
68
69     </bean>
70
71
72 </beans>
MyTest
 1 import com.xing.pojo.Student;
 2 import org.springframework.context.ApplicationContext;
 3 import org.springframework.context.support.ClassPathXmlApplicationContext;
 4
 5 public class MyTest {
 6     public static void main(String[] args) {
 7         ApplicationContext context = new ClassPathXmlApplicationContext("beans.xml");
 8
 9         Student student = (Student) context.getBean("student");
10         System.out.println(student.getName());//小明
11         System.out.println(student.toString());
12     }
13 }

6.3、拓展方式注入
p命名空间注入必须在xml文件中加入 xmlns:p="http://www.springframework.org/schema/p"
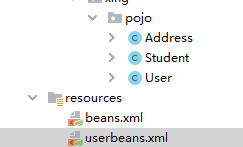
User
 1 package com.xing.pojo;
 2
 3 public class User {
 4     private String name;
 5     private int age;
 6
 7     public String getName() {
 8         return name;
 9     }
10
11     public void setName(String name) {
12         this.name = name;
13     }
14
15     public int getAge() {
16         return age;
17     }
18
19     public void setAge(int age) {
20         this.age = age;
21     }
22
23     @Override
24     public String toString() {
25         return "User{" +
26                 "name='" + name + '\'' +
27                 ", age=" + age +
28                 '}';
29     }
30 }
userbeans.xml
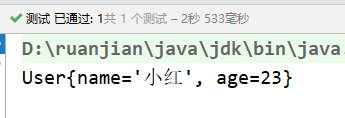
 1 <?xml version="1.0" encoding="UTF-8"?>
 2 <beans xmlns="http://www.springframework.org/schema/beans"
 3        xmlns:xsi="http://www.w3.org/2001/XMLSchema-instance"
 4        p命名空间注入
 5        xmlns:p="http://www.springframework.org/schema/p"
 6        xsi:schemaLocation="http://www.springframework.org/schema/beans
 7         https://www.springframework.org/schema/beans/spring-beans.xsd">
 8
 9     <!--p(property(属性))命名空间注入,可以直接注入属性的值: -->
10     <bean id="user" class="com.xing.pojo.User" p:name="小红" p:age="23"/>
11 </beans>
test
 1 import com.xing.pojo.Student;
 2 import com.xing.pojo.User;
 3 import org.junit.Test;
 4 import org.springframework.context.ApplicationContext;
 5 import org.springframework.context.support.ClassPathXmlApplicationContext;
 6
 7 public class MyTest {
 8
 9     @Test
10     public void test1() {
11         ApplicationContext context = new ClassPathXmlApplicationContext("userbeans.xml");
12         User user =context.getBean("user",User.class);//加入反射User.class这样就不用强转了
13
14         System.out.println(user);
15     }
16 }
c命名空间注入必须在xml文件中加入
xmlns:c="http://www.springframework.org/schema/c"
User
 1 package com.xing.pojo;
 2
 3 public class User {
 4     private String name;
 5     private int age;
 6
 7     public User() {
 8     }
 9
10     public User(String name, int age) {
11         this.name = name;
12         this.age = age;
13     }
14
15     public String getName() {
16         return name;
17     }
18
19     public void setName(String name) {
20         this.name = name;
21     }
22
23     public int getAge() {
24         return age;
25     }
26
27     public void setAge(int age) {
28         this.age = age;
29     }
30
31     @Override
32     public String toString() {
33         return "User{" +
34                 "name='" + name + '\'' +
35                 ", age=" + age +
36                 '}';
37     }
38 }
userbeans.xml
 1 <?xml version="1.0" encoding="UTF-8"?>
 2 <beans xmlns="http://www.springframework.org/schema/beans"
 3        xmlns:xsi="http://www.w3.org/2001/XMLSchema-instance"
 4        xmlns:c="http://www.springframework.org/schema/c"
 5        xsi:schemaLocation="http://www.springframework.org/schema/beans
 6         https://www.springframework.org/schema/beans/spring-beans.xsd">
 7
 8     <!--c命名空间注入,通过构造器(有参构造)注入: construct-args-->
 9     <bean id="user2" class="com.xing.pojo.User" c:name="小明" c:age="24"/>
10 </beans>
test
 1 import com.xing.pojo.Student;
 2 import com.xing.pojo.User;
 3 import org.junit.Test;
 4 import org.springframework.context.ApplicationContext;
 5 import org.springframework.context.support.ClassPathXmlApplicationContext;
 6
 7 public class MyTest {
 8
 9     @Test
10     public void test1() {
11         ApplicationContext context = new ClassPathXmlApplicationContext("userbeans.xml");
12         User user =context.getBean("user2",User.class);
13         System.out.println(user);
14     }
15 }
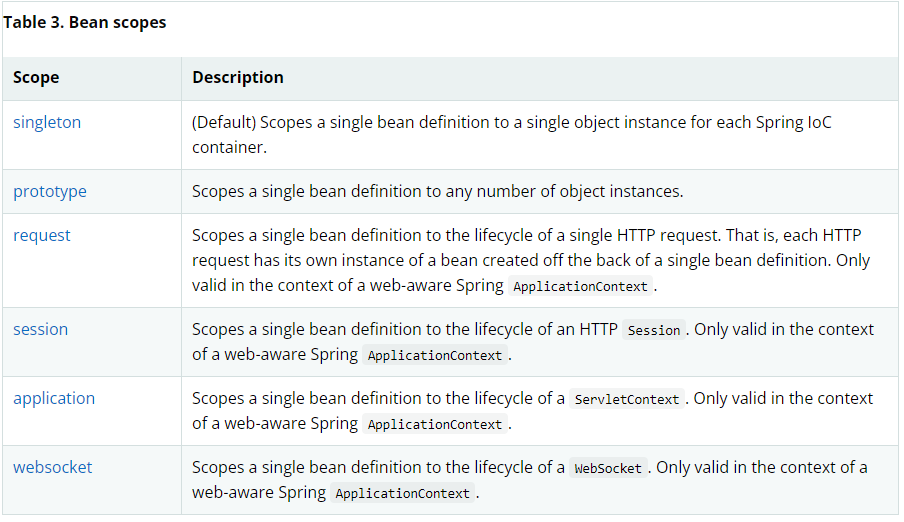
6.4、Bean的作用域


【推荐】国内首个AI IDE,深度理解中文开发场景,立即下载体验Trae
【推荐】编程新体验,更懂你的AI,立即体验豆包MarsCode编程助手
【推荐】抖音旗下AI助手豆包,你的智能百科全书,全免费不限次数
【推荐】轻量又高性能的 SSH 工具 IShell:AI 加持,快人一步
· 阿里最新开源QwQ-32B,效果媲美deepseek-r1满血版,部署成本又又又降低了!
· AI编程工具终极对决:字节Trae VS Cursor,谁才是开发者新宠?
· 开源Multi-agent AI智能体框架aevatar.ai,欢迎大家贡献代码
· Manus重磅发布:全球首款通用AI代理技术深度解析与实战指南
· 被坑几百块钱后,我竟然真的恢复了删除的微信聊天记录!