
前端富文本编辑器vue + tinymce
之前有项目需要用到富文本编辑器,在网上找了好几个后,最终选择了这个功能强大,扩展性强的tinymce
tinymce中文文档地址(不全):http://tinymce.ax-z.cn/
tinymce英文原版文档地址:https://www.tiny.cloud/docs/demo/
接下来大致讲一下一个小demo(vue项目 + tinymce)
1、npm 安装 tinymce 和 @packy-tang/vue-tinymce
npm i tinymce @packy-tang/vue-tinymce
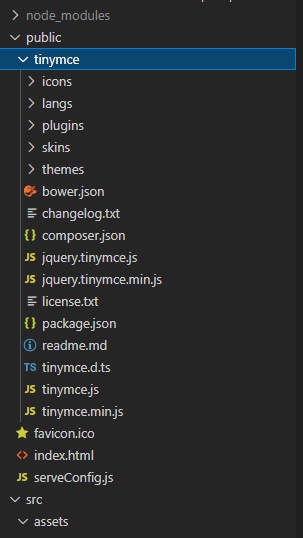
2、复制node_modules/tinymce目录下所有文件至public/目录下
如下图
然后在public/index.html页面全局引入tinymce
<body>
    <div id="app"></div>
    <script src="/tinymce/tinymce.min.js"></script>
</body>
3、汉化
tinymce需要额外做汉化处理,中文汉化包地址:zh_CN.js
将 zh_CN.js文件直接放到public/tinymce/langs/目录下就行了,后续配置(下面会讲)时加上{language: 'zh_CN'}就能实现。
4、引入
在vue项目main.js文件中
// tinymce编辑器
import tinymce from 'tinymce'
import VueTinymce from '@packy-tang/vue-tinymce'
Vue.prototype.$tinymce = tinymce
Vue.use(VueTinymce)
5、使用
tinymce有多种编辑器模式,具体可以看文档了解,
笔者一开始使用的是经典模式,但经典模式使用的是iframe,不方便影响编辑器内部的东西,于是采用内联模式,但是内联模式是需要
聚焦后才会出现编辑工具栏,不符合需求,所以采用设置聚焦的元素为body的方法让编辑工具栏一直显示
代码如下
<template>
  <div class="tinymce-editor">
    <div id="tinymceToolbar"></div>
    <vue-tinymce
      ref="editor"
      class="editor overflow-scroll"
      v-model="content"
      :setting="setting"
      :setup="setup"
      @keyup.native="$emit('editorChange', content)"
    />
  </div>
</template>

<script>
export default {
  name: 'tinymceEditor',
  components: {
  },
  data() {
    return {
      // 编辑器内容
      content: '',
      // 编辑器设置
      setting: {
        inline: true,  // 设置内敛模式
        menubar: false, // 隐藏菜单栏
        toolbar:
          'code undo redo restoredraft | cut copy paste pastetext | forecolor backcolor bold italic underline strikethrough link anchor | alignleft aligncenter alignright alignjustify outdent indent | \
        styleselect formatselect fontselect fontsizeselect | bullist numlist | blockquote subscript superscript removeformat | \
        table image media charmap emoticons hr pagebreak insertdatetime print preview | fullscreen | bdmap indent2em lineheight formatpainter axupimgs | myUpload',
           // 工具栏,根据需要写对应的工具名称,顺序及分割线等等,这里的最后的 ‘myUpload’ 是下面setup里的自定义插件
        toolbar_mode: 'sliding', // 工具栏模式,这里是滑行模式(当屏幕过小时,多余的工具会隐藏,点击更多按钮会出现其他工具,这里配置出现的特效)
        plugins: 'print preview searchreplace autolink directionality visualblocks visualchars fullscreen image link media template code
                  codesample table charmap hr pagebreak nonbreaking anchor insertdatetime advlist lists wordcount imagetools textpattern help
                 emoticons autosave bdmap indent2em autoresize formatpainter axupimgs',           // 需要用到的功能插件,如链接,列表等等
        language: 'zh_CN', // 语言,汉化
        branding: false, // 隐藏品牌,隐藏状态栏中显示的“ Powered by Tiny ”链接
        resize: false, // 是否可以缩放编辑器
        elementpath: false, // 在编辑器底部的状态栏中禁用元素路径。
        fixed_toolbar_container: '#tinymceToolbar', // 可以设置元素选择器指定工具栏嵌套在哪个元素里面
        custom_ui_selector: 'body', // 聚焦的元素
        noneditable_noneditable_class: 'mceNonEditable', // 使用此选项,您可以指定TinyMCE将使用的类名称,以确定使用noneditable插件时可编辑哪些内容区域。主要用入你想以代码的形式添加某些内容,并给这些内容设置类名,使他们不可编辑,只能整个删除
        init_instance_callback: editor => {
          editor.focus() // 初始化聚焦,让内联模式的编辑器工具显示
        },
      },
    }
  },
  methods: {
    /**
     * @description: 编辑器setup
     * @author: Depp_ck
     */
    setup(editor) {
        // 自定义插件实现自定义工具栏按钮功能
      editor.ui.registry.addButton('myUpload', {
        tooltip: '上传',
        icon: 'browse',
        onAction: () => {
          console.log('点击了上传')
        },
      })
    },
  },
}
</script>

<style lang="scss" scoped>
.tinymce-editor {
  padding: 20px;
  position: relative;
  .editor {
    padding: 10px;
    border: 1px solid #ddd;
    height: 410px;
    font-size: 16px;
    line-height: 1.4;
    overflow-y: scroll;
  }
}
</style>

