Eureka注册中心
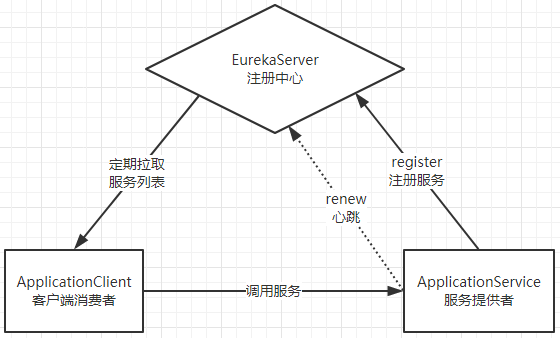
一、基本架构:

1、Eureka:服务注册中心 ,对外暴露地址,可以是一个集群。
2、服务提供者:启动后向Eureka注册自己的信息(地址、提供什么服务)。
3、消费者:向Eureka订阅服务,Eureka会将对应服务的所有提供者地址列表发送给消费者,并定期更新 。
4、心跳(续约):提供者定期向http方式向Eureka刷新自己的状态。
二、案例。
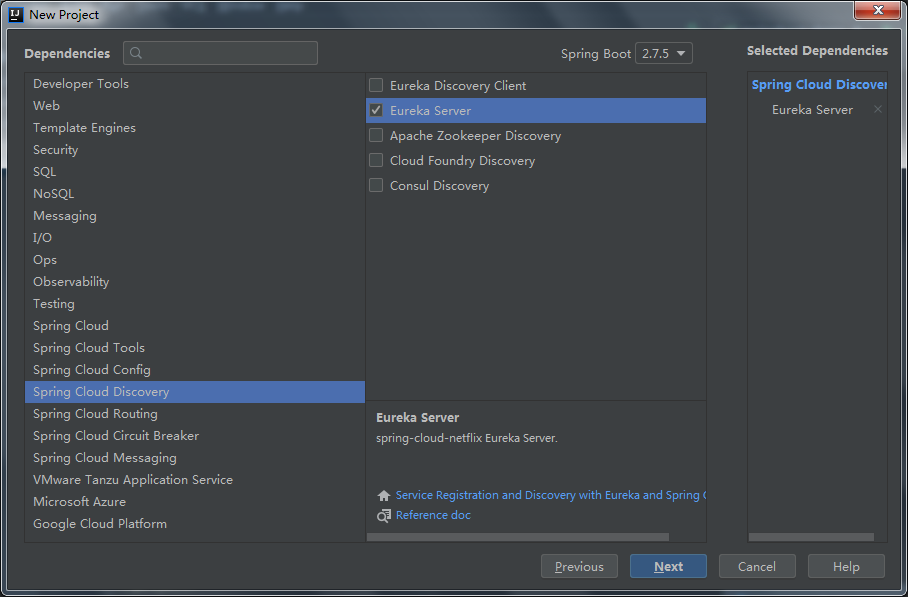
1、创建一个EurekaServer服务。

声明启动类是一个EurekaServer。
@SpringBootApplication
@EnableEurekaServer // 声明这个应用是一个EurekaServer
public class EurekaDemoApplication {
    public static void main(String[] args) {
        SpringApplication.run(EurekaDemoApplication.class, args);
    }
}
编写application.yml配置文件。
server:
  port: 10086 #端口
spring:
  application:
    name: eureka-service #应用名称,会在Eureka中显示
eureka:
  client:
    register-with-eureka: false # 是否注册自己的信息到EurekaServer,默认是true
    fetch-registry: false # 是否拉取其他服务的信息,默认是true
    service-url: # EurekaServer的地址,现在是自己的地址,如果是集群,需要加上其他Server地址
      defaultZone: http://127.0.0.1:${server.port}/eureka
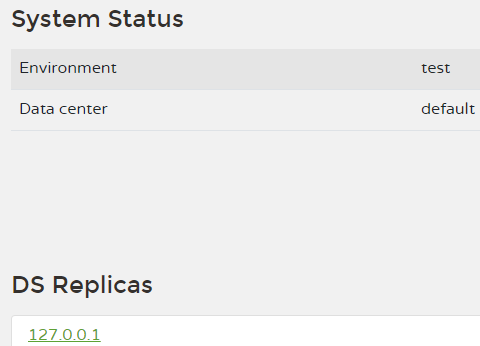
启动服务并访问地址:http://127.0.0.1:10086

2、将user-service注册到Eureka。
注册服务,就是在服务上添加Eureka客户端依赖,客户端代码会自动把服务注册到EurekaServer中。
2.1、先添加SpringCloud依赖:
<!-- SpringCloud的依赖 -->
<dependencyManagement>
    <dependencies>
        <dependency>
            <groupId>org.springframework.cloud</groupId>
            <artifactId>spring-cloud-dependencies</artifactId>
            <version>2021.0.4</version>
            <type>pom</type>
            <scope>import</scope>
        </dependency>
    </dependencies>
</dependencyManagement>
<!-- Spring的仓库地址 -->
<repositories>
    <repository>
        <id>spring-milestones</id>
        <name>Spring Milestones</name>
        <url>https://repo.spring.io/milestone</url>
        <snapshots>
            <enabled>false</enabled>
        </snapshots>
    </repository>
</repositories>
2.2、然后添加Eureka客户端依赖。
<!-- Eureka客户端 -->
<dependency>
    <groupId>org.springframework.cloud</groupId>
    <artifactId>spring-cloud-starter-netflix-eureka-client</artifactId>
</dependency>
2.3、在启动类上开启EurekaClient功能。
通过添加@EnableDiscoveryClient来开启EurekaClient功能。
@SpringBootApplication
@EnableDiscoveryClient
public class UserServiceApplication {
    public static void main(String[] args) {
        SpringApplication.run(UserServiceApplication.class, args);
    }
}
2.4、编写配置信息。
server:
  port: 8081
spring:
  application:
    name: user-service # 应用名,将来作为应该id使用
  datasource:
    url: jdbc:mysql://localhost:3306/springboot
    username: root
    password: 123456
    hikari:
      maximum-pool-size: 30
      minimum-idle: 10
mybatis:
  type-aliases-package: com.sfwu.pojo # 配置扫描包路径
eureka:
  client:
    service-url:  # EurekaServer地址
      defaultZone: http://127.0.0.1:10086/eureka
  instance:
    prefer-ip-address: true # 当调用getHostname获取实例的hostname时,返回ip而不是host名称
    ip-address: 127.0.0.1 # 指定自己的ip信息,不指定的话会自己寻找
2.5、访问 http://127.0.0.1:10086 user-service服务已经注册成功。

3、消费者从eureka获取服务。
3.1、同上先添加SpringCloud依赖。
3.2、然后添加Eureka客户端依赖。
3.3、在启动类添加@EnableDiscoveryClient注解,开启Eureka客户端。
@SpringBootApplication
@EnableDiscoveryClient
public class ConsumerDemoApplication {
    @Bean
    public RestTemplate restTemplate(){
        return new RestTemplate(new OkHttp3ClientHttpRequestFactory());
    }
    public static void main(String[] args) {
        SpringApplication.run(ConsumerDemoApplication.class, args);
    }
}
3.4、配置文件。
server:
  port: 8080
spring:
  application:
    name: consumer # 应用名称
eureka:
  client:
    service-url: # EurekaServer地址
      defaultZone: http://127.0.0.1:10086/eureka
  instance:
    prefer-ip-address: true # 当其它服务获取地址时提供ip而不是hostname
    ip-address: 127.0.0.1 # 指定自己的ip信息,不指定的话会自己寻找
3.5、修改UserService的代码,用DiscoveryClient类的方法,根据服务名称,获取服务实例。
思路:首先使用DiscoveryClient类调用getInstances方法,传入serviceId的值(user-service)获取服务实例信息。通过实例信息获取到实例的ip地址以及端口信息,拼接url。最后通过RestTemplate类远程查询user-service中的接口。
@Service
public class UserService {
    @Autowired
    private RestTemplate restTemplate;

    // Eureka客户端,可以获取到服务实例信息。
    @Autowired
    private DiscoveryClient discoveryClient;// Eureka客户端,可以获取到服务实例信息

    public List<User> queryListByIds(List<Long> ids) {
        List<User> users = new ArrayList<>();
        // 根据服务实例名,获取服务实例
        List<ServiceInstance> instances = discoveryClient.getInstances("user-service");
        // 因为只有一个UserService,因此我们直接get(0)获取
        ServiceInstance instanceInfo = instances.get(0);
        // 获取id和端口信息,拼接url
        String baseUrl = "http://"+instanceInfo.getHost() + ":" + instanceInfo.getPort() + "/user/";
        for (Long id : ids) {
            // 多次查询
            users.add(this.restTemplate.getForObject(baseUrl + id, User.class));
            // 每次间隔500毫秒
            try {
                Thread.sleep(500);
            } catch (InterruptedException e) {
                e.printStackTrace();
            }
        }
        return users;
    }
}
3.6、访问 http://localhost:8080/consumer?ids=1,2


