
让你 React 组件水平暴增的 5 个技巧
让你 React 组件水平暴增的 5 个技巧


最近看了一些 Ant Design 的组件源码,学到一些很实用的技巧,这篇文章来分享一下。
首先,我们用 create-react-app 创建个 React 项目(选择 typescript 模版):
npx create-react-app --template=typescript component-test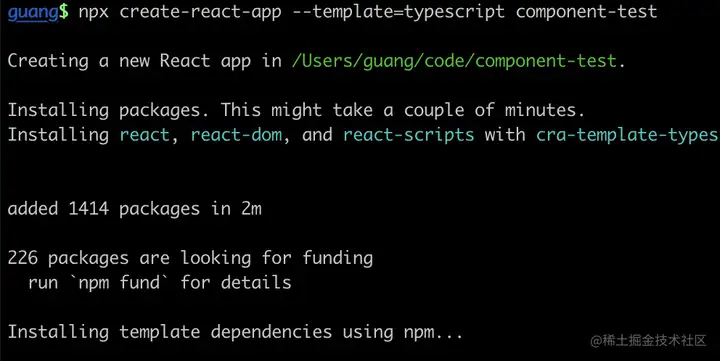
进入项目目录,把开发服务跑起来:
npm run start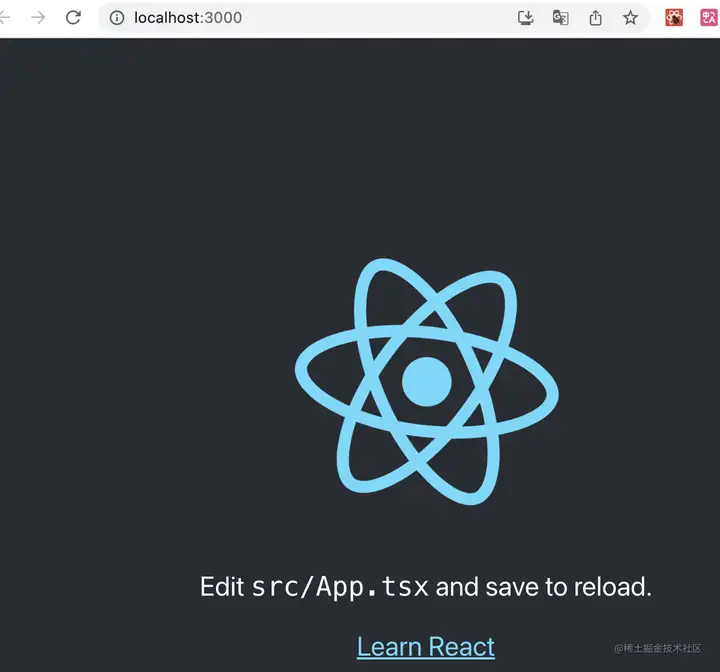
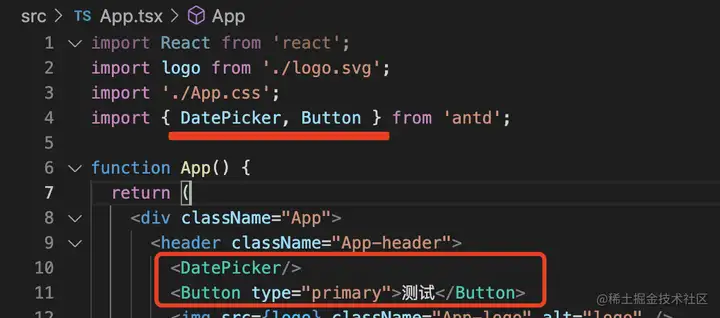
然后引入 antd:
npm install --save antd在 App.tsx 里引入几个 antd 组件:
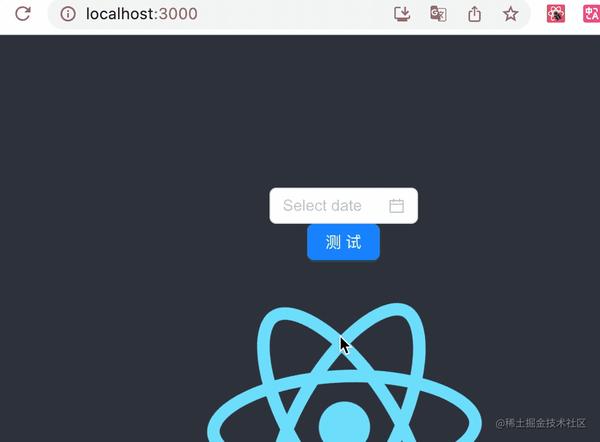
页面上可以看到这俩组件都成功渲染了:
然后我们来看一下 Ant Design 组件里的一些技巧:
透传 className、style
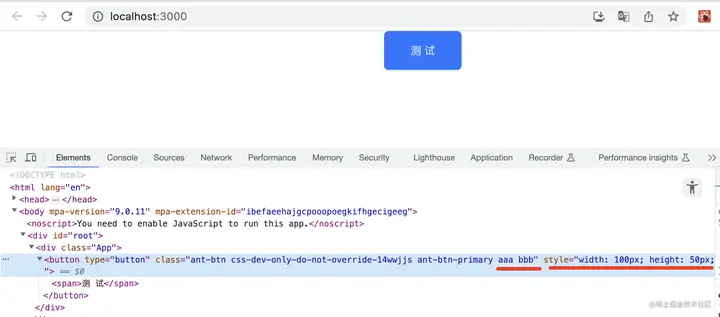
我们可以给组件设置 className 和 style:
import './App.css';
import { Button } from 'antd';

function App() {
  return (
    <div className="App">
        <Button className="aaa bbb" style={{
          width: '100px',
          height: '50px'
        }} type="primary">测试</Button>
    </div>
  );
}

export default App;
在页面里打开 DevTools 可以看到 className 和 style 都被设置到了 button 上。
这种功能的实现就是透传 className 和 style 的 props。
基本 antd 所有的组件都会做这个。
比如 VisualList 组件的源码:
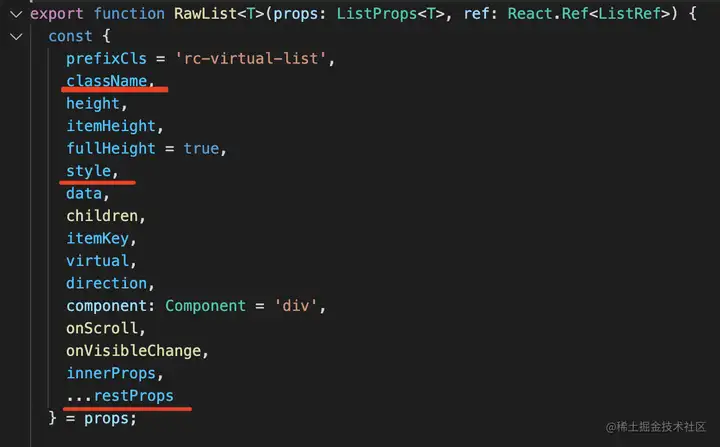
它取了传入的 className、style 的 props,还有剩余的所有 props。
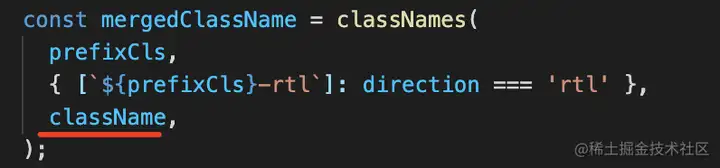
对 className 做了一些处理,添加了两个 className:
对 style 也做了扩展,添加了个 position: relative 的样式。
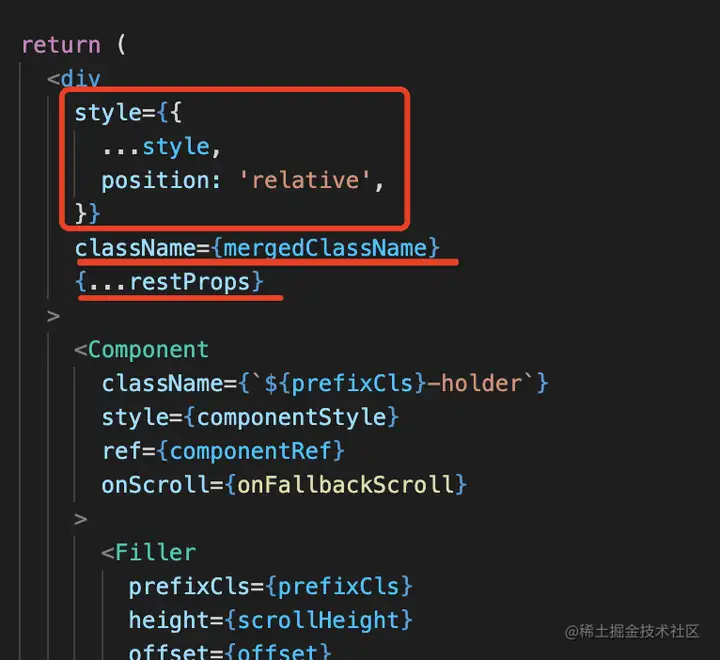
然后把 style、className,额外的 props 都设置给最外层的 div。
这样,使用这个组件的时候,就可以自己定义一些样式,设置一些 props。
其中,classnames 是用来动态产生 className 的一个包,用起来很简单。
比如这样调用:
classNames('aaa', { bbb: true, ccc: false }, false, { eee: true });
那么最终的 className 就是 'aaa bbb eee'。
这样,组件用起来体验就和 html 标签差不多,可以自己控制一些样式。
这样写 props 的类型的时候,也是直接用了 html 标签的类型。
比如这个 List 的参数就继承了 React.HTMLArrtibutes<any>,也就是任意 html 标签的属性:
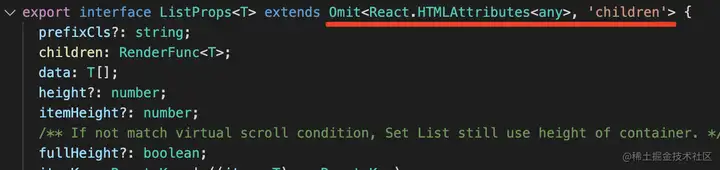
当然,children 属性是不可以设置的。因为 React 用 children 参数来传递子组件。
比如 form 组件:
它的参数是继承了 React.FormHTMLAttributes<HTMLFormElement>:
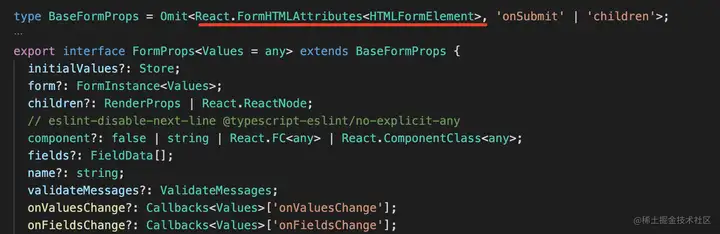
去掉了 children 和 onSubmit 这俩属性,因为这俩是 From 组件的参数。
也就是说:antd 的组件基本都支持传入 className、style 或者任何 html 标签的 props,会透传 props 到组件内的容器标签,所以用起来体验和原生标签很类似。但这也要求 props 实现 React.FormHTMLAttributes 的 type。
通过 forwardRef 暴露一些方法
外界控制组件的方式就是通过传 props,但有时候想调用组件的一些方法呢?
这时候就需要 ref 了。
我们先来试一下 ref:
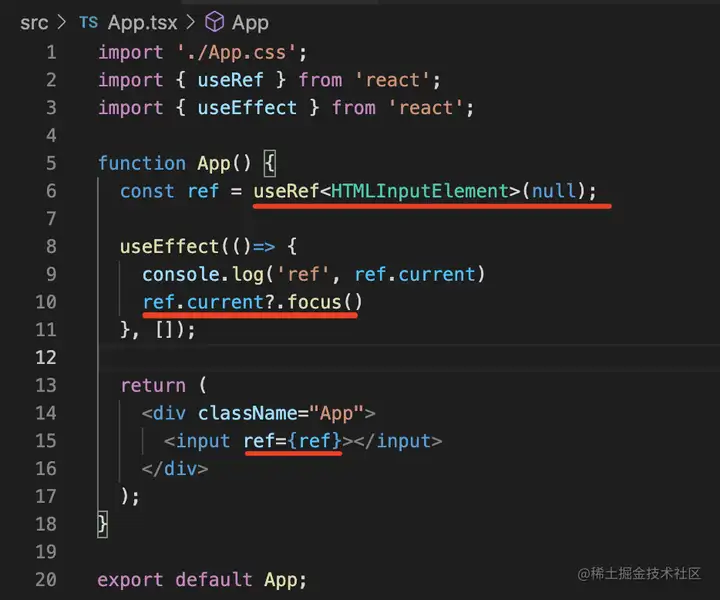
通过 useRef 创建个 ref 对象,然后把 input 标签设置到 ref。
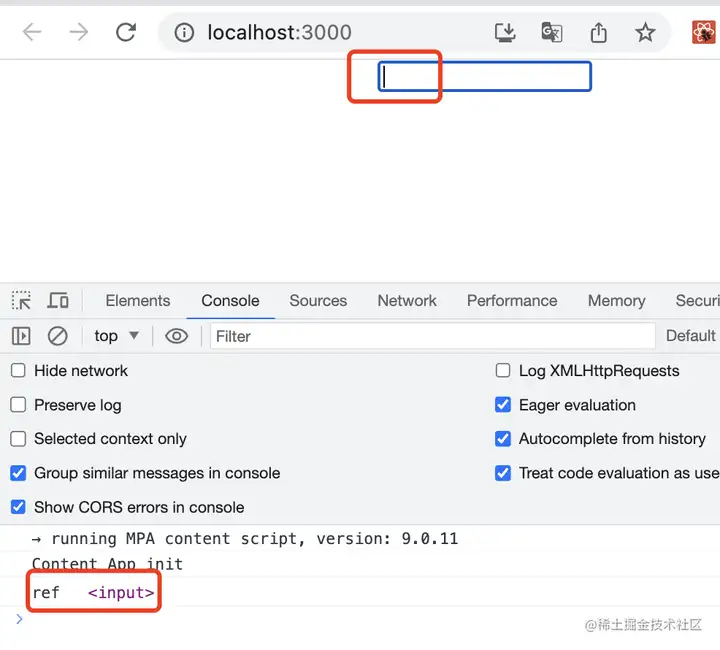
在 useEffect 里就可以调用 input 的方法了:
但这是原生标签,如果是组件呢?
这时候就需要 forwardRef 了,也就是把组件内的 ref 转发一下。
比如这样:
import './App.css';
import { useRef } from 'react';
import { useEffect } from 'react';
import React from 'react';

const Guang: React.ForwardRefRenderFunction<HTMLInputElement> = (props, ref) => {
  return <div>
    <input ref={ref}></input>
  </div>
}

const WrapedGuang = React.forwardRef(Guang);

function App() {
  const ref = useRef<HTMLInputElement>(null);

  useEffect(()=> {
    console.log('ref', ref.current)
    ref.current?.focus()
  }, []);

  return (
    <div className="App">
      <WrapedGuang ref={ref}/>
    </div>
  );
}

export default App;
其实 forwardRef 这个 api 做的事情也很容易懂。
就是把 ref 转发到组件内部来设置:
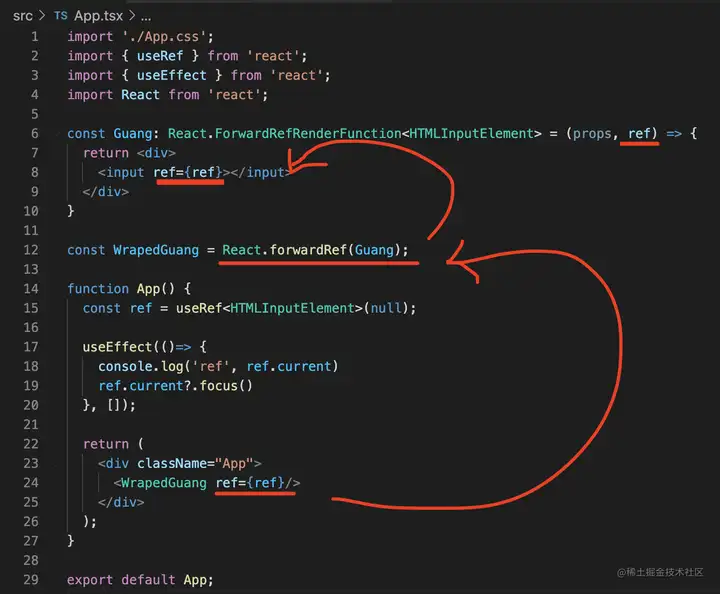
这样就把组件内的 input 通过 ref 的方式传递到了组件外。
效果和之前一样:

不过被 forwardRef 包裹的组件的类型就要用 React.forwardRefRenderFunction 了:
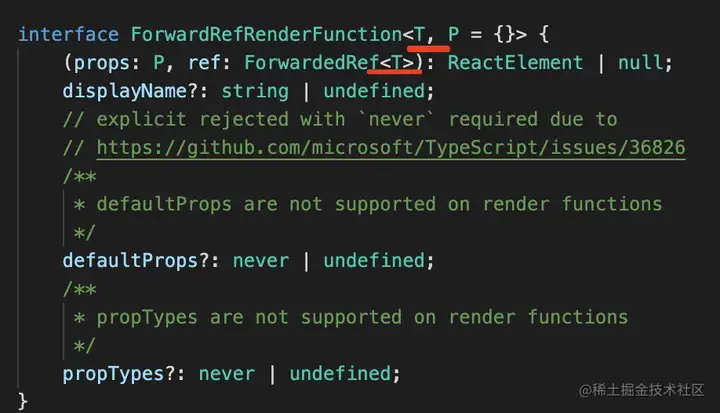
第一个类型参数是 ref 的 content 的类型。
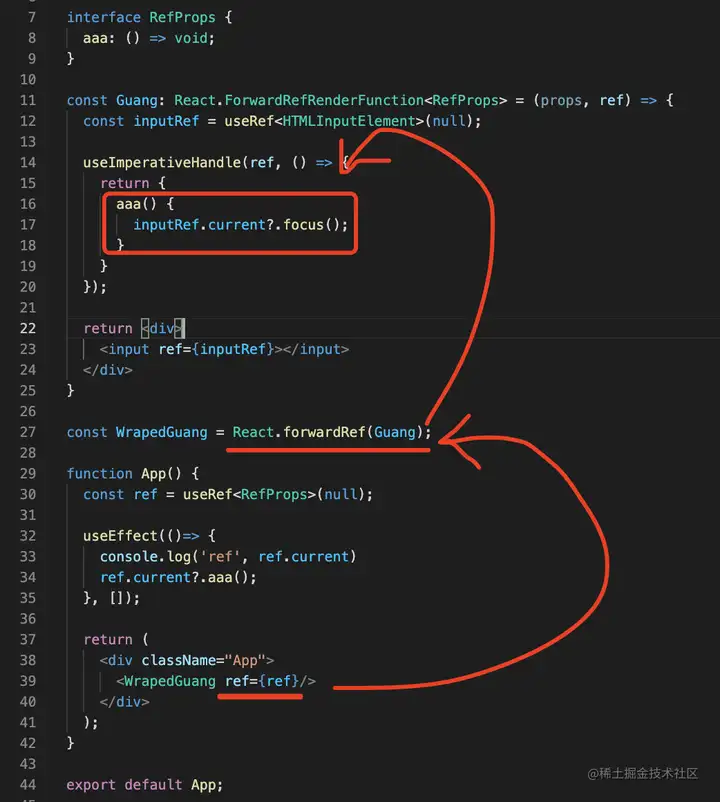
但有的时候,我不是想把原生标签暴露出去,而是暴露一些自定义方法。
这时候就需要 useImperativeHandle 的 hook 了。
这样写:
import './App.css';
import { useRef } from 'react';
import { useEffect } from 'react';
import React from 'react';
import { useImperativeHandle } from 'react';

interface RefProps {
  aaa: () => void;
}

const Guang: React.ForwardRefRenderFunction<RefProps> = (props, ref) => {
  const inputRef = useRef<HTMLInputElement>(null);

  useImperativeHandle(ref, () => {
    return {
      aaa() {
        inputRef.current?.focus();
      }
    }
  });

  return <div>
    <input ref={inputRef}></input>
  </div>
}

const WrapedGuang = React.forwardRef(Guang);

function App() {
  const ref = useRef<RefProps>(null);

  useEffect(()=> {
    console.log('ref', ref.current)
    ref.current?.aaa();
  }, []);

  return (
    <div className="App">
      <WrapedGuang ref={ref}/>
    </div>
  );
}

export default App;
也就是用 useImperativeHanlde 自定义了 ref 对象:
小结一下:
React 可以用 ref 保存原生标签,通过 ref.current 调用这个对象的属性、方法。跨组件传递 ref 需要用 forwardRef 方法,如果你要进一步自定义 ref,那就要用 useImperativeHandle 的 hook。
然后看看 antd 组件是怎么用 ref 的。
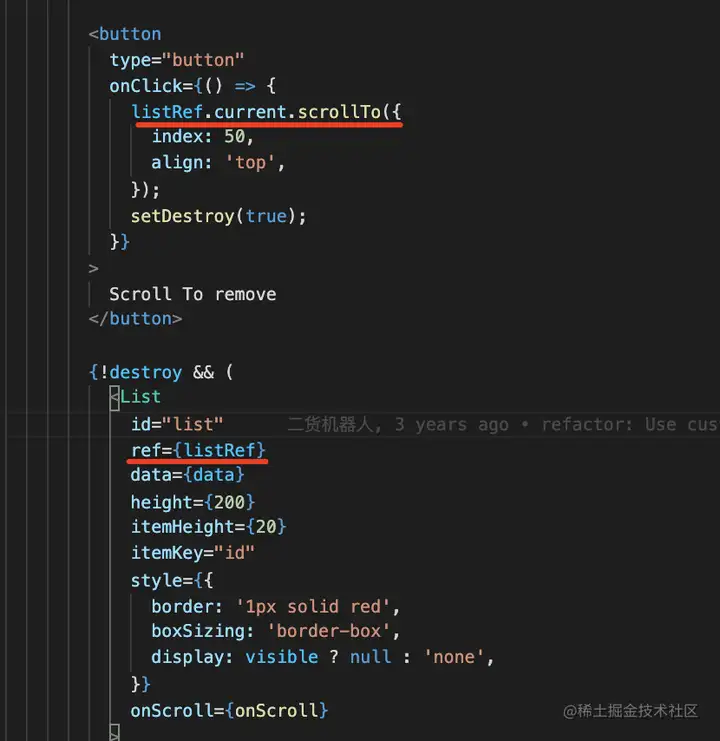
就如说 VisualList 组件:

它也是包了一层 React.forwardRef,内部用 useImperativeHandle 自定义了 ref:
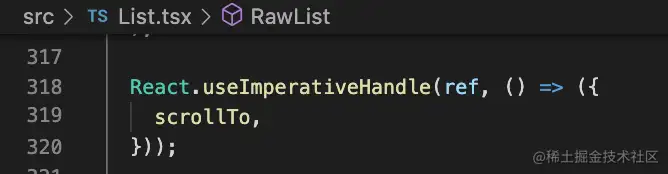
这样外部就可以调用这个 ref 的方法了:
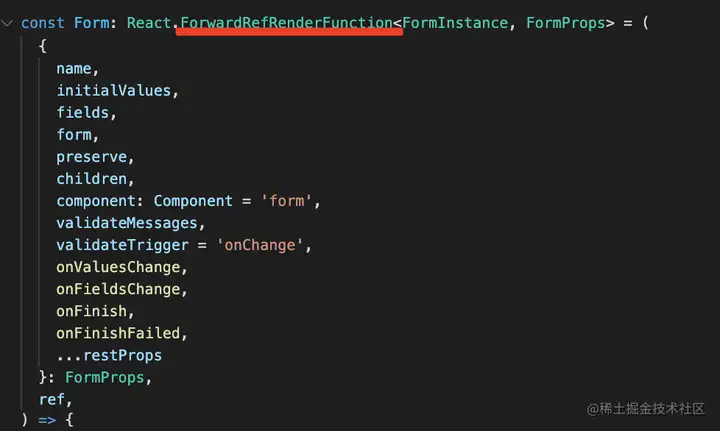
再比如 Form 组件:
它也是被 forwarRef 包裹的函数组件:
内部用 useImperativeHandle 返回了自定义的对象:
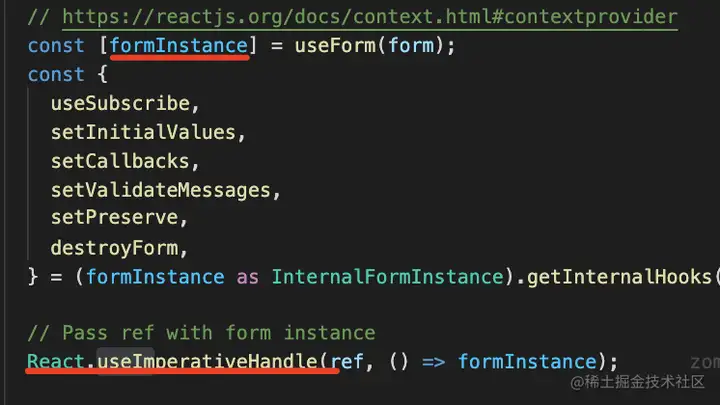
所以你才可以这样调用 form 组件的方法:
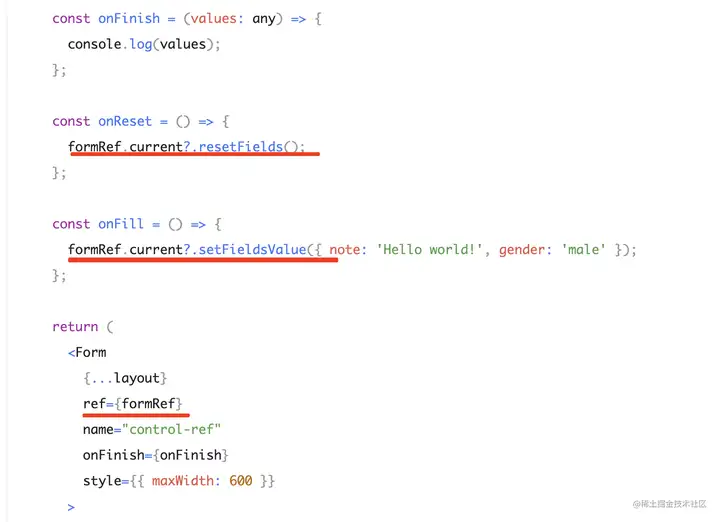
这就是说:antd 的组件都会用 forwardRef 包裹一层,用来转发 ref,或者是转发内部的 html 标签的引用,或者是用 useImperativeHandle 自定义 ref 对象,来暴露一些方法。
useCallback、useMemo
useMemo 和 useCallback 是性能优化相关的 hook。
很多人不知道啥时候用,其实看下 antd 怎么用的就知道了:
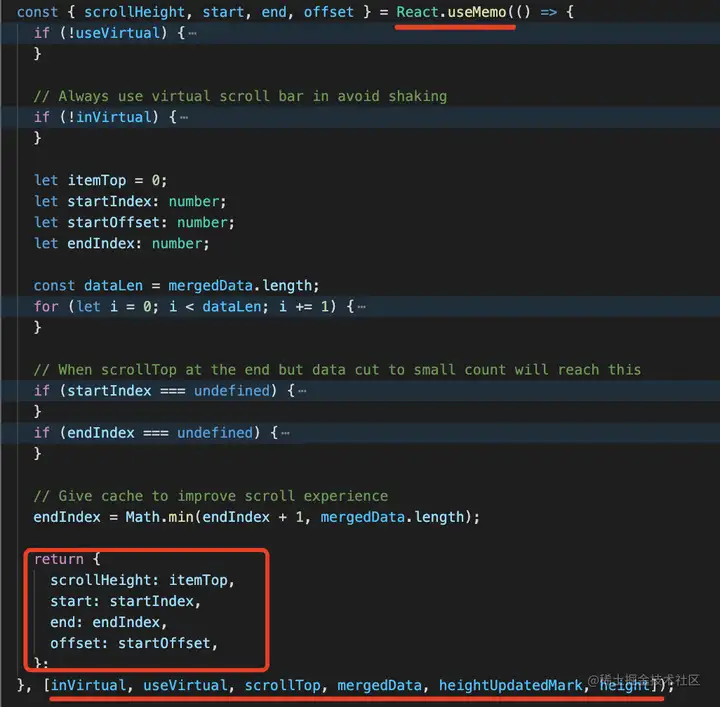
比如 VisualList 组件里计算 start、end、scrollHeight 这些值需要大量的计算。
这些计算需要每次 render 都跑一遍么?
不需要,只有在某些值变化的时候才需要重新计算。
这时候用 React.useMemo 包裹就可以减少计算量,它只会在 deps 数组变化的时候执行第一个参数的函数。
useMemo 是 deps 变化之后重新执行函数创建值,而 useCallback 并不会执行函数,它只是在 deps 变化的时候返回第一个参数的函数:

这样有什么用呢?
react 重新渲染的依据是 props 是否有变化,如果每次都创建新的函数,那是不是每次都会重新渲染?
所以用 useCallback 包裹的函数参数,就可以在 deps 没变的时候,始终返回同一个函数,这样避免了没必要的渲染。
当然,useMemo 也有这个作用:
比如说 Form 组件源码里的这个 useMemo:

你说它是为了减少计算量么?
并不是,它没有做任何计算,只是把参数原封不动返回了。
这也同样是为了避免 props 变化。
也就是说:antd 里很多地方都用了 useMemo 和 useCallback 来进行渲染性能优化。useMemo 只有在 deps 数组变化的时候才会执行第一个函数,返回新的值,可以用来减少不必要的计算,也可以保证 props 不变来避免不要的渲染。useCallback 是只有 deps 数组变化的时候才返回第一个函数的值,可以保证 props 不变来用来避免不必要的渲染
用 Context 来跨组件传递值
antd 里很多配置的传递都是通过 Context。
比如 disabled 的设置:
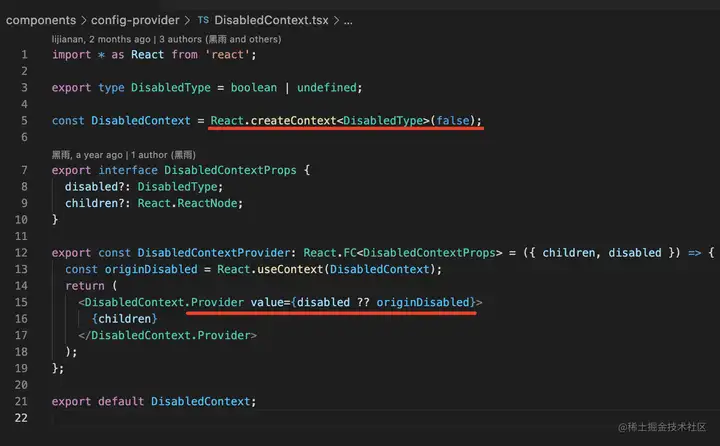
通过 React.createContext 创建 context 对象,通过 Provider 修改 context 的值。
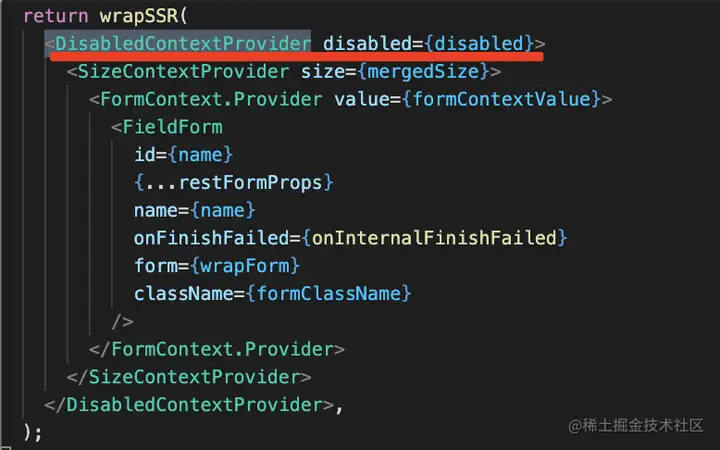
在最外层包裹这个 Provider 组件来修改 context 值:
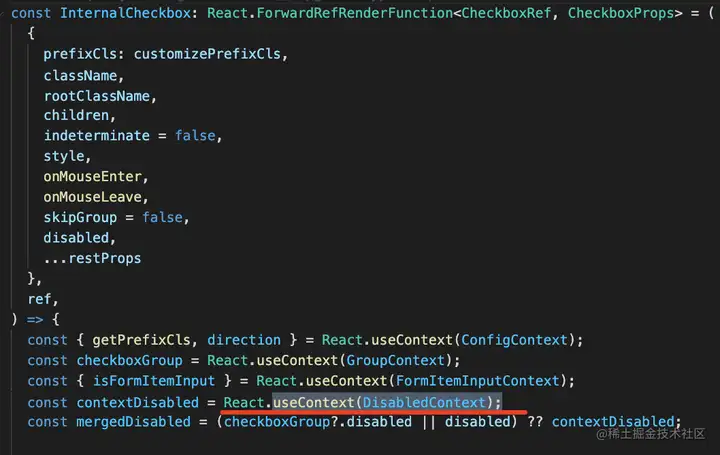
然后你可以在任意的组件把 context 值取出来用:
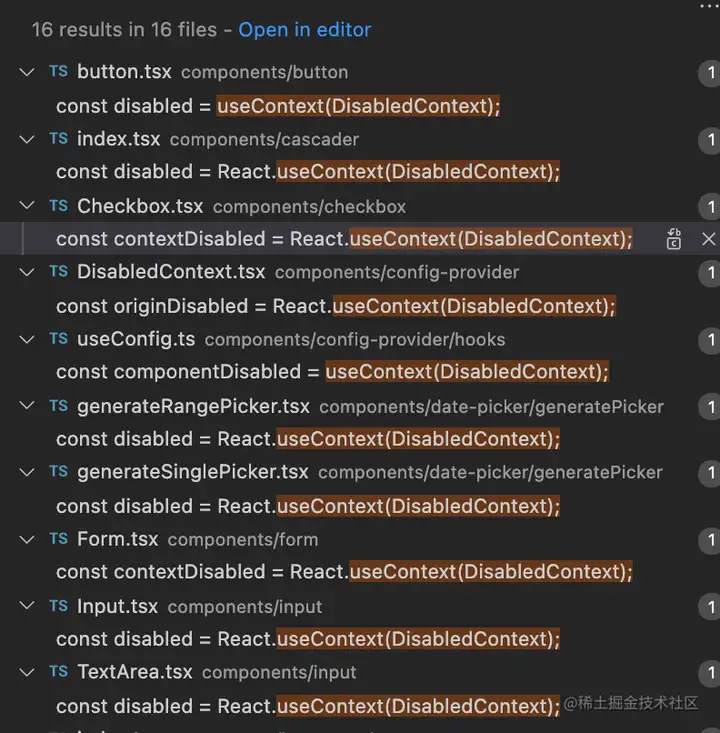
像什么主题、大小等配置,都是通过 Context 传递的。
除了用来传递配置外,很多组件也依赖 Context 来传递一些值,比如 Form:
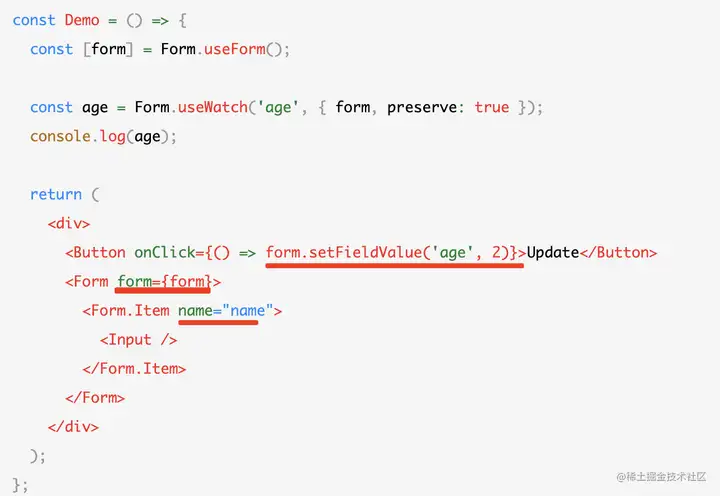
在 Form 组件里设置 form 对象,然后 setFieldValue 设置字段值。
为什么 Form.Item 里加个 name 就可以取出来了呢?
我并没有传递 form 参数过去呀?
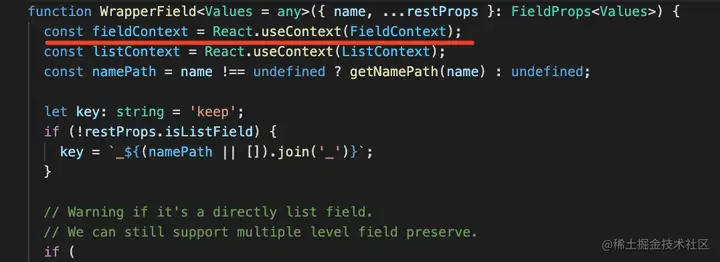
很明显,这里也是用 Context 来传递的:
antd 会创建这样一个 context 对象:
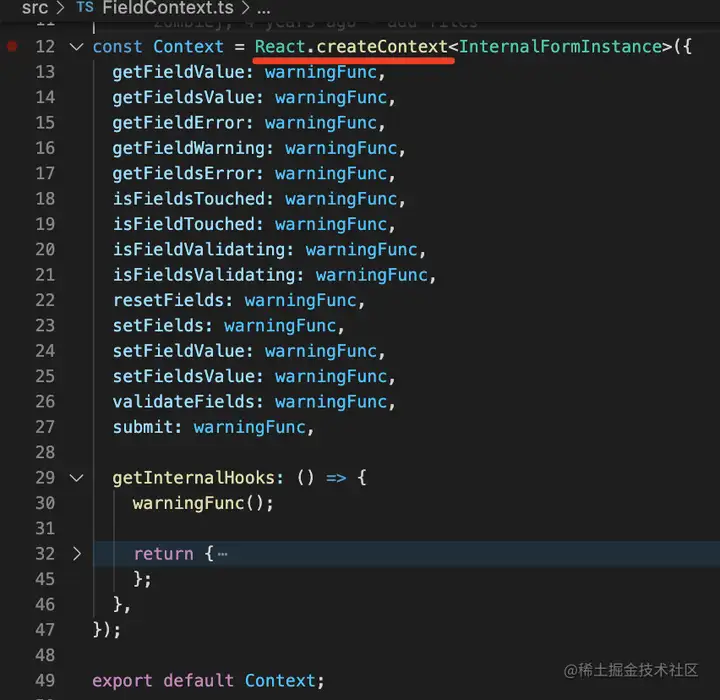
然后在外层用 Provider 设置 context 值:
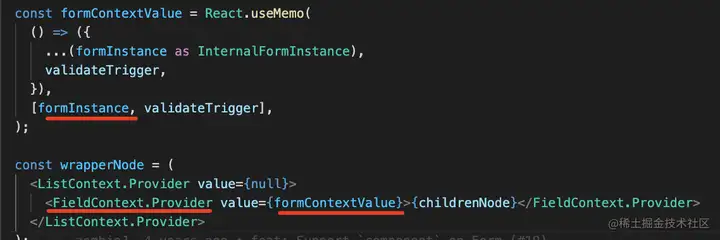
也就是我们这里传的 form:

那 Form.Item 里自然可以拿到 context 的值,从而取到具体字段信息了:

也就是说:antd 里大量用到了 Context,除了用来传递 config、theme、size 等全局配置信息外,还用来跨组件传递数据,比如 Form、Form.Item 组件,就是通过 Provider、useContext 来存取值的。
React.Children、React.cloneElement
React 组件可以设置内容,在组件内通过 props.children 来取。
import React from 'react';
interface GuangProps {
children: React.ReactNode[];
}
const Guang: React.FunctionComponent<GuangProps> = (props) => {
console.log(props);
return <div className="guang">
{props.children}
</div>
}
function App() {
return (
<div className="App">
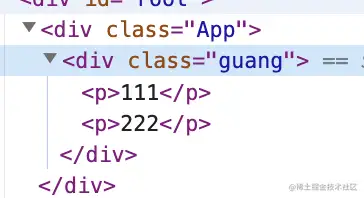
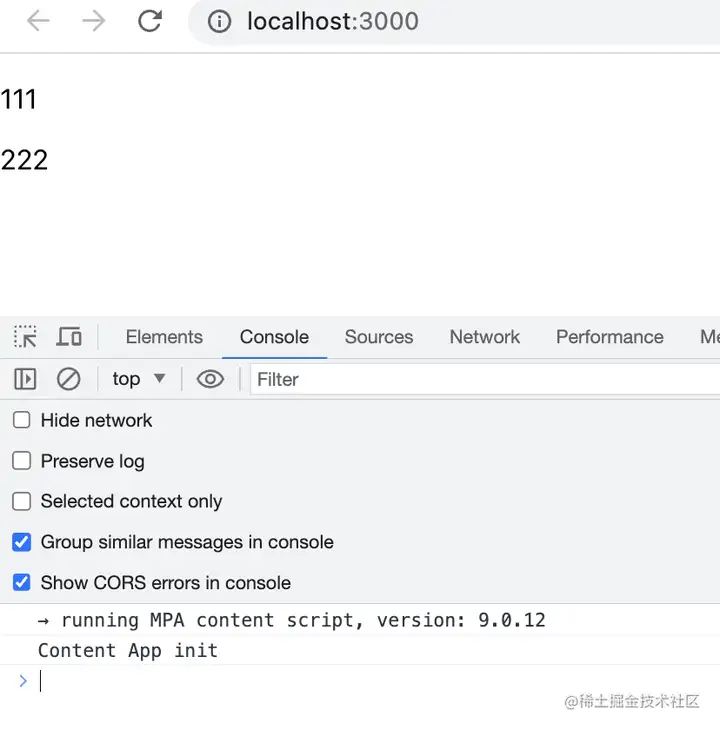
<Guang>
<p>111</p>
<p>222</p>
</Guang>
</div>
);
}
export default App;
比如我在组件里把 props.children 取出来,放到 className 为 guang 的 div 下:

如果想对这些 children 做一些操作,就需要用 React.Children 的 api 了,比如 React.Children.toArray、React.Children.forEach、React.Children.map
有同学说,props.children 本来就是数组啊,直接操作不就行了?
不行的,直接操作有一些问题,比如我 sort 一下:

会报错:
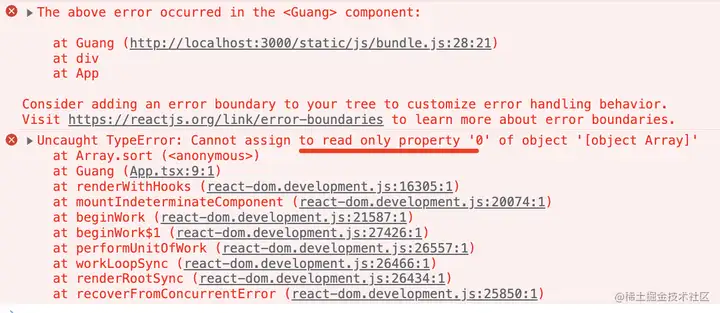
所以 props.children 不能直接当做数组用,需要 toArray 一下:
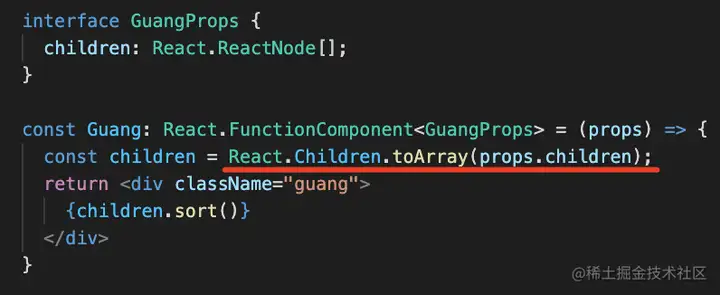
这样就没有报错了:
同理,React.Children 的 forEach 和 map 也很容易理解。
而且还可以用 React.cloneElement 复制下传入的 ReactElement。
比如这样:
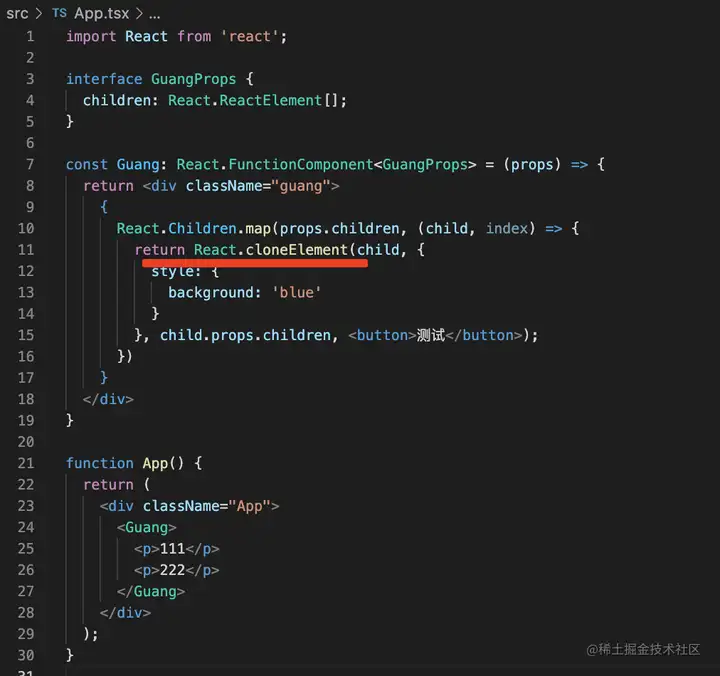
用 React.Children.map 遍历 children,对每个 child 复制一份出来,修改下 props ,并且添加一个 children。
效果是这样的:
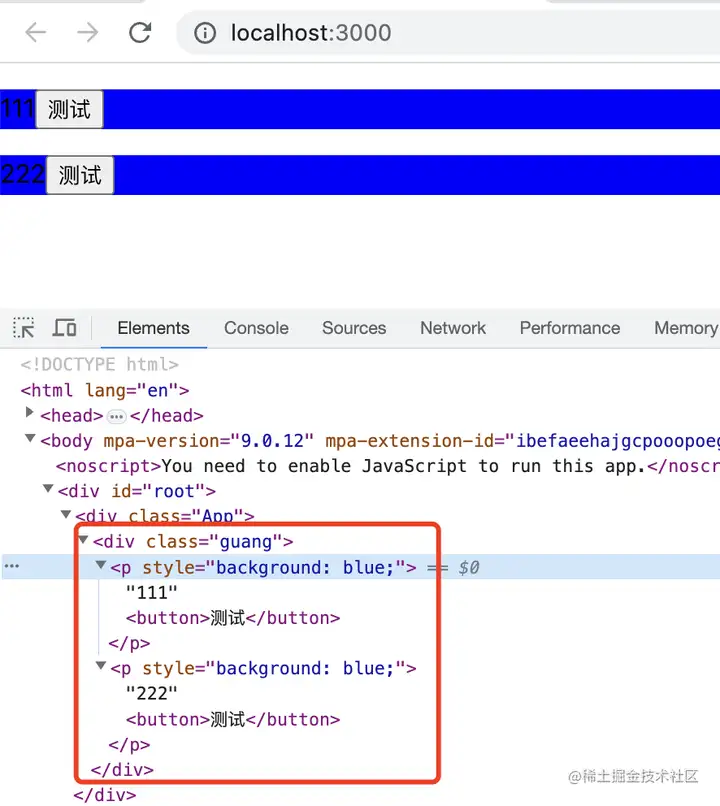
React.cloneElement 的第二个参数是修改的 props,后面的参数是 children:

结合 React.Children 的 api 和 React.cloneElement 的 api 就可以任意修改 children 渲染的结果。
在 antd 里也有大量运用:
比如 button 组件里,通过 map + cloneElement 来处理中文字符的问题:
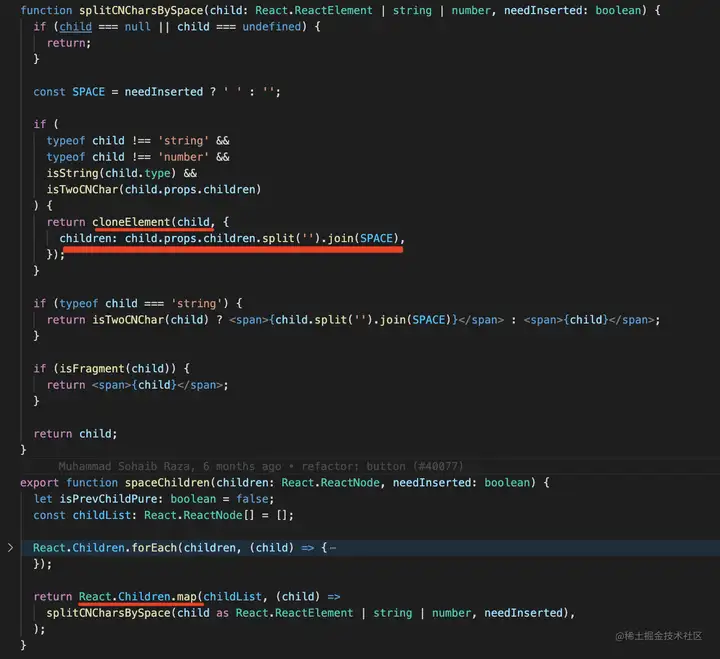
或者用 map + cloneElement 给 child 的 children 外包一层组件:
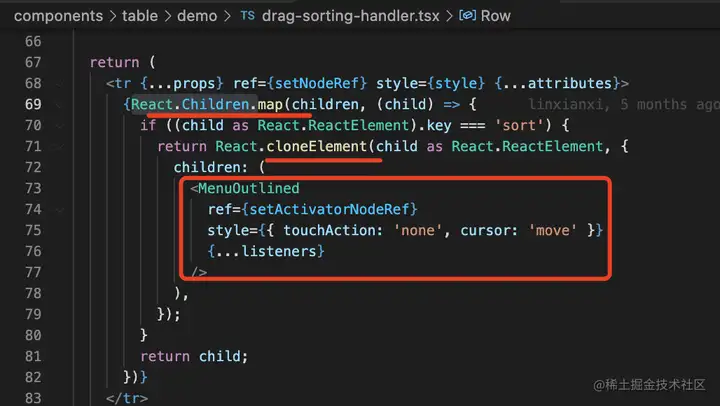
更巧妙的是 VirtualList 里的应用:
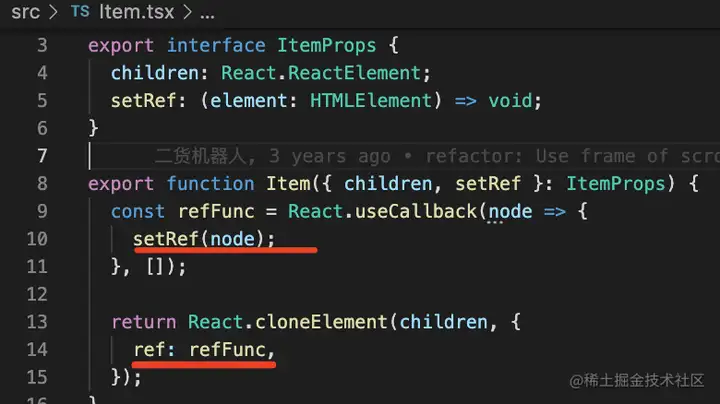
你不需要给传入的 children 设置 ref,antd 会通过 map + cloneElement 给你加上 ref 的 props,然后在回调函数里把这个 ref 保存下来。
这样就拿到了你传入的每一个 children 的 ref。
比如根据 key 来保存每个 Item 的 ref:

也就是说:antd 组件里大量用到了 React.Children + React.cloneElement 的 api 对 props.children 做一些修改,比如包一层组件、添加 ref 等参数、添加一些 children 等。
总结
这篇文章总结了 ant design 组件源码里的 5 个技巧:
- 透传 className、style,还有其他 html 标签的 props,让你的组件用起来体验和原生 html 标签一样
- 通过 forwardRef + useImperativeHandle 暴露一些方法,每个组件都可以通过 ref 暴露一些 api 出来
- useCallback、useMemo 缓存计算结果,通过让 props 不变来减少没必要的渲染
- 用 Context 的 Provider + useContext 来跨组件传递值,可以用来传递全局配置,也可以用来做业务组件的跨层传递数据
- 通过 React.Children + React.cloneElement 的 api 对 props.children 做各种修改
这些都是在 antd 里随处可见的技巧,可以说任何一个组件里都有这些东西。
这些写 React 组件的技巧你都用过么? 没用过的话不妨从今天开始用起来吧。

