Webpack 打包 - 3.webpack Html 资源打包
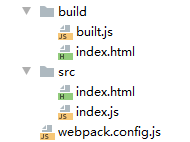
1.文件结构
2.安装 webpack、webpack-cli
$ npm init
$ npm i webpack@4.41.6  webpack-cli@3.3.11  -g   //(全局)
$ npm i webpack@4.41.6  webpack-cli@3.3.11  -D   //(开发环境)
2.1 安装 html-webpack-plugin
$ npm i html-webpack-plugin@3.2.0 -D
3.新建 src 文件夹
src 文件夹下新建 入口文件 index.js 文件
src 文件夹下新建 index.html 文件
3.1 新建 webpack.config.js 文件
index.js
function add(x,y) {
    return x+y
}

console.log(add(2,3));
index.html
<!DOCTYPE html>
<html lang="en">
<head>
    <meta charset="UTF-8">
    <title>Title</title>
</head>
<body>

</body>
</html>
webpack.config.js
/*
  loader: 1. 下载   2. 使用(配置loader)
  plugins: 1. 下载  2. 引入  3. 使用
  插件需要引入后再使用
*/
const {resolve} = require('path')
// HtmlWebpackPlugins 是一个构造函数
const HtmlWebpackPlugins = require('html-webpack-plugin')
module.exports = {
    entry: './src/index.js',
    output: {
        filename: "built.js",
        path: resolve(__dirname, 'build')
    },
    module: {
        rules: []
    },
    plugins: [
        //plugins 的配置
        // html-webpack-plugin
        //功能: 默认创建一个空的HTML,自动引入打包输出的所有资源(JS/CSS)
        new HtmlWebpackPlugins({
            // 复制 './src/index.html' 文件,并自动引入打包输出的所有资源(JS/CSS)
            template: './src/index.html'
        })
    ],
    mode: 'development'
}
这里主要是 使用 HtmlWebpackPlugins 处理 html 文件

4.打包
$ webpack
build 文件夹下回生成两个文件

预览

end~

 浙公网安备 33010602011771号