
[個人紀錄] RabbitMQ安裝
參考資料
https://blog.csdn.net/tjcyjd/article/details/77150893
https://blog.csdn.net/u014308482/article/details/53994401
https://blog.yowko.com/2017/05/install-rabbitmq-on-windows7-windows10-windows2016.html
https://www.jianshu.com/u/9f9214a11adb
http://jmesnil.net/stomp-websocket/doc/
我這邊是用 rabbitmq server 3.6.6 + erlan win64 18.0的組合
首先安裝Erlang https://www.erlang.org/
再安裝rabbit mq https://www.rabbitmq.com/
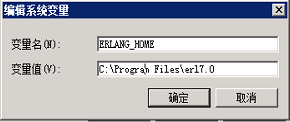
裝好後應該已經幫你建好一個叫ERLANG_HOME的環境變數
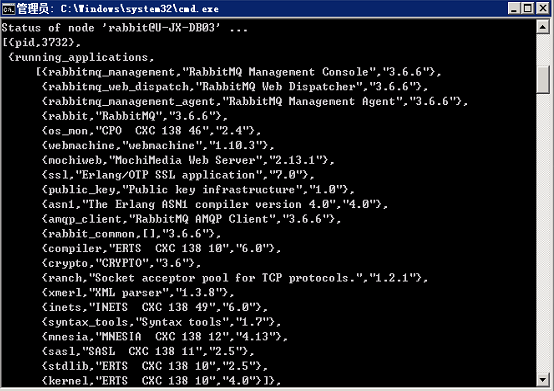
輸入 rabbitmqctl status 查看 mq狀態
如果出現
******************************
ERLANG_HOME not set correctly.
******************************
Please either set ERLANG_HOME to point to your Erlang installation or place the
RabbitMQ server distribution in the Erlang lib folder.
可能是環境變數的問題
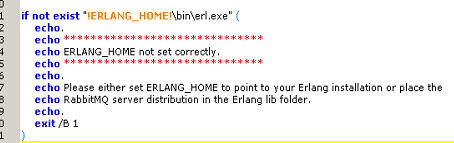
可以echo "!ERLANG_HOME! 來看 (可是應該不會有這個問題才是)
修改Path 環境變數
加上 ;%ERLANG_HOME%\bin;%RABBITMQ_SERVER%\sbin
rabbitmqctl status 就可以看到相關信息
如果出現nodedown
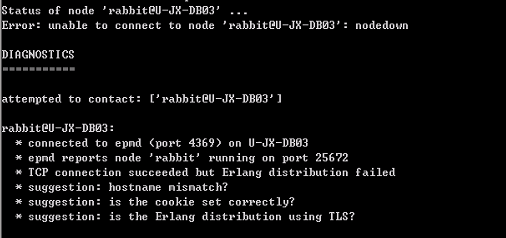
依上面的文章
根据提示,应该是Erlang的cookie出现问题,解决办法如下:
Erlang会生成两个cookie文件:C:\Windows\.erlang.cookie 及 C:\用户\你的用户名\.erlang.cookie。检查两个文件内容是否一致,不一致用其中一个替换另一个即可。
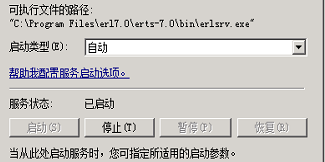
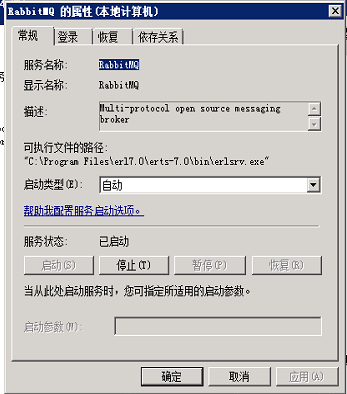
確認rabbitmq 服務自動啟動
安裝rabbitmq管理插件
rabbitmq-plugins enable rabbitmq_management
安裝好後可以用guest/guest登錄
因為我這邊是裝一台新的 可以匯出原有的設定再匯入
因為是用stomp over websocket,要安裝 stomp plugin
http://www.rabbitmq.com/web-stomp.html
https://github.com/sockjs/sockjs-client
rabbitmq-plugins enable rabbitmq_web_stomp
預設STOMP plugin會監聴15674 port ,然後用guest/guest登入,可是
guest/guest只能在localhost下進行,故建議加個新帳號
完成安裝後重新啟動服務
登入後台


 浙公网安备 33010602011771号