Installing Hyperledger Fabric v1.1 on Ubuntu 16.04 — Part I

There is an entire library of Blockchain APIs which you can select according to the needs that suffice your application. Some libraries are open-sourced and some are private. For examples, IBM’s Hyperledger Fabric Project, Ethereum, OpenChain, MultiChain are few of the open sourced models which are popular in the industry today.
This tutorial aims to help you get started and setup your development environment for a blockchain application using the IBM-Hyperledger Fabric API.
In this tutorial, we will be setting Hyperledger Fabric v1.1 on Ubuntu 16.04 on a localhost server. This tutorial can be applied to Ubuntu 14.04 too, but would involve certain changes to the commands due to the difference in the OS versions.
This tutorial is broken into 2 parts so that it is easier for you to understand and follow through the steps without making the article too long. The 1st part focuses on installing the prerequisites for the API and the 2nd part will focus on installing and running of Hyperledger API itself.
Prerequisites
- Go Language v1.10.x
- Docker CE (Community Edition)
Go Language v1.10.x
Go Language has been developed by Google and the IBM Hyperledger Fabric API uses Go for compiling and building. Go integrates the properties of C++ and Python into one language. It has fast run-time because it is a compiled language, similar to C++, as compared to an interpreted language like Python. It is also written in a similar way to Python so it benefits from having a simpler syntax when compared to C++. So, we get the faster speed and easiness of syntax under one hood, Go.
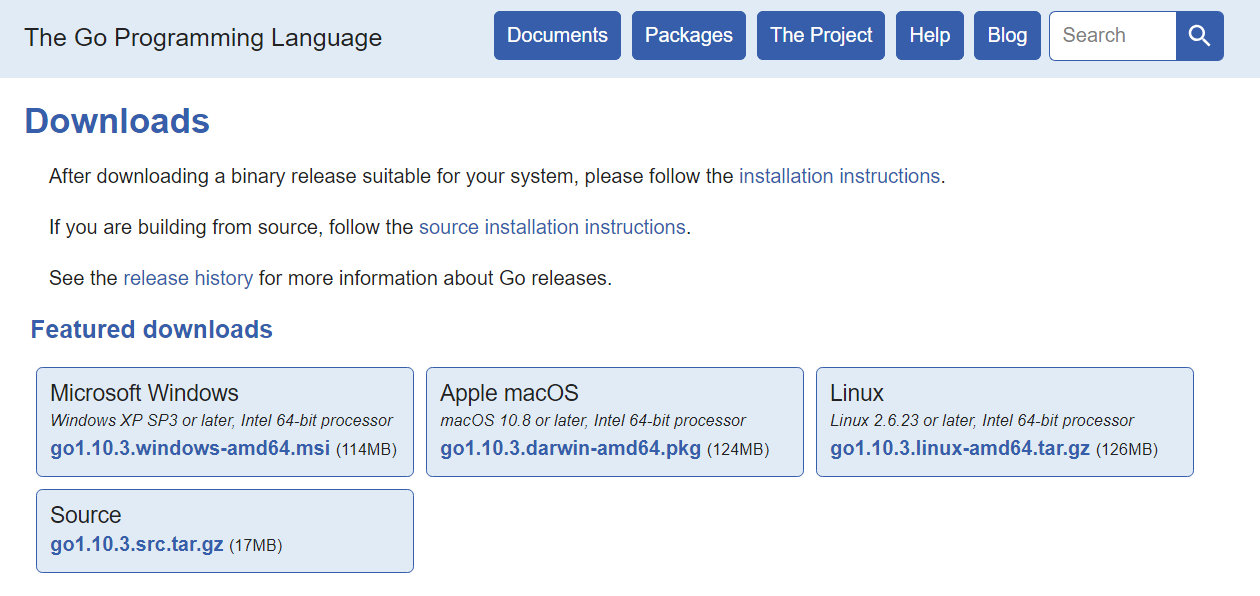
To install the Go Language, we need to download the package from the official Go Download Page. To follow along with this tutorial, select the option in the Linux section, as described in the screenshot below (xx.tar.gz package).

Once the package is downloaded, we need to extract it and move it to /usr/local/ directory, so that our application can access it and more importantly, the Go files are situated at a safe place, where you don’t accidentally delete them.
To extract the Go package, use the command:
tar -xvzf go1.10.3.linux-amd64.tar.gz
Upon successful extraction of the archive, you shall see a new directory has been created with the name: “go”, in the same directory as your downloaded archive. Now, we need to move it to another location, or “/usr/local/”. For this to work, you need to be a `sudo` user of the machine, or else it would throw an error of `Permission Denied`.
The command to transfer the go files into /usr/local/ directory is:
sudo mv go /usr/local/
When you see the directory (`/usr/local/`), you should now see that there is a new folder named “go”, in your directory. This shows that the go files have been correctly placed in the desired location. Here is, a screen shot for you to verify and check whether you have something similar to this or not.

Now that we have the Go files in the correct place, we want to configure the terminal to locate the files when we want to execute any Go command. We need to include it into our environment variables. For this, we need to edit the `~/.bashrc` file of the system, which keeps track of the environment variables of your system. To edit that file, we use the command:
sudo nano ~/.bashrc
Include the following lines at the end of the file:
#GO VARIABLES
export GOROOT=/usr/local/go
export PATH=$PATH:$GOROOT/bin
#END GO VARIABLES
The `PATH` variable is the environment Path variable. The `GOROOT` variable defines where are your Go files situated in the system.
To reload the environment variables, we use the following command:
source ~/.bashrc
This command gives no output, but just simply reloads all the environment variable in background. Now, we can check the installation of Go in our terminal by typing:
go
If the installation was successful, you should see the following output.

If you see any other output except this, maybe you might have done some mistake. Please go through the steps again above.
Now we have installed the Go language on the host machine and we are halfway through setup of prerequisites for the Hyperledger API, Congrats!.
Docker Engine
Docker is the container where you will be running your instances which makes sure that the blockchain application you run is available. Consider docker as a Virtual Machine Box, which runs images which have specific functionalities, just like Windows and Ubuntu, however each Docker image is smaller in size as compared to an Operating System. Each docker images will run a service associated with the Hyperledger network in your localhost. We shall cover two such services absolutely required by the Blockchain Network to run your application, in the next part of the tutorial. We will see how to install docker in this part.
We need to install docker on your system to be able to understand the beauty that lies within. So, let’s get started!
To install docker through CLI or Terminal, we will need to install two packages: docker-ce and docker-compose. Docker-ce is like the base package which makes all the necessary files available for the docker container to run properly. Docker-compose configures your docker images according to the specific configuration you provide, which will enable the Blockchain service.
To install docker-ce, enter the following command in the terminal.
$ curl -fsSL https://download.docker.com/linux/ubuntu/gpg | sudo apt-key add -
$ sudo add-apt-repository "deb [arch=amd64] https://download.docker.com/linux/ubuntu $(lsb_release -cs) stable"
$ sudo apt-get update
$ sudo apt-get install -y docker-ce
Your output might differ from me. But there is no error in the console, which ensures that it has been installed correctly. After you run the above command, docker should be installed on your system.

Now, we need to enable the docker service at startup of the system. We write the following commands:
To start the docker service:
sudo service docker start
If all goes well, there will be no output. If you get an error, please consider re-installing the docker-ce again.
To enable the docker to start at startup of the system, we use the following command:
sudo systemctl enable docker
If all goes well, each time you reboot your system, your docker container will be reloaded automatically.
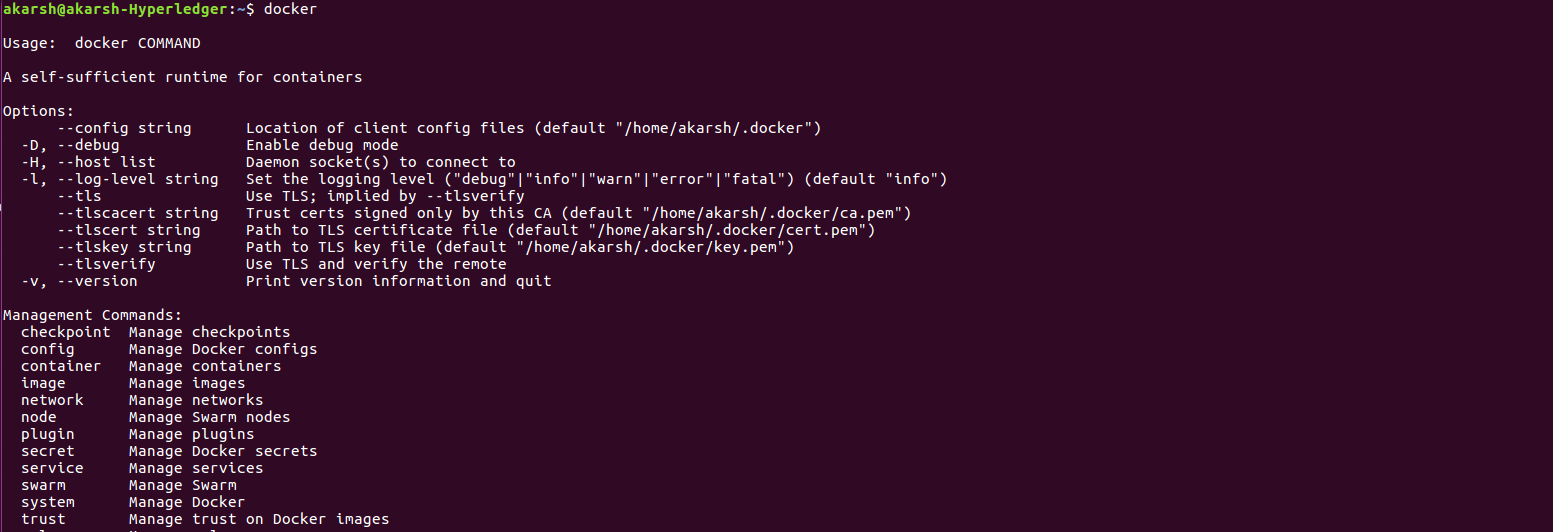
To check if the docker service is running, just type:
docker
And you should get a similar output as mine.

If you get anything else, please consider re-installing the docker-ce.
Now, the second part of docker-ce is the docker-compose function, which is needed to configure the docker images you are calling.
For that, we use python’s `pip`. You can use the following command to install docker-compose:
sudo pip install docker-compose
The installation should complete without any red text at the bottom. This makes sure that we have our docker-ce and docker-compose properly installed in our system. But to work with the docker images, you need to add your user to the docker group, which was created during installation of docker-ce as a part of setup.
sudo usermod -aG docker ${USER}
This command will provide no output. If any output is displayed, maybe there is something wrong with the command you just typed into your console. Please check if you have written the same line of code. After successfully completing, this adds your current logged in user to the docker group, which will enable you to run docker images.
So, at this point, we have setup our two essential packages, Go Language and Docker-ce, which are required to run the Hyperledger Fabric API. The setup and installation part of Hyperledger Fabric API will be presented in the next part of the tutorial.
Last Update Date: 2018–06–29

如果这篇文章帮助到了你,你可以请作者喝一杯咖啡


