qemu运行树莓派系统
qemu运行树莓派系统
去树莓派官网下载需要的镜像 https://downloads.raspberrypi.com/
Go to the Raspberry PI website to download the required image -> https://downloads.raspberrypi.com/
看你的需求选armhf或者arm64
Choose armhf or arm64 depending on your needs
| |
raspios_arm64/ | - | |
|---|---|---|---|
| |
raspios_armhf/ | - | |
| |
raspios_full_arm64/ | - | |
| |
raspios_full_armhf/ | - | |
| |
raspios_lite_arm64/ | - | |
| |
raspios_lite_armhf/ |
转换 img 到 qcow2
Convert img to qcow2
qemu-img convert -f raw 2024-03-15-raspios-bookworm-armhf-lite.img -O qcow2 raspios-bookworm-armhf-lite.qcow2
扩容到128G
Expand the capacity of qcow2 to 128 GB
qemu-img resize disk.qcow2 +128G
使用qemu-nbd挂载qcow2,修改里面的一些文件
Mount qcow2 using qemu-nbd and modify some files
sudo modprobe nbd
sudo qemu-nbd --connect /dev/nbd1 raspios-bookworm-armhf-lite.qcow2
sudo mount /dev/nbd1p2 /mnt
把fstab改成这个
Change fstab
proc            /proc           proc    defaults          0       0
LABEL=rootfs	/               ext4    defaults,noatime  0       1
然后自己生成一个用户加到passwd和shadow不然等下启动会没法登录到系统,我本机有个用户叫 r00t,我就直接复制过来了,一样的密码。根据自己的情况变换,也可以给shadow中的root生成一个密码
Then generate a user and add it to passwd and shadow, otherwise it will not be able to log in to the system after the startup. There is a user named r00t on my machine, so I directly copy it over with the same password. Depending on your situation, you can also generate a password for root in shadow
sudo sh -c "sudo cat /etc/passwd | grep r00t >> /mnt/etc/passwd"
sudo sh -c "sudo cat /etc/shadow | grep r00t >> /mnt/etc/shadow"
然后把用户加入 sudoers,不然启动之后没法使用 sudo
Then add the user to sudoers, otherwise you won't be able to use sudo once started
修改完了之后取消挂载
After the modification is complete, cancel the mount
sudo umount /mnt
sudo qemu-nbd --disconnect /dev/nbd1
启动试试,这里我用的 https://people.debian.org/~gio/dqib/ 的 armhf-virt 的 kernel 和 initrd
Start a try, here I am using https://people.debian.org/~gio/dqib/ armhf - virt kernel and initrd
qemu-system-arm -machine 'virt' -cpu 'cortex-a15' -m 1G -device virtio-blk-device,drive=hd -drive file=2024-03-15-raspios-bookworm-armhf-lite.qcow2,if=none,id=hd -device virtio-net-device,netdev=net -netdev user,id=net,hostfwd=tcp::2222-:22 -kernel kernel -initrd initrd -nographic -append "root=LABEL=rootfs console=ttyAMA0"
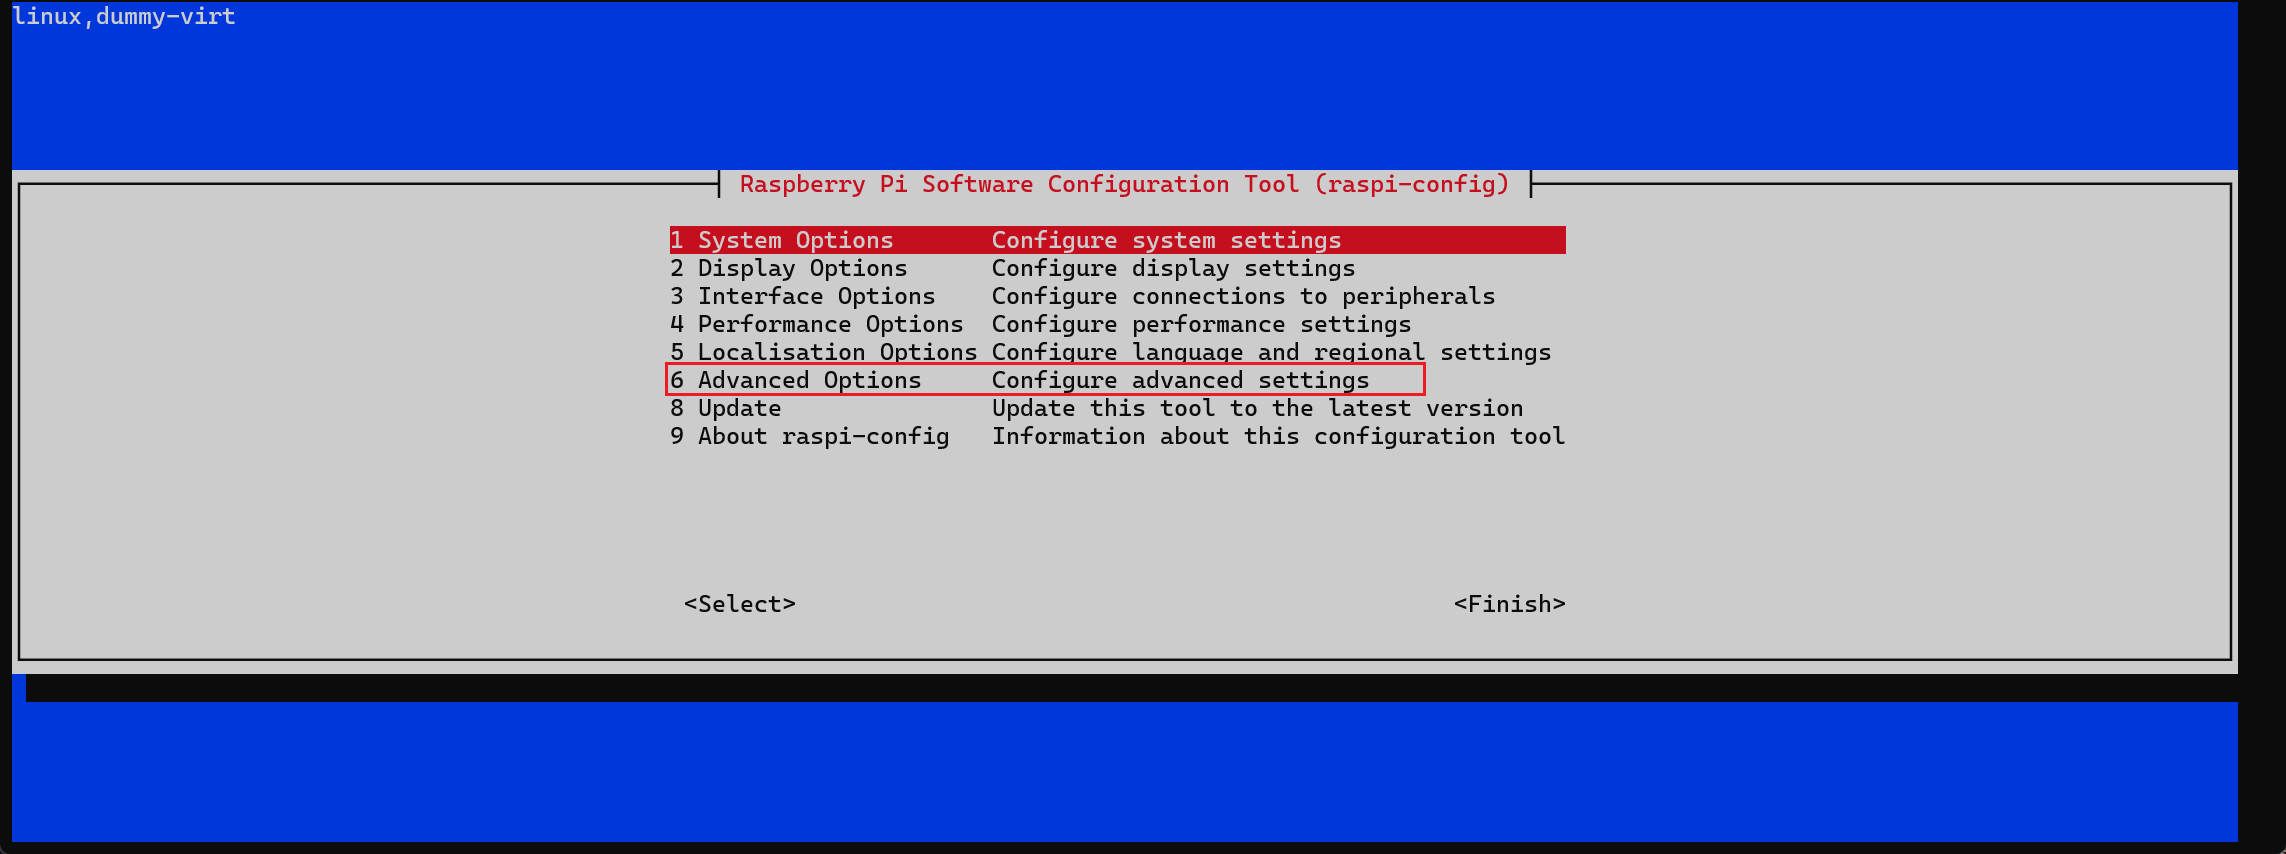
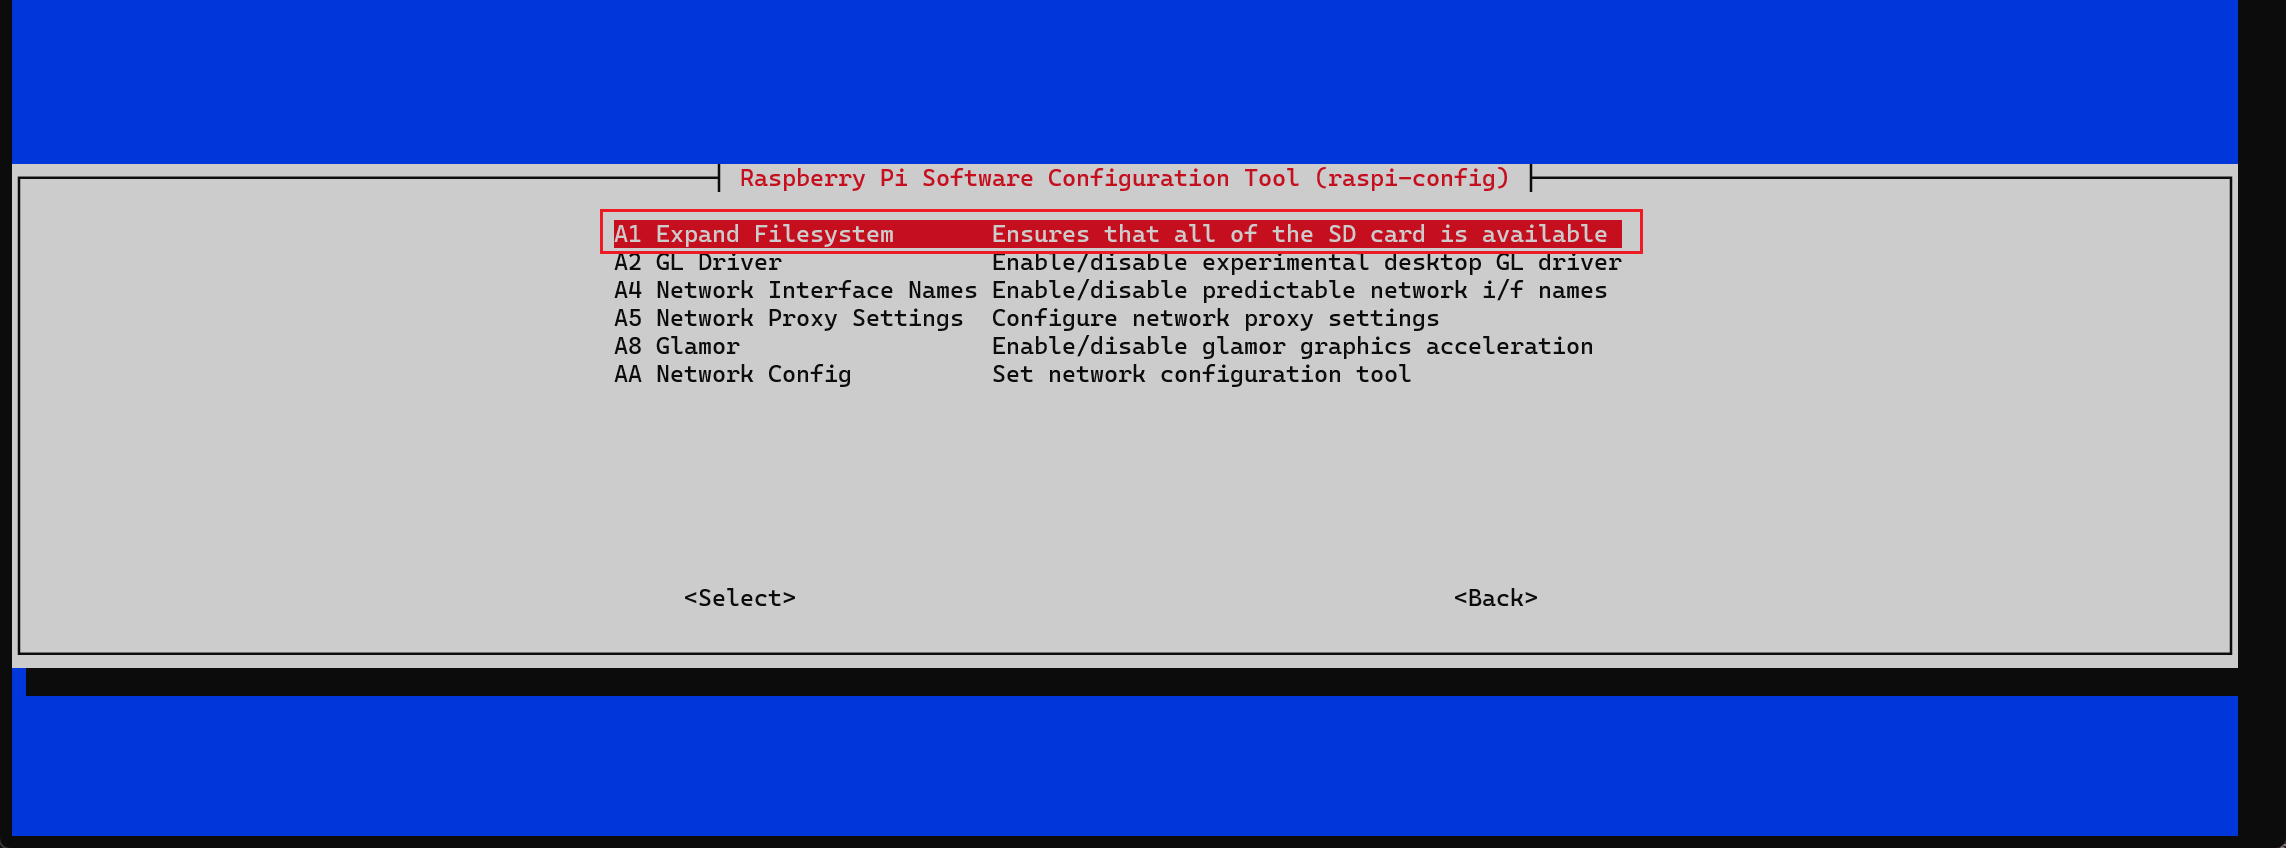
因为img镜像直接转换成qcow2相当与使用dd克隆了分区,我们扩展的空间没被使用,可以在启动之后可以用 raspi-config 去扩容根文件系统
Since converting the img image directly to qcow2 is equivalent to cloning the partition using dd, our extended space is not used, and you can use pfi-config to expand the root file system after booting
sudo raspi-config


