

JavaScript逆向之代码补环境(以iwencai为例)
知识点
1. 浏览器环境与Node环境的区别
1.1 浏览器环境具有的功能
- 页面渲染功能
(1)加载和控制页面元素的能力 -> 在js中由dom对象来完成
(2)渲染引擎 -> 和我们基本上无关 - 浏览器本身的一些东西(窗口大小,url) -> BOM对象
- 能够执行js的能力 -> v8引擎负责执行js代码
1.2 Node环境具有的功能
- 包含V8引擎,还拥有一些node做后端独有的一些功能
- node里面是没有页面渲染的部分的(如:document)
- node里面也没有BOM对象的东西(如:window)
1.3 补环境的逻辑
补环境相当于自己创造的一个山寨的浏览器
在node环境中,想办法补充浏览器(document,window)的环境
补环境的时候,要注意node环境中独有的内容,如果有需要,要想办法剔除掉
2.原型链的继承
2.1 原型
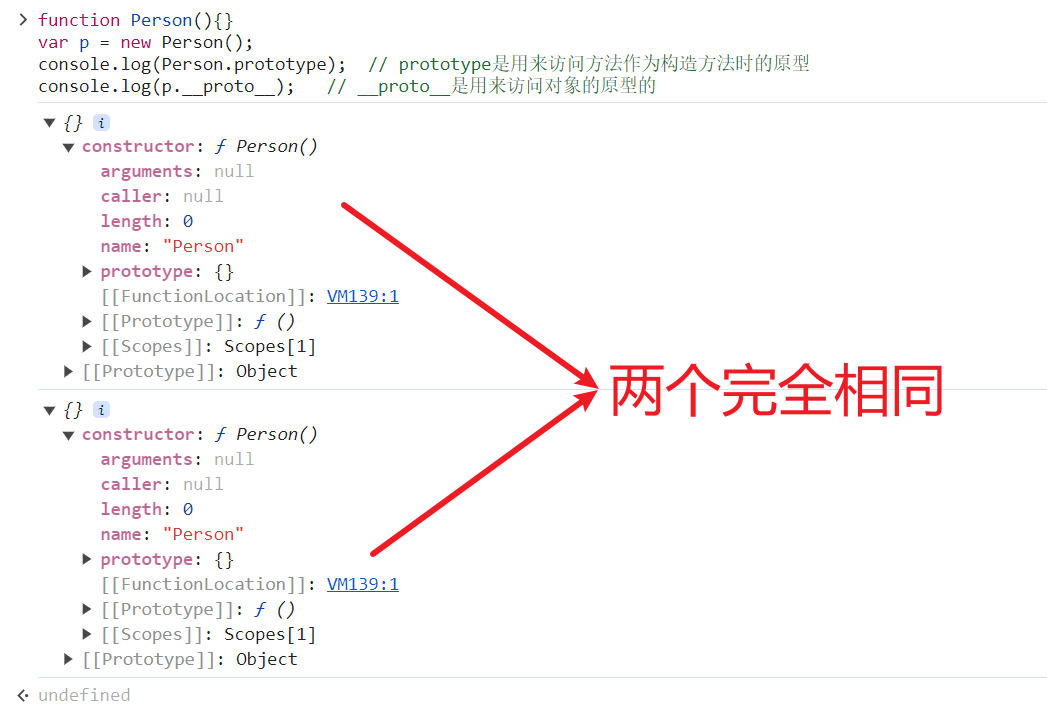
JavaScript是一种基于原型的语言,任何对象和函数都有其对应的原型。
先来一个demo:
function Person(){}
var p = new Person();
console.log(Person.prototype);	// prototype是用来访问方法作为构造方法时的原型
console.log(p.__proto__);	// __proto__是用来访问对象的原型的
将其放在浏览器的控制台运行。
2.2 原型链的继承实现
这时候,如果有个需求,实现类似java或python里的继承关系,那么在JavaScript中该怎么实现呢?这就需要用到原型链了,直接看demo。
// 需求:让Cat方法继承Animal方法
function Animal(){
this.name = "动物";
} //定义Animal方法
Animal.prototype.run = function (){
console.log("跑步");
} //给Animal的原型中添加一个run方法
function Cat(){
this.name = "猫";
} //定义Cat方法
Cat.prototype.eat = function (){
console.log("吃鱼");
} //给Cat的原型中添加一个eat方法
//实现Cat继承Animal
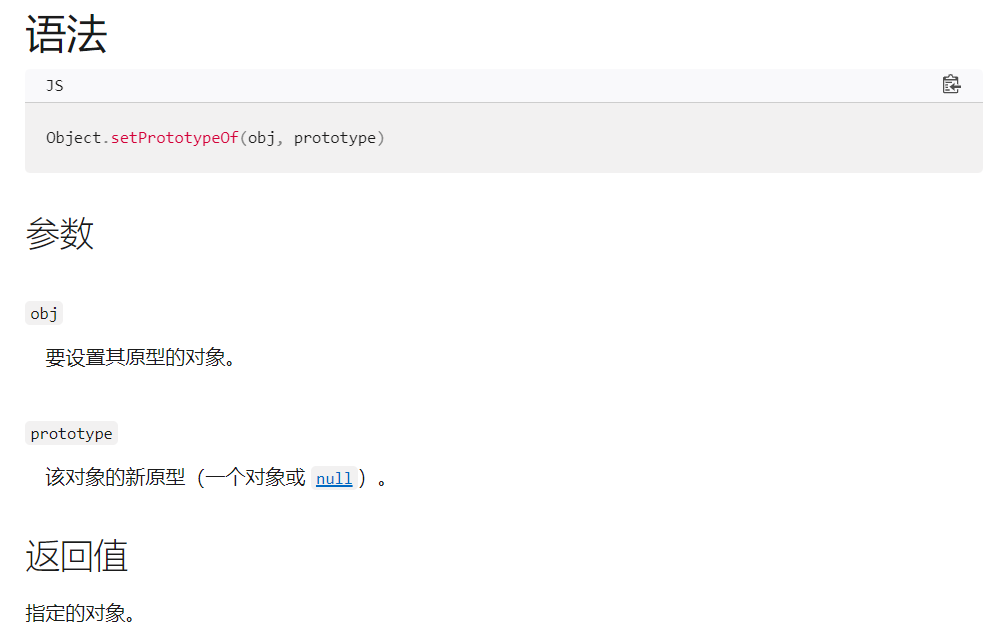
Object.setPrototypeOf(Cat.prototype, Animal.prototype);
// 测试,如果Cat的对象能够访问到Animal中的run方法,说明继承成功。
var cat = new Cat();
cat.run();
console.log(cat.__proto__);
浏览器里运行一下。
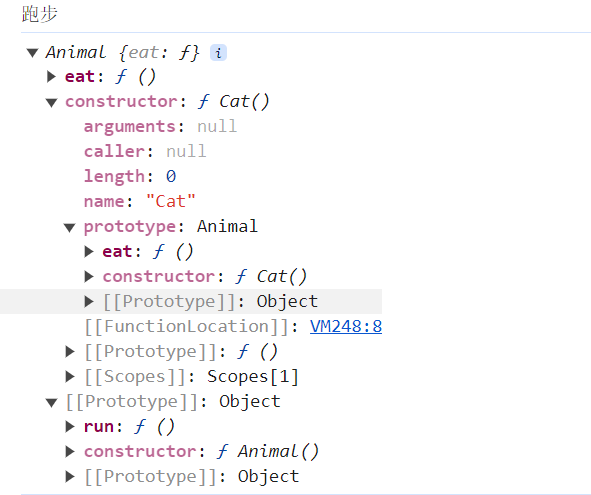
成功调用到了Animal原型中的run方法。所以如果要实现继承关系,就要用到setPrototypeOf函数,可以看下setPrototypeOf的官方用法。
3.原生ajax
现在比较多见的是jQuery封装过后的ajax了,调用起来比较方便,demo如下:
$.ajax({
	// url 是接口
	url: "xxxxx",

	// type 数据操作类型
	type: "GET",

	// 获取的数据格式
	dataType: "json",

	// 获取成功后的操作
	success: function (data) {
		// data是请求成功的数据
		console.log(data);
	}
})
原生的ajax如果要发送请求就会用到一个关键的对象XMLHttpRequest,那就通过代码来看看原生ajax是如何实现发送请求的。
// 创建 XMLHttpRequest,相当于打开浏览器
const xhr = new XMLHttpRequest()
// 打开一个与网址之间的连接 相当于输入网址
// 利用open()方法,第一个参数是对数据的操作,第二个是接口
xhr.open("GET", "xxxxxx")
// 通过连接发送请求 相当于点击回车或者链接
xhr.send(null)
// 指定 xhr 状态变化事件处理函数 相当于处理网页呈现后的操作
// 全小写
xhr.onreadystatechange = function () {
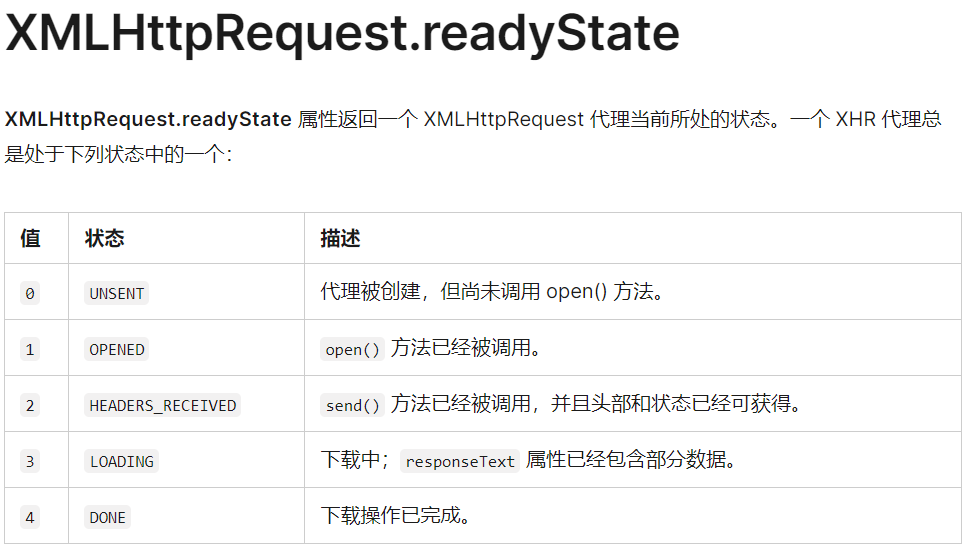
// 通过readyState的值来判断获取数据的情况
if (this.readyState === 4) {
// 响应体的文本 responseText
console.log(this.responseText);
}
}
XMLHttpRequest发送请求总共有5种状态,如下:
知道了以上知识点后,就可以开始实战了,还是老朋友-iwencai。
iwencai实战
上一篇关于iwencai请求头参数加密逻辑是通过抠代码的方式,接下来利用补环境的方式来解决。
通过上一篇文章已经知道需要解密的参数是Hexin-V和Cookie种的v,两个值是一样的。

查看initiator。
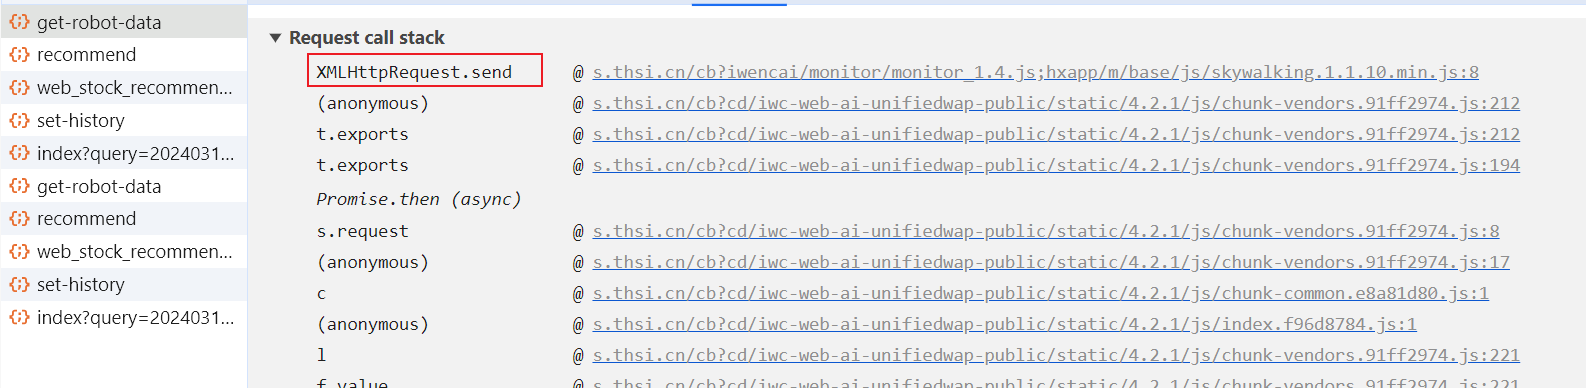
看到了XMLHttpRequest,点进去。

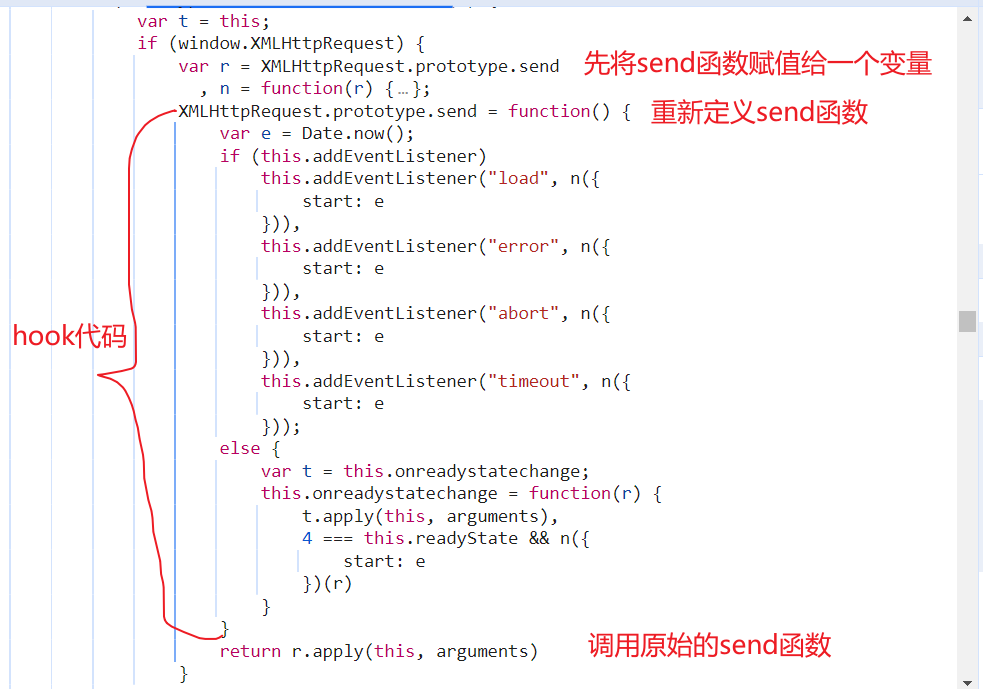
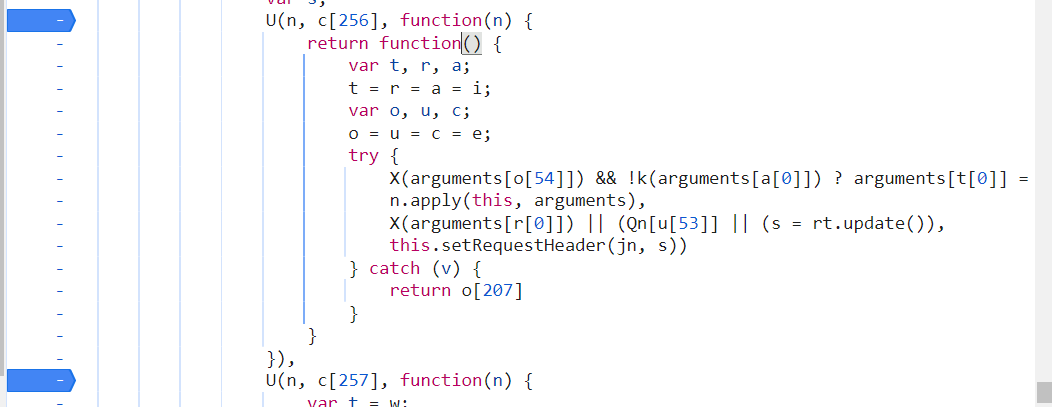
从这行代码往上看,可以明显的看到一个hook,对XMLHttpRequest的send函数进行了重写,肯定有猫腻。
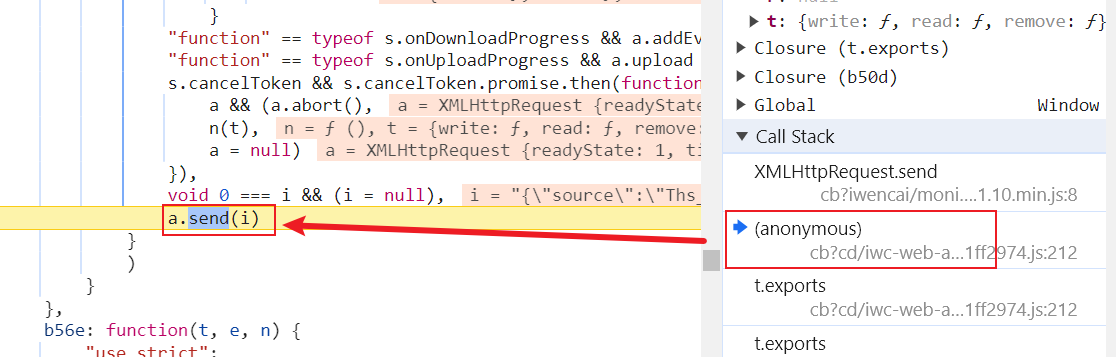
打断点,让代码运行,看在哪里调用了这行代码。
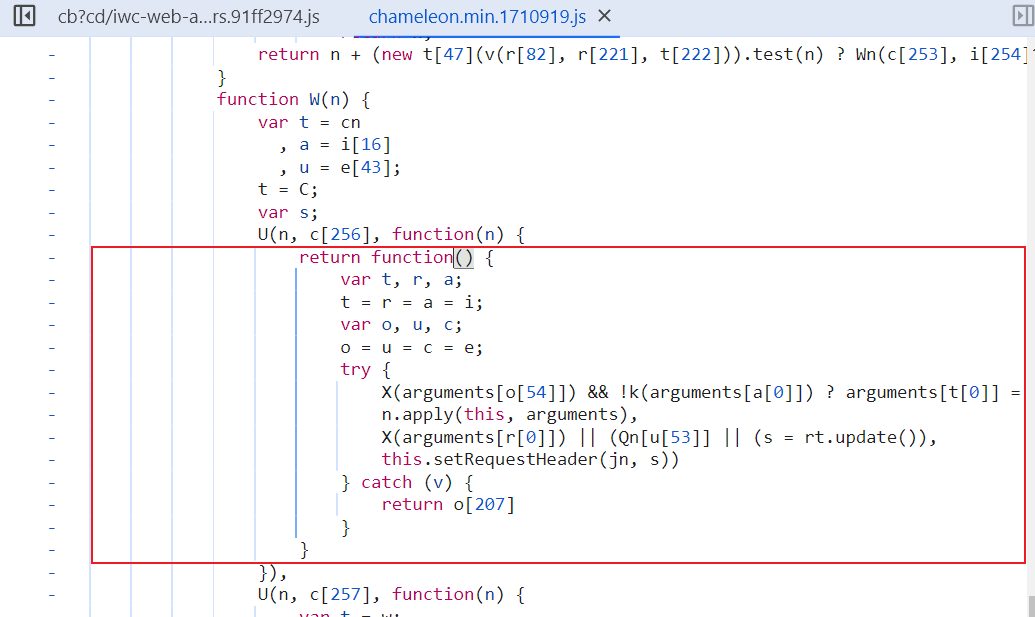
还记得在讲原生ajax发送请求的顺序,先open再send,这里有send,那么前面肯定有open,找到后打断点。

找到open函数的定义。
为了看到hook的效果,在下面两行代码前面打上断点。
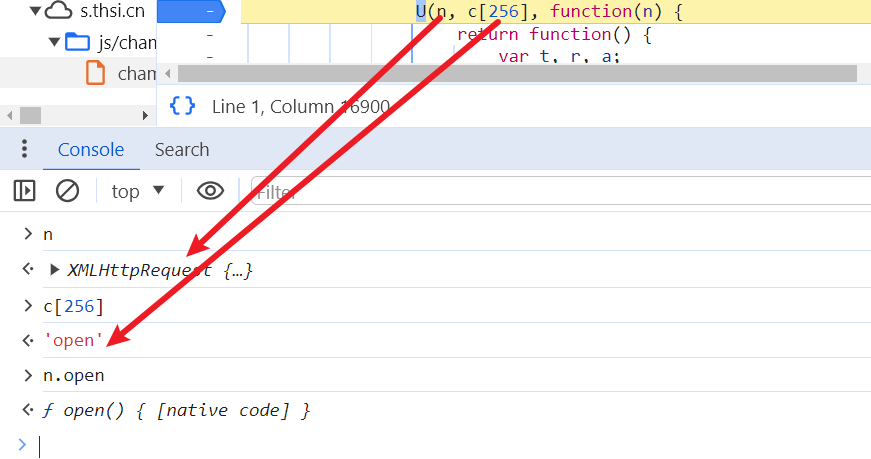
释放断点。运行到第一个断点时,open函数还是原生的。
运行到第二个断点时,open函数发生了变化。
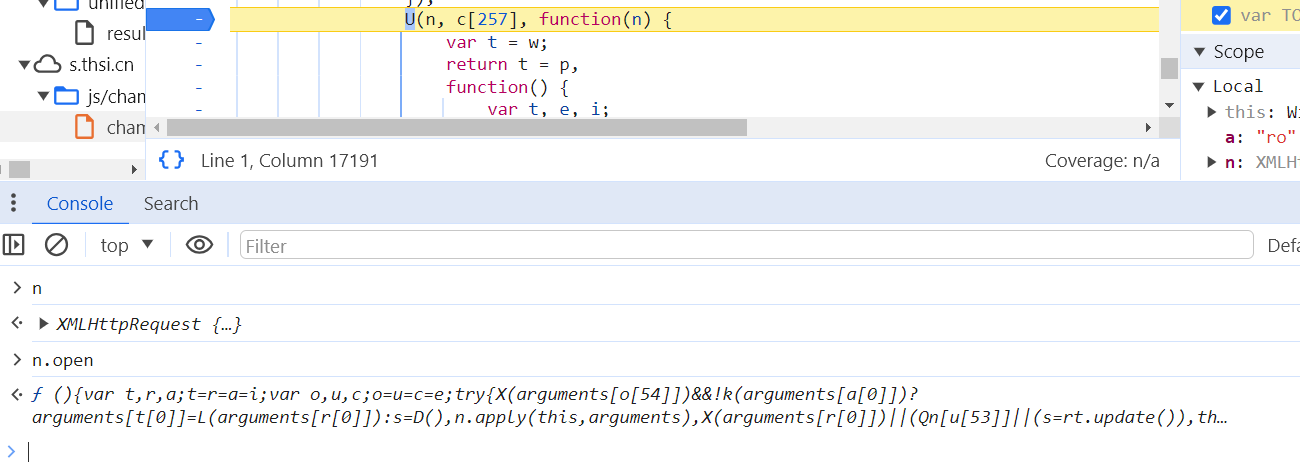
说明在第一个断点的函数内对open函数进行了hook。在这个网站中采用的都是自定义的open和send函数,如果采用原生代码肯定就无效了,需要采用补环境的方式来实现。
下面就是补环境来解决加密逻辑的全部步骤。
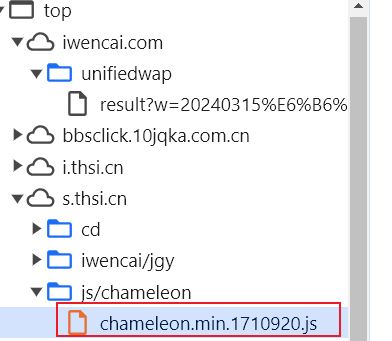
从上篇文章得知参数的加密逻辑在如图所示的这个文件中。(这个文件名会变换,需要注意)
将全部的代码复制到pycharm中,用node环境跑一下。

报错,说缺少document,要就给它一个,加上如下代码。
Document = function Document() {};
document = new Document();
继续跑,说缺少window,再继续补。
Window = function Window(){};
window = new Window();
继续跑,说r[51].getElementsByTagName is not a function,去源代码中找到这个地方,打上断点调试。
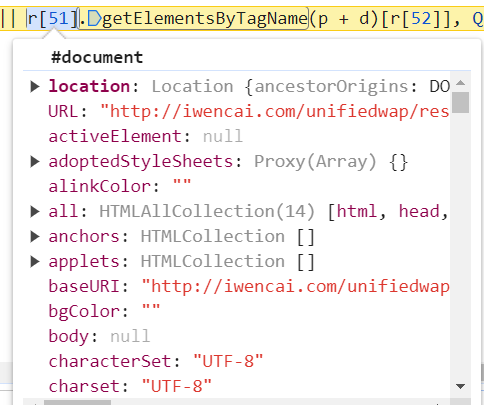
可以看到getElementsByTagName是由document对象调用的,所以在document方法的原型上需要补一个getElementsByTagName方法。

这句话会返回一个head标签,在补的方法中也要有返回值,返回一个空即可。
Document.prototype.getElementsByTagName = function getElementsByTagName(name){
    return [{}];
};
继续跑,报s[66].createElement is not a function,找源代码打断点。
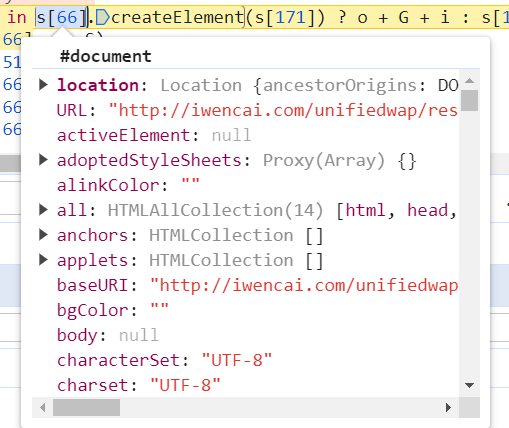
还是document原型上的方法,看下执行结果。
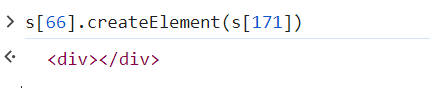
返回一个div标签,在补方法时需要有返回内容。
Document.prototype.createElement = function createElement(name){
    return [];
};
继续跑,报n.attachEvent is not a function,找源代码打断点。
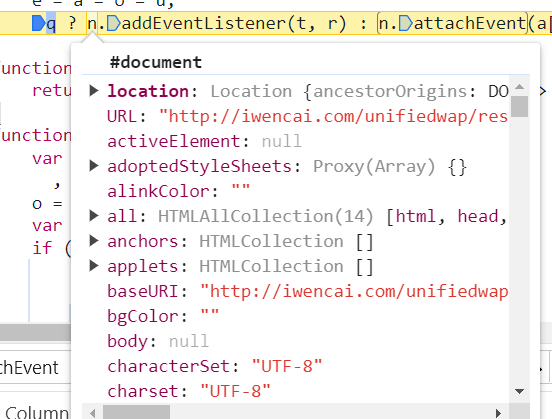
q值为true,看下q定义的地方,
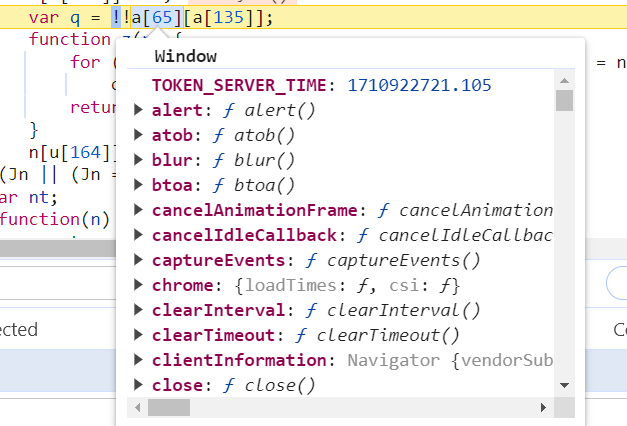
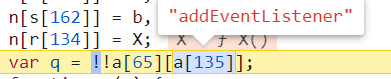
q值是判断window对象中有无addEventListener,官网查一下addEventListener。
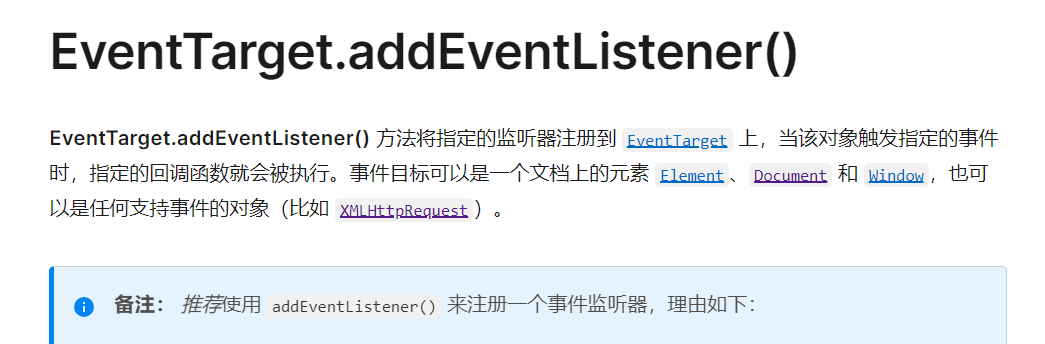
发现它是定义在EventTarget方法下的,并且Window是继承EventTarget的。

要补一个EventTarget方法,再补一个继承关系。
EventTarget = function EventTarget(){};
EventTarget.prototype.addEventListener = function addEventListener(type, listener){
};
Object.setPrototypeOf(Window.prototype, EventTarget.prototype);
继续跑,还是报n.attachEvent is not a function,再回去看代码,是document对象调用的addEventListener方法,还要再补一个Document和EventTarget的继承关系。
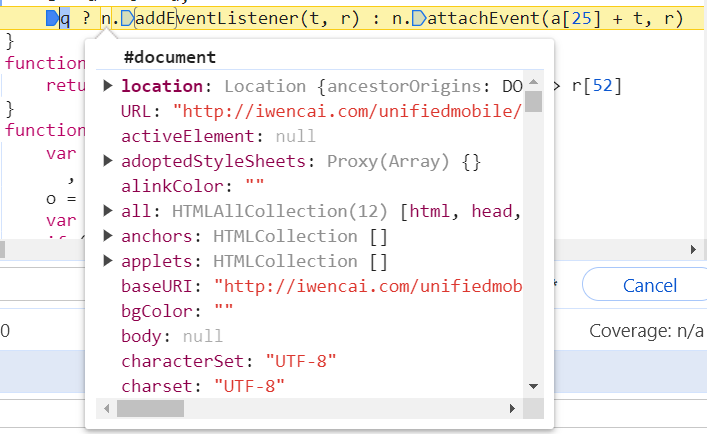
Object.setPrototypeOf(Document.prototype, EventTarget.prototype);
继续跑,报navigator is not defined,找源代码打断点。
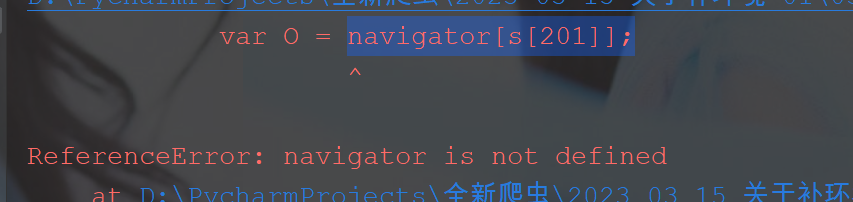
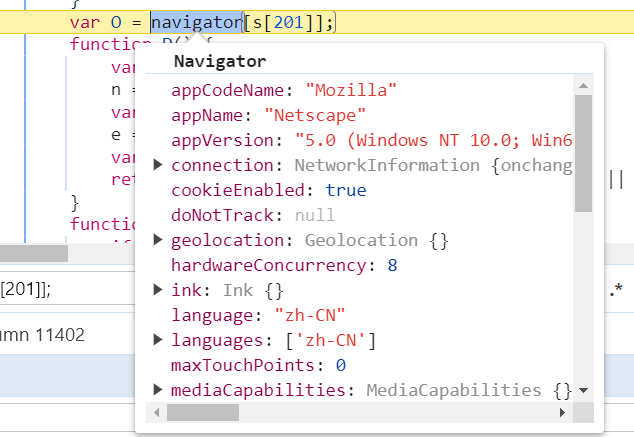
是个Navigator对象,需要补一个。
Navigator = function Navigator(){};
运行还是报navigator is not defined,继续看源代码。
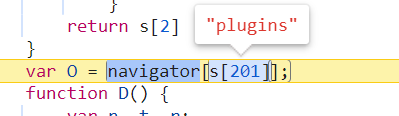
找的是plugins属性,补上。
Navigator.prototype.plugins = {};
navigator = new Navigator();
再跑,没报错了,写一个测试代码,看看能不能过当前代码,如果前后输出的结果一致,说明就没过,如果不一致,就说明过了。完整的测试代码如下:
EventTarget = function EventTarget(){};
EventTarget.prototype.addEventListener = function addEventListener(type, listener){
};
Document = function Document() {};
Document.prototype.getElementsByTagName = function getElementsByTagName(name){
return [{}];
};
Document.prototype.createElement = function createElement(name){
return [];
};
Window = function Window(){};
Navigator = function Navigator(){};
Navigator.prototype.plugins = {};
Object.setPrototypeOf(Window.prototype, EventTarget.prototype);
Object.setPrototypeOf(Document.prototype, EventTarget.prototype);
document = new Document();
window = new Window();
navigator = new Navigator();
XMLHttpRequest = function XMLHttpRequest(){};
xhr = new XMLHttpRequest();
XMLHttpRequest.prototype.open = function open() {
console.log(123456);
};
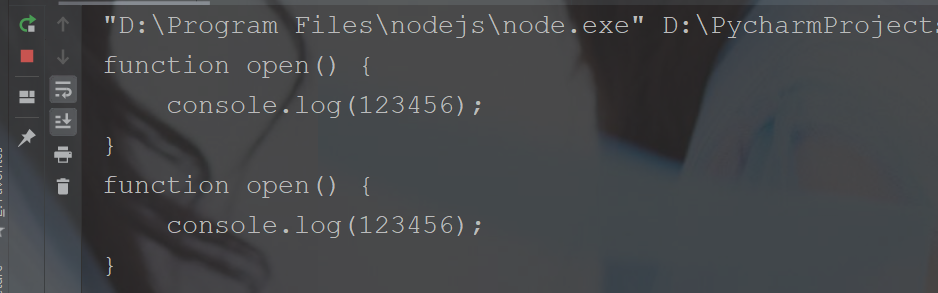
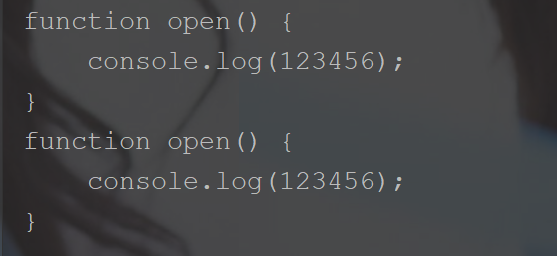
console.log(xhr.open.toString());
//这里是页面源代码,就不写了
console.log(xhr.open.toString());
运行结果如下:
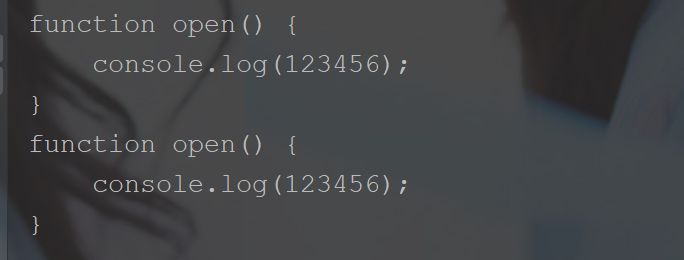
两次结果一致,没过,那就是还有地方没补好。再回到最初通过hook cookie找到生成加密字符串的地方。
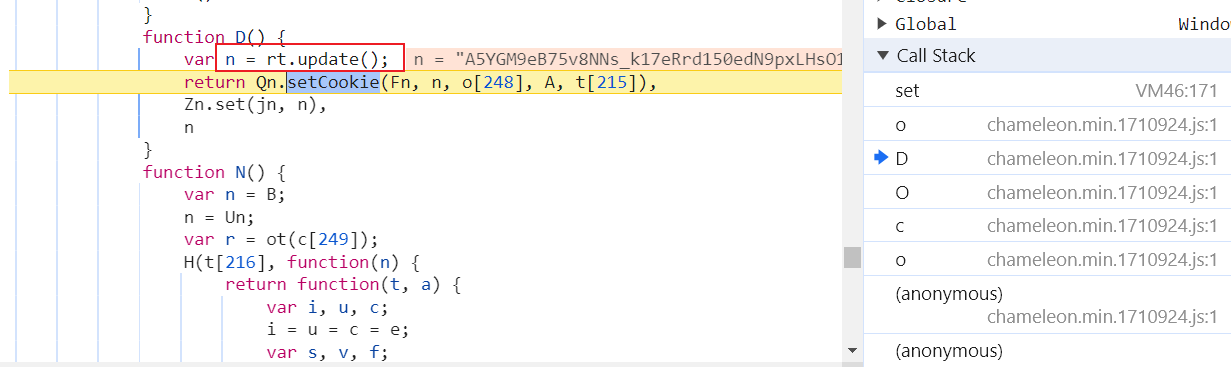
通过call stack往上看是哪里调用了。

看到了一个try...catch..的逻辑,那么有可能是报错被catch捕捉了,所以删除这个try...catch..,再跑一次测试代码。

果不其然,报错了。找到源代码打断点调试。但是(l[at(e[66])][at(e[67], a[68])])这行代码是不走的,往上看一行,
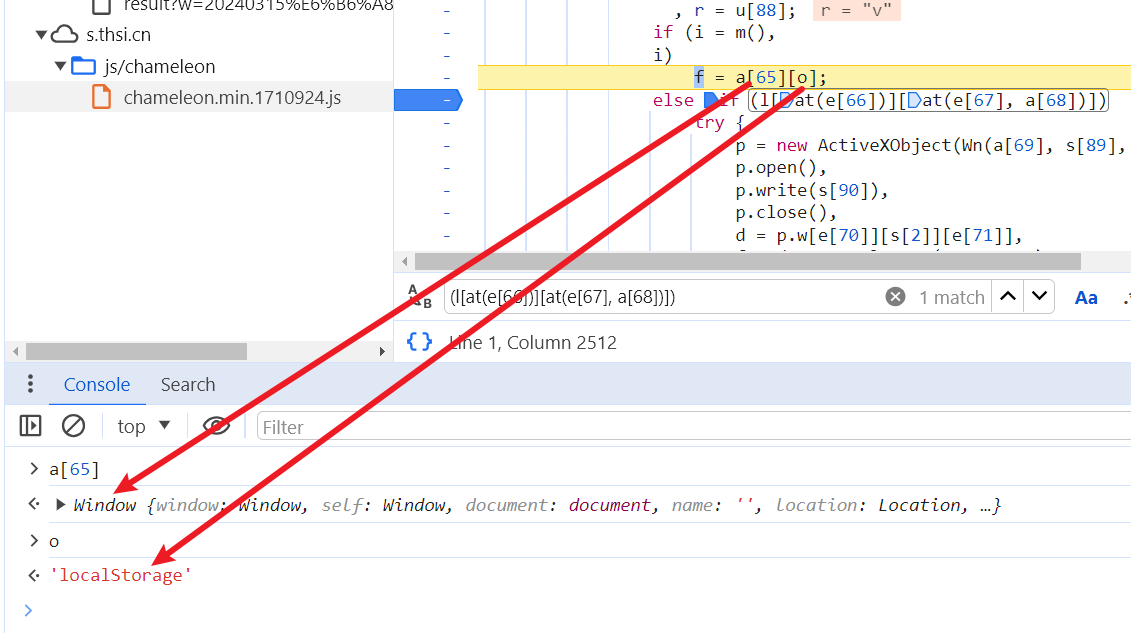
需要给Window加个localStorage属性。
Window.prototype.localStorage = {};
再跑,报错,找到源代码调试。


我们的代码中没有获取这一串字符串,看下它是哪里得到的,看call stack。
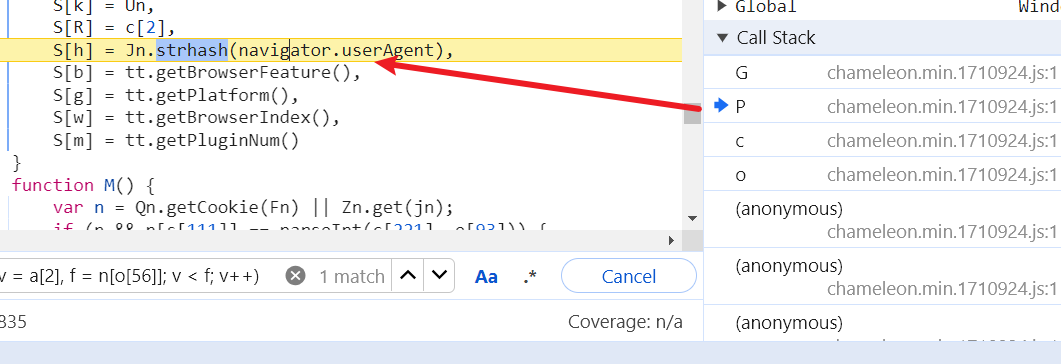
是从navigator对象中拿的,要给navigator补上userAgent。
Navigator.prototype.userAgent = "Mozilla/5.0 (Windows NT 10.0; Win64; x64) AppleWebKit/537.36 (KHTML, like Gecko) Chrome/122.0.0.0 Safari/537.36";
跑,报如下错误。

根据代码,需要给navigator对象补上javaEnabled方法。
Navigator.prototype.javaEnabled = function javaEnabled(){
    return false;
};
跑,报如下错误。

调试。
需要给window对象加上navigator属性。
window.navigator = navigator;
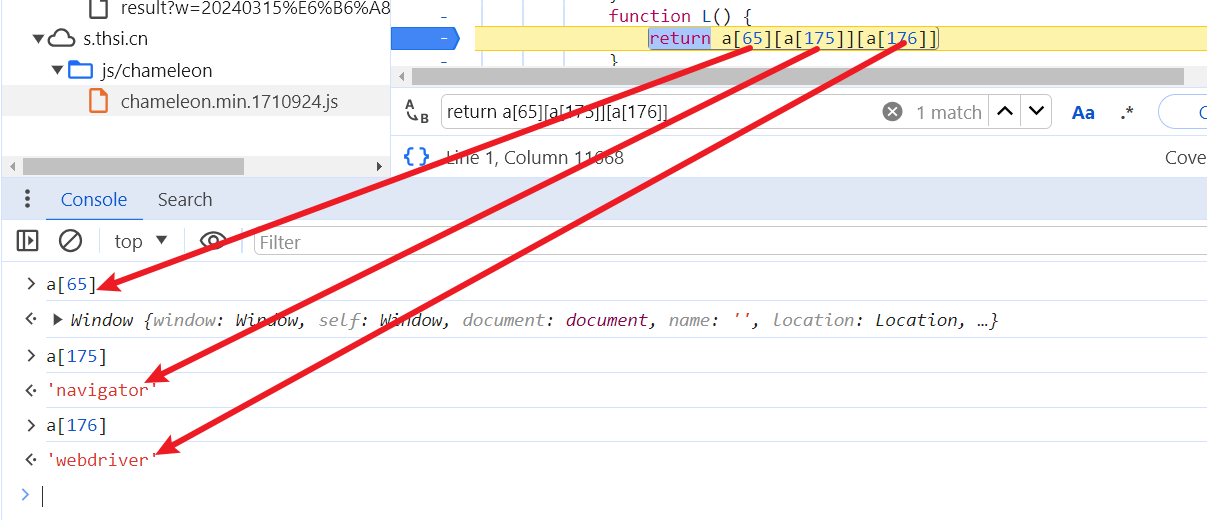
跑,报如下错误。

没定义location,打断点调试。
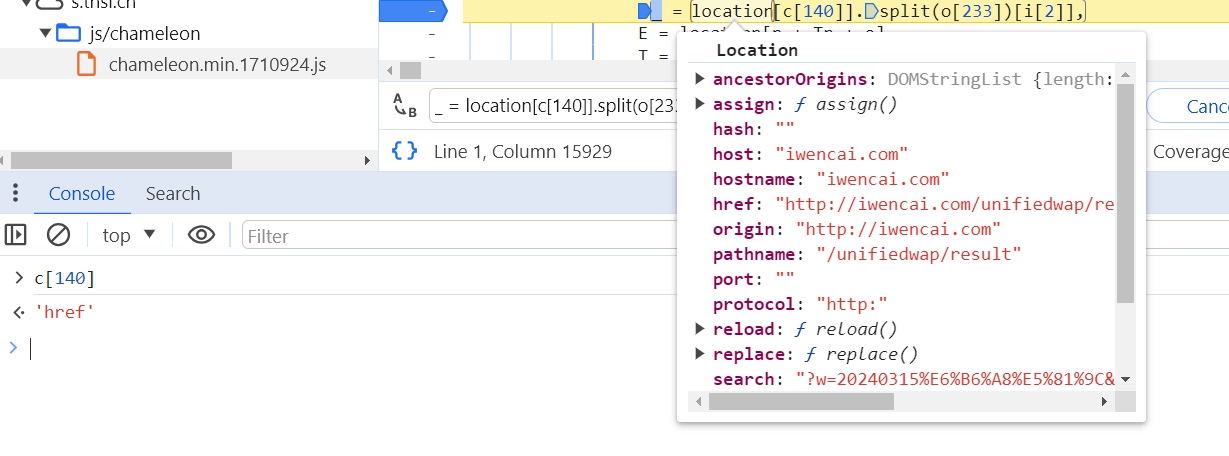
需要一个location对象,在location对象中要有href属性。
Location = function Location(){};
Location.prototype.href = "http://iwencai.com/unifiedwap/result?w=20240315%E6%B6%A8%E5%81%9C&querytype="
location = new Location();
跑,报如下错误。

调试。

变量n的没获取到,通过call stack,看下是哪里传来的。
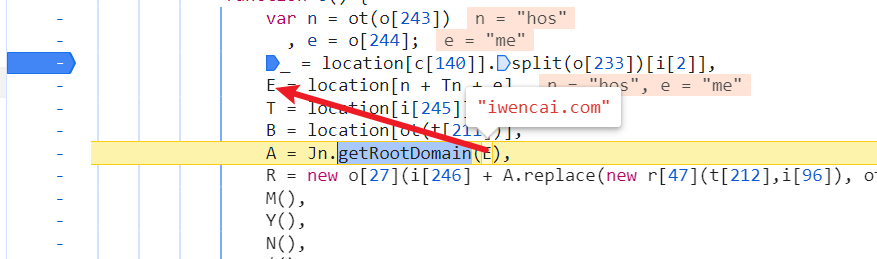
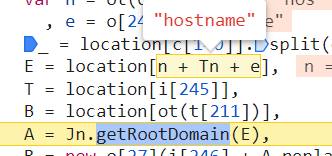
是location中的hostname属性,补上。跟location相关的还有host和protocol两个属性,一起补上。
Location.prototype.hostname = "iwencai.com";
Location.prototype.host = "iwencai.com";
Location.prototype.protocol = "http:";
跑,报如下错误。

调试。
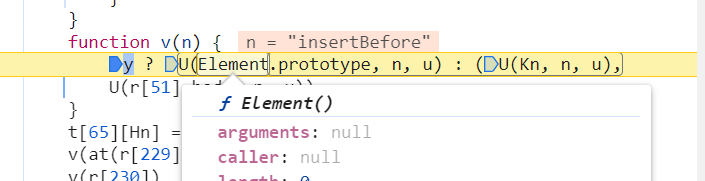
需要Element对象和insertBefore方法,补上。
Element = function Element(){};
Element.prototype.insertBefore = function insertBefore(){};
运行。
没报错了,但是程序一直在运行,大概率是有定时器,搜索一下。
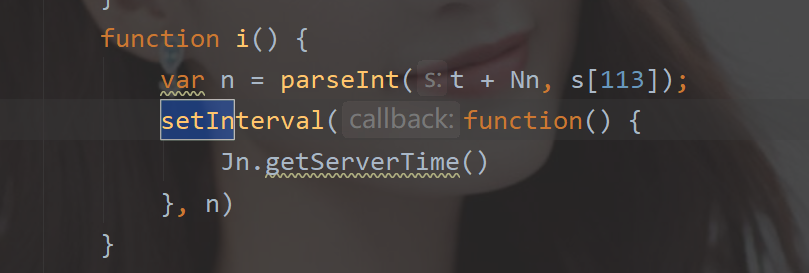
重写setInterval函数。
setInterval = function setInterval(){};
运行,两次结果还是一致,没绕过检测。
试了半天,才知道忘记XMLHttpRequest赋给window了,补上。
Window.prototype.XMLHttpRequest = XMLHttpRequest;
运行,两次结果不一致了,成功。

下面就可以直接通过这个获取Hexin-V的值了。
完整代码如下:
EventTarget = function EventTarget(){};
EventTarget.prototype.addEventListener = function addEventListener(type, listener){
};

Element = function Element(){};
Element.prototype.insertBefore = function insertBefore(){};


Document = function Document() {};
Document.prototype.getElementsByTagName = function getElementsByTagName(name){
    return [{}];
};
Document.prototype.createElement = function createElement(name){
    return [];
};


Window = function Window(){};
Window.prototype.localStorage = {};


Navigator = function Navigator(){};
Navigator.prototype.plugins = {};
Navigator.prototype.userAgent = "Mozilla/5.0 (Windows NT 10.0; Win64; x64) AppleWebKit/537.36 (KHTML, like Gecko) Chrome/122.0.0.0 Safari/537.36";
Navigator.prototype.javaEnabled = function javaEnabled(){
    return false;
};

Location = function Location(){};
Location.prototype.href = "http://iwencai.com/unifiedwap/result?w=20240315%E6%B6%A8%E5%81%9C&querytype="
Location.prototype.hostname = "iwencai.com";
Location.prototype.host = "iwencai.com";
Location.prototype.protocol = "http:";

Object.setPrototypeOf(Window.prototype, EventTarget.prototype);
Object.setPrototypeOf(Document.prototype, EventTarget.prototype);

document = new Document();
window = new Window();
navigator = new Navigator();
location = new Location();
window.navigator = navigator;


setInterval = function setInterval(){

};


XMLHttpRequest = function XMLHttpRequest(){};
xhr = new XMLHttpRequest();
Window.prototype.XMLHttpRequest = XMLHttpRequest;
XMLHttpRequest.prototype.open = function open() {
    console.log(123456);
};
console.log(xhr.open.toString());

window.test = {};
XMLHttpRequest.prototype.setRequestHeader = function setRequestHeader(k,v) {
    window.test[k] = v;
};


// 这里是页面源代码

// console.log(xhr.open.toString());

function fn() {
    xhr.open("get","http://iwencai.com/unifiedwap/suggest/V1/index/set-history")
    console.log(window.test['hexin-v']);
}

fn();
运行结果如下,直接就可以拿到hexin-v的值。


【推荐】国内首个AI IDE,深度理解中文开发场景,立即下载体验Trae
【推荐】编程新体验,更懂你的AI,立即体验豆包MarsCode编程助手
【推荐】抖音旗下AI助手豆包,你的智能百科全书,全免费不限次数
【推荐】轻量又高性能的 SSH 工具 IShell:AI 加持,快人一步
· 无需6万激活码!GitHub神秘组织3小时极速复刻Manus,手把手教你使用OpenManus搭建本
· Manus爆火,是硬核还是营销?
· 终于写完轮子一部分:tcp代理 了,记录一下
· 别再用vector<bool>了!Google高级工程师:这可能是STL最大的设计失误
· 单元测试从入门到精通