使用rviz实现本地计算机绘制机器人路径
机器人上搭载了stm32单片机和jetson nano,stm32进行电机控制+全场定位传感器的信息读取,将信息发送给jetson nano。nano上写一个发布全场坐标的节点,自己的计算机上写一个订阅的节点,将机器人的运动轨迹通过rviz可视化出来
自己的电脑上的环境:win10,安装了ubuntu 18.04的wsl
jetson nano上的环境:ubuntu 18.04(jetson特供版,软件全是arm64的)
在wsl上运行rviz时出现了问题,显示Segmentation fault(core dumped)
解决方案是,首先在启动xlaunch时应该禁用Native opengl选项,否则opengl会使用错误的opengl驱动,导致用于图形渲染的swrast找不到,继而无法启动rviz
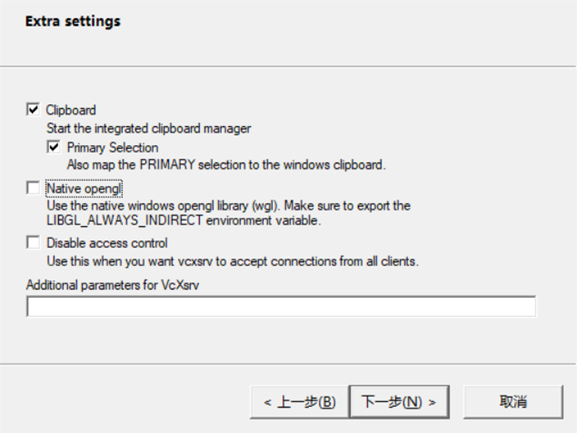

按照xlaunch启动时的要求,运行
LIBGL_ALWAYS_INDIRECT=
禁用之后运行glxinfo查看图形库,发现是mesa
glxinfo | grep "OpenGL version"
按照ros wiki的说法需要禁用硬件加速,所以执行如下
export LIBGL_ALWAYS_SOFTWARE=1
然后
rosrun rviz rviz
就能正常启动了
借鉴链接:
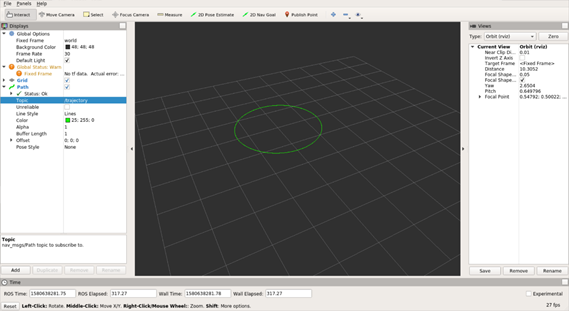
结果:

下面将发布一个话题绘制轨迹,然后显示在rviz上,可以参照这个的链接
https://blog.csdn.net/qq_43176116/article/details/88045741
编写一个用来显示路径并测试的代码
#include <ros/ros.h>
#include <ros/console.h>
#include <nav_msgs/Path.h>
#include <std_msgs/String.h>
#include <geometry_msgs/Quaternion.h>
#include <geometry_msgs/PoseStamped.h>
#include <tf/transform_broadcaster.h>
#include <tf/tf.h>
int main(int argc,char **argv)
{
    ros::init(argc,argv,"showpath");
    ros::NodeHandle nh;
    ros::Publisher path_pub = nh.advertise<nav_msgs::Path>("trajectory",1,true);
    ros::Time current_time,last_time;
    current_time = ros::Time::now();
    last_time = ros::Time::now();
    nav_msgs::Path path;
    path.header.stamp = current_time;
    path.header.frame_id = "world";
    double x = 0.0;
    double y = 0.0;
    double th = 0.0;
    double vx = 0.1;
    double vy = -0.1;
    double vth = 0.1;
    ros::Rate loop_rate(1);
    while(ros::ok())
    {
        current_time = ros::Time::now();
        double dt = (current_time - last_time).toSec();
        double delta_x = (vx * cos(th) - vy * sin(th)) * dt;
        double delta_y = (vx * sin(th) + vy * cos(th)) * dt;
        double delta_th = vth * dt;
        x += delta_x;
        y += delta_y;
        th += delta_th;
        geometry_msgs::PoseStamped this_pose_stamped;
        this_pose_stamped.pose.position.x = x;
        this_pose_stamped.pose.position.y = y;
        geometry_msgs::Quaternion goal_quat = tf::createQuaternionMsgFromYaw(th);
        this_pose_stamped.pose.orientation.x = goal_quat.x;
        this_pose_stamped.pose.orientation.y = goal_quat.y;
        this_pose_stamped.pose.orientation.z = goal_quat.z;
        this_pose_stamped.pose.orientation.w = goal_quat.w;
        this_pose_stamped.header.stamp = current_time;
        this_pose_stamped.header.frame_id = "world";
        path.poses.push_back(this_pose_stamped);
        path_pub.publish(path);
        ros::spinOnce();
        last_time = current_time;
        loop_rate.sleep();
    }
    return 0;
}
结果:
用rostopic查看/trajectory话题

rviz中成功显示一个圆
这样win10的上位机的部分就搞定了,接着在jetson nano上面布署ros,然后运行路径显示的节点
Jetson nano安装ros按照下面的教程走
https://blog.csdn.net/beckhans/article/details/90747828
需要注意的是由于安装ros arm64版本需要cross the wall(我都不知道弄墙的那群sb是怎么想的,墙ros的源干嘛,还嫌技术不够落后吗),FQ的话就八仙过海神通吧,我用的是ssr,服务器是自己找的,为了能够在终端里用还得设置为全局模式,具体操作看下面吧
https://samzong.me/2017/11/17/howto-use-ssr-on-linux-terminal/
总共消耗两小时,其中将近一个半小时浪费在cross the wall上面,在天朝只要是上网就被全世界网民自动矮一头,耶
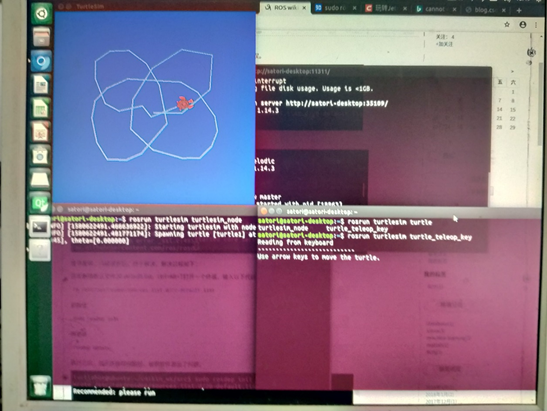
(拍的比较糊,就这样了)
下一步就是在jetson nano上面运行发布节点,我的win10电脑订阅即可,多机通信的部分可以在《ROS入门实例(第一版)》的4.12章节找到
首先连接到同一个热点或者同一个路由器下
然后检查能否互相ping通主机名(查看主机名用hostname)(不知道为什么我的电脑ping nano的时候不需要在主机名后面加.local
电脑:
ping satori-desktop
nano:
ping LAPTOP-25LTIPRI.local
相互能够ping通之后,设置一下变量
nano:
export ROS_HOSTNAME=satori-desktop
运行ros
roscore
电脑:
export ROS _HOSTNAME=LAPTOP-25LTIPRI.local
export ROS_MASTER_URL=http://satori-desktop:11311
11311是admin端口
然后在电脑上运行
rostopic list
显示
/rosout
/rosout_agg
说明连接成功
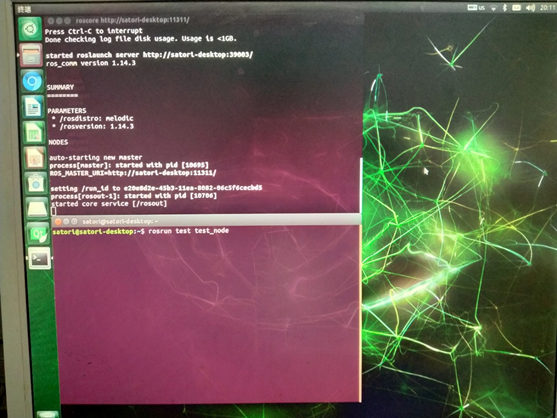
在nano上运行轨迹节点
rosrun test test_node
在电脑上运行rviz
rosrun rviz rviz
然后在电脑上订阅/trajectory话题即可
最终结果:笔记本电脑(只运行了rviz)
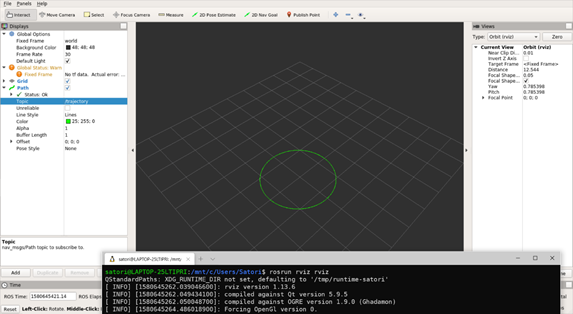
Jetson nano跑了roscore和发布轨迹的test_node

 浙公网安备 33010602011771号