课设个人实验报告
课设个人实验报告
北京电子科技学院
《信息安全工程技术应用》课程设计报告
基于密码算法库的国密算法支持研究与应用

小组成员姓名:20201303张奕博
指导教师: 娄嘉鹏
提交时间:2022年12月11日
个人报告(20201303张奕博):
1.列出自己的贡献:
本次课设我主要进行了C语言库的实践,其中设计四个库的实践
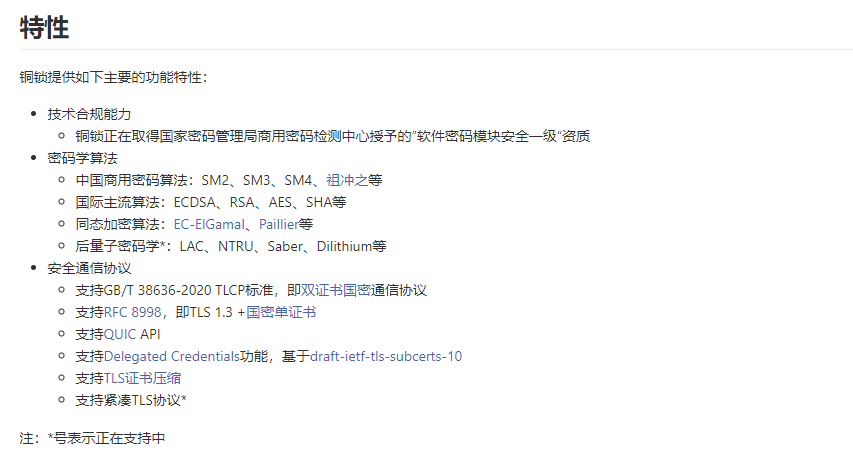
(1)babassl算法库
探索babassl是否支持国密
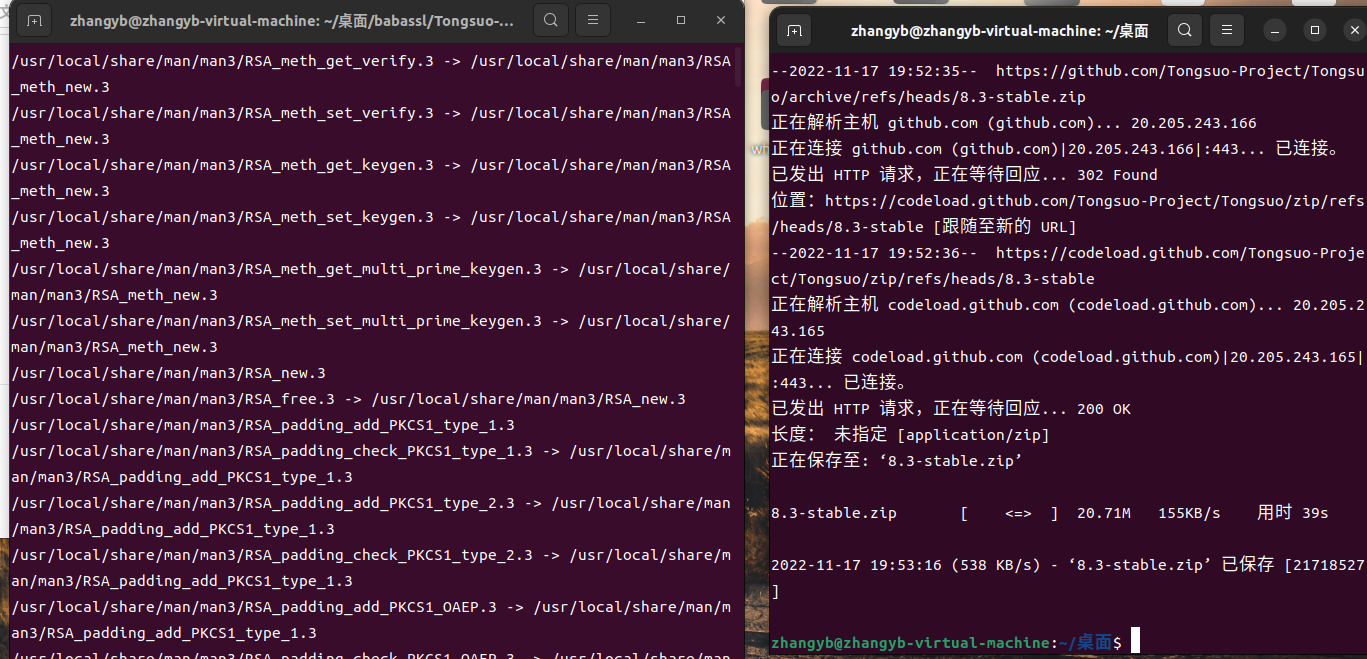
查找官方git链接
https://gitcode.net/mirrors/babassl/babassl
安装babassl库
从git里下载下安装包后解压缩
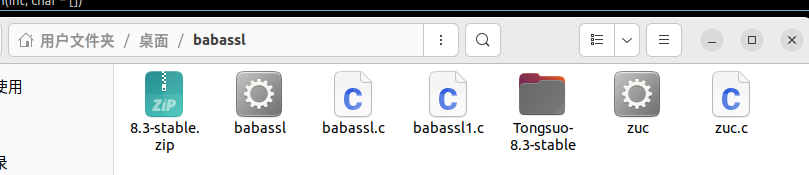
在解压后的地址下configure编译后make
之后sudo make install完成安装
安装后openssl version可查看babassl版本
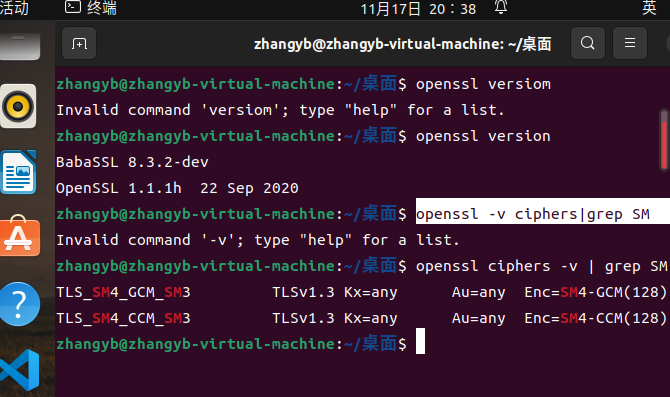
babassl国密实践
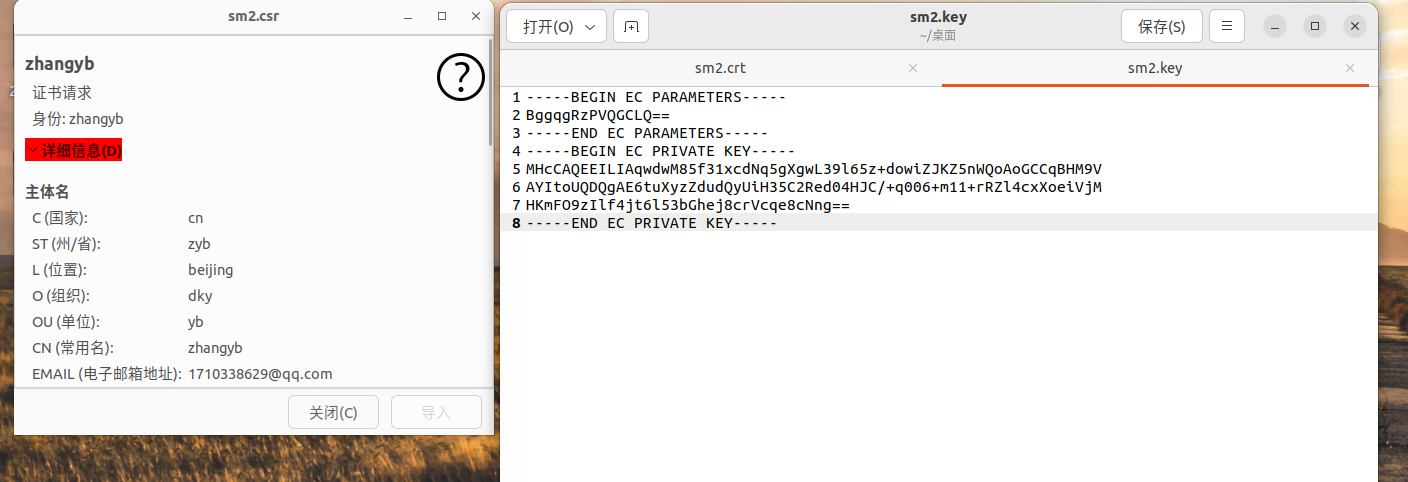
①SM2证书签发
生成SM2私钥
openssl ecparam -genkey -name SM2 -out sm2.key
②生成证书签名请求 csr
openssl req -new -key sm2.key -out sm2.csr -sm3 -sigopt "sm2_id:1234567812345678"
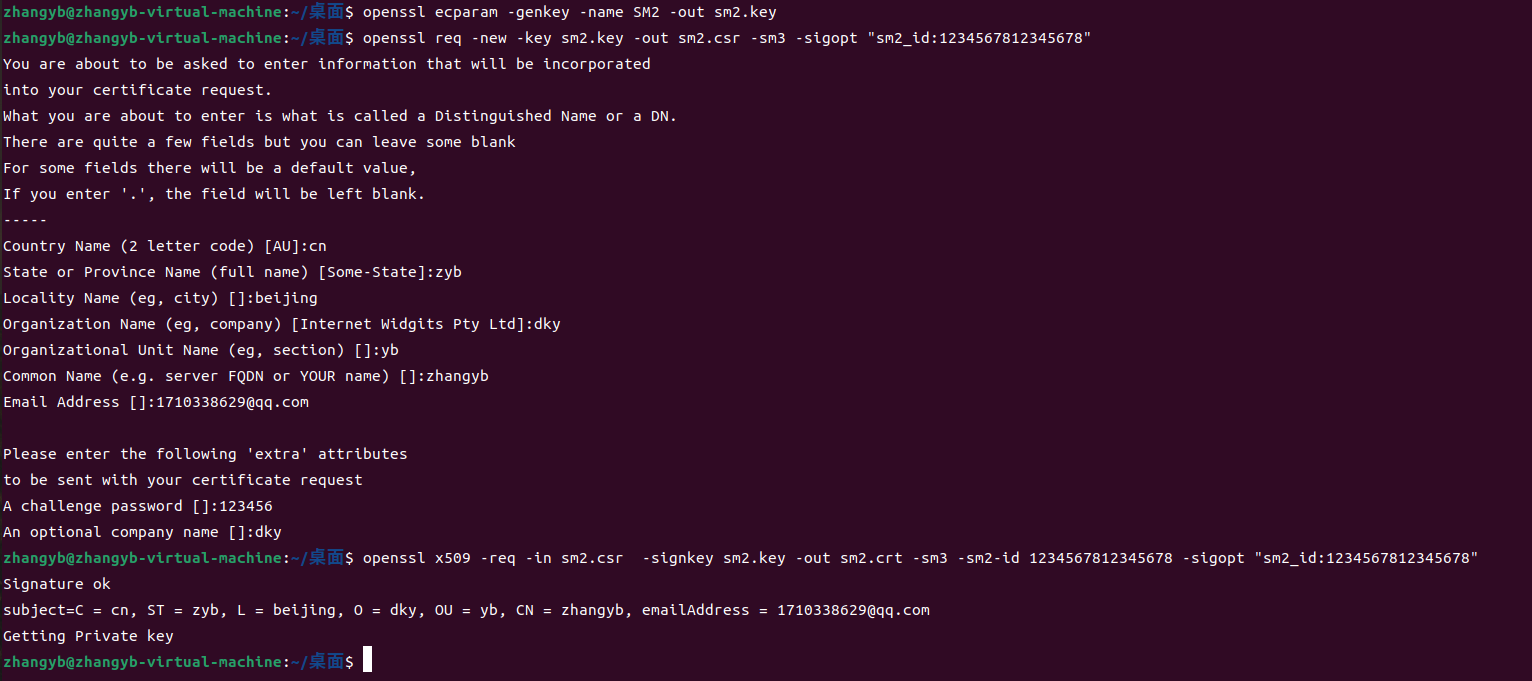
③生成证书(一般用于自签名测试证书)
openssl x509 -req -in sm2.csr -signkey sm2.key -out sm2.crt -sm3 -sm2-id 1234567812345678 -sigopt "sm2_id:1234567812345678"

2.ZUC算法实践
开启ZUC算法
./config enable-zuc
测试代码
#include <stdio.h>
#include <string.h>
#include <openssl/crypto.h>
#include <openssl/evp.h>

int main(int argc, char *argv[])
{
    EVP_MD_CTX *mctx = NULL;
    EVP_PKEY_CTX *pctx = NULL;
    EVP_PKEY *pkey = NULL;
    unsigned char *got = NULL;
    size_t got_len;
    char *mac;
    int rv;
    const char key[] = {
        0xc9, 0xe6, 0xce, 0xc4, 0x60, 0x7c, 0x72, 0xdb,
        0x00, 0x0a, 0xef, 0xa8, 0x83, 0x85, 0xab, 0x0a
        };
    /*
	 * EIA3 的 iv 只有5个字节(只用到38bit),不是随机构造,构造方法如下:
	 * |----------32bit----------|-----5bit-----|---1bit---|
	 * |          count          |    bearer    | direction|
 	 */
    const char *iv = "a94059da54";
    const char msg[] = {
        0x98, 0x3b, 0x41, 0xd4, 0x7d, 0x78, 0x0c, 0x9e,
        0x1a, 0xd1, 0x1d, 0x7e, 0xb7, 0x03, 0x91, 0xb1,
        0xde, 0x0b, 0x35, 0xda, 0x2d, 0xc6, 0x2f, 0x83,
        0xe7, 0xb7, 0x8d, 0x63, 0x06, 0xca, 0x0e, 0xa0,
        0x7e, 0x94, 0x1b, 0x7b, 0xe9, 0x13, 0x48, 0xf9,
        0xfc, 0xb1, 0x70, 0xe2, 0x21, 0x7f, 0xec, 0xd9,
        0x7f, 0x9f, 0x68, 0xad, 0xb1, 0x6e, 0x5d, 0x7d,
        0x21, 0xe5, 0x69, 0xd2, 0x80, 0xed, 0x77, 0x5c,
        0xeb, 0xde, 0x3f, 0x40, 0x93, 0xc5, 0x38, 0x81,
        0x00
        };
    size_t msg_len = 73;

    /*
	 * 将 EIA3 的 key 转换成 EVP_PKEY
	 */
    pkey = EVP_PKEY_new_raw_private_key(EVP_PKEY_EIA3, NULL, key, 16);
    if (pkey == NULL)
        goto end;

    mctx = EVP_MD_CTX_new();
    if (mctx == NULL)
        goto end;

    if (!EVP_DigestSignInit(mctx, &pctx, NULL, NULL, pkey))
        goto end;

    /*
	 * 设置 EIA3 的 iv,其中 iv 是十六进制的字符串形式
	 * 也可以设置 hexkey 来修改 key,同样是十六进制的字符吕形式
	 */
    rv = EVP_PKEY_CTX_ctrl_str(pctx, "iv", iv);
    if (rv <= 0)
        goto end;

    if (!EVP_DigestSignUpdate(mctx, msg, msg_len))
        goto end;

    if (!EVP_DigestSignFinal(mctx, NULL, &got_len))
        goto end;

    got = OPENSSL_malloc(got_len);
    if (got == NULL)
        goto end;

    if (!EVP_DigestSignFinal(mctx, got, &got_len))
        goto end;

    /*
	 * EIA3 的 mac 值为4个字节,这里打印出来
	 */
    mac = OPENSSL_buf2hexstr(got, got_len);
    printf("MAC=%s\n", mac);

    OPENSSL_free(mac);

    end:
    EVP_MD_CTX_free(mctx);
    OPENSSL_free(got);
    EVP_PKEY_free(pkey);

    return 0;
}
输出结果

(2)gmlib密码库
github下载链接:https://github.com/stan1y/gmlib
密码库探索
gmlib算法库支持国密 SM4/AES-ECB/CBC/GCM,SM3,SM2签名/加密,ZUC算法 的密码库,文档页面GMLib Docs ,项目地址 gmlib
密码库代码实践
尝试运行test内容
sm3_test
#include<gmlib/utils.h>
#include<gmlib/hash/sm3.h>
int main() {
    SM3_CTX sm3_ctx;
    uint8_t msg[] = {'a', 'b', 'c'};  // 原始消息
    uint8_t digest[SM3_DIGEST_SIZE];  // 消息摘要

    // 初始化 SM3
    sm3_init(&sm3_ctx);
    // 输入消息
    sm3_update(msg, sizeof(msg), &sm3_ctx);
    // 结束 SM3 并输出摘要 digest
    sm3_final(digest, &sm3_ctx);

    dump_data(digest, sizeof(digest));
    /*  SM3 摘要结果
        66 c7 f0 f4 62 ee ed d9 d1 f2 d4 6b dc 10 e4 e2
        41 67 c4 87 5c f2 f7 a2 29 7d a0 2b 8f 4b a8 e0
    */
    return 0;
}

sm4_test
#include <gmlib/cipher/mode.h>
#include <gmlib/cipher/sm4.h>
#include <gmlib/err.h>
#include <gmlib/utils.h>
static uint8_t sm4_key[SM4_KEYLEN] = {
0x01, 0x23, 0x45, 0x67, 0x89, 0xab, 0xcd, 0xef,
0xfe, 0xdc, 0xba, 0x98, 0x76, 0x54, 0x32, 0x10,
};
static uint8_t sm4_pt[SM4_BLOCK_SIZE] = {
0x00, 0x11, 0x22, 0x33, 0x44, 0x55, 0x66, 0x77,
0x88, 0x99, 0xaa, 0xbb, 0xcc, 0xdd, 0xee, 0xff,
};
static uint8_t out[SM4_BLOCK_SIZE * 2];
int main() {
SM4_CTX sm4key;
sm4_init(sm4_key, &sm4key);
sm4_encrypt(out, sm4_pt, &sm4key);
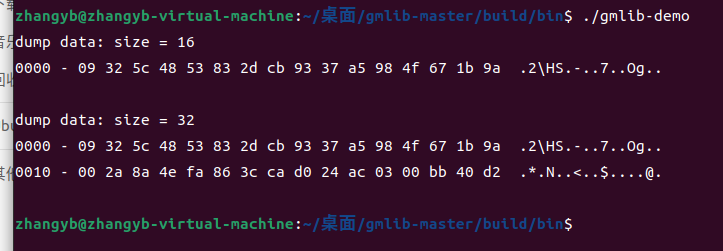
// 09 32 5c 48 53 83 2d cb 93 37 a5 98 4f 67 1b 9a
dump_data(out, SM4_BLOCK_SIZE);
ECB_CTX ctx;
uint8_t* outptr = out;
int outl;
ecb_init(sm4_key, &SM4Info, &sm4key, &ctx);
ecb_encrypt_update(outptr, &outl, sm4_pt, sizeof(sm4_pt), &ctx);
outptr += outl;
ecb_encrypt_final(outptr, &outl, &ctx);
outptr += outl;
// 09 32 5c 48 53 83 2d cb 93 37 a5 98 4f 67 1b 9a
// 00 2a 8a 4e fa 86 3c ca d0 24 ac 03 00 bb 40 d2
dump_data(out, (int)(outptr - out));
return 0;
}
(3)tjfoc-gm密码库
下载对应的安装包
在官网找到对应的安装包(https://golang.google.cn/dl/)
下好包之后直接unzip安装就好

配置环境变量
我们需要配置2个环境变量分别是 GOROOT 和 PATH。
为了方便以后的使用,需要把这几个环境变量添加profile文件中(~/.bash_profile 或 /etc/profile)。如果是单用户使用,可以将环境变量添加在 home 目录下的 bash_profile 文件中,如果是多用户使用,需要添加在 /etc/profile 文件。(推荐大家在 /etc/profile 文件中设置环境变量)
如下图修改即可
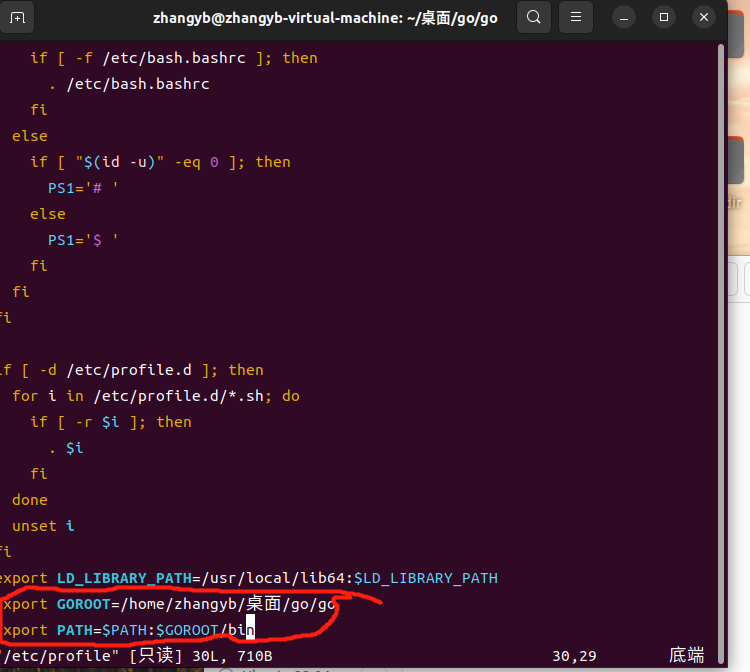
修改完成后可以在任意目录下输入go env查看go语言版本等详细信息

调通测试支持国密算法的基于go语言的算法库tjfoc-gm
首先证明SM系列可以完成


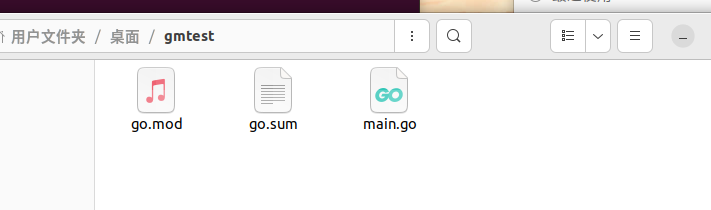
之后为了可以编译Go代码,先要进行go mod init gmtest(项目名)
项目下会自动创建 go.mod等文件
然后用go get从github里下好库
但是这里会出现一个下载很慢的问题,这里需要换一个代理即可

下载库之后查看go.mod会有如下变化

之后输入如下代码main.go
package main

import (
	"bytes"
	"crypto/cipher"
	"crypto/rand"
	"fmt"
	"log"

	"github.com/Hyperledger-TWGC/tjfoc-gm/sm2"
	"github.com/Hyperledger-TWGC/tjfoc-gm/sm3"
	"github.com/Hyperledger-TWGC/tjfoc-gm/sm4"
)

func main() {
	SM2()

	SM3()

	SM4()
}

func SM2() {
	priv, err := sm2.GenerateKey(rand.Reader) // 生成密钥对
	if err != nil {
		log.Fatal(err)
	}
	msg := []byte("Tongji Fintech Research Institute")
	pub := &priv.PublicKey
	ciphertxt, err := sm2.Encrypt(pub, msg, rand.Reader)
	if err != nil {
		log.Fatal(err)
	}
	fmt.Println("SM2加密密文是:", string(msg))
	fmt.Printf("SM2加密结果是:%x\n", ciphertxt)

	plaintxt, err := priv.Decrypt(nil, ciphertxt, nil)
	if err != nil {
		log.Fatal(err)
	}
	if !bytes.Equal(msg, plaintxt) {
		log.Fatal("原文不匹配")
	}

	sign, err := priv.Sign(rand.Reader, msg, nil)
	if err != nil {
		log.Fatal(err)
	}

	isok := priv.PublicKey.Verify(msg, sign)
	fmt.Printf("SM2 Verified: %v\n", isok)
}

func SM3() {
	data := "test"
	h := sm3.New()
	h.Write([]byte(data))
	sum := h.Sum(nil)
	fmt.Printf("SM3 digest value is: %x\n", sum)
}

func SM4() {
	// 128比特密钥
	key := []byte("1234567890abcdef")
	// 128比特iv
	iv := make([]byte, sm4.BlockSize)
	data := []byte("Tongji Fintech Research Institute")
	fmt.Println("SM4加密密文是:", string(data))
	ciphertxt, err := sm4Encrypt(key, iv, data)
	if err != nil {
		log.Fatal(err)
	}
	fmt.Printf("SM4加密结果: %x\n", ciphertxt)

	res, err := sm4Decrypt(key, iv, ciphertxt)
	if err != nil {
		log.Fatal(err)
	}
	fmt.Printf("SM4解密结果: %x\n", res)
	fmt.Println("SM4解密密文是:", string(res))
}

func sm4Encrypt(key, iv, plainText []byte) ([]byte, error) {
	block, err := sm4.NewCipher(key)
	if err != nil {
		return nil, err
	}
	blockSize := block.BlockSize()
	origData := pkcs5Padding(plainText, blockSize)
	blockMode := cipher.NewCBCEncrypter(block, iv)
	cryted := make([]byte, len(origData))
	blockMode.CryptBlocks(cryted, origData)
	return cryted, nil
}

func sm4Decrypt(key, iv, cipherText []byte) ([]byte, error) {
	block, err := sm4.NewCipher(key)
	if err != nil {
		return nil, err
	}
	blockMode := cipher.NewCBCDecrypter(block, iv)
	origData := make([]byte, len(cipherText))
	blockMode.CryptBlocks(origData, cipherText)
	origData = pkcs5UnPadding(origData)
	return origData, nil
}

// pkcs5填充
func pkcs5Padding(src []byte, blockSize int) []byte {
	padding := blockSize - len(src)%blockSize
	padtext := bytes.Repeat([]byte{byte(padding)}, padding)
	return append(src, padtext...)
}

func pkcs5UnPadding(src []byte) []byte {
	length := len(src)
	if length == 0 {
		return nil
	}
	unpadding := int(src[length-1])
	return src[:(length - unpadding)]
}
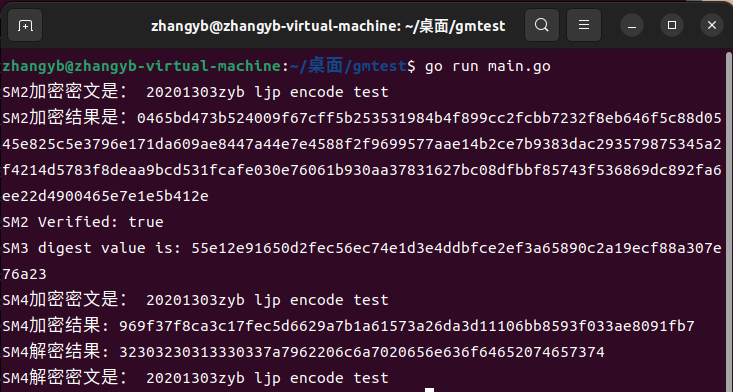
之后用go run运行main.go即可
(4)crypto++密码库
参考教程:https://blog.csdn.net/qq_32261191/article/details/78855651
https://blog.csdn.net/Yonggie/article/details/100592532
1.下载crypto++文件包,并且生成lib库文件(我生成的是debug的)
https://cryptopp.com/
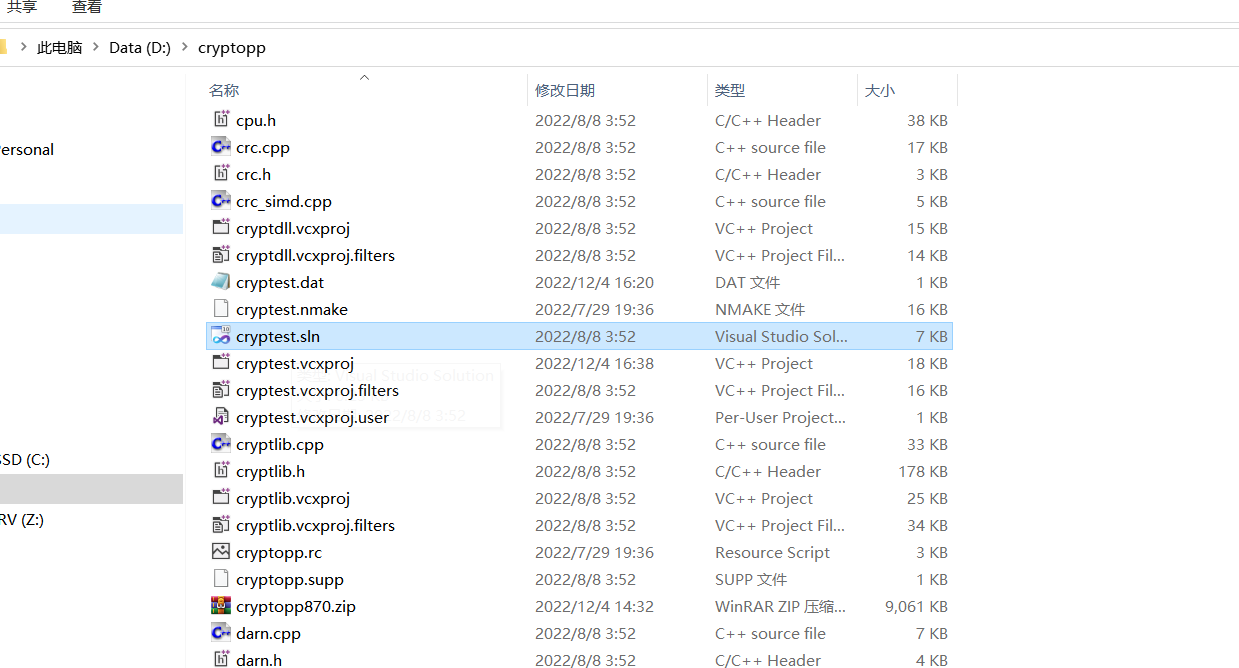
运行sln文件后,用debug模式运行就好
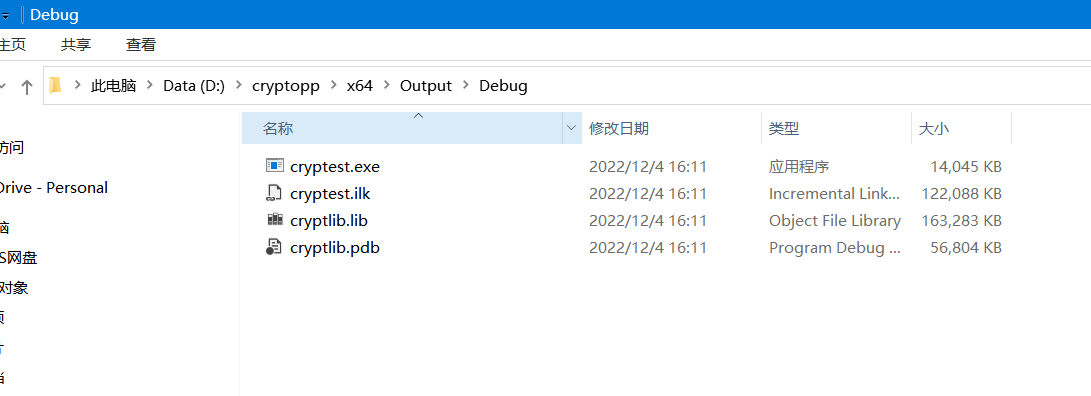
运行结束后在D:\cryptopp\x64\Output\Debug里有cryptlib.lib即可
之后运行代码,代码如下
#include "pch.h"
#include <string>
#include <cstring>
#include <vector>
#include <iostream>
#include <fstream>
#include <iomanip>
#include <algorithm>
#include "cryptopp/aes.h"
#include "cryptopp/filters.h"
#include "cryptopp/modes.h"
using namespace std;
using namespace CryptoPP;
byte key[CryptoPP::AES::DEFAULT_KEYLENGTH], iv[CryptoPP::AES::BLOCKSIZE];
void initKV() {
memset(key, 0x00, CryptoPP::AES::DEFAULT_KEYLENGTH);
memset(iv, 0x00, CryptoPP::AES::BLOCKSIZE);
}
string encrypt(string plainText) {
string cipherText;
CryptoPP::AES::Encryption aesEncryption(key, CryptoPP::AES::DEFAULT_KEYLENGTH);
CryptoPP::CBC_Mode_ExternalCipher::Encryption cbcEncryption(aesEncryption, iv);
CryptoPP::StreamTransformationFilter stfEncryptor(cbcEncryption, new CryptoPP::StringSink(cipherText));
stfEncryptor.Put(reinterpret_cast<const unsigned char*>(plainText.c_str()), plainText.length() + 1);
stfEncryptor.MessageEnd();
string cipherTextHex;
for (int i = 0; i < cipherText.size(); i++)
{
char ch[3] = { 0 };
sprintf_s(ch, "%02x", static_cast<byte>(cipherText[i]));
cipherTextHex += ch;
}
return cipherTextHex;
}
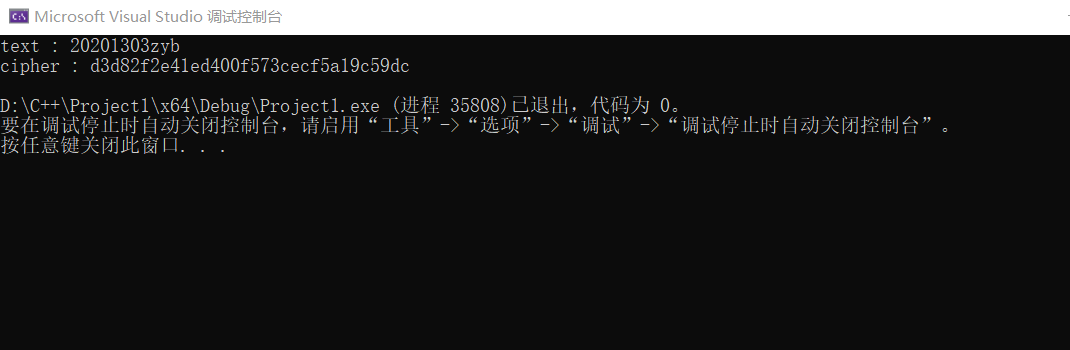
int main() {
string text = "20201303zyb";
cout << "text : " << text << endl;
initKV();
string cipherHex = encrypt(text);
cout << "cipher : " << cipherHex << endl;
}
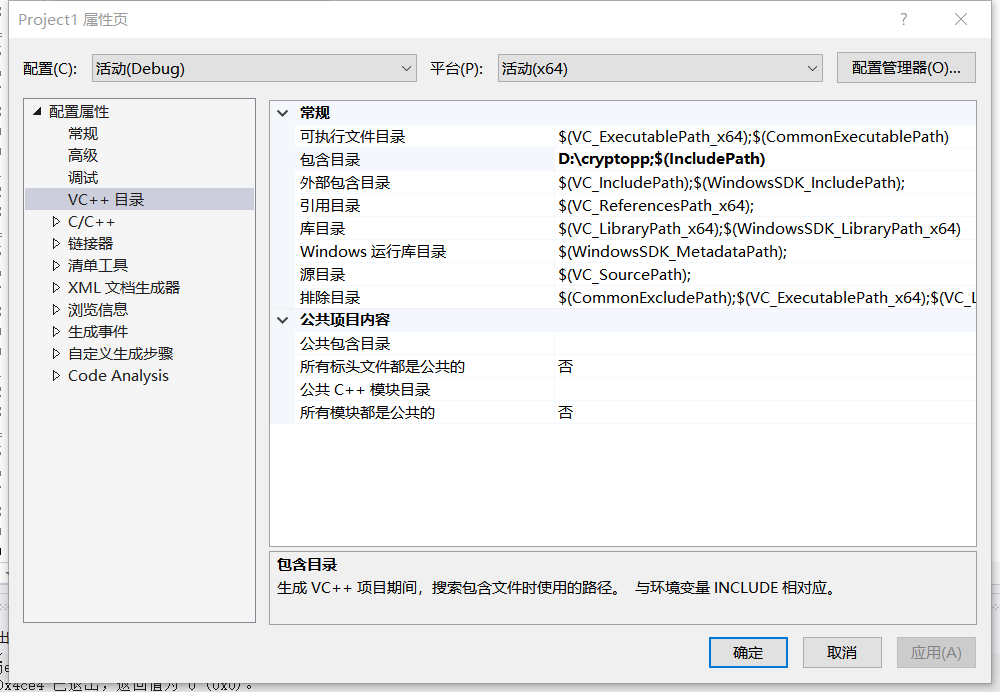
下面是关键一步,就是导入项目和lib库
导入项目
将cryptopp文件放入D:\vs\VC\Tools\MSVC\14.34.31933\include地址里
导入lib库
将debug模式生成的lib库放入D:\vs\VC\Tools\MSVC\14.34.31933\lib\x64里,注意一定要对应debug/release模式,不要整差了。

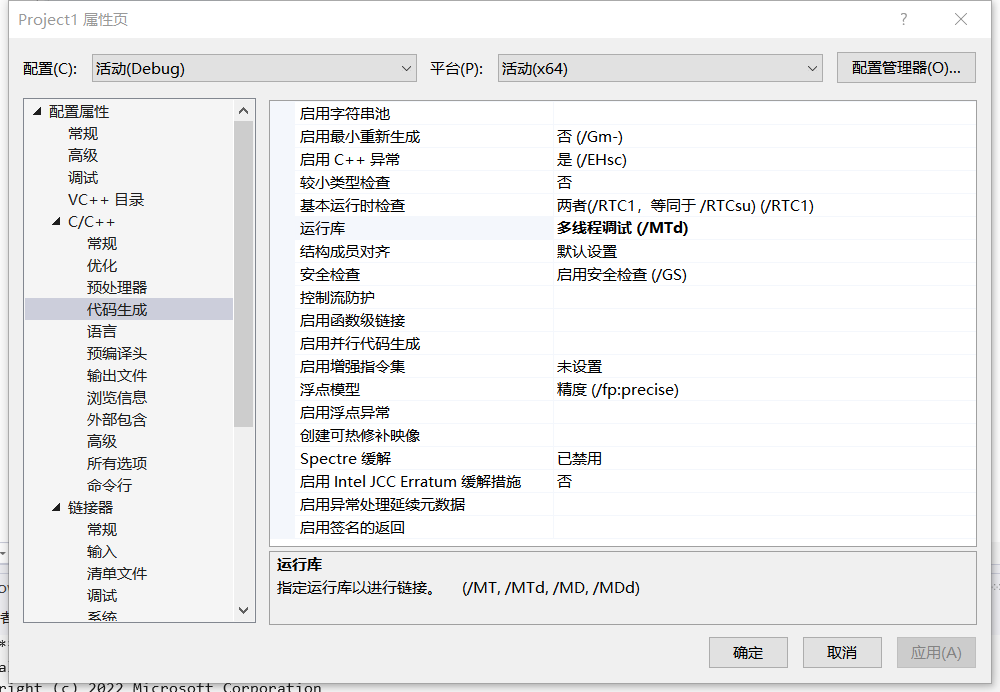
导入后发现报错_ITERATOR_DEBUG_LEVEL不匹配,错误代码LNK2038
调整C/C++模块的代码生成内容,改成多线程调试(/MTD)即可
发现debug运行成功
(5)Miracl密码库(SM9算法实践)
代码链接:https://github.com/songgeng87/SM9_FREE
sm9代码
#include <stdio.h>
#include <string.h>
#include <time.h>


#include "sm9/sm9_algorithm.h"
#include "sm9/print_out.h"

#define TEST 100

int main(int argc, char **argv)
{
    printf("20201303begin test \n");
//===========签名用到的参数==========
    unsigned char cks[32] = "\x86\xDC\xD6\x4F\xEB\x81\xA7\x19\x63\x59\x59\xF1\xA5\xC2\xF9\x88\xBD\x39\x43\x1B\x08\xA8\x63\xF0\x42\x8D\x21\xDF\xFA\xF2\xBF\x89";
    unsigned char id[5] = {"\x41\x6C\x69\x63\x65"};
    unsigned char rand[32] = {"\x1A\x23\x29\x77\xBA\x9F\xA2\xD1\xC5\x58\xF2\xD4\x67\xFE\x7B\xE7\x04\x05\x41\x26\x73\xF8\xBE\x64\x9B\xBD\xD4\xA0\x95\xBE\x1B\x4B"};
    unsigned char msg[20] = {"\x43\x68\x69\x6E\x65\x73\x65\x20\x49\x42\x53\x20\x73\x74\x61\x6E\x64\x61\x72\x64"};
//========加密用到的参数===================
    unsigned char cmsg[20] = {"\x43\x68\x69\x6E\x65\x73\x65\x20\x49\x42\x45\x20\x73\x74\x61\x6E\x64\x61\x72\x64"};
    unsigned char eks[32] = {"\x00\x01\xED\xEE\x37\x78\xF4\x41\xF8\xDE\xA3\xD9\xFA\x0A\xCC\x4E\x07\xEE\x36\xC9\x3F\x9A\x08\x61\x8A\xF4\xAD\x85\xCE\xDE\x1C\x22"};
    unsigned char eid[3] = {"\x42\x6F\x62"};
    unsigned char er[32] = {"\x00\x00\xAA\xC0\x54\x17\x79\xC8\xFC\x45\xE3\xE2\xCB\x25\xC1\x2B\x5D\x25\x76\xB2\x12\x9A\xE8\xBB\x5E\xE2\xCB\xE5\xEC\x9E\x78\x5C"};
    unsigned char plain[32];
    unsigned int plainlen;
//==============密钥交换用到的参数================
    unsigned char kks[32] = {"\x00\x02\xE6\x5B\x07\x62\xD0\x42\xF5\x1F\x0D\x23\x54\x2B\x13\xED\x8C\xFA\x2E\x9A\x0E\x72\x06\x36\x1E\x01\x3A\x28\x39\x05\xE3\x1F"};
    unsigned char alice[5] = {"\x41\x6C\x69\x63\x65"};
    unsigned char bob[3] = {"\x42\x6F\x62"};

    unsigned char ra[32] = {"\x00\x00\x58\x79\xDD\x1D\x51\xE1\x75\x94\x6F\x23\xB1\xB4\x1E\x93\xBA\x31\xC5\x84\xAE\x59\xA4\x26\xEC\x10\x46\xA4\xD0\x3B\x06\xC8"};

    unsigned char rb[32] = {"\x00\x01\x8B\x98\xC4\x4B\xEF\x9F\x85\x37\xFB\x7D\x07\x1B\x2C\x92\x8B\x3B\xC6\x5B\xD3\xD6\x9E\x1E\xEE\x21\x35\x64\x90\x56\x34\xFE"};

    time_t start,end;
    int res;

    unsigned char *gg;

    unsigned char AS1[32];
    unsigned char AS2[32];
    unsigned char ASK[16];

    unsigned char BS1[32];
    unsigned char BS2[32];
    unsigned char BSK[16];


//============独立验证时用到的参数==========
    unsigned char x1[32] = {"\x0f\xbd\x02\x40\x35\xb4\xca\x2f\x94\x14\x4f\xdf\x33\x3b\xf8\xe1\x81\x74\x7c\x8d\xd8\x5d\xe4\x12\xad\xc7\x18\x18\x98\x72\x43\x27"};
    unsigned char x2[32] = {"\x13\x2d\x39\x44\x38\x7b\x63\x1e\xe4\xb0\x55\x89\x9f\x6c\xfe\x42\x8f\xb9\xfc\x9f\xa2\x75\x68\x9f\xeb\x36\xbe\x2b\x60\x21\xea\xbe"};
    unsigned char y1[32] = {"\x07\x81\x20\x17\xdb\x06\x91\xd3\x43\x11\x36\x83\x21\x19\xe0\xe1\x94\x4e\x85\x5a\xed\xfc\xa7\x10\xed\xd1\x46\x6e\x69\x01\x8e\xa1"};
    unsigned char y2[32] = {"\x89\xf9\xf0\x0f\x5e\x05\x10\x6c\xb3\x4f\x60\x0f\xd9\x48\x92\x4b\x87\x24\x7b\xde\x11\xdf\x34\x01\x3d\xb6\xb9\x54\xbb\xf1\x9a\x55"};

    unsigned char h[32] = {"\xa1\xc3\xa6\xce\x30\x90\xea\x0d\xbd\x07\xe2\x1b\xcb\xdb\x43\x40\x4b\x80\x98\xf1\x90\x4d\xd6\xe7\x28\x3c\x7d\xfc\xdb\x23\x65\x91"};
    unsigned char xs[32] = {"\x2f\x5f\xe6\x33\xb6\x04\x16\x76\xfe\x77\x0d\x3f\xd3\x09\x6e\x0b\x64\xb0\x01\x0e\x1d\xa5\x50\x96\x5c\xd1\x94\xad\x53\x51\xa4\x98"};
    unsigned char ys[32] = {"\x51\x2b\x48\xf2\xae\xde\x4b\x10\xef\x25\xca\x58\x46\x49\x93\x8b\xfc\xd6\x3e\xe8\xb4\x8f\xbb\x86\xeb\x82\xa8\x22\x42\x97\x63\x14"};


    //如下可以使用SM9 第五部分 指定的曲线类型和主密钥初始化系统
    //也可以使用自定义曲线
    //
    SM9_Init(0,0,32,NULL,NULL, NULL, NULL, NULL, NULL, NULL, NULL, NULL, NULL, NULL );


// ========================================================
    SM9_MSK msk = SM9_MSK_New(32, cks);  // 申明一个签名主密钥
    SM9_MSPK mspk = SM9_MSPK_New(32);   //申明一个主签名公钥

    SM9_GenMSignPubKey(&msk, &mspk);  // 生成签名主公钥

    gg = SM9_Set_Sign(mspk.x1, mspk.x2, mspk.y1, mspk.y2, NULL); // 启动签名lib

    if (gg == NULL){
        printf("init sign lib error\n");
        return 1;
    }
    SM9_PK pk = SM9_PK_New(5, id);       // 申明一个签名公钥
    SM9_SSK sk = SM9_SSK_New(32);            // 申明一个签名私钥

    SM9_GenSignSecKey(&sk, &pk, &msk); // 由公钥(id)生成签名私钥

    SM9_Sign sign = SM9_Sign_New(32);   // 申明一个签名体

//===============signature test===============
      //使用私钥sk和随机数ran,对消息mes签名
    time(&start);

    for(int i=0;i<TEST;i++){
        SM9_Signature(msg, 20, rand, &sk, &sign);
    }
    time(&end);

    printf("sign %d time is %ld sec\n",TEST, end-start);

    time(&start);
    for(int i=0;i<TEST;i++){// 验证函数
        res = SM9_Verify(msg, 20, &sign, &pk, NULL);
        if (res) printf("verify error at %d = %d\n", i,res);
    }

    time(&end);
    printf("verify %d time is %ld sec\n",TEST, end-start);

//===============independent verify test===============
    SM9_Free();  //注销SM9

    //重新启动SM9
    SM9_Init(0,0,32,NULL,NULL, NULL, NULL, NULL, NULL, NULL, NULL, NULL, NULL, NULL );

    SM9_MSPK inmspk = SM9_MSPK_New(32);
    SM9_Sign insign = SM9_Sign_New(32);
    SM9_PK inpk = SM9_PK_New(5, id);

    inmspk.secLevel =32;
    inmspk.x1 = x1;
    inmspk.x2 = x2;
    inmspk.y1 = y1;
    inmspk.y2 = y2;

    gg = SM9_Set_Sign(inmspk.x1, inmspk.x2, inmspk.y1, inmspk.y2, NULL); // 启动签名lib

    if (gg == NULL){
        printf("init sign lib error\n");
        return 1;
    }

    insign.h = h;
    insign.xs = xs;
    insign.ys = ys;
    int inres;
    inres = SM9_Verify(msg, 20, &insign, &inpk, NULL);
    if (inres) {
        printf("independent verify error = %d\n",inres);
    }else{
        printf("independent verify success! \n");
    }

//===============encryption test===============
    SM9_MSK esk = SM9_MSK_New(32, eks);  // 申明一个加密主密钥
    SM9_MCPK mcpk = SM9_MCPK_New(32);   //申明一个主加密公钥
    SM9_GenMEncryptPubKey(&esk, &mcpk); // 生成加密主公钥
    gg = SM9_Set_Encrypt(mcpk.x, mcpk.y,NULL);  // 启动加密lib
    if (gg == NULL){
        printf("init encryption lib error\n");
        return 1;
    }

    SM9_PK epk = SM9_PK_New(3, eid);   //申明一个加密公钥
    SM9_CSK csk = SM9_CSK_New(32);   //申明一个加密私钥
    SM9_GenEncryptSecKey(&csk, &epk, &esk);  // 由公钥(id)生成加密私钥

    SM9_Cipher cipher = SM9_Cipher_New(32);

    time(&start);
    for(int i=0;i<TEST;i++){
        SM9_Encrypt(cmsg, 20, KDF_SM4, er, &epk, &cipher);
    }
    time(&end);
    printf("Encrypt %d time is %ld sec\n",TEST, end-start);

    time(&start);
    for(int i=0;i<TEST;i++){
        res = SM9_Decrypt(&epk, KDF_SM4, &csk, &cipher, plain, &plainlen);
        if (res) printf("decrypt error code is %d \n", res);
    }
    time(&end);
    printf("Decrypt %d time is %ld sec\n",TEST, end-start);


//===============keyexchange test===============
    SM9_MSK ksk = SM9_MSK_New(32, kks);

    SM9_MKPK mkpk = SM9_MKPK_New(32);   //申明一个主协商公钥
    SM9_GenMKeyExchangePubKey(&ksk, &mkpk); // 生成协商主公钥

    gg = SM9_Set_KeyExchange(mkpk.x, mkpk.y,NULL);  // 启动协商lib

    if (gg == NULL){
        printf("init keyexchange lib error\n");
        return 1;
    }

    SM9_PK  apk = SM9_PK_New(5, alice);
    SM9_KSK ask = SM9_KSK_New(32);
    SM9_GenKeyExchangeSecKey(&ask, &apk, &ksk);

    SM9_PK  bpk = SM9_PK_New(3, bob);
    SM9_KSK bsk = SM9_KSK_New(32);
    SM9_GenKeyExchangeSecKey(&bsk, &bpk, &ksk);

    SM9_Send ase = SM9_Send_New(32);
    SM9_Send bse = SM9_Send_New(32);

    SM9_SendStep(ra, &bpk, &ase);
    SM9_SendStep(rb, &apk, &bse);


    time(&start);
    for(int i=0;i<TEST;i++){
        SM9_ReceiveStep(ra, &ase, &bse, &apk, &bpk, &ask, 16, AS1, AS2, ASK, AKE_SENDER);
        SM9_ReceiveStep(rb, &bse, &ase, &bpk, &apk, &bsk, 16, BS1, BS2, BSK, AKE_RECEIVER);
        if(SM9_CheckStep(AS1, BS2)) printf("error at step 1\n");
        if(SM9_CheckStep(AS2, BS1)) printf("error at step 2\n");
    }
    time(&end);
    printf("key exchange %d time is %ld sec\n", TEST*2,end-start);
    printf("end test \n ================== \n");
    return 0;
}
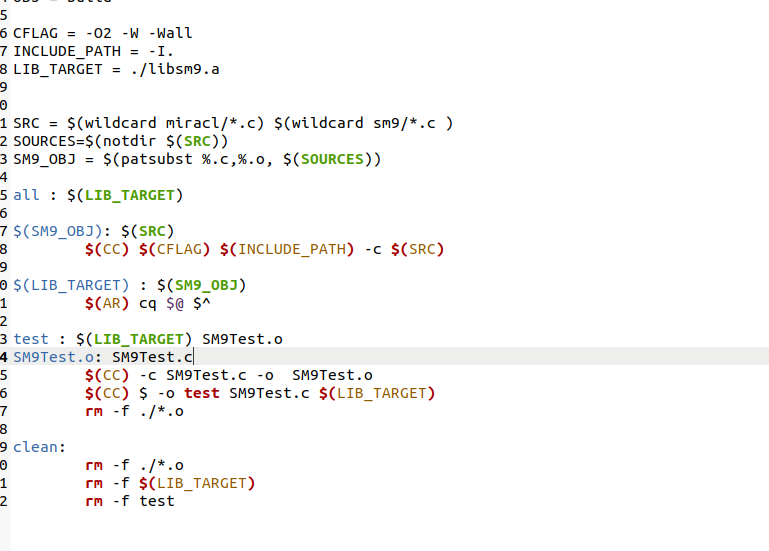
然后 make test发现不行,这时候查询之后发现问题,是makefile有点问题
参考https://www.cnblogs.com/PiaYie/p/16746335.html修改makefile文件
test : $(LIB_TARGET) SM9Test.o
SM9Test.o: SM9Test.c
	$(CC) -c SM9Test.c -o  SM9Test.o
	$(CC) $ -o test SM9Test.c $(LIB_TARGET)
	rm -f ./*.o
运行截图

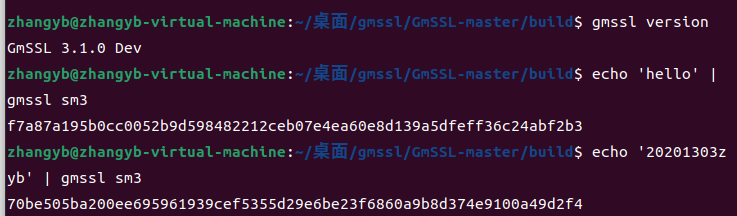
(6)OPENSSL/GMSSL密码库
GMSSL代码链接:https://github.com/guanzhi/GmSSL
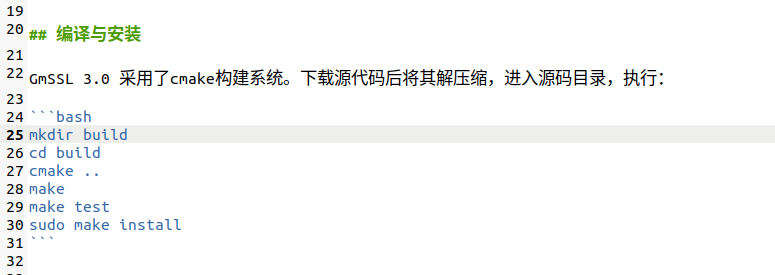

OPENSSL:
代码
#include <stddef.h>
#include <stdio.h>
#include <stdlib.h>
#include <string.h>
#include "openssl/err.h"
#include "openssl/evp.h"

/* Before OpenSSL 1.1.1-pre1, we did not have EVP_sm4_ecb() */
#if defined(OPENSSL_VERSION_NUMBER) \
    && OPENSSL_VERSION_NUMBER < 0x10101001L
static const EVP_CIPHER *(*EVP_sm4_ecb)()=EVP_aes_128_ecb;
#endif

typedef struct {
    const unsigned char *in_data;
    size_t in_data_len;
    int in_data_is_already_padded;
    const unsigned char *in_ivec;
    const unsigned char *in_key;
    size_t in_key_len;
} test_case_t;


void test_encrypt_with_cipher(const test_case_t *in, const EVP_CIPHER *cipher)
{
    unsigned char *out_buf = NULL;
    int out_len;
    int out_padding_len;
    EVP_CIPHER_CTX *ctx;

    ctx = EVP_CIPHER_CTX_new();
    EVP_EncryptInit_ex(ctx, cipher, NULL, in->in_key, in->in_ivec);

    if (in->in_data_is_already_padded)
    {
        /* Check whether the input data is already padded.
        And its length must be an integral multiple of the cipher's block size. */
        const size_t bs = EVP_CIPHER_block_size(cipher);
        if (in->in_data_len % bs != 0)
        {
            printf("ERROR-1: data length=%d which is not added yet; block size=%d\n", (int) in->in_data_len, (int) bs);
            /* Warning: Remember to do some clean-ups */
            EVP_CIPHER_CTX_free(ctx);
            return;
        }
        /* Disable the implicit PKCS#7 padding defined in EVP_CIPHER */
        EVP_CIPHER_CTX_set_padding(ctx, 0);
    }

    out_buf = (unsigned char *) malloc(((in->in_data_len>>4)+1) << 4);
    out_len = 0;
    EVP_EncryptUpdate(ctx, out_buf, &out_len, in->in_data, in->in_data_len);
    if (1)
    {
        printf("Debug: out_len=%d\n", out_len);
    }

    out_padding_len = 0;
    EVP_EncryptFinal_ex(ctx, out_buf+out_len, &out_padding_len);
    if (1)
    {
        printf("Debug: out_padding_len=%d\n", out_padding_len);
    }

    EVP_CIPHER_CTX_free(ctx);
    if (1)
    {
        int i;
        int len;
        len = out_len + out_padding_len;
        for (i=0; i<len; i++)
        {
            printf("%02x ", out_buf[i]);
        }
        printf("\n");
    }

    if (out_buf)
    {
        free(out_buf);
        out_buf = NULL;
    }
}

void main()
{
    int have_sm4 = (OPENSSL_VERSION_NUMBER >= 0x10101001L);
    int have_aes = 1;
    const unsigned char data[]=
    {
        0x01, 0x23, 0x45, 0x67, 0x89, 0xab, 0xcd, 0xef,
        0xfe, 0xdc, 0xba, 0x98, 0x76, 0x54, 0x32, 0x10,
    };
    unsigned char ivec[EVP_MAX_IV_LENGTH]; ///< IV 向量
    const unsigned char key1[16] = ///< key_data, 密钥内容, 至少16字节
    {
        0x01, 0x23, 0x45, 0x67, 0x89, 0xab, 0xcd, 0xef,
        0xfe, 0xdc, 0xba, 0x98, 0x76, 0x54, 0x32, 0x10,
    };
    test_case_t tc;

    tc.in_data = data;
    tc.in_data_len = sizeof(data);
    tc.in_data_is_already_padded = (tc.in_data_len % 16)==0; // Hard coded 16 as the cipher's block size
    tc.in_key = key1;
    tc.in_key_len = sizeof(key1);
    memset(ivec, 0x00, EVP_MAX_IV_LENGTH);
    tc.in_ivec = ivec;

#if defined(OPENSSL_NO_SM4)
    have_sm4 = 0;
#endif
    if (have_sm4)
    {
        printf("[1]\n");
        printf("Debug: EVP_sm4_ecb() test\n");
        test_encrypt_with_cipher(&tc, EVP_sm4_ecb());
    }
#if defined(OPENSSL_NO_AES)
    have_aes = 0;
#endif
    if (have_aes)
    {
        printf("[2]\n");
        printf("Debug: EVP_aes_128_ecb() test\n");
        test_encrypt_with_cipher(&tc, EVP_aes_128_ecb());
    }
}

#include <stdio.h>
#include <string.h>
#include <openssl/evp.h>
#include <openssl/err.h>
void tDigest(){
	unsigned char md_value[EVP_MAX_MD_SIZE];
	unsigned int md_len;
	EVP_MD_CTX *mdctx;
	mdctx = EVP_MD_CTX_new();
	char msg1[] = "20201303";
	char msg2[] = "ZHANGyibo";
	EVP_MD_CTX_init(mdctx);
	EVP_DigestInit_ex(mdctx, EVP_sm3(), NULL);
	EVP_DigestUpdate(mdctx, msg1, strlen(msg1));
	EVP_DigestUpdate(mdctx, msg2, strlen(msg2));
	EVP_DigestFinal_ex(mdctx, md_value, &md_len);
	EVP_MD_CTX_destroy(mdctx);

	printf("Debug:Message1%s and Message2%s digest to:\n",msg1, msg2);
	for(int i = 0; i<md_len; i++){

		printf("0x%02x ", md_value[i]);
	}
	printf("\n");
}

int main(){

	OpenSSL_add_all_algorithms();
	tDigest();
	return 0;
}

2.列出调试过程中遇到的主要问题,并说明解决方法;
(1) 很多代码调试出现问题,代码提示缺少头文件等报错
其实,后面基本每个算法库都会有头文件报错等问题,但是每个算法库的对应解决方法不太一样,这里列举一下
①BABASSL头文件丢失的问题,我找到对应算法库缺失的代码加入静态链接就好了
②gmlib头文件丢失问题,编译时出现问题,这时候修改cmakelist.txt文件,发现make编译出现的问题,这时候修改文件将最后编译的内容改成自己要编译的文件即可。
③tjfoc-gm头文件丢失,这时候用go get从github上把库copy下来就行了
④crypto++头文件丢失,这时候我们采用vs软件重新编译,按着网络上找的攻略就好
⑤mircal头文件丢失,这时候我们修改makefile文件,将其补充完整就行
(2)有些函数跑不了
基本上出现的问题都是因为密码库版本和网络上查的攻略版本不同,总之要注意一下版本兼容性,有些密码库比如gmssl在2.4之后支持SM2,SM3,SM4等内容,但是我下载的是GMSSL3.1.0出现了和攻略不兼容的问题,修改版本成gmssl2.4.0版本后就可以运行。
(3)其余问题
其实,还有很多其他问题,这里因为没有共性所以就没有列举,但是基本上所有问题都可以通过百度解决,这次实验我也更充分的学到了如何更高效的通过百度解决问题
3.设计体会及收获
本次课设,我负责完成C语言和GO语言的部分,也是尝试了很多的库,但是成功的和失败的基本上是一半一半,其中遇到了非常多的问题,但是我并没有遇到困难而放弃,遇到问题就解决,虽然可以经常一个代码很多的报错,但是其实就是一个头文件的问题,解决了之后许多报错就同步消失了。总之,这次课设难度很高,但是经过很多的考验,我们组也顺利完成任务,基本完成各项代码的调试。
4.参考资料
https://gitcode.net/mirrors/babassl/babassl
https://github.com/stan1y/gmlib
https://golang.google.cn/dl/
https://blog.csdn.net/qq_32261191/article/details/78855651
https://blog.csdn.net/Yonggie/article/details/100592532
https://cryptopp.com/
https://github.com/songgeng87/SM9_FREE
https://github.com/guanzhi/GmSSL
还有一些攻略博客这里找不到了。。
