

spring jpa 学习笔记(一) 之集成
一、pom 配置
<?xml version="1.0"?>
<project
    xsi:schemaLocation="http://maven.apache.org/POM/4.0.0 http://maven.apache.org/xsd/maven-4.0.0.xsd"
    xmlns="http://maven.apache.org/POM/4.0.0" xmlns:xsi="http://www.w3.org/2001/XMLSchema-instance">
    <modelVersion>4.0.0</modelVersion>
    <parent>
        <groupId>com.module.demo</groupId>
        <artifactId>module-parent</artifactId>
        <version>${module.version}</version>
        <relativePath>../../module-parent/pom.xml</relativePath>
    </parent>
    <artifactId>module-jpa-dao</artifactId>
    <name>module-jpa-dao</name>
    <url>http://maven.apache.org</url>
    <properties>
        <project.build.sourceEncoding>UTF-8</project.build.sourceEncoding>
    </properties>
    <dependencies>
        <dependency>
            <groupId>junit</groupId>
            <artifactId>junit</artifactId>
            <scope>test</scope>
        </dependency>
        <dependency>
            <groupId>org.springframework.boot</groupId>
            <artifactId>spring-boot-starter-data-jpa</artifactId>
        </dependency>
        <dependency>
            <groupId>mysql</groupId>
            <artifactId>mysql-connector-java</artifactId>
            <scope>runtime</scope>
        </dependency>                        //引入JPA和数据库驱动
        <dependency>
            <groupId>com.module.demo</groupId>
            <artifactId>module-dao-interface</artifactId>
        </dependency>
    </dependencies>
</project>
二、Jpa Tool 将数据库表生成 实体对象
由于数据库表格较多,且实体对象编写需要在了解并深入学习了 jpa 实体对象方面的知识后,才能正确配置,这样给集成工作带来了很大的难度,基于此,为了减少集成成本,使用了 eclipse 中的 JPA tool 工具直接将 数据库表格映射成实体类。
1、eclipse 建立 Database Connection
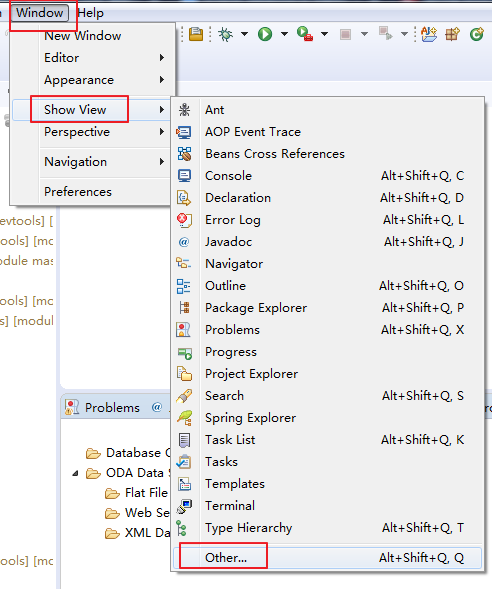
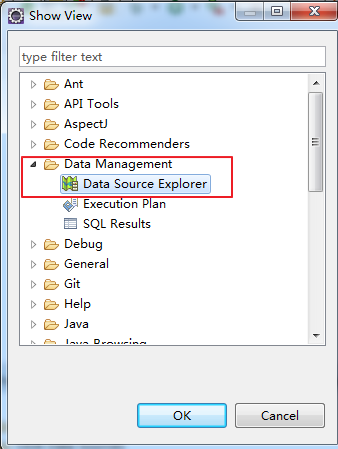
(1)点击 eclipse 中的 window --> show view ---> other ---> Data Management --> Data Source Explorer 打开 数据库连接管理视图

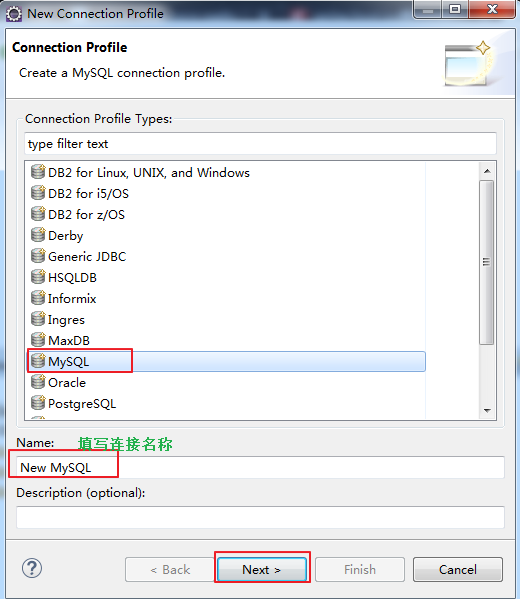
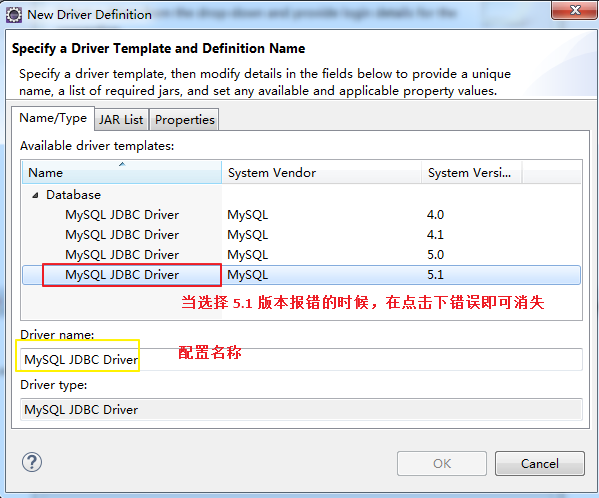
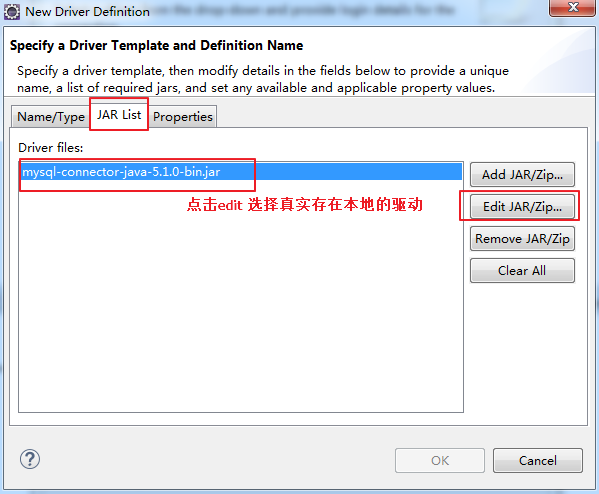
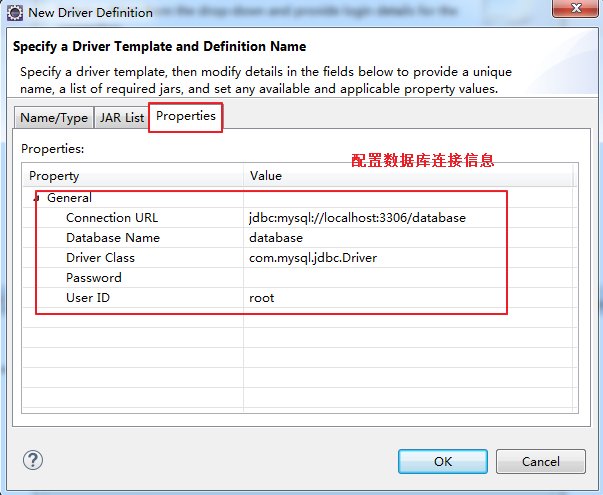
(2)建立数据库连接
这里使用的是 mysql。


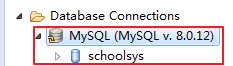 Data Source Explorer 出现该视图表示 数据库连接已经建立完毕。
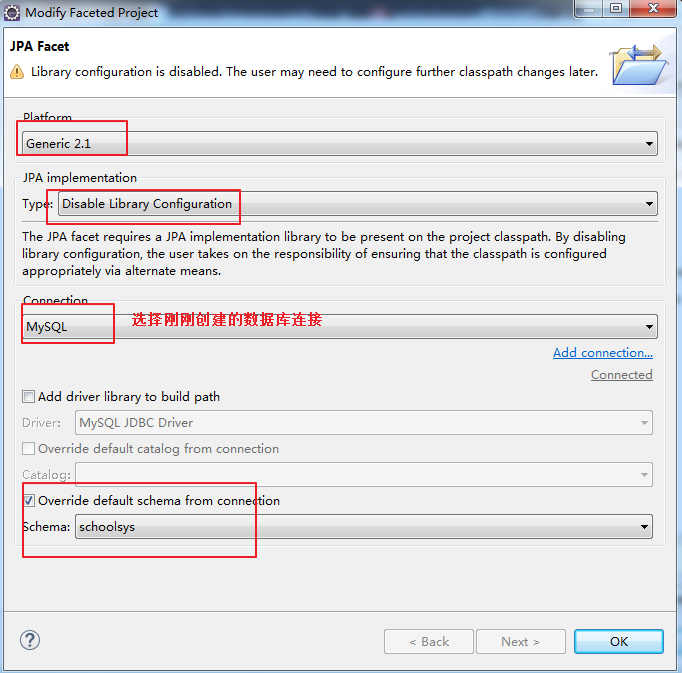
(3) 为项目添加 JPA Tool
选择项目,右键 选择 properties


(4) 通过(3)给项目添加了 JPA Tool,此时通过 JPA TOOL 生成实体类
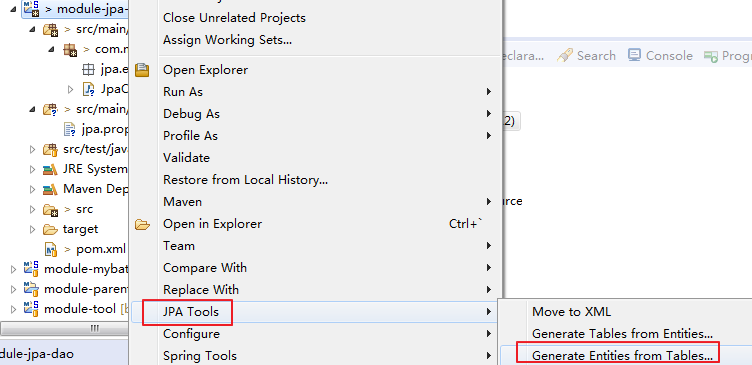
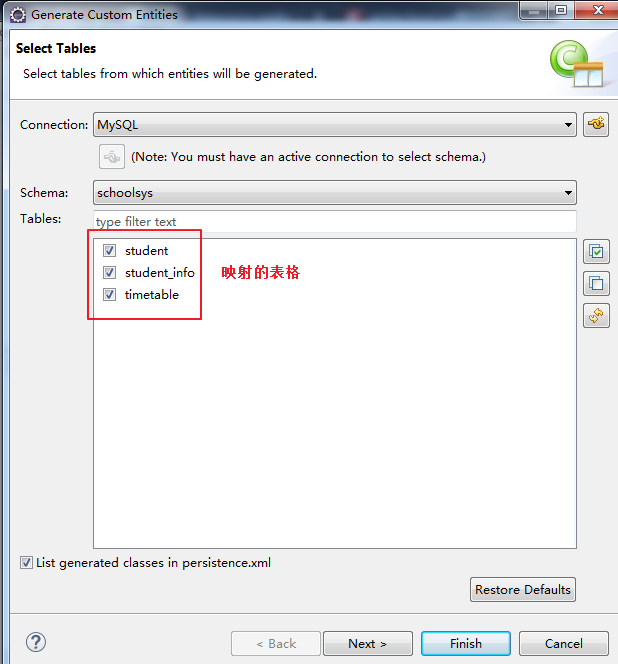

经过以上步骤, 在 com.module.demo.dap.jpa.entity 下面就生成了对应的实体类,如:
package com.module.demo.dao.jpa.entity;

import java.io.Serializable;
import javax.persistence.*;


/**
 * The persistent class for the student database table.
 *
 */
@Entity
@NamedQuery(name="Student.findAll", query="SELECT s FROM Student s")
public class Student implements Serializable {
    private static final long serialVersionUID = 1L;

    @Id
    @GeneratedValue(strategy=GenerationType.IDENTITY)
    private int id;

    private String name;

    //bi-directional many-to-one association to Timetable
    @ManyToOne
    @JoinColumn(name="timaeable")
    private Timetable timetable;

    public Student() {
    }

    public int getId() {
        return this.id;
    }

    public void setId(int id) {
        this.id = id;
    }

    public String getName() {
        return this.name;
    }

    public void setName(String name) {
        this.name = name;
    }

    public Timetable getTimetable() {
        return this.timetable;
    }

    public void setTimetable(Timetable timetable) {
        this.timetable = timetable;
    }

}
三、JPA配置
(1) 配置 dao 层(即配置数据库访问层的仓库)
package com.module.demo.dao.jpa.repository;

import org.springframework.data.repository.PagingAndSortingRepository;

import com.module.demo.dao.jpa.entity.Student;

public interface StudentRepository extends PagingAndSortingRepository<Student, Integer> {    //一定要继承

}
(2)经过以上配置,需要配置 jpa 实体类扫描和 仓库扫描
配置扫描的方式有两种,一种使用 JPA的注解;另一种使用通用注解 a) JPA的注解
package com.module.demo.dao;

import org.springframework.boot.autoconfigure.domain.EntityScan;
import org.springframework.context.annotation.ComponentScan;
import org.springframework.context.annotation.Configuration;
import org.springframework.context.annotation.PropertySource;
import org.springframework.data.jpa.repository.config.EnableJpaRepositories;

@Configuration
@PropertySource("classpath:jpa.properties")    //JPA 个性化配置
@ComponentScan(basePackageClasses=JpaConfiguration.class)
@EnableJpaRepositories     //指明扫描的dao层,在这里没有配置具体的包,默认会在当前类所属包及其子包中进行扫描
@EntityScan   //指明扫描的实体类,在这里没有配置具体的包,默认会在当前类所属包及其子包中进行扫描
public class JpaConfiguration {
}
b) 通用注解
- 在 application.yml 文件中添加注解 spring.main.allow-bean-definition-overriding=true;
spring:
  application:
    name: web
  profiles:
    active: "@package.env@"
# datasource:
#    type: com.alibaba.druid.pool.DruidDataSource
  main:
    allow-bean-definition-overriding: true     //允许bean定义覆盖

server:
  port: 8090
  servlet:
    context-path: /web
- 在 配置类中添加 @EnableAutoConfiguration
@Configuration
@PropertySource("classpath:jpa.properties")
@ComponentScan(basePackageClasses=JpaConfiguration.class)
/*@EnableJpaRepositories
@EntityScan*/
@EnableAutoConfiguration     //自动根据classpath 加载对应配置类
public class JpaConfiguration {
}

 浙公网安备 33010602011771号