

Azkaban的下载与安装
1. Azkaban的下载
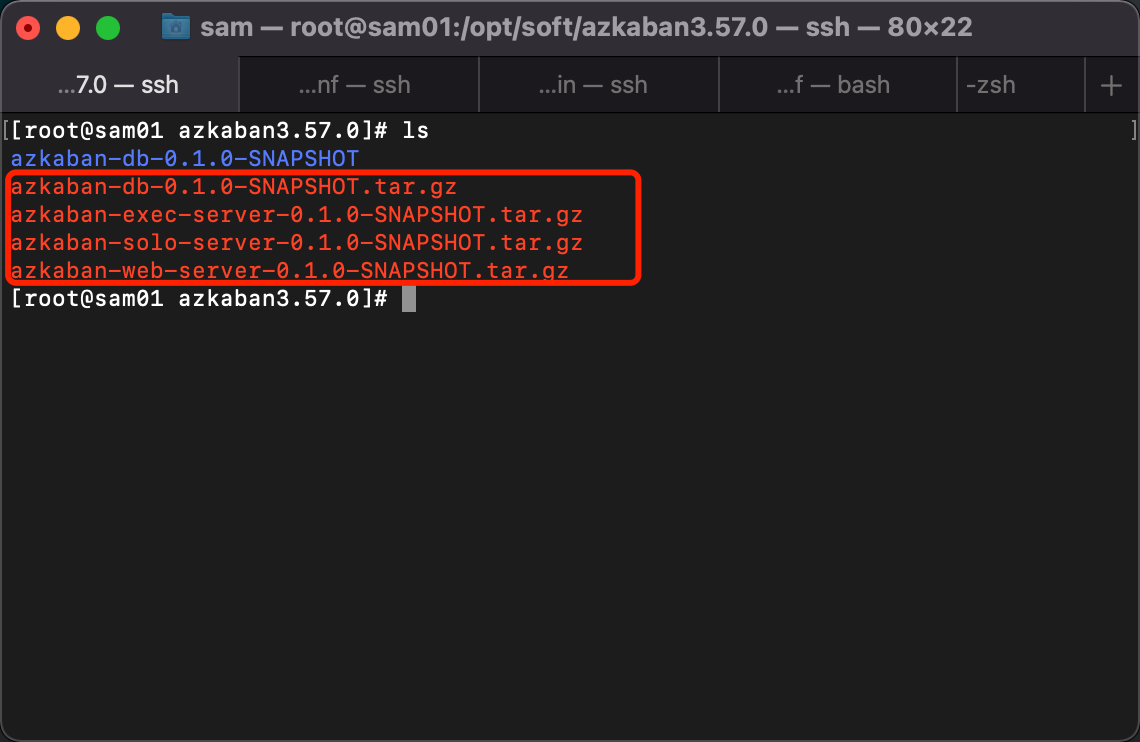
2.解压得到安装包
3. mysql中配置Azkaban的元数据库
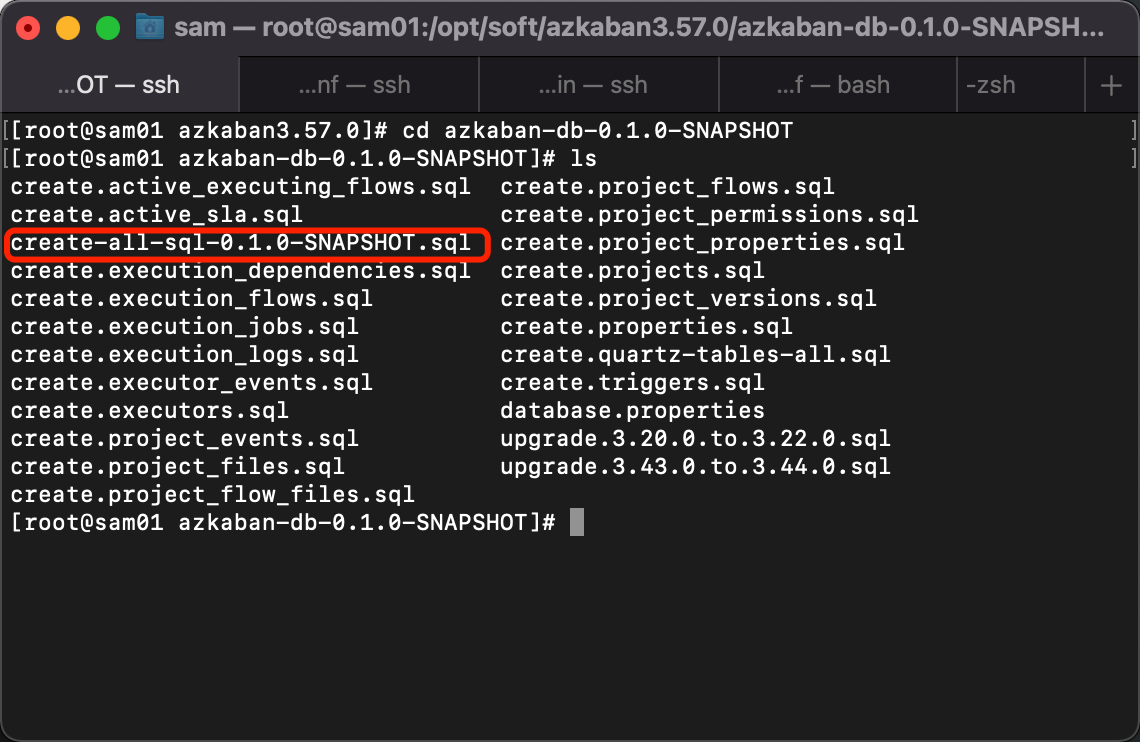
3.1 解压azkaban-db-0.1.0-SNAPSHOT.tar.gz
[root@sam01 azkaban3.57.0]# tar -zxvf azkaban-db-0.1.0-SNAPSHOT.tar.gz .
3.2 解压后,找到create-all的脚本
将create-all脚本发送到带有mysql的机器sam03
3.3 在机器sam03上执行脚本
执行脚本
mysql> create database azkaban;
mysql> use azkaban;
mysql> source /root/create-all-sql-0.1.0-SNAPSHOT.sql;
对azkaban数据库进行远程授权
mysql> grant all privileges on *.* to root@'%' identified by '123456' with grant option;
mysql> show grants for root@'%';
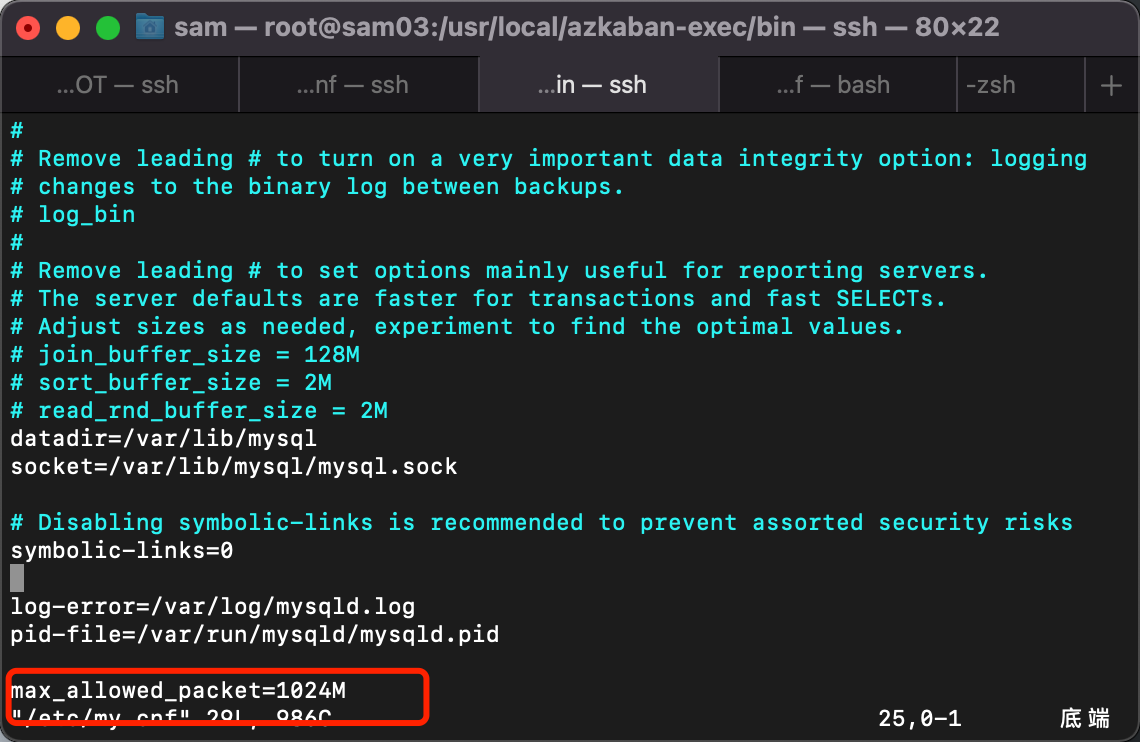
4. 修改mysql的配置
[root@sam03 bin]# vim /etc/my.cnf
添加以下内容
max_allowed_packet=1024M
4.1 重启mysql服务
[root@sam03 bin]# systemctl restart mysqld
5. 配置Webserver
5.1上传azkaban-web-server-0.1.0-SNAPSHOT.tar.gz到sam01并进行解压
[root@sam01 azkaban3.57.0]# tar -zxvf azkaban-web-server-0.1.0-SNAPSHOT.tar.gz -C /usr/local/
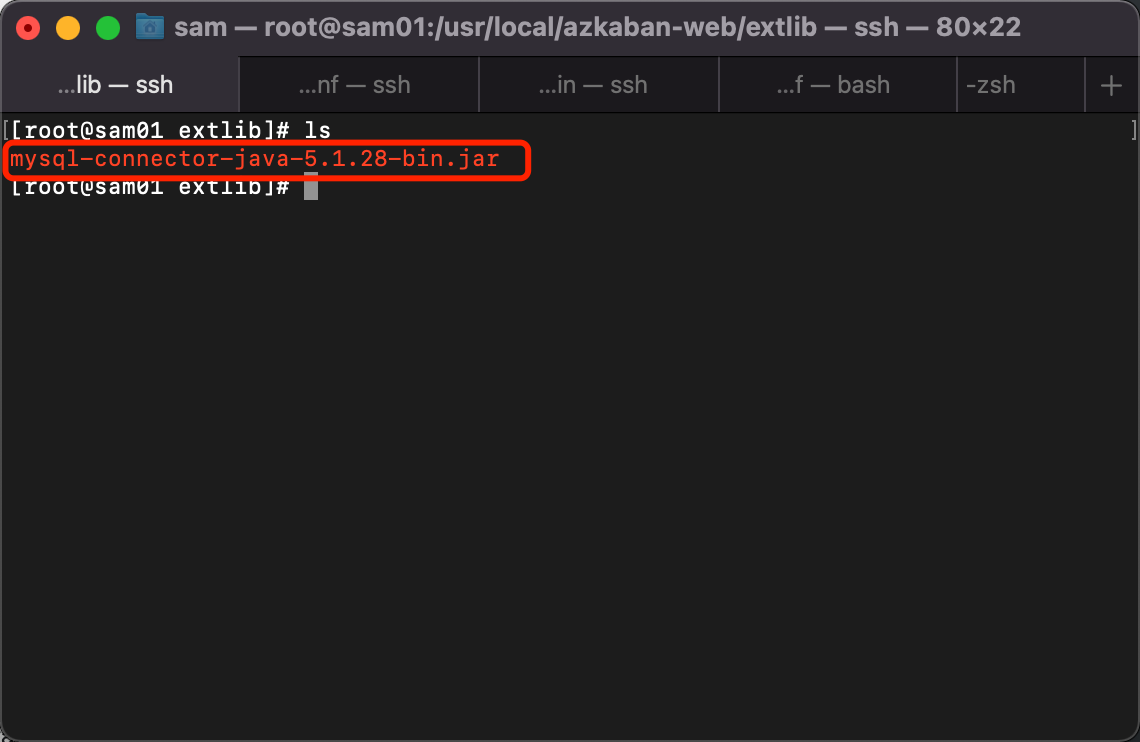
5.2 导入mysql驱动包
5.2.1 创建放置驱动包的文件夹
[root@sam01 azkaban-web]# mkdir -p /usr/local/azkaban-web/extlib
5.2.2 加入驱动包
5.3 生成密钥
[root@sam01 azkaban-web]# keytool -keystore keystore -alias jetty -genkey -keyalg RSA
除了输入密码,其他直接回车,到问你是否正确时,输入y
5.4 配置azkaban.properties
[root@sam01 azkaban-web]# vim /usr/local/azkaban-web/conf/azkaban.properties
# Azkaban Personalization Settings
azkaban.name=Test
azkaban.label=My Local Azkaban
azkaban.color=#FF3601
azkaban.default.servlet.path=/index
web.resource.dir=/usr/local/azkaban-web/web/
default.timezone.id=Asia/Shanghai
# Azkaban UserManager class
user.manager.class=azkaban.user.XmlUserManager
user.manager.xml.file=/usr/local/azkaban-web/conf/azkaban-users.xml
# Loader for projects
executor.global.properties=/usr/local/azkaban-exec/conf/global.properties
azkaban.project.dir=projects
# Velocity dev mode
velocity.dev.mode=false
# Azkaban Jetty server properties.
jetty.use.ssl=false
jetty.maxThreads=25
jetty.port=8081
jetty.ssl.port=8443
jetty.keystore=keystore
jetty.password=123456
jetty.keypassword=123456
jetty.truststore=keystore
jetty.trustpassword=123456
# Azkaban Executor settings
# mail settings
mail.sender=
mail.host=
# User facing web server configurations used to construct the user facing server URLs. They are useful when there is a reverse proxy between Azkaban web servers and users.
# enduser -> myazkabanhost:443 -> proxy -> localhost:8081
# when this parameters set then these parameters are used to generate email links.
# if these parameters are not set then jetty.hostname, and jetty.port(if ssl configured jetty.ssl.port) are used.
# azkaban.webserver.external_hostname=myazkabanhost.com
# azkaban.webserver.external_ssl_port=443
# azkaban.webserver.external_port=8081
job.failure.email=
job.success.email=
lockdown.create.projects=false
cache.directory=cache
# JMX stats
jetty.connector.stats=true
executor.connector.stats=true
# Azkaban mysql settings by default. Users should configure their own username and password.
database.type=mysql
mysql.port=3306
mysql.host=sam03
mysql.database=azkaban
mysql.user=root
mysql.password=****			##mysql的密码
mysql.numconnections=100
#Multiple Executor
azkaban.use.multiple.executors=true
azkaban.executorselector.filters=StaticRemainingFlowSize,MinimumFreeMemory,CpuStatus
azkaban.executorselector.comparator.NumberOfAssignedFlowComparator=1
azkaban.executorselector.comparator.Memory=1
azkaban.executorselector.comparator.LastDispatched=1
azkaban.executorselector.comparator.CpuUsage=1
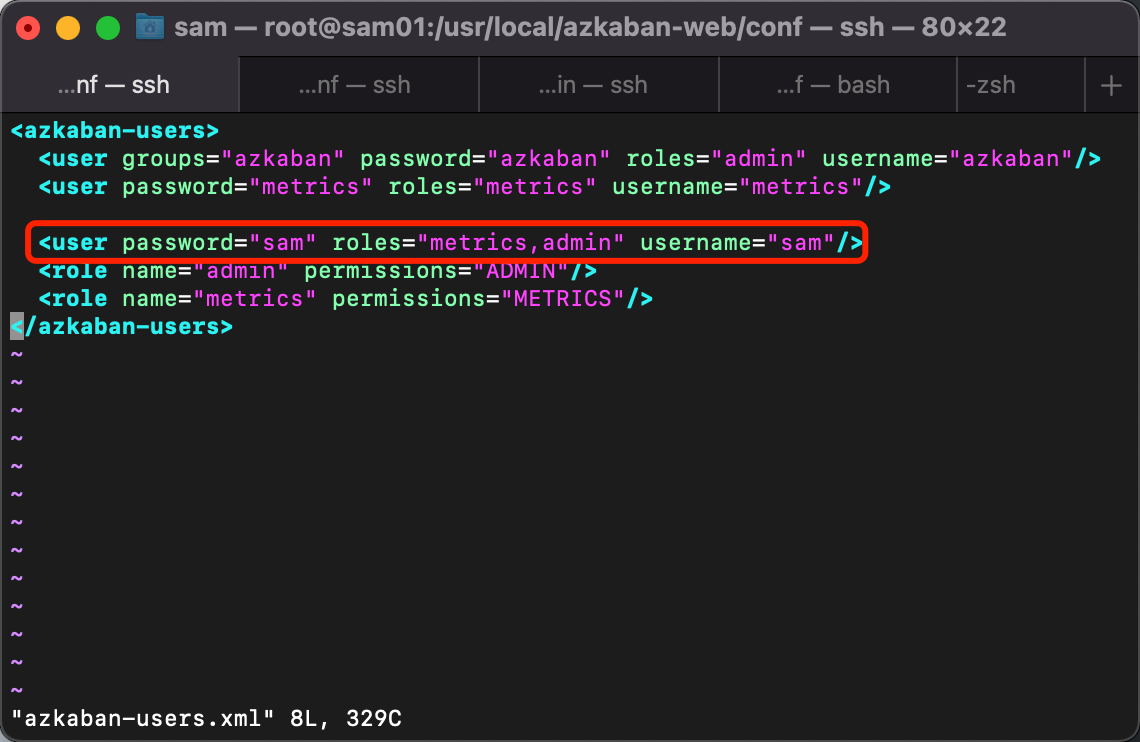
5.5 配置azkaban-users.xml
添加登录Azkaban的用户名和密码
<azkaban-users>
  <user groups="azkaban" password="azkaban" roles="admin" username="azkaban"/>
  <user password="metrics" roles="metrics" username="metrics"/>
  <user password="sam" roles="metrics,admin" username="sam"/>
  <role name="admin" permissions="ADMIN"/>
  <role name="metrics" permissions="METRICS"/>
</azkaban-users>
6. 安装azkaban-exec-server
6.1 上传并解压azkaban-exec-server-0.1.0-SNAPSHOT.tar.gz到机器sam02
[root@sam02 soft]# tar -zxvf azkaban-exec-server-0.1.0-SNAPSHOT.tar.gz -C /usr/local/
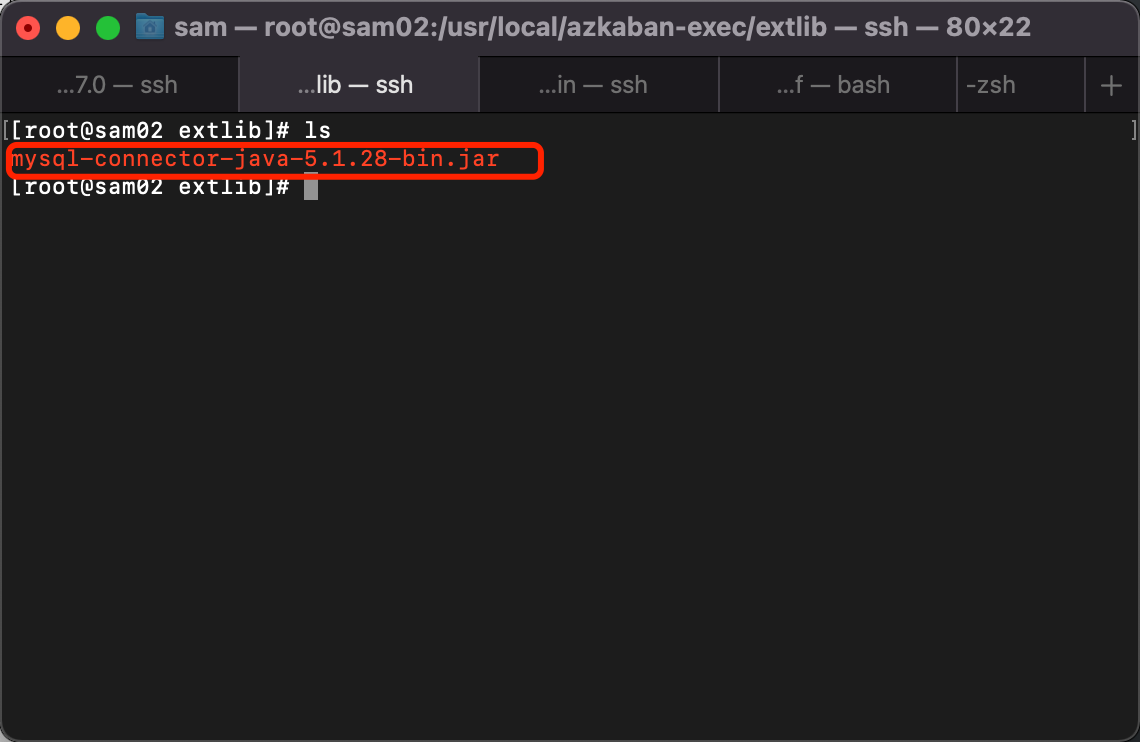
6.2 导入mysql驱动包
6.2.1 创建放置驱动包的文件夹
[root@sam02 /]# mkdir -p /usr/local/azkaban-exec/extlib/
6.2.2 加入驱动包
6.3 修改azkaban.properties
[root@sam02 azkaban-exec]# vim /usr/local/azkaban-exec/conf/azkaban.properties
# Azkaban Personalization Settings
azkaban.name=Test
azkaban.label=My Local Azkaban
azkaban.color=#FF3601
azkaban.default.servlet.path=/index
web.resource.dir=/usr/local/azkaban-web/web/
default.timezone.id=Asia/Shanghai
# Azkaban UserManager class
user.manager.class=azkaban.user.XmlUserManager
user.manager.xml.file=/usr/local/azkaban-web/conf/azkaban-users.xml
# Loader for projects
executor.global.properties=/usr/local/azkaban-exec/conf/global.properties
azkaban.project.dir=projects
# Velocity dev mode
velocity.dev.mode=false
# Azkaban Jetty server properties.
jetty.use.ssl=false
jetty.maxThreads=25
jetty.port=8081
# Where the Azkaban web server is located
azkaban.webserver.url=http://sam01:8081
# mail settings
mail.sender=
mail.host=
# User facing web server configurations used to construct the user facing server URLs. They are useful when there is a reverse proxy between Azkaban web servers and users.
# enduser -> myazkabanhost:443 -> proxy -> localhost:8081
# when this parameters set then these parameters are used to generate email links.
# if these parameters are not set then jetty.hostname, and jetty.port(if ssl configured jetty.ssl.port) are used.
# azkaban.webserver.external_hostname=myazkabanhost.com
# azkaban.webserver.external_ssl_port=443
# azkaban.webserver.external_port=8081
job.failure.email=
job.success.email=
lockdown.create.projects=false
cache.directory=cache
# JMX stats
jetty.connector.stats=true
executor.connector.stats=true
# Azkaban plugin settings
azkaban.jobtype.plugin.dir=/usr/local/azkaban-exec/plugins/jobtypes
# Azkaban mysql settings by default. Users should configure their own username and password.
database.type=mysql
mysql.port=3306
mysql.host=sam03
mysql.database=azkaban
mysql.user=root
mysql.password=****		#mysql用户密码
mysql.numconnections=100
# Azkaban Executor settings
executor.port=12321
executor.maxThreads=50
executor.flow.threads=30
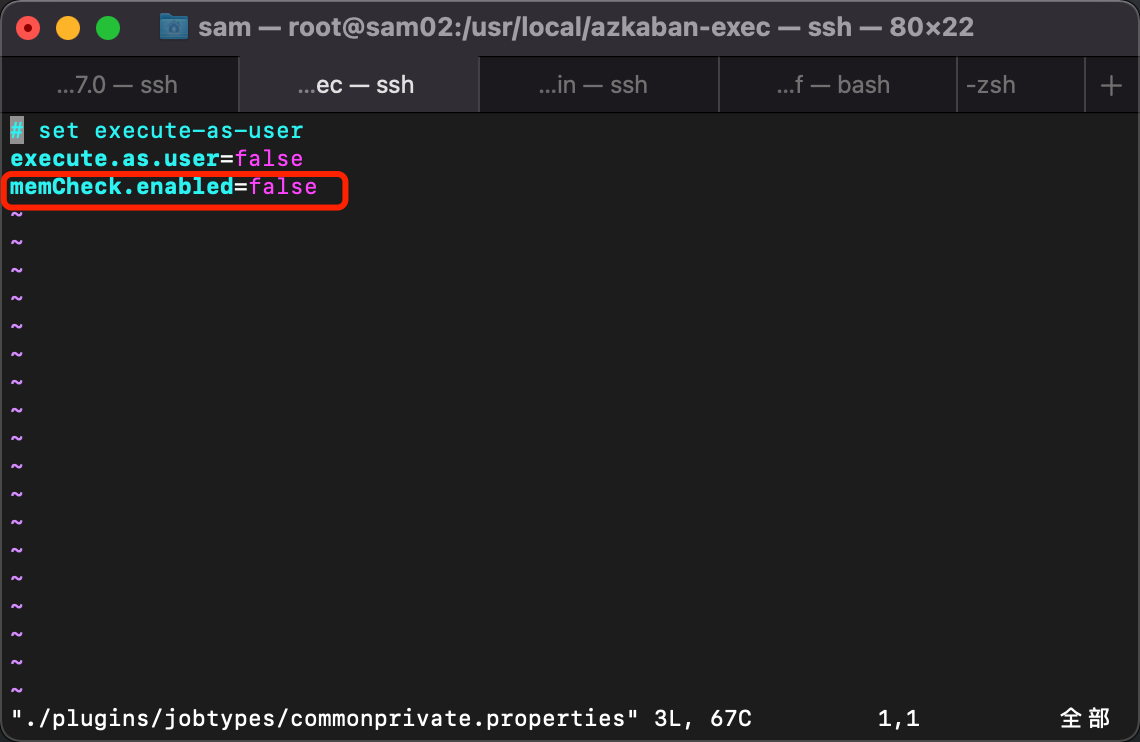
6.4 修改插件的文件
[root@sam02 azkaban-exec]# vim ./plugins/jobtypes/commonprivate.properties
添加以下内容
memCheck.enabled=false #添加内存检查关闭 ,否则报错不足3G
7. 将机器sam02所配置好的azkaban分发一份给机器sam03
[root@sam02 local]# scp -r /usr/local/azkaban-exec/ sam03:$PWD

 浙公网安备 33010602011771号