Spring
Spring是一个基于IOC和AOP结构的J2EE框架
IOC(Inversion of Control)控制反转是Spring的基础,简单地说,就是创建对象由以前的程序员自己new构造方法调用,变成了交由Spring创建对象
DI(Dependency Injection)依赖注入,简单地说,就是拿到的对象的属性,已经被注入好相关的值了,直接用即可
AOP(Aspect Oriented Programming)面向切面编程,在面向切面编程的思想里面,把功能分为核心业务功能和辅助功能
核心业务:登录、增加数据、删除数据等
辅助功能:性能统计、日志、事务管理等,对应切面
IOC和DI
xml方式
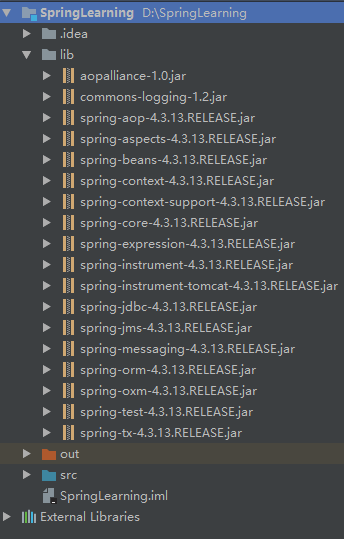
1. 打开IDEA,Create New Project选择Spring项目(IDEA会自动导入Spring项目所需要的jar包)默认next,项目名称为SpringLearning,Finish
IDEA默认导入的Jar包
2. 准备POJO
 1 package com.sakura.pojo;
 2
 3 public class Category {
 4     private int id;
 5     private String name;
 6
 7     public int getId() {
 8         return id;
 9     }
10
11     public void setId(int id) {
12         this.id = id;
13     }
14
15     public String getName() {
16         return name;
17     }
18
19     public void setName(String name) {
20         this.name = name;
21     }
22
23 }
3. 在src目录下新建applicationContext.xml文件
 1 <?xml version="1.0" encoding="UTF-8"?>
 2 <beans xmlns="http://www.springframework.org/schema/beans"
 3        xmlns:xsi="http://www.w3.org/2001/XMLSchema-instance"
 4        xsi:schemaLocation="http://www.springframework.org/schema/beans http://www.springframework.org/schema/beans/spring-beans.xsd">
 5     <!-- name="c"对应ac.getBean("c") -->
 6     <bean name="c" class="com.sakura.pojo.Category">
 7         <!-- name="name"对应Category类的name属性 -->
 8         <property name="name" value="category 1"/>
 9     </bean>
10 </beans>
4. 测试代码
 1 package com.sakura.test;
 2
 3 import com.sakura.pojo.Category;
 4 import org.springframework.context.ApplicationContext;
 5 import org.springframework.context.support.ClassPathXmlApplicationContext;
 6
 7 public class Test {
 8     public static void main(String[] args) {
 9         ApplicationContext ac=new ClassPathXmlApplicationContext("applicationContext.xml");
10         Category c= (Category) ac.getBean("c");//category 1
11         System.out.println(c.getName());
12     }
13 }
5. Product类中有对Category对象的setter getter
 1 package com.sakura.pojo;
 2
 3 public class Product {
 4     private int id;
 5     private String name;
 6     private Category category;
 7
 8     public int getId() {
 9         return id;
10     }
11
12     public void setId(int id) {
13         this.id = id;
14     }
15
16     public String getName() {
17         return name;
18     }
19
20     public void setName(String name) {
21         this.name = name;
22     }
23
24     public Category getCategory() {
25         return category;
26     }
27
28     public void setCategory(Category category) {
29         this.category = category;
30     }
31
32 }
6. 创建Product时用ref注入Category对象
 1 <?xml version="1.0" encoding="UTF-8"?>
 2 <beans xmlns="http://www.springframework.org/schema/beans"
 3        xmlns:xsi="http://www.w3.org/2001/XMLSchema-instance"
 4        xsi:schemaLocation="http://www.springframework.org/schema/beans http://www.springframework.org/schema/beans/spring-beans.xsd">
 5     <bean name="c" class="com.sakura.pojo.Category">
 6         <property name="name" value="category 1"/>
 7     </bean>
 8     <bean name="p" class="com.sakura.pojo.Product">
 9         <property name="name" value="product 1" />
10         <property name="category" ref="c" />
11     </bean>
12 </beans>
7. 测试代码
 1 package com.sakura.test;
 2
 3 import com.sakura.pojo.Product;
 4 import org.springframework.context.ApplicationContext;
 5 import org.springframework.context.support.ClassPathXmlApplicationContext;
 6
 7 public class Test {
 8     public static void main(String[] args) {
 9         ApplicationContext ac=new ClassPathXmlApplicationContext("applicationContext.xml");
10         Product p= (Product) ac.getBean("p");
11         System.out.println(p.getName());//product 1
12         System.out.println(p.getCategory().getName());//category 1
13
14     }
15 }
注解方式
1. 修改applicationContext.xml
 1 <?xml version="1.0" encoding="UTF-8"?>
 2 <beans xmlns="http://www.springframework.org/schema/beans"
 3        xmlns:xsi="http://www.w3.org/2001/XMLSchema-instance"
 4        xmlns:context="http://www.springframework.org/schema/context"
 5        xsi:schemaLocation="http://www.springframework.org/schema/beans http://www.springframework.org/schema/beans/spring-beans.xsd http://www.springframework.org/schema/context http://www.springframework.org/schema/context/spring-context.xsd">
 6     <!--注解的方式进行配置-->
 7     <context:annotation-config/>
 8     <bean name="c" class="com.sakura.pojo.Category">
 9         <property name="name" value="category 1" />
10     </bean>
11     <bean name="p" class="com.sakura.pojo.Product">
12         <property name="name" value="product1" />
13         <!-- <property name="category" ref="c" /> -->
14     </bean>
15 </beans>
2. 加上@Autowired注解
 1 package com.sakura.pojo;
 2
 3 import org.springframework.beans.factory.annotation.Autowired;
 4
 5 public class Product {
 6     private int id;
 7     private String name;
 8     @Autowired
 9     private Category category;
10
11     public int getId() {
12         return id;
13     }
14
15     public void setId(int id) {
16         this.id = id;
17     }
18
19     public String getName() {
20         return name;
21     }
22
23     public void setName(String name) {
24         this.name = name;
25     }
26
27     public Category getCategory() {
28         return category;
29     }
30
31     public void setCategory(Category category) {
32         this.category = category;
33     }
34
35 }
在setCategory方法前加上@Autowired可以达到同样的效果
3. 测试代码
 1 package com.sakura.test;
 2
 3 import com.sakura.pojo.Product;
 4 import org.springframework.context.ApplicationContext;
 5 import org.springframework.context.support.ClassPathXmlApplicationContext;
 6
 7 public class Test {
 8     public static void main(String[] args) {
 9         ApplicationContext ac=new ClassPathXmlApplicationContext("applicationContext.xml");
10         Product p= (Product) ac.getBean("p");
11         System.out.println(p.getName());//product 1
12         System.out.println(p.getCategory().getName());//category 1
13
14     }
15 }
4. 除了@Autowired之外,也可以用@Resource
 1 package com.sakura.pojo;
 2
 3 import javax.annotation.Resource;
 4
 5 public class Product {
 6     private int id;
 7     private String name;
 8     @Resource(name="c")
 9     private Category category;
10
11     public int getId() {
12         return id;
13     }
14
15     public void setId(int id) {
16         this.id = id;
17     }
18
19     public String getName() {
20         return name;
21     }
22
23     public void setName(String name) {
24         this.name = name;
25     }
26
27     public Category getCategory() {
28         return category;
29     }
30
31     public void setCategory(Category category) {
32         this.category = category;
33     }
34
35 }
接下来讲解如何对Bean进行注解配置
5. 修改applicationContext.xml
1 <?xml version="1.0" encoding="UTF-8"?>
2 <beans xmlns="http://www.springframework.org/schema/beans"
3        xmlns:xsi="http://www.w3.org/2001/XMLSchema-instance"
4        xmlns:context="http://www.springframework.org/schema/context"
5        xsi:schemaLocation="http://www.springframework.org/schema/beans http://www.springframework.org/schema/beans/spring-beans.xsd http://www.springframework.org/schema/context http://www.springframework.org/schema/context/spring-context.xsd">
6     <!--bean扫描-->
7     <context:component-scan base-package="com.sakura.pojo"/>
8 </beans>
6. 加上@Component
 1 package com.sakura.pojo;
 2
 3 import org.springframework.stereotype.Component;
 4
 5 @Component("c")
 6 public class Category {
 7     private int id;
 8     private String name="category 1";
 9
10     public int getId() {
11         return id;
12     }
13
14     public void setId(int id) {
15         this.id = id;
16     }
17
18     public String getName() {
19         return name;
20     }
21
22     public void setName(String name) {
23         this.name = name;
24     }
25
26 }
 1 package com.sakura.pojo;
 2
 3 import org.springframework.stereotype.Component;
 4
 5 import javax.annotation.Resource;
 6
 7 @Component("p")
 8 public class Product {
 9     private int id;
10     private String name="product 1";
11     @Resource(name="c")
12     private Category category;
13
14     public int getId() {
15         return id;
16     }
17
18     public void setId(int id) {
19         this.id = id;
20     }
21
22     public String getName() {
23         return name;
24     }
25
26     public void setName(String name) {
27         this.name = name;
28     }
29
30     public Category getCategory() {
31         return category;
32     }
33
34     public void setCategory(Category category) {
35         this.category = category;
36     }
37
38 }
7. 测试代码
 1 package com.sakura.test;
 2
 3 import com.sakura.pojo.Product;
 4 import org.springframework.context.ApplicationContext;
 5 import org.springframework.context.support.ClassPathXmlApplicationContext;
 6
 7 public class Test {
 8     public static void main(String[] args) {
 9         ApplicationContext ac=new ClassPathXmlApplicationContext("applicationContext.xml");
10         Product p= (Product) ac.getBean("p");
11         System.out.println(p.getName());//product 1
12         System.out.println(p.getCategory().getName());//category 1
13
14     }
15 }
AOP
xml方式
1. 准备业务类 ProductService
1 package com.sakura.service;
2
3 public class ProductService {
4     public void doSomeService(){
5         System.out.println("doSomeService");
6     }
7 }
2. 准备日志切面LoggerAspect
需要再导入一个名为aspectjweaver.jar的jar包,File->Project Structure->Modules->Dependencies->右边绿色的+选择JARs or directories…->Apply,OK
 1 package com.sakura.aspect;
 2
 3 import org.aspectj.lang.ProceedingJoinPoint;
 4
 5 public class LoggerAspect {
 6     public Object log(ProceedingJoinPoint joinPoint) throws Throwable{
 7         System.out.println("start log:"+joinPoint.getSignature().getName());
 8         Object object=joinPoint.proceed();
 9         System.out.println("end log:"+joinPoint.getSignature().getName());
10         return object;
11     }
12 }
3. 修改applicationContext.xml
 1 <?xml version="1.0" encoding="UTF-8"?>
 2 <beans xmlns="http://www.springframework.org/schema/beans"
 3        xmlns:xsi="http://www.w3.org/2001/XMLSchema-instance"
 4        xmlns:aop="http://www.springframework.org/schema/aop"
 5        xsi:schemaLocation="http://www.springframework.org/schema/beans http://www.springframework.org/schema/beans/spring-beans.xsd http://www.springframework.org/schema/context http://www.springframework.org/schema/context/spring-context.xsd http://www.springframework.org/schema/aop http://www.springframework.org/schema/aop/spring-aop.xsd">
 6     <!--声明业务对象-->
 7     <bean name="s" class="com.sakura.service.ProductService"/>
 8     <!--声明日志切面-->
 9     <bean id="loggerAspect" class="com.sakura.aspect.LoggerAspect"/>
10     <aop:config>
11         <!--指定核心业务功能-->
12         <aop:pointcut id="loggerCutpoint" expression="execution(* com.sakura.service.ProductService.*(..))"/>
13         <!--指定辅助功能-->
14         <aop:aspect id="logAspect" ref="loggerAspect">
15             <aop:around pointcut-ref="loggerCutpoint" method="log"/>
16         </aop:aspect>
17     </aop:config>
18 </beans>
4. 测试代码
 1 package com.sakura.test;
 2
 3 import com.sakura.service.ProductService;
 4 import org.springframework.context.ApplicationContext;
 5 import org.springframework.context.support.ClassPathXmlApplicationContext;
 6
 7 public class Test {
 8     public static void main(String[] args) {
 9         ApplicationContext ac=new ClassPathXmlApplicationContext("applicationContext.xml");
10         ProductService s= (ProductService) ac.getBean("s");
11         s.doSomeService();
12     }
13 }
14 /*
15 start log:doSomeService
16 doSomeService
17 end log:doSomeService
18  */
注解方式
1. 注解配置业务类
 1 package com.sakura.service;
 2
 3 import org.springframework.stereotype.Component;
 4
 5 @Component("s")
 6 public class ProductService {
 7     public void doSomeService(){
 8         System.out.println("doSomeService");
 9     }
10 }
2. 注解配置切面
@Aspect 注解表示这是一个切面
@Component 表示这是一个bean,由Spring进行管理
@Around(value=”execution(* com.sakura.service.ProductService.*(..))”) 表示对com.sakura.service.ProductService这个类中的所有方法进行切面操作
 1 package com.sakura.aspect;
 2
 3 import org.aspectj.lang.ProceedingJoinPoint;
 4 import org.aspectj.lang.annotation.Around;
 5 import org.aspectj.lang.annotation.Aspect;
 6 import org.springframework.stereotype.Component;
 7
 8 @Aspect
 9 @Component
10 public class LoggerAspect {
11     @Around(value="execution(* com.sakura.service.ProductService.*(..))")
12     public Object log(ProceedingJoinPoint joinPoint) throws Throwable{
13         System.out.println("start log:"+joinPoint.getSignature().getName());
14         Object object=joinPoint.proceed();
15         System.out.println("end log:"+joinPoint.getSignature().getName());
16         return object;
17     }
18 }
3. 修改applicationContext.xml
 1 <?xml version="1.0" encoding="UTF-8"?>
 2 <beans xmlns="http://www.springframework.org/schema/beans"
 3        xmlns:xsi="http://www.w3.org/2001/XMLSchema-instance"
 4        xmlns:context="http://www.springframework.org/schema/context"
 5        xmlns:aop="http://www.springframework.org/schema/aop"
 6        xsi:schemaLocation="http://www.springframework.org/schema/beans http://www.springframework.org/schema/beans/spring-beans.xsd http://www.springframework.org/schema/context http://www.springframework.org/schema/context/spring-context.xsd http://www.springframework.org/schema/aop http://www.springframework.org/schema/aop/spring-aop.xsd">
 7     <context:component-scan base-package="com.sakura.aspect"/>
 8     <context:component-scan base-package="com.sakura.service"/>
 9     <aop:aspectj-autoproxy/>
10 </beans>
4. 测试代码
 1 package com.sakura.test;
 2
 3 import com.sakura.service.ProductService;
 4 import org.springframework.context.ApplicationContext;
 5 import org.springframework.context.support.ClassPathXmlApplicationContext;
 6
 7 public class Test {
 8     public static void main(String[] args) {
 9         ApplicationContext ac=new ClassPathXmlApplicationContext("applicationContext.xml");
10         ProductService s= (ProductService) ac.getBean("s");
11         s.doSomeService();
12     }
13 }
14 /*
15 start log:doSomeService
16 doSomeService
17 end log:doSomeService
18  */
Spring与Junit的整合
1. 导入名为junit-4.12.jar和hamcrest-all-1.3.jar的jar包
2. 修改applicationContext.xml
1 <?xml version="1.0" encoding="UTF-8"?>
2 <beans xmlns="http://www.springframework.org/schema/beans"
3        xmlns:xsi="http://www.w3.org/2001/XMLSchema-instance"
4        xmlns:context="http://www.springframework.org/schema/context"
5        xsi:schemaLocation="http://www.springframework.org/schema/beans http://www.springframework.org/schema/beans/spring-beans.xsd http://www.springframework.org/schema/context http://www.springframework.org/schema/context/spring-context.xsd http://www.springframework.org/schema/aop http://www.springframework.org/schema/aop/spring-aop.xsd">
6     <context:component-scan base-package="com.sakura.pojo"/>
7 </beans>
3. 测试代码
@RunWith(SpringJUnit4ClassRunner.class)表示这是一个Spring的测试类
@ContextConfiguration(“classpath:applicationContext.xml”)定位Spring的配置文件
@Autowired给这个测试类装配Category对象
@Test测试逻辑,打印c对象的名称
 1 package com.sakura.test;
 2
 3 import com.sakura.pojo.Category;
 4 import org.junit.Test;
 5 import org.junit.runner.RunWith;
 6 import org.springframework.beans.factory.annotation.Autowired;
 7 import org.springframework.test.context.ContextConfiguration;
 8 import org.springframework.test.context.junit4.SpringJUnit4ClassRunner;
 9
10 @RunWith(SpringJUnit4ClassRunner.class)
11 @ContextConfiguration("classpath:applicationContext.xml")
12 public class SpringTest {
13     @Autowired
14     Category c;
15     @Test
16     public void test(){
17         System.out.println(c.getName());//category 1
18     }
19
20 }

 浙公网安备 33010602011771号