
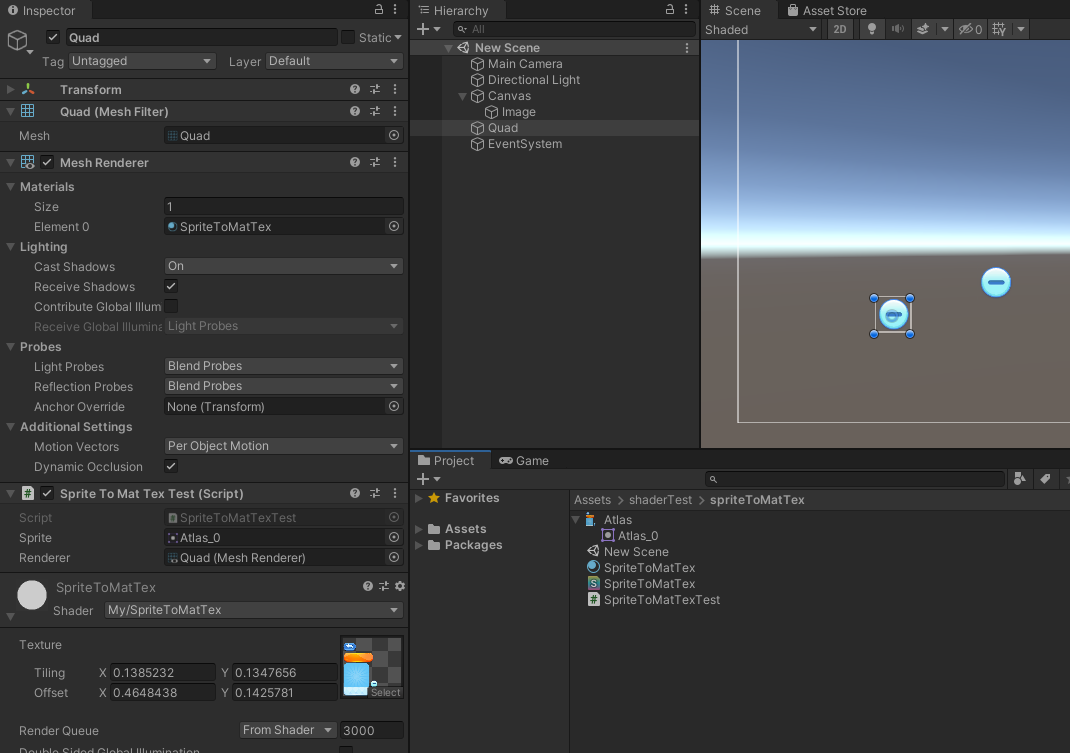
图集Sprite作为材质贴图显示
效果
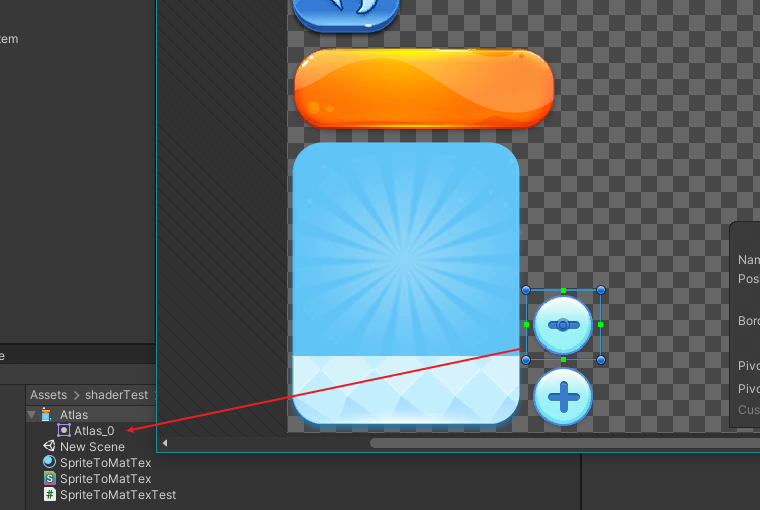
使用的图集
测试shader
注意:如果Sprite带有透明度,注意使用Blend,否则透明部分将显示为黑色
Shader "My/SpriteToMatTex"
{
    Properties
    {
        _MainTex ("Texture", 2D) = "white" {}
    }
    SubShader
    {
        Tags
        {
            "Queue" = "Transparent"
            "RenderType" = "Transparent"
        }

        Blend SrcAlpha OneMinusSrcAlpha

        Pass
        {
            CGPROGRAM
            #pragma vertex vert
            #pragma fragment frag

            #include "UnityCG.cginc"

            struct appdata
            {
                float4 vertex : POSITION;
                float2 uv : TEXCOORD0;
            };

            struct v2f
            {
                float4 vertex : SV_POSITION;
                float2 uv : TEXCOORD0;
            };

            sampler2D _MainTex;
            float4 _MainTex_ST;

            v2f vert (appdata v)
            {
                v2f o;
                o.vertex = UnityObjectToClipPos(v.vertex); //模型空间转换为裁剪空间
                o.uv = TRANSFORM_TEX(v.uv, _MainTex); //应用tiling, offset
                return o;
            }

            fixed4 frag (v2f i) : SV_Target
            {
                fixed4 c = tex2D(_MainTex, i.uv); //像素颜色
                return c;
            }
            ENDCG
        }
    }
}
测试代码
using UnityEngine;

public class SpriteToMatTexTest : MonoBehaviour
{
    public Sprite m_sprite;
    public Renderer m_renderer;

    private MaterialPropertyBlock m_tempMPB;

    void Start()
    {
        m_tempMPB = new MaterialPropertyBlock();
        m_renderer.GetPropertyBlock(m_tempMPB);
        m_tempMPB.SetTexture("_MainTex", m_sprite.texture);

        var texRect = m_sprite.textureRect;
        var tex = m_sprite.texture;
        var texWidth = tex.width;
        var texHeight = tex.height;

        var mainTexST = new Vector4(
            texRect.width / texWidth, texRect.height / texHeight, //tiling
            texRect.x / texWidth, texRect.y / texHeight //offset
        );
        m_tempMPB.SetVector("_MainTex_ST", mainTexST);

        m_renderer.SetPropertyBlock(m_tempMPB);
    }

}

 浙公网安备 33010602011771号