Fast DFS(一)
单点上传文件
原先来的单点上传文件就是在同一个系统内上传
graph LR
A(图片系统) -->B[图片服务器]
C(支付系统) -->D[支付服务器]
E(后台系统) -->F[后台服务器]
使用FastDFS分布式文件上传
FastDFS:使用C语音编写的一款分布式文件系统,FastDFS充分考虑到冗余备份,负载均衡,
线性扩容等机制,注重高可用,高性能,使用FastDFS很容易搭建一套高性能的文件服务器集群提供文件上传,下载等服务
graph LR
A(图片系统) -->B[图片服务器]
C(支付系统) -->B[支付服务器]
E(后台系统) -->B[后台服务器]
使用FastDFS分布式文件上传
上传流程
Tracker : 管理
Storage :存放位置
客户端上传一个文件,Tracker回去查看Storage有没有空余的位置,有的话返回状态
Storage会不定时地返回状态信息给Tracker
流程图
graph LR
A(客户端)-->|2.发送请求|B[Tracker Server] -->C[Storage Server]
C[Storage Server] -->|1.定时向tracker上传工作状态|B[Tracker Server]
B[Tracker Server] -->D[3.检查是否有可用的的Storage]
D[3检查是否有可用的的Storage] -->|4.返回可用的Storage| E[xx]
E[xx] -->|5.文件上传|F[6.文件写入]
F[6.文件写入] -->|7.返回文件相对路径|E[xx]
G[8.客户端对文件路径进行存储或处理]
在linux服务器上搭建FastDFS
下载文件
文件链接
提取码:ael6
下载好了,把文件放到linux服务器上面

安装所需要的依赖
yum -y install libevent
进入fastDFS解压libf文件
[root fastDFS]# tar -zxvf libfastcommon-1.0.7.tar.gz
解压后进入解压后的文件
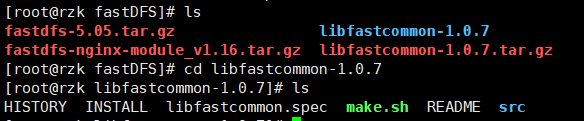
make.sh编译和安装文件
运行编译文件
[root@rzk libfastcommon-1.0.7]# ./make.sh
如果不能运行
安装需要的依赖
yum -y install zlib zlib-devel pcre prce-devel gcc gcc-c++ opensll openssl-devel libevent libevent-devel perl unzip net-tools wget;
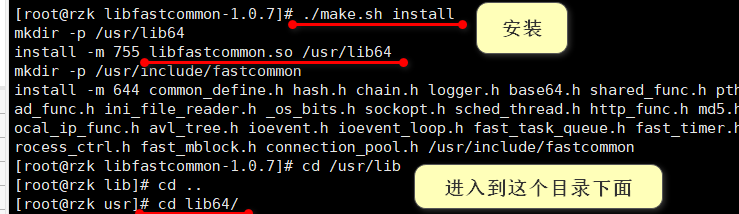
安装
[root@rzk libfastcommon-1.0.7]# ./make.sh install
进入到usr/lib64目录下
查看 libfastcommon.so
[root@rzk lib64]# ll libfast*
-rwxr-xr-x 1 root root 281120 Feb  2 10:47 libfastcommon.so
lrwxrwxrwx 1 root root     20 Aug  3  2020 libfastjson.so.4 -> libfastjson.so.4.0.0
-rwxr-xr-x 1 root root  40896 Oct 31  2018 libfastjson.so.4.0.0
拷贝一份到 /usr/lib
[root@rzk lib64]# cp libfastcommon.so /usr/lib
[root@rzk lib64]# cd /usr/lib
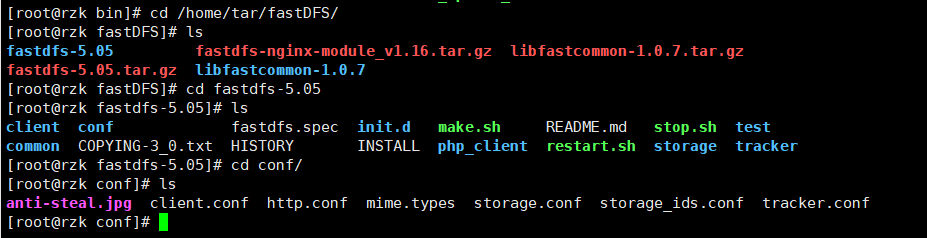
解压fastDFS
[root@rzk tar]# cd fastDFS/
[root@rzk fastDFS]# ls
fastdfs-5.05.tar.gz                libfastcommon-1.0.7
fastdfs-nginx-module_v1.16.tar.gz  libfastcommon-1.0.7.tar.gz
[root@rzk fastDFS]# tar -zxvf fastdfs-5.05.tar.gz
进入fastDFS 5
[root@rzk fastdfs-5.05]# ls
client  COPYING-3_0.txt  init.d   php_client  stop.sh  tracker
common  fastdfs.spec     INSTALL  README.md   storage
conf    HISTORY          make.sh  restart.sh  test
编译make.sh
./make.sh
安装
[root@rzk fastdfs-5.05]# ./make.sh install
**mkdir -p /usr/bin**
mkdir -p /etc/fdfs
cp -f fdfs_trackerd /usr/bin
if [ ! -f /etc/fdfs/tracker.conf.sample ]; then cp -f ../conf/tracker.conf /etc/fdfs/tracker.conf.sample; fi
**mkdir -p /usr/bin**
mkdir -p /etc/fdfs
cp -f fdfs_storaged  /usr/bin
if [ ! -f /etc/fdfs/storage.conf.sample ]; then cp -f ../conf/storage.conf /etc/fdfs/storage.conf.sample; fi
mkdir -p /usr/bin
mkdir -p /etc/fdfs
mkdir -p /usr/lib64

[root@rzk fastdfs-5.05]#
进入usr/bin目录
**mkdir -p /usr/bin**
过滤查看文件

进入配置文件下
这里会有相关的配置信息
也就是上面流程图扮演的角色
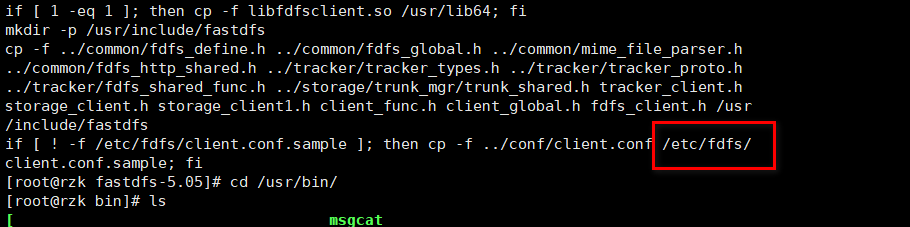
返回FastDFS 5 文件 把文件copy到etc/fdfs
需要把conf文件下所有的文件copy到etc/fdfs
[root@rzk conf]#  cp * /etc/fdfs/
[root@rzk conf]# cd /etc/fdfs/
[root@rzk fdfs]# ls
anti-steal.jpg  client.conf.sample  mime.types    storage.conf.sample  tracker.conf
client.conf     http.conf           storage.conf  storage_ids.conf     tracker.conf.sample
[root@rzk fdfs]#
进入etc/fdfs修改tracker.conf

根据你命名的文件,在etc/fdfs/目录下创建该文件
[root@rzk fdfs]# mkdir /fastdfs/tracker -p 递归创建
[root@rzk fdfs]# mkdir /fastdfs/storage -p
[root@rzk fdfs]# mkdir /fastdfs/storage/store -p
[root@rzk fdfs]# mkdir /fastdfs/client -p
[root@rzk fdfs]# mkdir /fastdfs/tmp -p
[root@rzk fdfs]# cd /fastdfs/
[root@rzk fastdfs]# ls
client  storage  tmp  tracker
[root@rzk fastdfs]#
启动tracker
[root@rzk bin]# cd /usr/bin
[root@rzk bin]# ll fdfs*
-rwxr-xr-x 1 root root  321760 Feb  2 11:23 fdfs_appender_test
-rwxr-xr-x 1 root root  321536 Feb  2 11:23 fdfs_appender_test1
-rwxr-xr-x 1 root root  308416 Feb  2 11:23 fdfs_append_file
-rwxr-xr-x 1 root root  307848 Feb  2 11:23 fdfs_crc32
-rwxr-xr-x 1 root root  308440 Feb  2 11:23 fdfs_delete_file
-rwxr-xr-x 1 root root  309208 Feb  2 11:23 fdfs_download_file
-rwxr-xr-x 1 root root  308784 Feb  2 11:23 fdfs_file_info
-rwxr-xr-x 1 root root  322592 Feb  2 11:23 fdfs_monitor
-rwxr-xr-x 1 root root 1125200 Feb  2 11:23 fdfs_storaged
-rwxr-xr-x 1 root root  331664 Feb  2 11:23 fdfs_test
-rwxr-xr-x 1 root root  326776 Feb  2 11:23 fdfs_test1
-rwxr-xr-x 1 root root  465208 Feb  2 11:23 fdfs_trackerd
-rwxr-xr-x 1 root root  309400 Feb  2 11:23 fdfs_upload_appender
-rwxr-xr-x 1 root root  310424 Feb  2 11:23 fdfs_upload_file
[root@rzk bin]#
启动 fdfs_trackerd 指向刚刚编辑的conf配置文件
[root@rzk bin]# fdfs_trackerd /etc/fdfs/tracker.conf
[root@rzk bin]#
重新启动 fdfs_trackerd /etc/fdfs/tracker.conf restart
查看是否有启动
[root@rzk bin]# ps aux | grep tracker
root      3864  0.0  0.1 144552  2588 ?        Sl   12:17   0:01 fdfs_trackerd /etc/fdfs/tracker.conf
root     18936  0.0  0.0 112812   972 pts/2    S+   17:21   0:00 grep --color=auto tracker
进入etc/fdfs修改storage.conf配置文件
group_name=rzk   //根据你的命名改
base_path=/fastdfs/storage
store_path0=/fastdfs/storage
tracker_server=192.168.1.103:22122   **端口号需要开启**
启动storage.conf
[root@rzk fdfs]# vim storage.conf
[root@rzk fdfs]# cd /usr/bin/
[root@rzk bin]# ll fdfs*
-rwxr-xr-x 1 root root  321760 Feb  2 11:23 fdfs_appender_test
-rwxr-xr-x 1 root root  321536 Feb  2 11:23 fdfs_appender_test1
-rwxr-xr-x 1 root root  308416 Feb  2 11:23 fdfs_append_file
-rwxr-xr-x 1 root root  307848 Feb  2 11:23 fdfs_crc32
-rwxr-xr-x 1 root root  308440 Feb  2 11:23 fdfs_delete_file
-rwxr-xr-x 1 root root  309208 Feb  2 11:23 fdfs_download_file
-rwxr-xr-x 1 root root  308784 Feb  2 11:23 fdfs_file_info
-rwxr-xr-x 1 root root  322592 Feb  2 11:23 fdfs_monitor
-rwxr-xr-x 1 root root 1125200 Feb  2 11:23 fdfs_storaged
-rwxr-xr-x 1 root root  331664 Feb  2 11:23 fdfs_test
-rwxr-xr-x 1 root root  326776 Feb  2 11:23 fdfs_test1
-rwxr-xr-x 1 root root  465208 Feb  2 11:23 fdfs_trackerd
-rwxr-xr-x 1 root root  309400 Feb  2 11:23 fdfs_upload_appender
-rwxr-xr-x 1 root root  310424 Feb  2 11:23 fdfs_upload_file
启动 这里需要开启服务器端口号
[root@rzk bin]# fdfs_storaged  /etc/fdfs/storage.conf
[root@rzk bin]#
重新启动 fdfs_storaged /etc/fdfs/storage.conf restart
查看是否有启动
[root@rzk bin]# fdfs_storaged  /etc/fdfs/storage.conf
[root@rzk bin]# ps aux | grep storage
root     18697  0.0  3.5 147184 66612 ?        Sl   17:17   0:00 fdfs_storaged /etc/fdfs/storage.conf
root     18875  0.0  0.0 112812   972 pts/2    S+   17:20   0:00 grep --color=auto storage
进入etc/client 修改client.conf
base_path=/fastdfs/client
tracker_server=120.55.192.186:22122  你配置的端口需要开启
测试 上传文件
进入 cd /usr/bin/
这里可以从本地上传一张照片到hone目录下改名为 1.png
下面就是测试上传文件
[root@rzk bin]# fdfs_test /etc/fdfs/client.conf upload /home/1.png
This is FastDFS client test program v5.05

Copyright (C) 2008, Happy Fish / YuQing

FastDFS may be copied only under the terms of the GNU General
Public License V3, which may be found in the FastDFS source kit.
Please visit the FastDFS Home Page http://www.csource.org/
for more detail.

[2021-02-02 18:20:14] DEBUG - base_path=/fastdfs/client, connect_timeout=30, network_timeout=60, tracker_server_count=1, anti_steal_token=0, anti_steal_secret_key length=0, use_connection_pool=0, g_connection_pool_max_idle_time=3600s, use_storage_id=0, storage server id count: 0

tracker_query_storage_store_list_without_group:
	server 1. group_name=, ip_addr=xxx, port=23000

group_name=rzk, ip_addr=xxx, port=23000
storage_upload_by_filename
group_name=rzk, remote_filename=M00/00/00/rBAnO2AZJ16AS-wtAAABG7SKnKg603.png
source ip address: 172.16.39.59
file timestamp=2021-02-02 18:20:14
file size=283
file crc32=3028982952
example file url: https://xxx/rzk/M00/00/00/rBAnO2AZJ16AS-wtAAABG7SKnKg603.png
storage_upload_slave_by_filename
group_name=rzk, remote_filename=M00/00/00/rBAnO2AZJ16AS-wtAAABG7SKnKg603_big.png
source ip address: xxx
file timestamp=2021-02-02 18:20:14
file size=283
file crc32=3028982952
example file url: https://xxx/rzk/M00/00/00/rBAnO2AZJ16AS-wtAAABG7SKnKg603_big.png
总结
- 需要开启两个端口号
- 配置三个配置文件需要仔细配置
