第一种哦通过ConfigurationProperties 指定一个yaml文件#
新建Pojo实体包#
@Component
public class Dog {
@Value("狗子")
private String name;
@Value("11")
private Integer age;
}
@Component
@ConfigurationProperties(prefix = "person")
public class Person {
private String name;
private Integer age;
private Boolean happy;
private Date birth;
private Map<String,Object> maps;
private List<Object> lists;
private Dog dog;
}
新建application.yaml#
  yaml语法学习教程:https://www.runoob.com/w3cnote/yaml-intro.html

  person:
    name: 小狗
    age: 12
    happy: false
    birth: 2022/11/02
    maps: {k:v,k1:v1}
    lists:
      - code
      - music
      - readBook
      - watch
    dog:
      name: 旺财
      age: 12
在通过Person类上设置一个ConfigurationProperties#
1.他是SpringBoot包下的
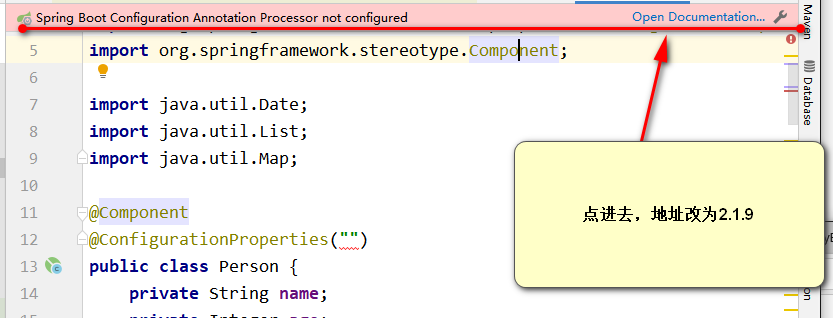
2.如果在实体类上定义这个注解,这个类上会让你打开一个连接
https://docs.spring.io/spring-boot/docs/2.1.9.RELEASE/reference/html/configuration-metadata.html

  @SpringBootTest
  class Springboot01HelloworldApplicationTests {
      @Autowired
      private Person person;
      @Test
      void contextLoads() {
          System.out.println(person);
      }
  }
  //    Person{
  //    name='小狗',
  //    age=12,
  //    happy=false,
  //    birth=Wed Nov 02 00:00:00 CST 2022,
  //    maps=null,
  //    lists=null,
  //    dog=Dog{name='旺财', age=12}}
第二种指定配置文件#
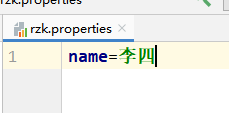
新建一个properties#

Person#
@Component
@PropertySource(value = "classpath:rzk.properties")
public class Person {
@Value("${name}")
private String name;
private Integer age;
private Boolean happy;
private Date birth;
private Map<String,Object> maps;
private List<Object> lists;
private Dog dog;
}
测试结果#
Person{name='李四', age=null, happy=null, birth=null, maps=null, lists=null, dog=null}
@ConfigurationProperties作用#
  /**
   * @ConfigurationProperties作用:
   * 将配置文件中配置的每一个属性的值,映射到这个组件中;
   * 告诉SpringBoot将本类中的所有属性和配置文件中相关的配置进行绑定
   * 参数  prefix = "person" ,将配置文件中的person下面所有属性一一对应
   *
   * 只有这个组件是容器中的组件,才能使用容器提供的@ConfigurationProperties功能
   */
Thymeleaf使用foreach#
导入依赖#
<dependency>
<groupId>org.thymeleaf</groupId>
<artifactId>thymeleaf-spring5</artifactId>
</dependency>
<dependency>
<groupId>org.thymeleaf.extras</groupId>
<artifactId>thymeleaf-extras-java8time</artifactId>
</dependency>
新建一个test.html#
  <!DOCTYPE html>
  <html lang="en" xmlns:th="http://www.thymeleaf.org">
  <head>
      <meta charset="UTF-8">
      <title>Title</title>
  </head>
  <body>
      <h1 th:text="${msg}"></h1>
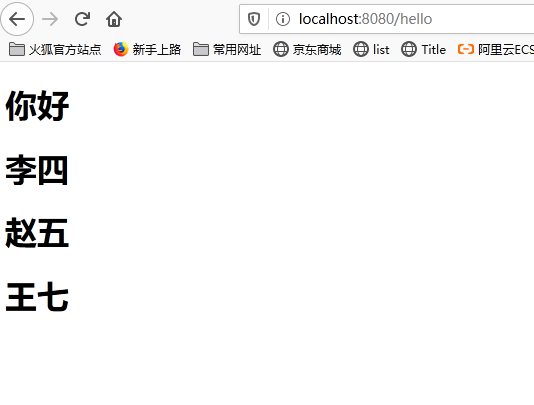
      <h1 th:each="user : ${users}" th:text="${user}"></h1>
  </body>
  </html>
controller#
  @Controller
  public class HelloController {
      @RequestMapping("/hello")
      public String hello(Model model){
          model.addAttribute("users", Arrays.asList("李四","赵五","王七"));
          return "test";
      }
  }


【推荐】编程新体验,更懂你的AI,立即体验豆包MarsCode编程助手
【推荐】凌霞软件回馈社区,博客园 & 1Panel & Halo 联合会员上线
【推荐】抖音旗下AI助手豆包,你的智能百科全书,全免费不限次数
【推荐】轻量又高性能的 SSH 工具 IShell:AI 加持,快人一步
· 深入理解 Mybatis 分库分表执行原理
· 如何打造一个高并发系统?
· .NET Core GC压缩(compact_phase)底层原理浅谈
· 现代计算机视觉入门之:什么是图片特征编码
· .NET 9 new features-C#13新的锁类型和语义
· Sdcb Chats 技术博客:数据库 ID 选型的曲折之路 - 从 Guid 到自增 ID,再到
· 语音处理 开源项目 EchoSharp
· 《HelloGitHub》第 106 期
· Spring AI + Ollama 实现 deepseek-r1 的API服务和调用
· 使用 Dify + LLM 构建精确任务处理应用