前后端分离 の 购物商城
本文的前端使用 vue 框架, 本文的后端使用 net core 框架。
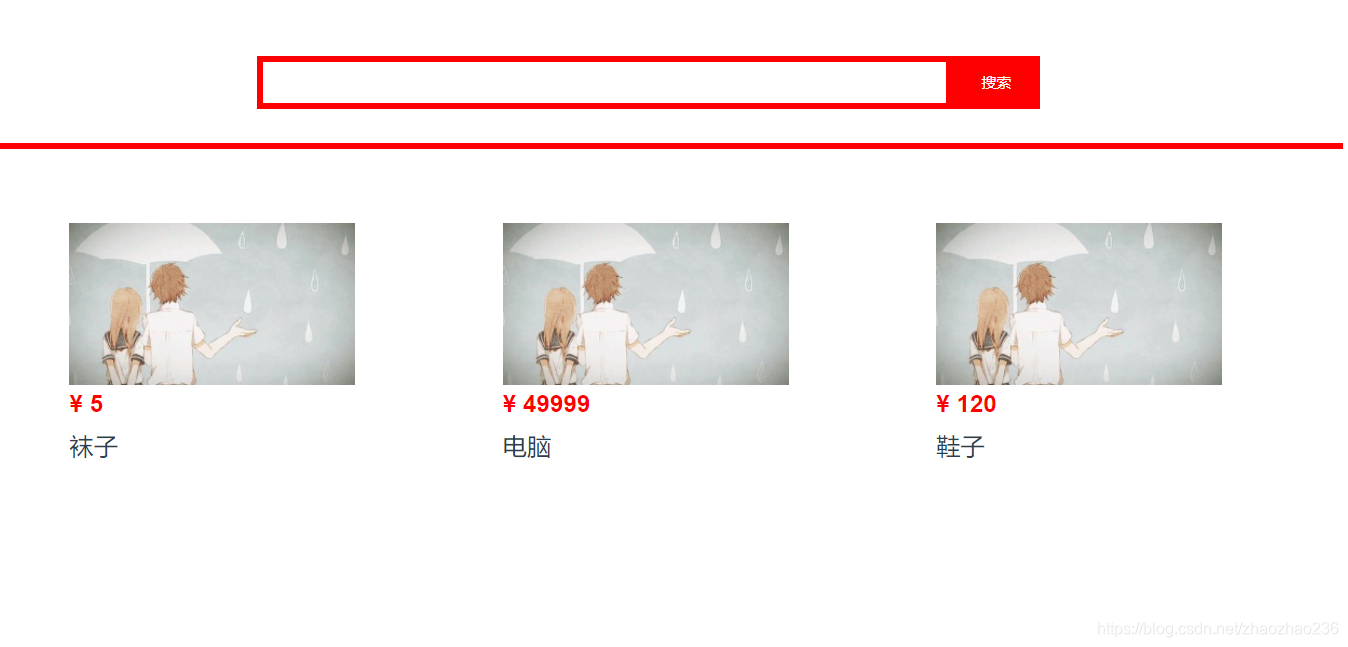
最终的效果图

一 .前端部分
总的来说,就是在 app 文件里面,添加了一个 productList.vue 文件
1.1App文件:
<template>
  <div id="app">
    <router-view></router-view>
  </div>
</template>

<script>
export default {
  name: 'App'
}
</script>

<style>
#app {
  font-family: 'Avenir', Helvetica, Arial, sans-serif;
  -webkit-font-smoothing: antialiased;
  -moz-osx-font-smoothing: grayscale;
  text-align: center;
  color: #2c3e50;
  margin-top: 60px;
}
</style>
1.2 ProductList 文件
<template>
<div>
<div class="product-search">
<input type="text" id="txtSearch" />
<button>搜索</button>
</div>
<br />
<hr />
<div class="product-list">
<ul>
<!-- key 是必须要加的 -->
<li v-for="product in productList" :key="product.id">
<img src="../../static/u=1119895080,3120720251&fm=26&gp=0.jpg" alt />
<p class="p-price">¥ {{product.price}}</p>
<p class="p-name">{{product.productName}}</p>
</li>
</ul>
</div>
</div>
</template>
<script>
import axios from "axios";
export default {
name: "ProductList",
data() {
return {
productList: [],
};
},
mounted() {
this.getProductList();
},
methods: {
getProductList() {
var thisVue = this; // 在使用 axios 之前,需要把 this 先保存一下。
axios({
method: "get",
url: "http://localhost:5000/api/Products/GetProducts",
}).then(function (response) {
thisVue.productList = response.data;
console.log(response.data)
});
},
},
};
</script>
<style scoped>
* {
/* 把浏览器默认的样式改掉,所有的样式都由我自己来掌控 */
padding: 0;
margin: 0;
}
.product-search {
/* 把div 的总长度设置为和外边一样长,然后把 margin 设置为自动填充 */
width: 750px;
margin: auto;
}
#txtSearch {
width: 600px;
height: 36px;
border: 6px solid red;
float: left;
/* 设置鼠标放上去不要有反应 */
outline: none;
/* 为了让进去的时候,打字有空,可以给他设置内边距 */
/* 注意中间不要有逗号 */
padding: 0px 10px;
}
button {
width: 80px;
height: 48px; /* 算一下下边的框,应该是44个像素 */
border: 0 none;
background: red;
color: #fff;
float: left;
/* 设置鼠标放上去不要有反应 */
}
hr {
margin-top: 60px;
border: solid red;
}
.product-list li {
width: 260px;
margin: 60px 60px;
/* 把列表前的小点去掉 */
list-style: none;
/* 把所有的图片向左看齐 */
float: left;
border: 1px solid #fff;
padding: 6px;
}
/* 鼠标放上去有动图 */
.product-list li:hover {
border-color: #ddd;
box-shadow: 0 0 20px #ccc;
}
.product-list img {
width: 260px;
}
.product-list li p {
text-align: left;
font-size: 22px;
}
.p-price {
color: red;
font-weight: bold;
margin-bottom: 10px;
}
</style>
1.3 物品详情页
<template>
<div>
<div class="product-info"></div>
<div class="product-info-left">
<img src="../../static/u=2029538042,859585808&fm=26&gp=0.jpg" alt />
</div>
<div class="product-info-right">
<p class="p-name">笔记本电脑</p>
<p class="p-price">¥8555</p>
<p class="p-number">
<span class="sub" @click="subNumber()">-</span>
<input type="text" :value="count" />
<span class="pls" @click="plsNumber()">+</span>
</p>
<p class="p-butten">
<button>加入购物车</button>
</p>
</div>
<br />
<hr />
<div class="product-detail"></div>
</div>
</template>
<script>
export default {
data() {
return {
count: 1,
};
},
created() {
alert("创建以后");
},
mounted() {
// 把路由里的 pid 的值给弄出来,然后再谈出来
var pid = this.$route.query.pid;
alert(pid);
},
methods: {
plsNumber() {
this.count++;
},
subNumber() {
this.count--;
},
},
};
</script>
<style scoped>
/* 让左右两个部分对齐 */
.product-info-left {
float: left;
}
.product-info-right {
float: left;
}
.product-info-right .p-name {
font-size: 40px;
font-weight: bold;
}
.product-info-right .p-price {
font-size: 20px;
font-weight: bold;
color: rgb(206, 38, 38);
}
/* 如何选择 p-button 下面的 button 按钮 */
.product-info-right .p-butten button {
width: 250px;
height: 50px;
background-color: rgb(223, 108, 32);
border: 0 none;
border-radius: 6px; /* 圆角 */
color: #fff;
font-size: 16px;
font-weight: bold;
/* 鼠标放上去,变成手型 */
cursor: pointer;
}
p {
/* 让每行的上下边距拉大一点 */
margin-bottom: 50px;
margin-left: 30px;
/* 都让他们往左对齐 */
text-align: left;
}
.sub{
display: inline-block;
width: 36px;
height: 36px;
border: #ccc solid 1px;
/* 让字体居中 */
text-align: center;
cursor: pointer;
/* 行高,只要和高度一样,那么就一定是居中的 */
line-height: 36px;
border-radius: 3px;
}
.pls{
display: inline-block;
width: 36px;
height: 36px;
border: #ccc solid 1px;
/* 让字体居中 */
text-align: center;
cursor: pointer;
/* 行高,只要和高度一样,那么就一定是居中的 */
line-height: 36px;
border-radius: 3px;
}
.p-number input {
height: 36px;
width: 40px;
border: 1px sold #ccc;
outline: none;
text-align: center;
}
</style>
效果图如下:

二. 后端程序:
2.1后端 Controller 文件
[Route("api/Products/GetProducts")]
    [ApiController]
    public class BussinessController : ControllerBase
    {
        [EnableCors("any")]
        [HttpGet]
        public IActionResult GetProducts()
        {
            List<Product> products = new List<Product>
            {
            new Product(){ id=1,price=5,productName="袜子"},
            new Product() { id = 2, price = 49999, productName = "电脑" },
            new Product() { id = 3, price = 120, productName = "鞋子" },
        };

            return Ok(products);
        }
    }
2.2 解决跨域问题
 public class Startup
    {
        public Startup(IConfiguration configuration)
        {
            Configuration = configuration;
        }

        public IConfiguration Configuration { get; }

        public void ConfigureServices(IServiceCollection services)
        {
            services.AddControllers();
            services.AddCors(                 //添加跨域
                option => option.AddPolicy(
                    "any",                    //跨域的名字
                    p => p
                    .AllowAnyOrigin()          // 允许任何域名
                    .AllowAnyHeader()          // 允许任何head
                    .AllowAnyMethod()          // 允许任何方法
                    //.WithOrigins()          //  允许哪些域名
                    ));
        }

        public void Configure(IApplicationBuilder app, IWebHostEnvironment env)
        {
            if (env.IsDevelopment())
            {
                app.UseDeveloperExceptionPage();
            }

            app.UseRouting();

            app.UseAuthorization();
            app.UseCors();  // 在中间使用跨域

            app.UseEndpoints(endpoints =>
            {
                endpoints.MapControllers();
            });
        }
    }
