Java对接微信公众号模板消息推送
内容有点多,请耐心!
最近公司的有这个业务需求,又很凑巧让我来完成:
首先想要对接,先要一个公众号,再就是开发文档了:https://developers.weixin.qq.com/doc/offiaccount/Getting_Started/Overview.html
不过请注意这一点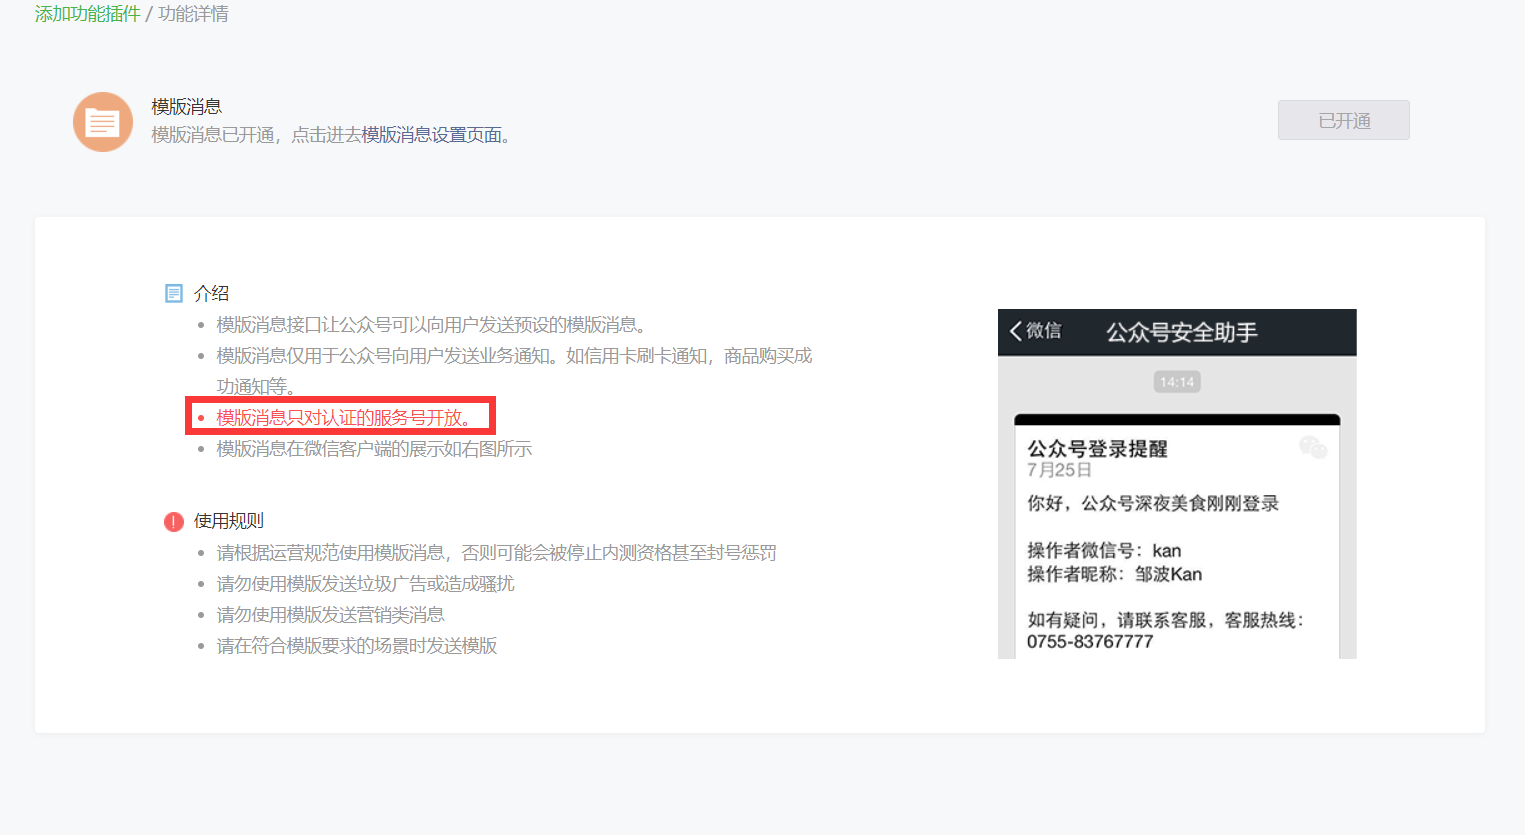
ok,我们继续:再来完成公众号的基本配置:
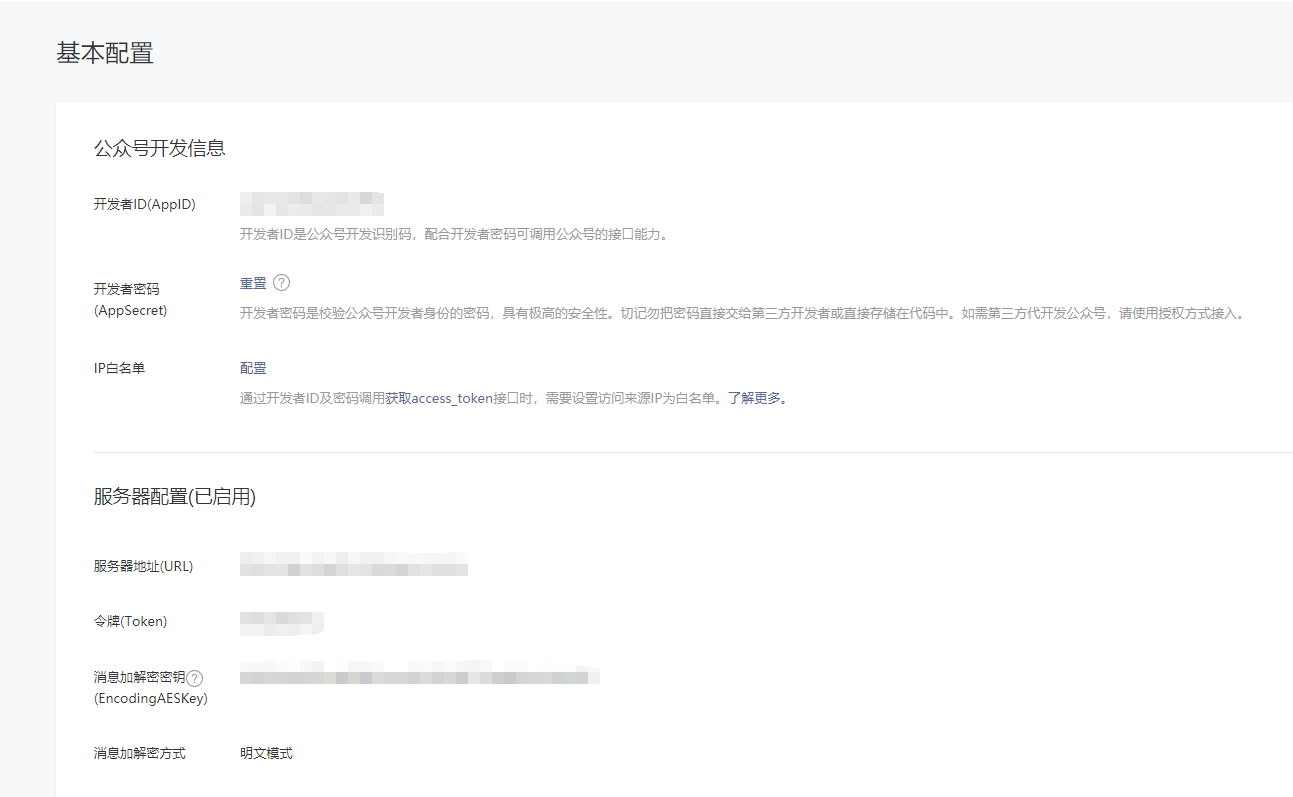
服务器地址(URL):必须以http://或https://开头,分别支持80端口和443端口。这个URL是很重要的,需要响应微信发送的token验证
令牌(Token):必须为英文或数字,长度为3-32字符。上面说过做验证的
消息加解密密钥:可以直接随机生成
消息加解密方式:明文、兼容、安全 看业务需求选择:我觉得明文省事点(个人见解)
详解微信开发文档:https://developers.weixin.qq.com/doc/offiaccount/Getting_Started/Overview.html
如果一直用微信的接口调用,会有点麻烦所以这边我就引用了 ---》WxJava《---
github:https://github.com/Wechat-Group/WxJava
gitee:https://gitee.com/binary/weixin-java-tools
先来看看官方文档对于推送模板消息参数说明: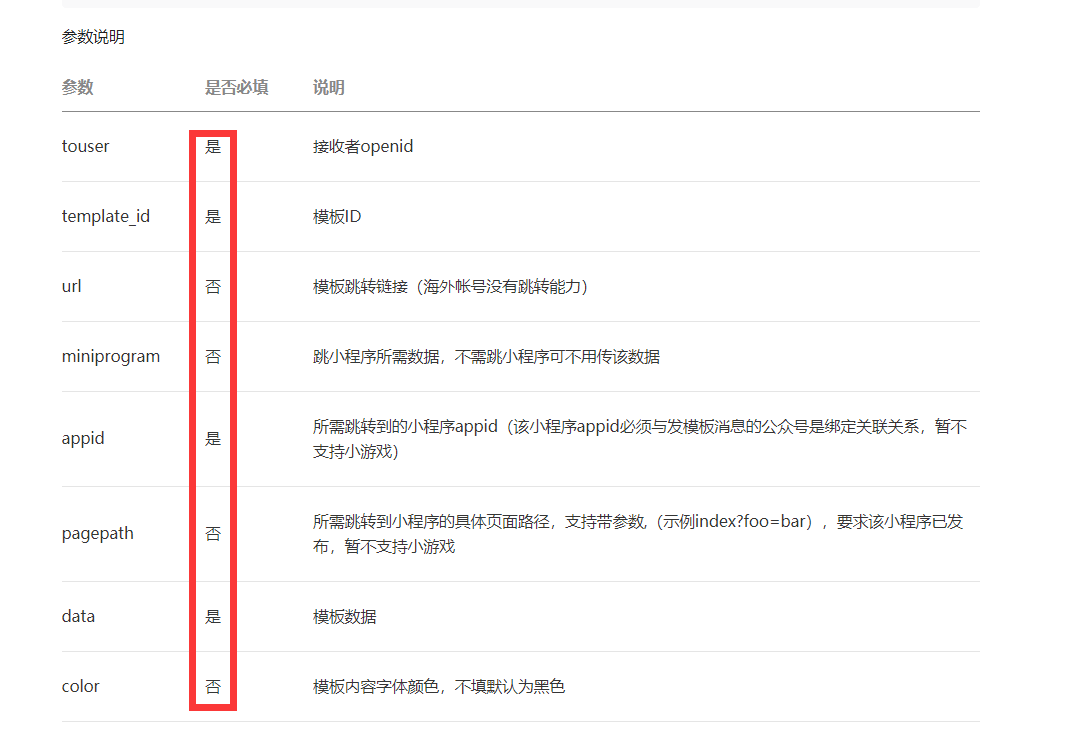
刚开始看这个开发文档的时候我还是有些懵的
openId怎么拿? 不知道!那好吧,度娘一下、google一下,疑惑不就解决了!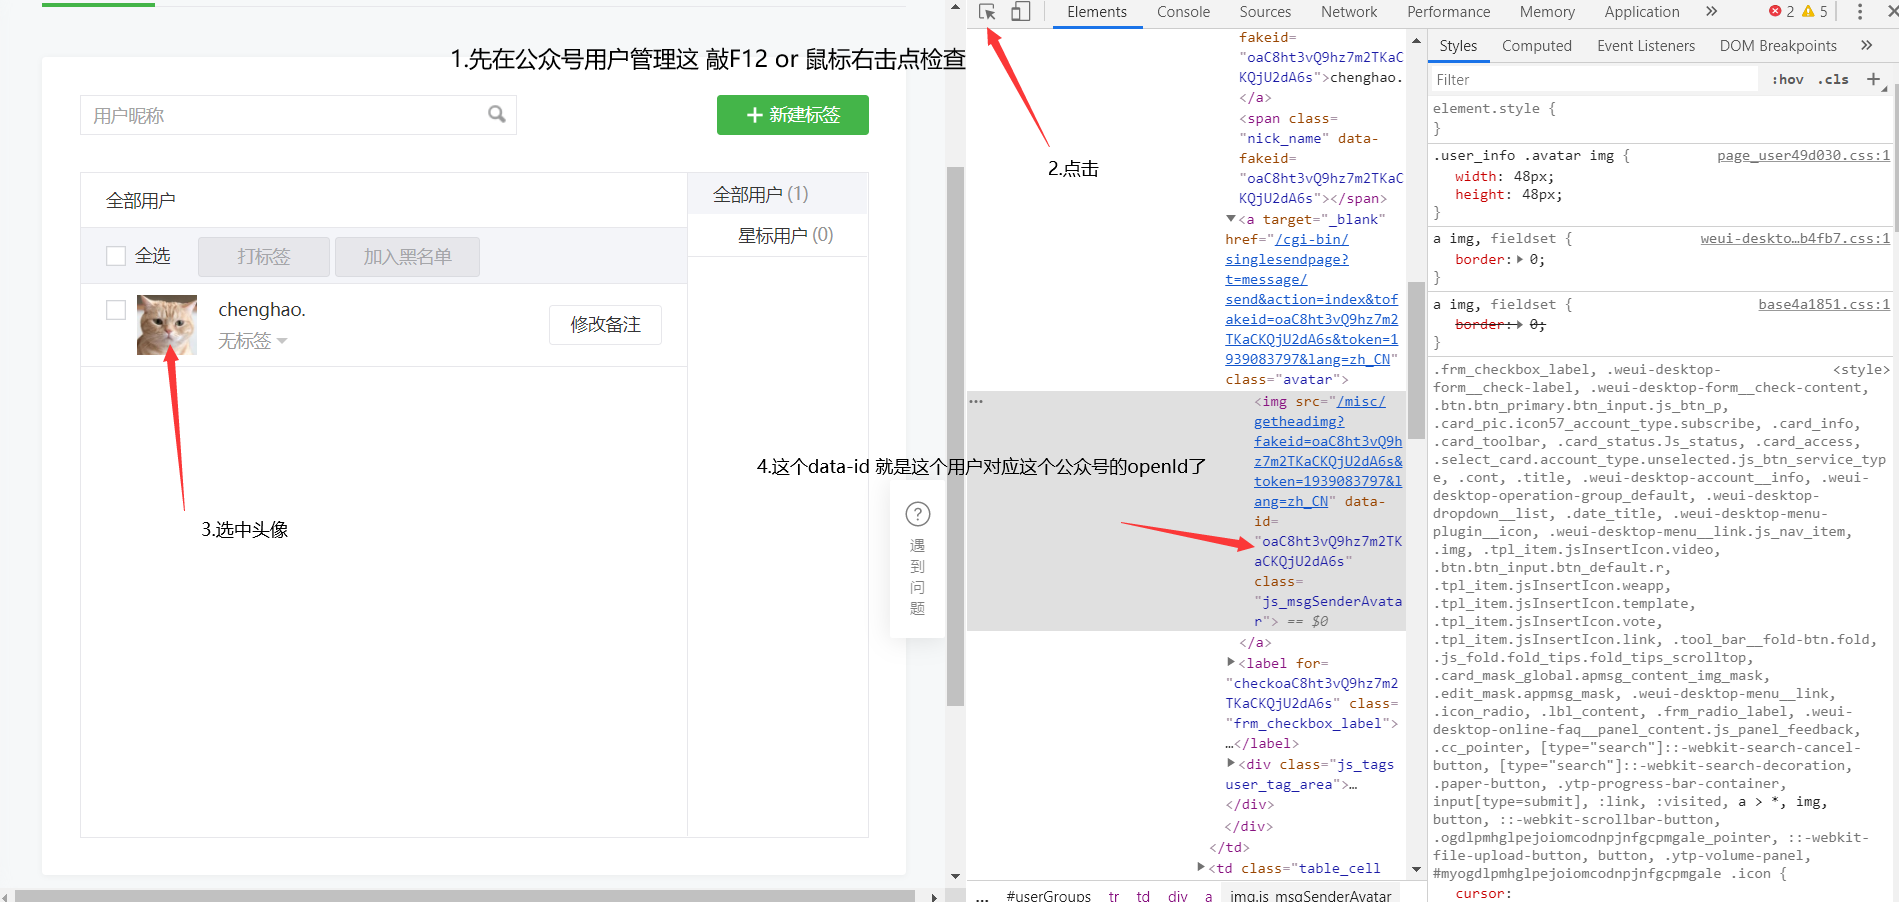
ok,下一步template_id:模板Id;对于这个可以自己申请 or 选用已有的
我就省去没必要的麻烦方正是个Demo,就选择已有的: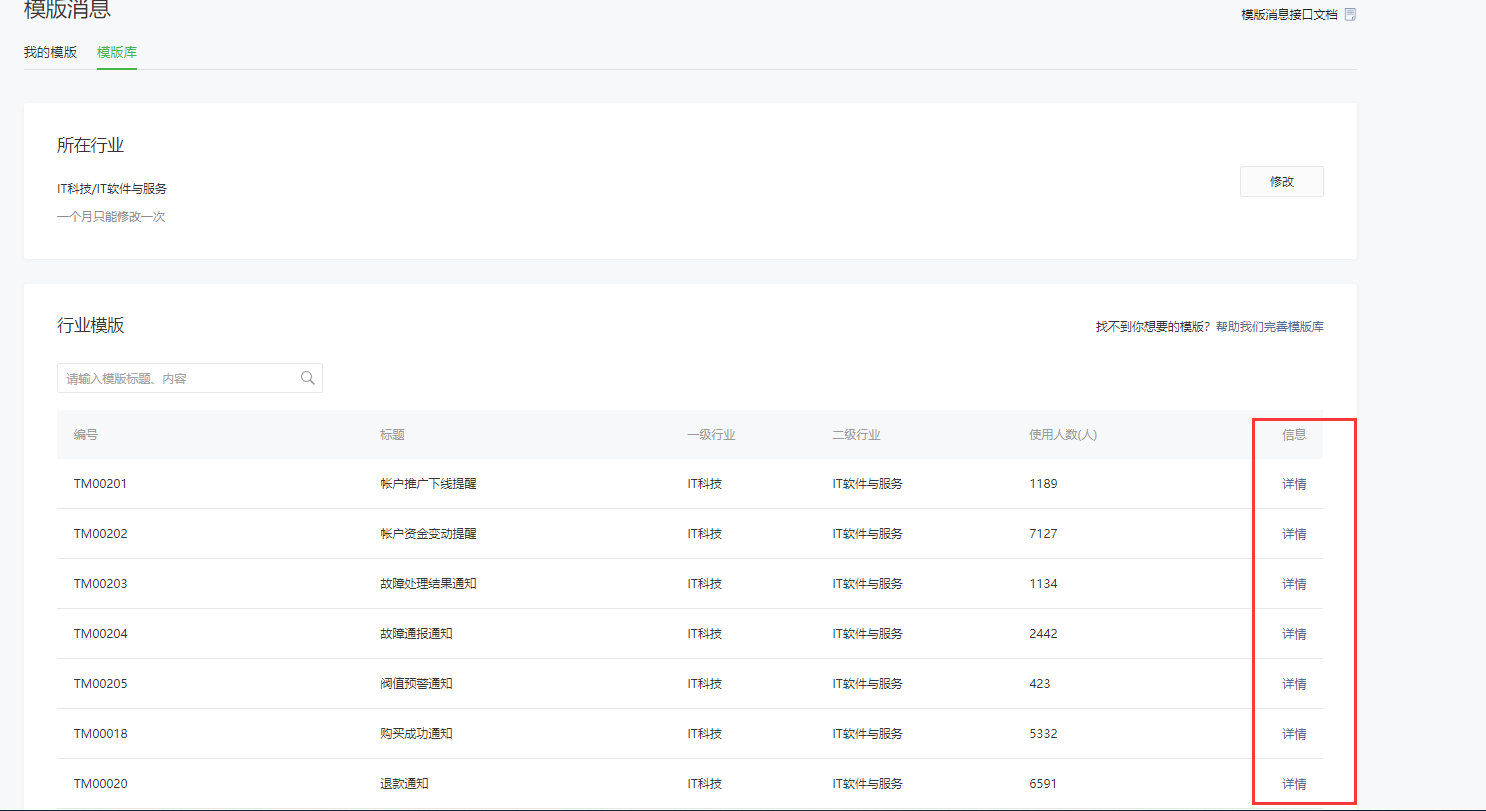
选择一个进去添加模板就行了:
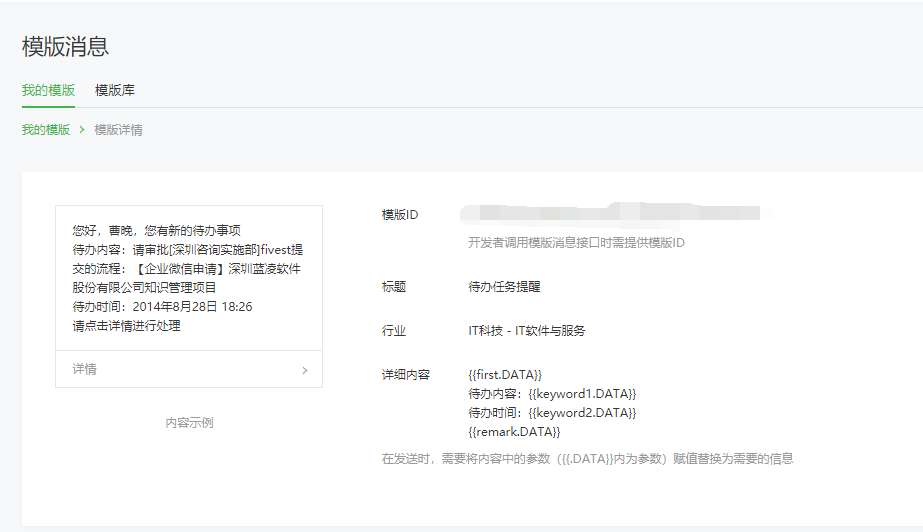
ok,模板id也拿到了,现在就开始
请大家也详细的看看 WxJava 的文档
---先建立 SpringBoot 项目---
导入wxjava公众号 对应的pom
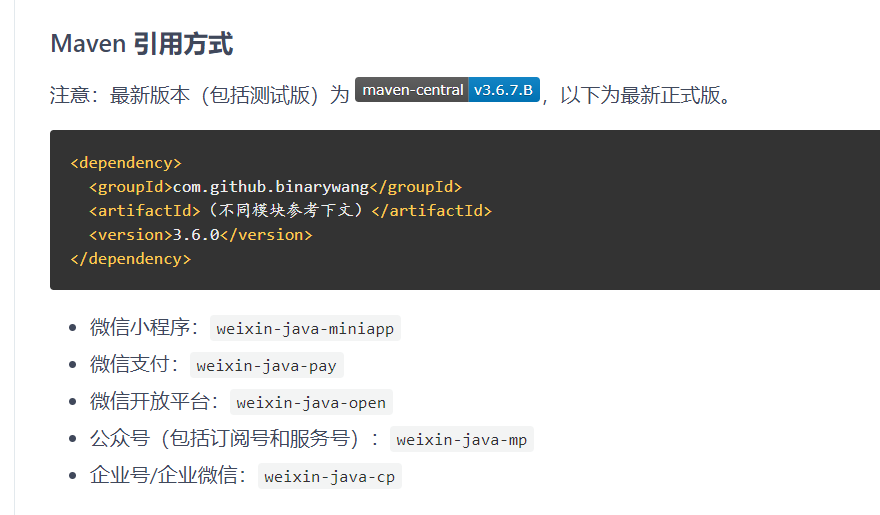
<!-- WxJava公众号 -->
<dependency>
   <groupId>com.github.binarywang</groupId>
   <artifactId>weixin-java-mp</artifactId>
   <version>3.6.0</version>
</dependency>
然后就需要配置公众号相关的信息了,我个人比较喜欢在 yml 里面配置
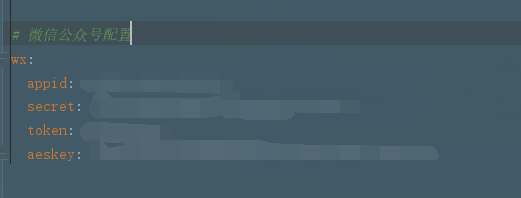
# 微信公众号配置
wx:
  appid: 11111
  secret: 22222
  token: 33333
  aeskey: 44444
配置了这个就需要对应这个配置的Component了(实体类)
/**
 * @ClassName WXProperties
 * @Author chenghao
 * @Date 2020/1/10 15:44
 **/
@Data
@Component
@ConfigurationProperties(prefix = "wx")
public class WxMpProperties {

    /**
     * 公众号appId
     */
    private String appId;

    /**
     * 公众号appSecret
     */
    private String secret;

    /**
     * 公众号token
     */
    private String token;

    /**
     * 公众号aesKey
     */
    private String aesKey;
}
关于注解啥的我就不去详解了 不明白的自己去看看官方文档
SpringBoot:
Lombok:
https://projectlombok.org/features/all
-----------------------------好的,各位,我们现在开始-----------------------------
我先给大家一步一步分析
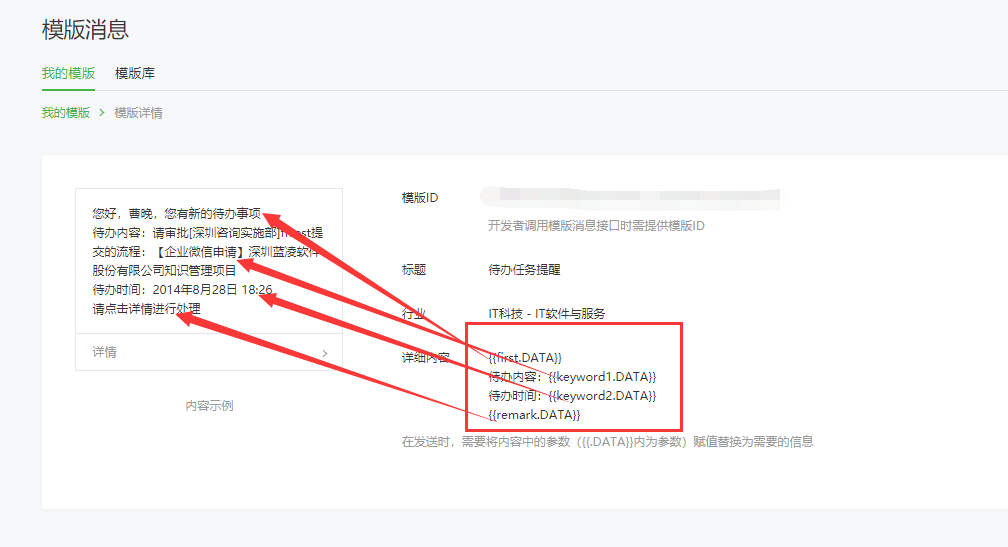
刚刚我们选择的模板,这些key都一个一个参数,文档上面说的很明白,赋值替换!!! 明白了这点就ok了。
好,再来回头看 WxJava 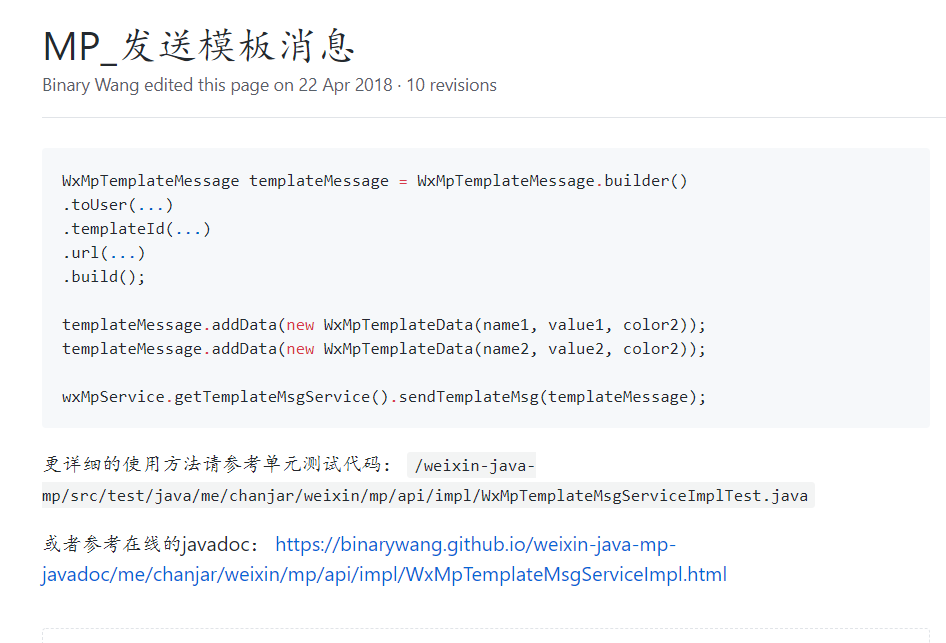
恩,根据上面的示例代码,我写了个Demo
/**
 * 微信消息推送
 *
 * @ClassName WxMsgPush
 * @Author chenghao
 * @Date 2020/1/10 16:20
 **/
    @Slf4j
    @Component
    public class WxMsgPush {

    /**
     * 微信公众号API的Service
     */
    private final WxMpService wxMpService;

    /**
     * 构造注入
     */
    WxMsgPush(WxMpService wxMpService) {
        this.wxMpService = wxMpService;
    }


    /**
     * 发送微信模板信息
     *
     * @param openId 接受者openId
     * @return 是否推送成功
     */
    public Boolean SendWxMsg(String openId) {
        // 发送模板消息接口
        WxMpTemplateMessage templateMessage = WxMpTemplateMessage.builder()
                // 接收者openid
                .toUser(openId)
                // 模板id
                .templateId("xxxxxxxxxxxxxxxxxxxxxxxxxxx")
                // 模板跳转链接
                .url("http://www.baidu.com")
                .build();
        // 添加模板数据
        templateMessage.addData(new WxMpTemplateData("first", "您好", "#FF00FF"))
                .addData(new WxMpTemplateData("keyword1", "这是个测试", "#A9A9A9"))
                .addData(new WxMpTemplateData("keyword2", "这又是个测试", "#FF00FF"))
                .addData(new WxMpTemplateData("remark", "这还是个测试", "#000000"));
        String msgId = null;
        try {
            // 发送模板消息
            msgId = wxMpService.getTemplateMsgService().sendTemplateMsg(templateMessage);
        } catch (WxErrorException e) {
            e.printStackTrace();
        }
        log.warn("·==++--·推送微信模板信息:{}·--++==·", msgId != null ? "成功" : "失败");
        return msgId != null;
    }
}
wdnmd!一上来就发现报错!!!
Could not autowire. No beans of 'WxMpService' type found. -------> 无法自动接线。找不到“ WxMpService”类型的bean
一脸懵逼,然后看了下这个WxMpService接口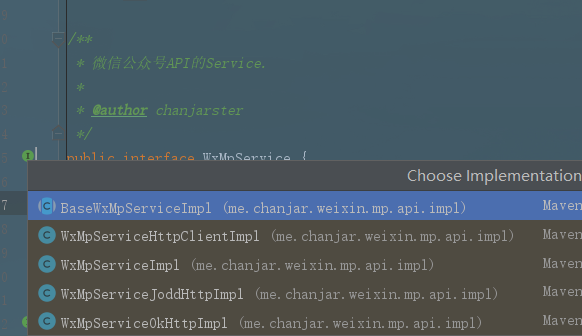 我靠,这些实现类,淦!
后来仔细研究了下,因为有多个实现类,我们需要自己写个config,把这个实现类@Bean注入
/**
 * @ClassName WxConfig
 * @Author chenghao
 * @Date 2020/1/11 09:23
 **/
@Configuration
public class WxConfig {

    /**
     * 声明实例
     *
     * @return
     */
    @Bean
    public WxMpService wxMpService() {
        WxMpService wxMpService = new WxMpServiceImpl();
        return wxMpService;
    }
ok,开始分析代码
首先这个
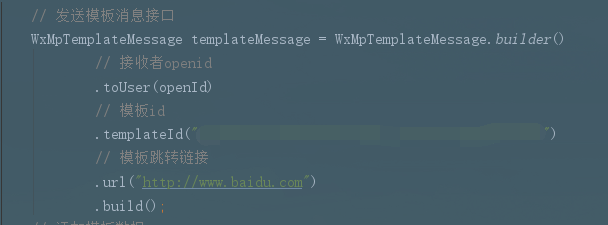
点进去瞅一眼有四个属性:
/**
 * 接收者openid.
 */
private String toUser;

/**
 * 模板ID.
 */
private String templateId;

/**
   * 模板跳转链接.
   * <pre>
   * url和miniprogram都是非必填字段,若都不传则模板无跳转;若都传,会优先跳转至小程序。
   * 开发者可根据实际需要选择其中一种跳转方式即可。当用户的微信客户端版本不支持跳小程序时,将会跳转至url。
   * </pre>
   */
  private String url;

  /**
   * 跳小程序所需数据,不需跳小程序可不用传该数据.
   *
   * @see #url
   */
  private MiniProgram miniProgram;
ok,我们继续分析
留意一下这个
需要跟你自己申请的模板那些key对应!!!
 这个就是赋值的内容了
 文字对应的颜色
最后一步:推送

懵逼中·········
点进去,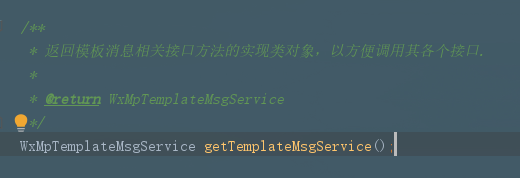
 又来个接口
又来个接口
 看到相应的方法了
好了,知道了对应方法的作用,终于可以推送了。但是但是,到现在,我才想起一件事情,我配置的公众号信息,他能自己读?很显然我们少配置了信息。
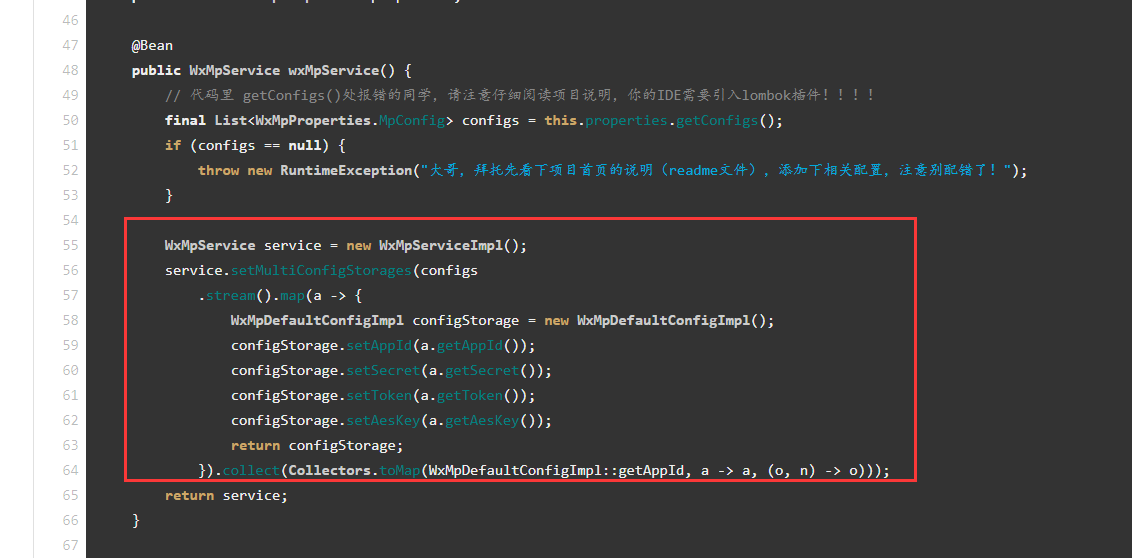
真的是让我一顿好找啊
他用是Lambda表达式+Stream 这里我就不用了,我不想太骚(主要是不会)
改了一下自己写的config,大家要注意这个!!!
/**
 * @ClassName WxConfig
 * @Author chenghao
 * @Date 2020/1/11 09:23
 **/
@Configuration
public class WxConfig {

    private final WxMpProperties wxMpProperties;

    /**
     * 构造注入
     *
     * @param wxMpProperties
     */
    WxConfig(WxMpProperties wxMpProperties) {
        this.wxMpProperties = wxMpProperties;
    }

    /**
     * 微信客户端配置存储
     *
     * @return
     */
    @Bean
    public WxMpConfigStorage wxMpConfigStorage() {
        WxMpDefaultConfigImpl configStorage = new WxMpDefaultConfigImpl();
        // 公众号appId
        configStorage.setAppId(wxMpProperties.getAppId());
        // 公众号appSecret
        configStorage.setSecret(wxMpProperties.getSecret());
        // 公众号Token
        configStorage.setToken(wxMpProperties.getToken());
        // 公众号EncodingAESKey
        configStorage.setAesKey(wxMpProperties.getAesKey());
        return configStorage;
    }

    /**
     * 声明实例
     *
     * @return
     */
    @Bean
    public WxMpService wxMpService() {
        WxMpService wxMpService = new WxMpServiceImpl();
        wxMpService.setWxMpConfigStorage(wxMpConfigStorage());
        return wxMpService;
    }
ok,主要 code 部分都完成了,开始测试吧。请自己建一个Controller
/**
 * 微信消息推送
 */
private final WxMsgPush wxMsgPush;

/**
 * 构造注入
 */
protected PushMsgApi(WxMsgPush wxMsgPush) {
    this.wxMsgPush = wxMsgPush;
}
/**
     * 发送微信模板消息
     */
    @ApiOperation("发送微信模板消息")
    @ApiImplicitParams({
            @ApiImplicitParam(name = "openId", value = "接受者openId", dataType = "String", paramType = "query")
    })
    @PostMapping("/sendWxInfo")
    public void sendWxInfo(String openId) {
        // 执行发送
        Boolean aBoolean = wxMsgPush.SendWxMsg(openId);
        System.out.println(aBoolean);
    }
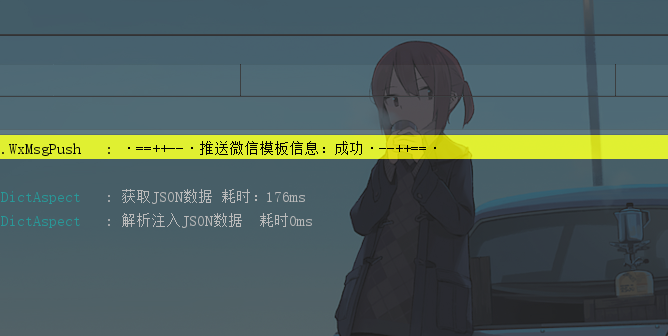
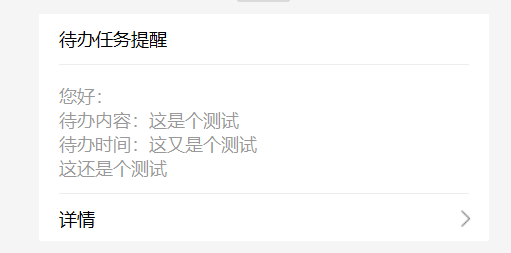
ok!推送完成!!请大家自行去编写!!!
(下篇出个微信登录详解)


