Apache 随记
默认目录和用户
默认用户: apache (自动创建的用户)
Apache 安装目录:/etc/httpd
常用模块配置文件存放目录:/etc/httpd/conf.modules.d
Apache 主配置文件内容简单描述
Apache 主配置文件所在路径:/etc/httpd/conf/httpd.conf
User 运行的系统用户名
Group 运行的系统用户组
ServerRoot 服务器根路径
DocumentRoot 网页文件存放目录(网站主目录)
Apache 主机访问控制
- DAC(Discretionary Access Control) 自主访问控制,基于用户名和密码的访问控制
- MAC(Mandatory Access Control) 强制访问控制,基于 IP,域名,主机名 的访问控制
- mod_access 根据访问者的IP,域名,主机名来控制访问,该模块提供
order,deny,allow等控制指令
权限配置:
    Allow from All         允许所有客户端访问
    Allow from 1.1.1.1     允许IP地址为 1.1.1.1 的客户端访问
    AllowOverride All      使用页面目录中的.htaccess文件中的规则重写默认规则
    AllowOverride None     不使用页面目录中的.htaccess文件中的规则重写默认规则
    Deny from All          禁止所有客户端访问
    Deny from 1.1.1.1      禁止IP地址为 1.1.1.1 的客户端访问
    Order allow,deny       先执行 allow 的规则再执行 deny 规则
    Require local          仅允许本地访问
    Require all granted    允许所有访问请求
    Require all denied     禁止所有访问请求
    Satisfy All            当同时设置了Allow, Required等控制条件时,需要条件都满足才行
    Satisfy Any            当同时设置了Allow, Required等控制条件时,只需满足其中任意一个条件即可

注意:下层的权限会覆盖上层的权限
例:/var/www/html/test 目录下除了 test.txt 文件其他文件都不允许访问
<Directory "/var/www/html/test">
    Deny from all
    <Files "test.txt">
        Allow from all
    </Files>
</Directory>
Order allow,deny 使用时注意事项:Order 以最后一个规则为结束规则,在 Order allow,deny 中 deny 就是最后一个规则
由于 Deny 为 Order 中的结束规则所以当执行到 Deny 时就结束并不会继续执行后面的 Allow, 所以1.1.1.1也访问不了 test 目录
<Directory "/var/www/html/test">
    Order Allow,Deny
    Deny from all
    Allow from 1.1.1.1
</Directory>

要使 1.1.1.1 能访问 test 目录只需将 Order Allow,Deny 换成 Order Deny,Allow 即可
<Directory "/var/www/html/test">
    Order Deny,Allow
    Deny from all
    Allow from 1.1.1.1
</Directory>
Apache 账户访问控制
作用:网站资源只有通过认证的用户才能访问
常用基本认证模块:mod_auth_basic
注:可自己在页面目录下创建 .htaccess 文件然后把规则写入 .htaccess 中,也可直接在主配置文件中创建对应的目录规则。若使用 .htaccess 文件来制定规则则需要更改主配置文件中的
AllowOverride规则要注意合理设置文件的权限,要能让Apache服务读取这些文件或目录
例1. 为网页指定认证的用户(单一用户认证)
[root@localhost ~]# vi /etc/httpd/conf/httpd.conf
DocumentRoot "/html" # 设置页面主目录为 /html
...
<Directory "/html">
    Options Indexes FollowSymlinks # 当目录下没有index.html就列出该目录下的文件和子目录
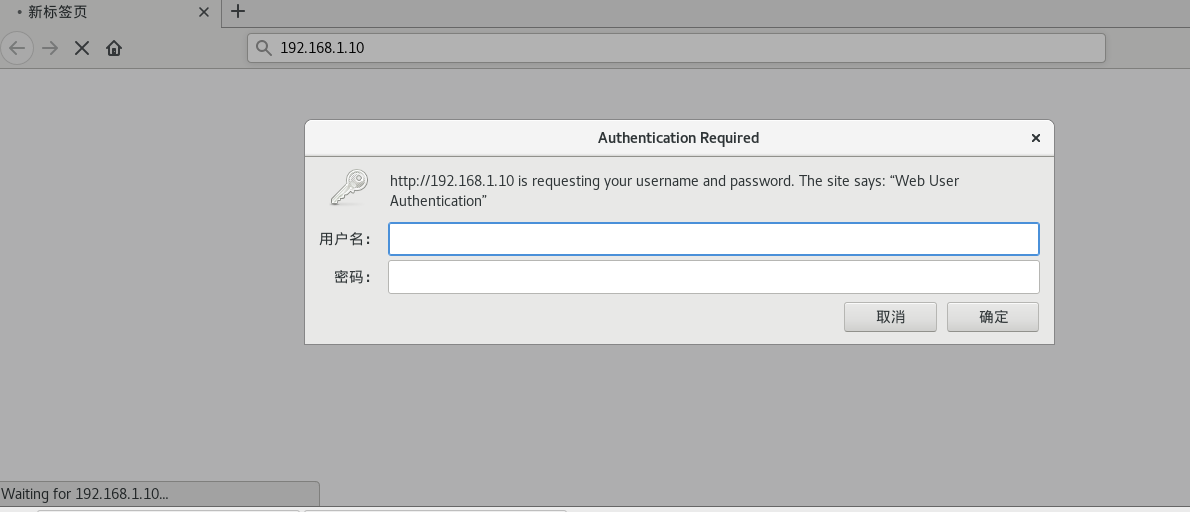
    AuthName "Web User Authentication" # 认证区域的名称,让其他相同认证区域的资源也可被同一认证用户访问
    AuthType Basic # 设置认证类型为基础类型
    Require User test # 指定认证的用户名只能为 test,其他的用户名无法通过认证
    AuthUserFile "/etc/httpd/.test" # 指定用户认证文件的路径(建议放在权限低的地方,以免被非法下载)
</Directory>
...

# 为Apache认证用户 test 设置认证密码并把认证用户名和加密后的密码写入指定的用户认证文件(/etc/httpd/.test)
# htpasswd 的 -c 参数表示覆盖原先文件中的内容,不加 -c 表示追加
[root@localhost ~]# htpasswd -c /etc/httpd/.test test
New password: 123
Re-type new password: 123
Adding password for user test
例2. 用户认证文件中的用户都能认证访问网站(多用户认证)
# 编辑主配置文件
[root@localhost ~]# vi /etc/httpd/conf/httpd.conf
DocumentRoot "/html" # 设置页面主目录为 /html
...
<Directory "/html">
    Options Indexes FollowSymlinks
    AuthName "Web User Authentication"
    AuthType Basic
    Require valid-user # 用户认证文件中任意用户名都可进行认证访问网站
    AuthUserFile "/etc/httpd/.testusers" # 指定用户认证文件的路径
</Directory>
...

# 添加Apache认证用户
[root@localhost ~]# htpasswd -c /etc/httpd/.testusers test1
...
[root@localhost ~]# htpasswd /etc/httpd/.testusers test2
...
[root@localhost ~]# htpasswd /etc/httpd/.testusers test3
...

# 查看是否添加成功
[root@localhost ~]# cat /etc/httpd/.testusers
test1:$apr1$ixYFqjIS$13WBaYjNY3UPcC3KhiF8N.
test2:$apr1$jCnxaXkQ$lRP8u.Jbh3JTD.UEfaYvV0
test3:$apr1$wuQpoK.u$ly7hbvSGYxS0tIyGQGAhp0
例3. 为网页指定认证的组,只有组内成员能进行认证(组认证)
# 编辑主配置文件
[root@localhost ~]# vi /etc/httpd/conf/httpd.conf
DocumentRoot "/html" # 设置页面主目录为 /html
...
<Directory "/html">
    Options Indexes FollowSymlinks
    AuthName "Web User Authentication"
    AuthType Basic
    Require Group webuser # 指定认证的组,只能用组中的用户进行认证
    AuthGroupFile "/etc/httpd/.webuser" # 组认证文件,里面指定了组内用哪些用户
    AuthUserFile "/etc/httpd/.users" # 用户认证文件,里面存放了组内用户的认证信息
</Directory>
...

# 组认证文件的格式为 组名: 组内用户1 组内用户2 组内用户3 ...
[root@localhost ~]# cat /etc/httpd/.webuser
webuser: user1 user2 user3

# 为webuser组内的认证用户设置认证密码并写入指定的用户认证文件(/etc/httpd/.users)
[root@localhost ~]# htpasswd -c /etc/httpd/.users user1
...
[root@localhost ~]# htpasswd /etc/httpd/.users user2
...
[root@localhost ~]# htpasswd /etc/httpd/.users user2
...

# 查看用户是否已写入指定的用户认证文件
[root@localhost ~]# cat /etc/httpd/.users
user1:$apr1$KB0TuS/t$wv1lIgrQgZlZk2IiVZ50W0
user2:$apr1$VKSyoGWA$NOEO2kMgBDlroSCDDzqkc/
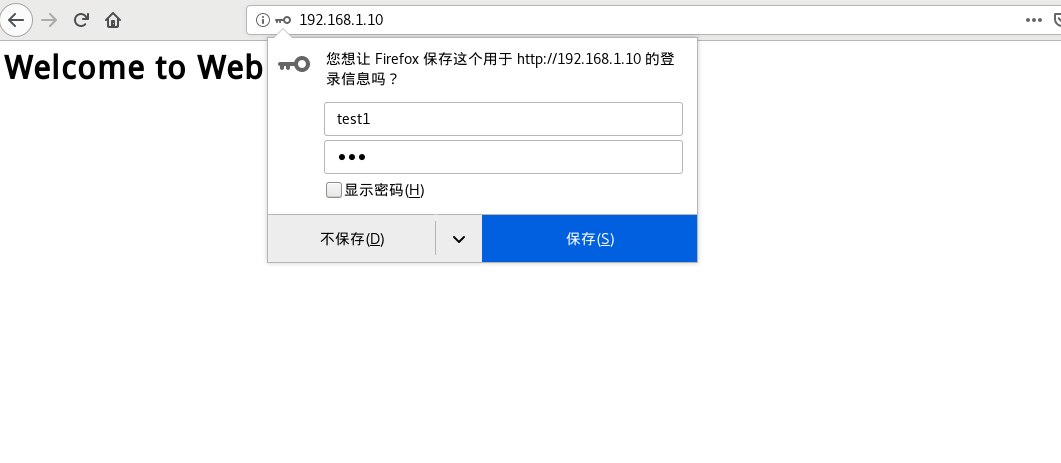
user3:$apr1$K61CLuGN$7dj4pEMUeJ1vNWqPNz3sZ/- 开始认证

- 认证成功

Apache 虚拟目录和虚拟主机
虚拟目录:映射到本地或远程服务器上的物理目录的目录名称。当资源在其他地方时,可用虚拟目录让服务器仍然能够访问资源。
虚拟主机:在网络服务器上划分出一定大小的磁盘空间,该空间可存放站点,应用组件与必要的站点数据等,使得单一机器上可运行多个站点服务。
- 创建虚拟目录让 Apache 服务器可访问其他位置的资源
# 创建目录
[root@localhost ~]# mkdir -p /resource/book

# 创建虚拟目录并为物理目录设置访问权限
[root@localhost ~]# vi /etc/httpd/conf/httpd.conf
...
Alias /book "/resource/book"  # 为物理目录(/resource/book)创建虚拟目录(/book)
<Directory "/resource/book">
    Require all granted  # 定义访问权限为所有人均可访问
</Directory>
...

# 重启服务
[root@localhost ~]# systemctl restart httpd- 在单一机器上使用虚拟主机来管理多个网站
# 把虚拟主机示例复制到 Apache 服务器目录下(也可以自己手打,为方便这里就直接复制了而且没有改名字)
[root@localhost ~]# cp /usr/share/doc/httpd-2.4.6/httpd-vhosts.conf /etc/httpd/conf.d

# 编辑虚拟主机文件(httpd-vhosts.conf)
[root@localhost ~]# vi /etc/httpd/conf.d/httpd-vhosts.conf
...
<VirtualHost *:80>  # 80端口上的站点(站点1)
    ServerAdmin webmaster@dummy-host.example.com
    DocumentRoot "/web1"  # 站点根目录
    ServerName dummy-host.example.com
    ServerAlias www.dummy-host.example.com
    <Directory "/web1">  # 目录访问权限设置
        AllowOverride None
        Require all granted
    </Directory>
    Alias /book "/resource/book"  # 创建虚拟目录
    <Directory "/resource/book">  # 物理目录权限设置
        AllowOverride None
        Require all granted
    </Directory>
    ErrorLog "/var/log/httpd/dummy-host.example.com-error_log"
    CustomLog "/var/log/httpd/dummy-host.example.com-access_log" common
</VirtualHost>

Listen 8080  监听8080端口
<VirtualHost *:8080>  # 8080端口上的站点(站点2)
    DocumentRoot "/web2"  # 站点根目录
    <Directory "/web2">  # 目录访问权限设置
        Require all granted
    </Directory>
</VirtualHost>
...

# 重启服务
[root@localhost ~]# systemctl restart httpd


 浙公网安备 33010602011771号