

玩转k8s pod调度之Taint 和 Toleration
Taint(污点) 和 Toleration(容忍)
节点亲和性,是 pod 的一种属性(偏好或硬性要求),它使 pod 被吸引到一类特定的节点。Taint 则相反,它使 节点 能够 排斥 一类特定的 pod
Taint 和 toleration 相互配合,可以用来避免 pod 被分配到不合适的节点上。每个节点上都可以应用一个或多个 taint ,这表示对于那些不能容忍这些 taint 的 pod,是不会被该节点接受的。如果将 toleration 应用于 pod 上,则表示这些 pod 可以(但不要求)被调度到具有匹配 taint 的节点上。
污点(Taint)
污点 ( Taint ) 的组成
使用 kubectl taint 命令可以给某个 Node 节点设置污点,Node 被设置上污点之后就和 Pod 之间存在了一种相斥的关系,可以让 Node 拒绝 Pod 的调度执行,甚至将 Node 已经存在的 Pod 驱逐出去
每个污点有一个 key 和 value 作为污点的标签,其中 value 可以为空,effect 描述污点的作用。
如果node有多个taint,pod需要容忍多有的key:value effcet才可以调度到这个节点。
当前 taint effect 支持如下三个选项:
NoSchedule:只有拥有和这个 taint 相匹配的 toleration 的 pod 才能够被分配到这个节点。
PreferNoSchedule:系统会尽量避免将 pod 调度到存在其不能容忍 taint 的节点上,但这不是强制的。
NoExecute :任何不能忍受这个 taint 的 pod 都会马上被驱逐,任何可以忍受这个 taint 的 pod 都不会被驱逐。Pod可指定属性 tolerationSeconds 的值,表示pod 还能继续在节点上运行的时间,过了这个时间后开始驱逐pod,重新调度,有可能会重新调度到这台节点,因为pod可以容忍这个污点。
tolerations:
- key: "key1"
operator: "Equal"
value: "value1"
effect: "NoExecute"
tolerationSeconds: 3600   // pod 还能在这个节点上继续运行这个指定的时间长度
给节点增加一个taint(污点),它的key是<key>,value是<value>,effect是NoSchedule
kubectl taint nodes <node_name> <key>=<value>:NoSchedule
删除节点上的taint
kubectl taint nodes node1 key=value:NoSchedule-
node打污点命令解释

kubectl cordon # 不可调度
恢复
kubectl  uncordon
-------------------------------------------------------------
# 打污点
kubectl  taint node node-1 key-value:effect
-------------------------------------------------------------
# 排空节点pod,建议配合pdb策略
# 给定节点将被标记为不可调度,以防止新 pod 到达。drain将驱逐 po
kubectl drain node-1 --ignore-daemonsets  # 排空节点pod
# 恢复
kubectl uncordon
node节点的隔离
几种方法
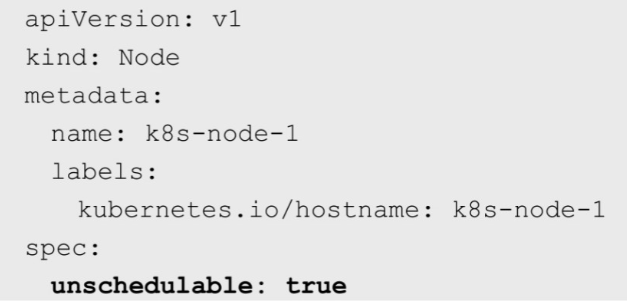
1. 创建配置文件unschedule_node.yaml,在spec部分指定unschedulable为true:
通过kubectl replace命令完成对Node状态的修改:
kubectl replace -f unschedule_node.yaml
kubectl patch node master-1 -p '{"spec":{"unschedulable":"true"}}'
3. 使用cordon和uncordon实现节点调度隔离和恢复调度。
]# kubectl cordon  master-1
node/master-1 cordoned

]# kubectl uncordon  master-1
node/master-1 uncordoned
查看node详情,可以看到给节点加上了Taints污点
]# kubectl describe node master-1
Name:               master-1
Roles:              <none>...
CreationTimestamp:  Mon, 25 Nov 2024 09:16:32 +0800
Taints:             node.kubernetes.io/unschedulable:NoSchedule
Unschedulable:      true
需要注意的是,将某个Node脱离调度范围时,在其上运行的Pod并不会自动停止,管理员需要手动停止在该Node上运行的Pod。
]#  kubectl  get pod -A -owide  |grep master-1
app           rabbitmq-965dc557b-hw44x                      1/1     Running   2          20h     10.244.39.38     master-1   <none>           <none>
app           redis-86cc584c4-wlm2k                         1/1     Running   2          22h     10.244.39.11     master-1   <none>           <none>
default       configmap-kv-all-5497bc449d-s4wh8             1/1     Running   1          167m    10.244.39.35     master-1   <none>           <none>
default       configmap-volume-844c84566b-5w64q             1/1     Running   1          167m    10.244.39.40     master-1   <none>           <none>
default       ingressclass-ingress-nginx-controller-tt7wg   1/1     Running   44         30d     192.168.43.129   master-1   <none>           <none>
default       nfs-client-provisioner-7d4f48bb8f-xrg6k       1/1     Running   1          167m    10.244.39.32     master-1   <none>           <none>
kube-system   calico-kube-controllers-7775799c8c-48w8h      1/1     Running   0          3h39m   10.244.39.31     master-1   <none>           <none>
kube-system   calico-kube-controllers-7775799c8c-gss8z      1/1     Running   55         30d     10.244.39.14     master-1   <none>           <none>
kube-system   calico-node-k89f9                             1/1     Running   45         30d     192.168.43.129   master-1   <none>           <none>
kube-system   calico-typha-5dc577d877-ht7rq                 1/1     Running   45         30d     192.168.43.129   master-1   <none>           <none>
kube-system   coredns-6bd54f798b-7fl28                      1/1     Running   0          3h46m   10.244.39.37     master-1   <none>           <none>
kube-system   metrics-server-5bbd7cb4c6-kkdct               1/1     Running   0          167m    192.168.43.129   master-1   <none>           <none>
容忍(Tolerations)
设置了污点的 Node 将根据 taint 的 effect:NoSchedule、PreferNoSchedule、NoExecute 和 Pod 之间产生互斥的关系,Pod 将在一定程度上不会被调度到 Node 上。 但我们可以在 Pod 上设置容忍 ( Toleration ) ,意思是设置了容忍的 Pod 将可以容忍污点的存在,可以被调度到存在污点的 Node 上
在 Pod Spec 中定义 pod toleration 的两种方式:
operator:Equal 会比较key和value
operator:Exists 只要含有key就会容忍该污点
如果不指定operator,则默认值为Equal。
空的key配合Exists操作符能够匹配所有的键和值。
空的effect匹配所有的effect
tolerations:
- key: "key"
operator: "Equal"
value: "value"     # 精确匹配
effect: "NoSchedule"
tolerations:
- key: "key"
operator: "Exists"
effect: "NoSchedule"   # 只匹配key和effect
容忍所有含污点的node
tolerations:
- operator: "Exists"
容忍所有key相同的,忽视effect
tolerations:
- key: "key"
operator: "Exists"
kubectl taint nodes Node-Name node-role.kubernetes.io/master=:PreferNoSchedule
2.3. 使用场景
2.3.1. 专用节点
kubectl taint nodes <nodename> dedicated=<groupName>:NoSchedule
先给Node添加taint,然后给Pod添加相对应的 toleration,则该Pod可调度到taint的Node,也可调度到其他节点。
如果想让Pod只调度某些节点且某些节点只接受对应的Pod,则需要在Node上添加Label(例如:dedicated=groupName),同时给Pod的nodeSelector添加对应的Label。
2.3.2. 特殊硬件节点
如果某些节点配置了特殊硬件(例如CPU),希望不使用这些特殊硬件的Pod不被调度该Node,以便保留必要资源。即可给Node设置taint和label,同时给Pod设置toleration和label来使得这些Node专门被指定Pod使用。
kubectl taint
kubectl taint nodes nodename special=true:NoSchedule
或者
kubectl taint nodes nodename special=true:PreferNoSchedule
2.3.3. 基于taint驱逐
effect 值 NoExecute ,它会影响已经在节点上运行的 pod,即根据策略对Pod进行驱逐。
如果 pod 不能忍受effect 值为 NoExecute 的 taint,那么 pod 将马上被驱逐
如果 pod 能够忍受effect 值为 NoExecute 的 taint,但是在 toleration 定义中没有指定 tolerationSeconds,则 pod 还会一直在这个节点上运行。
如果 pod 能够忍受effect 值为 NoExecute 的 taint,而且指定了 tolerationSeconds,则 pod 还能在这个节点上继续运行这个指定的时间长度。
测试阶段:
NoSchedule
给节点打上标签
]# kubectl taint node master-1 NS=value:NoSchedule
node/master-1 tainted

]# kubectl taint node node-1 NS=value1:PreferNoSchedule
设置node亲和性
      affinity:
        nodeAffinity:
          requiredDuringSchedulingIgnoredDuringExecution:
            nodeSelectorTerms:
            - matchExpressions:
              - key: diskType
                operator: In
                values:
                - ssd
          preferredDuringSchedulingIgnoredDuringExecution:
          - weight: 1
            preference:
              matchExpressions:
              - key: kubernetes.io/arch
                operator: In
                values:
                - amd64
调度发现集群没有符合需求的node,pod pending
Events:
  Type     Reason            Age   From               Message
  ----     ------            ----  ----               -------
  Warning  FailedScheduling  21s   default-scheduler  0/3 nodes are available: 1 node(s) had taint {NS: value}, that the pod didn't tolerate, 2 node(s) didn't match Pod's node affinity.
  Warning  FailedScheduling  21s   default-scheduler  0/3 nodes are available: 1 node(s) had taint {NS: value}, that the pod didn't tolerate, 2 node(s) didn't match Pod's node affinity.
设置pod容忍
      tolerations:
      - key: "NS"
        operator: "Equal"
        value: "value"
        effect: "NoSchedule"
调度到node亲和性的节点
]# kubectl get pod -n app -owide
NAME                               READY   STATUS    RESTARTS   AGE    IP              NODE       NOMINATED NODE   READINESS GATES
backend-8dd8454bf-bjtcx            1/1     Running   0          123m   10.244.84.154   node-1     <none>           <none>
nginx-configmap-849b876b64-dzzq5   1/1     Running   0          82m    10.244.84.159   node-1     <none>           <none>
nginx-configmap-849b876b64-vqx2p   1/1     Running   0          82m    10.244.84.160   node-1     <none>           <none>
rabbitmq-7b4b55c897-tsxpf          1/1     Running   0          10s    10.244.39.25    master-1   <none>           <none>
redis-86cc584c4-wlm2k              1/1     Running   0          128m   10.244.39.26    master-1   <none>           <none>
NoExecute
对于驱逐效果,一般来说,需要考虑设置pod的pdb,避免服务中断或者服务降级。
参考另外一篇:https://www.cnblogs.com/rtnb/p/18589965
查看当前pod运行
]# kubectl get pod -A -owide
NAMESPACE     NAME                                          READY   STATUS      RESTARTS   AGE     IP               NODE       NOMINATED NODE   READINESS GATES
app           backend-69fdd59577-2wrvm                      1/1     Running     1          11h     10.244.84.185    node-1     <none>           <none>
app           rabbitmq-965dc557b-hw44x                      1/1     Running     2          16h     10.244.39.38     master-1   <none>           <none>
app           redis-86cc584c4-wlm2k                         1/1     Running     2          18h     10.244.39.11     master-1   <none>           <none>
default       configmap-kv-all-5497bc449d-bxq5b             0/1     Completed   1          11h     10.244.84.130    node-1     <none>           <none>
default       configmap-volume-844c84566b-dgkvb             0/1     Completed   1          11h     10.244.84.183    node-1     <none>           <none>
default       ingressclass-ingress-nginx-controller-nr85l   1/1     Running     1          11h     192.168.43.130   node-1     <none>           <none>
default       ingressclass-ingress-nginx-controller-tt7wg   1/1     Running     44         30d     192.168.43.129   master-1   <none>           <none>
default       ingressclass-ingress-nginx-controller-z5w5b   1/1     Running     0          17s     192.168.43.131   node-2     <none>           <none>
default       nfs-client-provisioner-7d4f48bb8f-v7zmm       1/1     Running     1          11h     10.244.84.180    node-1     <none>           <none>
kube-system   calico-kube-controllers-7775799c8c-7mqg7      1/1     Running     1          11h     10.244.84.188    node-1     <none>           <none>
kube-system   calico-kube-controllers-7775799c8c-gss8z      1/1     Running     55         30d     10.244.39.14     master-1   <none>           <none>
kube-system   calico-kube-controllers-7775799c8c-ldccs      1/1     Running     1          11h     10.244.84.142    node-1     <none>           <none>
kube-system   calico-node-cczr6                             1/1     Running     44         30d     192.168.43.130   node-1     <none>           <none>
kube-system   calico-node-k89f9                             1/1     Running     45         30d     192.168.43.129   master-1   <none>           <none>
kube-system   calico-node-w4xgb                             1/1     Running     45         30d     192.168.43.131   node-2     <none>           <none>
kube-system   calico-typha-5dc577d877-ht7rq                 1/1     Running     45         30d     192.168.43.129   master-1   <none>           <none>
kube-system   coredns-6bd54f798b-7fl28                      1/1     Running     0          4m48s   10.244.39.37     master-1   <none>           <none>
kube-system   coredns-6bd54f798b-lzlq7                      1/1     Running     1          11h     10.244.84.181    node-1     <none>           <none>
kube-system   metrics-server-5bbd7cb4c6-qd7gw               1/1     Running     2          11h     192.168.43.130   node-1     <none>           <none>
给节点打上NoExecute污点,pod会立即被驱逐
]# kubectl taint node node-1 NS=value:NoExecute
查看pod
]# kubectl get pod -A -owide
NAMESPACE     NAME                                          READY   STATUS              RESTARTS   AGE     IP               NODE       NOMINATED NODE   READINESS GATES
app           backend-69fdd59577-2wrvm                      1/1     Terminating         1          11h     10.244.84.185    node-1     <none>           <none>
app           backend-69fdd59577-w8f4l                      0/1     Pending             0          2s      <none>           node-2     <none>           <none>
app           rabbitmq-965dc557b-hw44x                      1/1     Running             2          16h     10.244.39.38     master-1   <none>           <none>
app           redis-86cc584c4-wlm2k                         1/1     Running             2          19h     10.244.39.11     master-1   <none>           <none>
default       configmap-kv-all-5497bc449d-bxq5b             1/1     Terminating         2          11h     10.244.84.130    node-1     <none>           <none>
default       configmap-kv-all-5497bc449d-mzh45             0/1     ContainerCreating   0          2s      <none>           node-2     <none>           <none>
default       configmap-volume-844c84566b-dgkvb             1/1     Terminating         2          11h     10.244.84.183    node-1     <none>           <none>
default       configmap-volume-844c84566b-t5c9t             0/1     Pending             0          2s      <none>           node-2     <none>           <none>
default       ingressclass-ingress-nginx-controller-nr85l   1/1     Terminating         1          11h     192.168.43.130   node-1     <none>           <none>
default       ingressclass-ingress-nginx-controller-tt7wg   1/1     Running             44         30d     192.168.43.129   master-1   <none>           <none>
default       ingressclass-ingress-nginx-controller-z5w5b   1/1     Running             0          2m42s   192.168.43.131   node-2     <none>           <none>
default       nfs-client-provisioner-7d4f48bb8f-mtgdr       0/1     ContainerCreating   0          2s      <none>           node-2     <none>           <none>
default       nfs-client-provisioner-7d4f48bb8f-v7zmm       1/1     Terminating         1          11h     10.244.84.180    node-1     <none>           <none>
kube-system   calico-kube-controllers-7775799c8c-48w8h      0/1     ContainerCreating   0          2s      <none>           master-1   <none>           <none>
kube-system   calico-kube-controllers-7775799c8c-7mqg7      1/1     Terminating         1          11h     10.244.84.188    node-1     <none>           <none>
kube-system   calico-kube-controllers-7775799c8c-gss8z      1/1     Running             55         30d     10.244.39.14     master-1   <none>           <none>
kube-system   calico-kube-controllers-7775799c8c-ldccs      1/1     Terminating         1          11h     10.244.84.142    node-1     <none>           <none>
kube-system   calico-kube-controllers-7775799c8c-vbjg7      0/1     ContainerCreating   0          2s      <none>           node-2     <none>           <none>
kube-system   calico-node-cczr6                             1/1     Running             44         30d     192.168.43.130   node-1     <none>           <none>
kube-system   calico-node-k89f9                             1/1     Running             45         30d     192.168.43.129   master-1   <none>           <none>
kube-system   calico-node-w4xgb                             1/1     Running             45         30d     192.168.43.131   node-2     <none>           <none>
kube-system   calico-typha-5dc577d877-ht7rq                 1/1     Running             45         30d     192.168.43.129   master-1   <none>           <none>
kube-system   coredns-6bd54f798b-7fl28                      1/1     Running             0          7m13s   10.244.39.37     master-1   <none>           <none>
kube-system   coredns-6bd54f798b-gtkkh                      0/1     ContainerCreating   0          2s      <none>           node-2     <none>           <none>
kube-system   coredns-6bd54f798b-lzlq7                      1/1     Terminating         1          11h     10.244.84.181    node-1     <none>           <none>
kube-system   metrics-server-5bbd7cb4c6-bnnc5               0/1     Pending             0          2s      <none>           node-2     <none>           <none>
kube-system   metrics-server-5bbd7cb4c6-qd7gw               1/1     Terminating         2          11h     192.168.43.130   node-1     <none>           <none>

]# kubectl get pod -A -owide
NAMESPACE     NAME                                          READY   STATUS        RESTARTS   AGE     IP               NODE       NOMINATED NODE   READINESS GATES
app           backend-69fdd59577-w8f4l                      1/1     Running       0          23s     10.244.247.12    node-2     <none>           <none>
app           rabbitmq-965dc557b-hw44x                      1/1     Running       2          16h     10.244.39.38     master-1   <none>           <none>
app           redis-86cc584c4-wlm2k                         1/1     Running       2          19h     10.244.39.11     master-1   <none>           <none>
default       configmap-kv-all-5497bc449d-bxq5b             1/1     Terminating   2          11h     10.244.84.130    node-1     <none>           <none>
default       configmap-kv-all-5497bc449d-mzh45             1/1     Running       0          23s     10.244.247.58    node-2     <none>           <none>
default       configmap-volume-844c84566b-dgkvb             1/1     Terminating   2          11h     10.244.84.183    node-1     <none>           <none>
default       configmap-volume-844c84566b-t5c9t             1/1     Running       0          23s     10.244.247.9     node-2     <none>           <none>
default       ingressclass-ingress-nginx-controller-tt7wg   1/1     Running       44         30d     192.168.43.129   master-1   <none>           <none>
default       ingressclass-ingress-nginx-controller-z5w5b   1/1     Running       0          3m3s    192.168.43.131   node-2     <none>           <none>
default       nfs-client-provisioner-7d4f48bb8f-mtgdr       1/1     Running       0          23s     10.244.247.13    node-2     <none>           <none>
kube-system   calico-kube-controllers-7775799c8c-48w8h      1/1     Running       0          23s     10.244.39.31     master-1   <none>           <none>
kube-system   calico-kube-controllers-7775799c8c-gss8z      1/1     Running       55         30d     10.244.39.14     master-1   <none>           <none>
kube-system   calico-kube-controllers-7775799c8c-vbjg7      1/1     Running       0          23s     10.244.247.10    node-2     <none>           <none>
kube-system   calico-node-cczr6                             1/1     Running       44         30d     192.168.43.130   node-1     <none>           <none>
kube-system   calico-node-k89f9                             1/1     Running       45         30d     192.168.43.129   master-1   <none>           <none>
kube-system   calico-node-w4xgb                             1/1     Running       45         30d     192.168.43.131   node-2     <none>           <none>
kube-system   calico-typha-5dc577d877-ht7rq                 1/1     Running       45         30d     192.168.43.129   master-1   <none>           <none>
kube-system   coredns-6bd54f798b-7fl28                      1/1     Running       0          7m34s   10.244.39.37     master-1   <none>           <none>
kube-system   coredns-6bd54f798b-gtkkh                      1/1     Running       0          23s     10.244.247.5     node-2     <none>           <none>
kube-system   metrics-server-5bbd7cb4c6-bnnc5               1/1     Running       0          23s     192.168.43.131   node-2     <none>           <none>
查看daemonset
]# kubectl get daemonset -A
NAMESPACE     NAME                                    DESIRED   CURRENT   READY   UP-TO-DATE   AVAILABLE   NODE SELECTOR            AGE
default       ingressclass-ingress-nginx-controller   2         2         2       2            2           kubernetes.io/os=linux   30d
kube-system   calico-node                             3         3         3       3            3           kubernetes.io/os=linux   30d
ingressclass被驱逐删除了,同样是DaemonSet,因为没有写容忍
所以得出结论:无论是什么类型的控制器,只要没写容忍NoExecute,一样会被删除或者驱逐
但是calico node却没有被驱逐,进入清单
kind: DaemonSet
apiVersion: apps/v1
metadata:
  name: calico-node
  namespace: kube-system
  labels:
    k8s-app: calico-node
spec:
  selector:
    matchLabels:
      k8s-app: calico-node
  updateStrategy:
    type: RollingUpdate
    rollingUpdate:
      maxUnavailable: 1
  template:
    metadata:
      labels:
        k8s-app: calico-node
    spec:
      nodeSelector:
        kubernetes.io/os: linux
      hostNetwork: true
      tolerations:
        # Make sure calico-node gets scheduled on all nodes.
        - effect: NoSchedule
          operator: Exists
        # Mark the pod as a critical add-on for rescheduling.
        - key: CriticalAddonsOnly
          operator: Exists
        - effect: NoExecute
          operator: Exists
      serviceAccountName: calico-node
coredns被驱逐了
apiVersion: apps/v1
kind: Deployment
metadata:
...
spec:
  replicas: 2...
    spec:
      priorityClassName: system-cluster-critical
      serviceAccountName: coredns
      tolerations:
        - key: "CriticalAddonsOnly"
          operator: "Exists"
      nodeSelector:
        kubernetes.io/os: linux
      affinity:
         podAntiAffinity:
           requiredDuringSchedulingIgnoredDuringExecution:
           - labelSelector:
               matchExpressions:
               - key: k8s-app
                 operator: In
                 values: ["kube-dns"]
             topologyKey: kubernetes.io/hostname    # 以hostname划分单台节点为拓扑域,并且pod反亲和,让一台节点运行一个pod,调度更均匀
取消节点NoExecute污点
]# kubectl taint node node-1 NS=value:NoExecute-
查看pod,daemonset类型的ingressclass 又被创建出来了
]# kubectl  get pod -owide -A
NAMESPACE     NAME                                          READY   STATUS    RESTARTS   AGE   IP               NODE       NOMINATED NODE   READINESS GATES
app           backend-69fdd59577-w8f4l                      1/1     Running   0          15m   10.244.247.12    node-2     <none>           <none>
app           rabbitmq-965dc557b-hw44x                      1/1     Running   2          17h   10.244.39.38     master-1   <none>           <none>
app           redis-86cc584c4-wlm2k                         1/1     Running   2          19h   10.244.39.11     master-1   <none>           <none>
default       configmap-kv-all-5497bc449d-mzh45             1/1     Running   0          15m   10.244.247.58    node-2     <none>           <none>
default       configmap-volume-844c84566b-t5c9t             1/1     Running   0          15m   10.244.247.9     node-2     <none>           <none>
default       ingressclass-ingress-nginx-controller-8pkhb   1/1     Running   0          20s   192.168.43.130   node-1     <none>           <none>
default       ingressclass-ingress-nginx-controller-tt7wg   1/1     Running   44         30d   192.168.43.129   master-1   <none>           <none>
default       ingressclass-ingress-nginx-controller-z5w5b   1/1     Running   0          18m   192.168.43.131   node-2     <none>           <none>
default       nfs-client-provisioner-7d4f48bb8f-mtgdr       1/1     Running   0          15m   10.244.247.13    node-2     <none>           <none>
kube-system   calico-kube-controllers-7775799c8c-48w8h      1/1     Running   0          15m   10.244.39.31     master-1   <none>           <none>
kube-system   calico-kube-controllers-7775799c8c-gss8z      1/1     Running   55         30d   10.244.39.14     master-1   <none>           <none>
kube-system   calico-kube-controllers-7775799c8c-vbjg7      1/1     Running   0          15m   10.244.247.10    node-2     <none>           <none>
kube-system   calico-node-cczr6                             1/1     Running   44         30d   192.168.43.130   node-1     <none>           <none>
kube-system   calico-node-k89f9                             1/1     Running   45         30d   192.168.43.129   master-1   <none>           <none>
kube-system   calico-node-w4xgb                             1/1     Running   45         30d   192.168.43.131   node-2     <none>           <none>
kube-system   calico-typha-5dc577d877-ht7rq                 1/1     Running   45         30d   192.168.43.129   master-1   <none>           <none>
kube-system   coredns-6bd54f798b-7fl28                      1/1     Running   0          22m   10.244.39.37     master-1   <none>           <none>
kube-system   coredns-6bd54f798b-gtkkh                      1/1     Running   0          15m   10.244.247.5     node-2     <none>           <none>
kube-system   metrics-server-5bbd7cb4c6-bnnc5               1/1     Running   0          15m   192.168.43.131   node-2     <none>           <none>
设置pod tolerationSeconds
      affinity:
        podAntiAffinity:
          #preferredDuringSchedulingIgnoredDuringExecution:
          requiredDuringSchedulingIgnoredDuringExecution:
            #- weight: 50
            #  podAffinityTerm:
          - labelSelector:
              matchExpressions:
              - key: app
                operator: In
                values:
                  - redis
            namespaces:
              - app
            topologyKey: diskType
        podAffinity:
          preferredDuringSchedulingIgnoredDuringExecution:
            - weight: 50
              podAffinityTerm:
                labelSelector:
                  matchExpressions:
                    - key: app
                      operator: In
                      values:
                        - backend
                namespaces:
                  - app
                topologyKey: topology.kubernetes.io/zone
      tolerations:
      - key: "NS"
        operator: "Equal"
        value: "value"
        #effect: "NoSchedule"
        effect: "NoExecute"
        tolerationSeconds: 60
给节点打污点
]# kubectl taint node node-2 NS=value:NoExecute
监测 pod 发现过了60s 后,节点污点没有被移除 ,pod开始被驱逐后重新被调度,经过一系列调度算法后,pod被调度到了node-2节点,然后过了60s,pod再次被驱逐,反复循环...
]# kubectl get pod -owide -n app -w
NAME                               READY   STATUS    RESTARTS   AGE     IP              NODE       NOMINATED NODE   READINESS GATES
backend-69fdd59577-2wrvm           1/1     Running   0          5m4s    10.244.84.153   node-1     <none>           <none>
nginx-configmap-5dc8bdc668-55nx8   1/1     Running   0          3m11s   10.244.84.172   node-1     <none>           <none>
nginx-configmap-5dc8bdc668-6qvrt   1/1     Running   0          30s     10.244.247.52   node-2     <none>           <none>
nginx-configmap-5dc8bdc668-h6dzt   1/1     Running   0          3m11s   10.244.84.140   node-1     <none>           <none>
nginx-configmap-5dc8bdc668-jhvm4   1/1     Running   0          30s     10.244.247.49   node-2     <none>           <none>
rabbitmq-965dc557b-hw44x           1/1     Running   1          5h3m    10.244.39.30    master-1   <none>           <none>
redis-86cc584c4-wlm2k              1/1     Running   1          7h15m   10.244.39.12    master-1   <none>           <none>
nginx-configmap-5dc8bdc668-jhvm4   1/1     Terminating   0          60s     10.244.247.49   node-2     <none>           <none>
nginx-configmap-5dc8bdc668-wzgb4   0/1     Pending       0          0s      <none>          <none>     <none>           <none>
nginx-configmap-5dc8bdc668-wzgb4   0/1     Pending       0          0s      <none>          node-2     <none>           <none>
nginx-configmap-5dc8bdc668-wzgb4   0/1     Init:0/1      0          0s      <none>          node-2     <none>           <none>
nginx-configmap-5dc8bdc668-6qvrt   1/1     Terminating   0          60s     10.244.247.52   node-2     <none>           <none>
nginx-configmap-5dc8bdc668-ndq4q   0/1     Pending       0          0s      <none>          <none>     <none>           <none>
nginx-configmap-5dc8bdc668-ndq4q   0/1     Pending       0          0s      <none>          node-2     <none>           <none>
nginx-configmap-5dc8bdc668-ndq4q   0/1     Init:0/1      0          0s      <none>          node-2     <none>           <none>
nginx-configmap-5dc8bdc668-jhvm4   1/1     Terminating   0          60s     10.244.247.49   node-2     <none>           <none>
nginx-configmap-5dc8bdc668-6qvrt   1/1     Terminating   0          60s     10.244.247.52   node-2     <none>           <none>
nginx-configmap-5dc8bdc668-wzgb4   0/1     Init:0/1      0          1s      <none>          node-2     <none>           <none>
nginx-configmap-5dc8bdc668-ndq4q   0/1     Init:0/1      0          1s      <none>          node-2     <none>           <none>
nginx-configmap-5dc8bdc668-6qvrt   0/1     Terminating   0          61s     10.244.247.52   node-2     <none>           <none>
nginx-configmap-5dc8bdc668-jhvm4   0/1     Terminating   0          61s     <none>          node-2     <none>           <none>
nginx-configmap-5dc8bdc668-wzgb4   0/1     PodInitializing   0          1s      10.244.247.48   node-2     <none>           <none>
nginx-configmap-5dc8bdc668-ndq4q   0/1     PodInitializing   0          1s      10.244.247.38   node-2     <none>           <none>
nginx-configmap-5dc8bdc668-ndq4q   0/1     Running           0          2s      10.244.247.38   node-2     <none>           <none>
nginx-configmap-5dc8bdc668-wzgb4   0/1     Running           0          2s      10.244.247.48   node-2     <none>           <none>
nginx-configmap-5dc8bdc668-ndq4q   0/1     Running           0          3s      10.244.247.38   node-2     <none>           <none>
nginx-configmap-5dc8bdc668-wzgb4   0/1     Running           0          5s      10.244.247.48   node-2     <none>           <none>
cnginx-configmap-5dc8bdc668-wzgb4   1/1     Running           0          7s      10.244.247.48   node-2     <none>           <none>
这是因为 NoExecute 与 tolerationSeconds 共同作用原因导致的。
tolerationSeconds 允许 Pod 在节点上 暂时存在 60 秒。60 秒后,Kubernetes 将驱逐 Pod
调度器发现其他节点(例如 node-1 或 master-1)上可能有资源限制,或者节点选择权重较低,导致重新选择 node-2。
Pod 被重新调度到 node-2 后,再次受到污点影响,60 秒后又被驱逐。
这种机制在 Pod 配置了 tolerationSeconds 时会导致循环行为。
tolerationSeconds使用场景
- 节点可能因网络、存储或硬件问题短暂不可用,但问题可能会自动恢复。
- 集群中的部分节点暂时承受高负载(可能会打上污点),但希望某些关键服务能够短时间内继续运行。
- 为节点打上
NoExecute污点,计划将节点上的工作负载逐步迁移到其他节点,而不是立即驱逐所有 Pod - 有状态应用(如数据库或缓存服务)需要时间完成数据同步或持久化,不能立即被驱逐。为pod提供缓冲时间
- 当您在节点上添加新的污点时,希望现有 Pod 能继续运行一段时间,避免对业务造成即时中断
当节点宕机不可用,驱逐等待时间,比如因为节点网络状态震荡导致未及时通过kubelet将节点状态报告给apiserver,那么master认为节点nodeready,给节点打不可调度污点,任何不能容忍这个污点的pod 马上被驱逐,加上缓冲时间可以降低因为节点震荡导致的暂时性失联。
node unreachable及node not ready
查看pod详情,可以看到集群设置默认是300s
]# kubectl  describe pod -n app nginx-deployment-84c4cb9fdd-ssw27
...
Node-Selectors:  <none>
Tolerations:     node.kubernetes.io/not-ready:NoExecute op=Exists for 300s   # 当节点宕机不可用,驱逐等待时长
                 node.kubernetes.io/unreachable:NoExecute op=Exists for 300s  # 当节点无法访问驱逐时长
Events:          <none>
模拟故障,关闭node-1节点
查看node状态
]# kubectl get node -w
NAME       STATUS   ROLES    AGE   VERSION
master-1   Ready    <none>   30d   v1.20.15
node-1     Ready    <none>   30d   v1.20.15
node-2     Ready    <none>   30d   v1.20.15
node-1     NotReady   <none>   30d   v1.20.15
node-1     NotReady   <none>   30d   v1.20.15
node-1     NotReady   <none>   30d   v1.20.15
查看node标签
[root@master-1 ~]# kubectl describe node node-1
Name:               node-1
Roles:              <none>
Labels:             beta.kubernetes.io/arch=amd64
                    beta.kubernetes.io/os=linux
                    cpuType=gpu
                    kubernetes.io/arch=amd64
                    kubernetes.io/hostname=node-1
                    kubernetes.io/os=linux
                    os=centos
                    topology.kubernetes.io/zone=zone2
Annotations:        node.alpha.kubernetes.io/ttl: 0
                    projectcalico.org/IPv4Address: 192.168.43.130/24
                    projectcalico.org/IPv4IPIPTunnelAddr: 10.244.84.128
                    volumes.kubernetes.io/controller-managed-attach-detach: true
CreationTimestamp:  Mon, 25 Nov 2024 09:16:32 +0800
Taints:             node.kubernetes.io/unreachable:NoExecute
                    node.kubernetes.io/unreachable:NoSchedule
                    NS=value1:PreferNoSchedule
Unschedulable:      false

[root@master-1 ~]# kubectl describe node master-1
Name:               master-1
Roles:              <none>
Labels:             beta.kubernetes.io/arch=amd64
                    beta.kubernetes.io/os=linux
                    diskType=ssd
                    kubernetes.io/arch=amd64
                    kubernetes.io/hostname=master-1
                    kubernetes.io/master=true
                    kubernetes.io/os=linux
                    os=centos
                    topology.kubernetes.io/zone=zone1
Annotations:        node.alpha.kubernetes.io/ttl: 0
                    projectcalico.org/IPv4Address: 192.168.43.129/24
                    projectcalico.org/IPv4IPIPTunnelAddr: 10.244.39.0
                    volumes.kubernetes.io/controller-managed-attach-detach: true
CreationTimestamp:  Mon, 25 Nov 2024 09:16:32 +0800
Taints:             <none>
Unschedulable:      false

]#  kubectl describe node node-2
Name:               node-2
Roles:              <none>
Labels:             beta.kubernetes.io/arch=amd64
                    beta.kubernetes.io/os=linux
                    kubernetes.io/arch=amd64
                    kubernetes.io/hostname=node-2
                    kubernetes.io/os=linux
                    mem=64Gi
                    os=centos
                    topology.kubernetes.io/zone=zone3
Annotations:        node.alpha.kubernetes.io/ttl: 0
                    projectcalico.org/IPv4Address: 192.168.43.131/24
                    projectcalico.org/IPv4IPIPTunnelAddr: 10.244.247.0
                    volumes.kubernetes.io/controller-managed-attach-detach: true
CreationTimestamp:  Mon, 25 Nov 2024 09:16:32 +0800
Taints:             <none>
Unschedulable:      false
查看pod 驱逐
可以看到pod在等待tolerationSeconds 300s后,开始驱逐pod到其他节点
]# kubectl get pod -A -owide -w
NAMESPACE     NAME                                          READY   STATUS    RESTARTS   AGE     IP               NODE       NOMINATED NODE   READINESS GATES
app           backend-69fdd59577-pxtcb                      1/1     Running   0          8m28s   10.244.84.131    node-1     <none>           <none>
app           rabbitmq-965dc557b-hw44x                      1/1     Running   2          17h     10.244.39.38     master-1   <none>           <none>
app           redis-86cc584c4-wlm2k                         1/1     Running   2          20h     10.244.39.11     master-1   <none>           <none>
default       configmap-kv-all-5497bc449d-s4wh8             1/1     Running   0          8m28s   10.244.39.35     master-1   <none>           <none>
default       configmap-volume-844c84566b-5w64q             1/1     Running   0          8m28s   10.244.39.40     master-1   <none>           <none>
default       ingressclass-ingress-nginx-controller-8pkhb   1/1     Running   0          45m     192.168.43.130   node-1     <none>           <none>
default       ingressclass-ingress-nginx-controller-tt7wg   1/1     Running   44         30d     192.168.43.129   master-1   <none>           <none>
default       ingressclass-ingress-nginx-controller-z5w5b   1/1     Running   1          63m     192.168.43.131   node-2     <none>           <none>
default       nfs-client-provisioner-7d4f48bb8f-xrg6k       1/1     Running   0          8m28s   10.244.39.32     master-1   <none>           <none>
kube-system   calico-kube-controllers-7775799c8c-48w8h      1/1     Running   0          60m     10.244.39.31     master-1   <none>           <none>
kube-system   calico-kube-controllers-7775799c8c-49cds      1/1     Running   0          8m28s   10.244.84.129    node-1     <none>           <none>
kube-system   calico-kube-controllers-7775799c8c-gss8z      1/1     Running   55         30d     10.244.39.14     master-1   <none>           <none>
kube-system   calico-node-cczr6                             1/1     Running   44         30d     192.168.43.130   node-1     <none>           <none>
kube-system   calico-node-k89f9                             1/1     Running   45         30d     192.168.43.129   master-1   <none>           <none>
kube-system   calico-node-w4xgb                             1/1     Running   46         30d     192.168.43.131   node-2     <none>           <none>
kube-system   calico-typha-5dc577d877-ht7rq                 1/1     Running   45         30d     192.168.43.129   master-1   <none>           <none>
kube-system   coredns-6bd54f798b-4t2cq                      1/1     Running   0          8m28s   10.244.84.182    node-1     <none>           <none>
kube-system   coredns-6bd54f798b-7fl28                      1/1     Running   0          67m     10.244.39.37     master-1   <none>           <none>
kube-system   metrics-server-5bbd7cb4c6-kkdct               1/1     Running   0          8m28s   192.168.43.129   master-1   <none>           <none>

app           backend-69fdd59577-pxtcb                      1/1     Terminating   0          15m     10.244.84.131    node-1     <none>           <none>
kube-system   calico-kube-controllers-7775799c8c-49cds      1/1     Terminating   0          15m     10.244.84.129    node-1     <none>           <none>
kube-system   coredns-6bd54f798b-4t2cq                      1/1     Terminating   0          15m     10.244.84.182    node-1     <none>           <none>
app           backend-69fdd59577-9qjsx                      0/1     Pending       0          0s      <none>           <none>     <none>           <none>
app           backend-69fdd59577-9qjsx                      0/1     Pending       0          0s      <none>           node-2     <none>           <none>
kube-system   coredns-6bd54f798b-6ngcq                      0/1     Pending       0          0s      <none>           <none>     <none>           <none>
kube-system   calico-kube-controllers-7775799c8c-5gd8m      0/1     Pending       0          0s      <none>           <none>     <none>           <none>
kube-system   coredns-6bd54f798b-6ngcq                      0/1     Pending       0          0s      <none>           node-2     <none>           <none>
kube-system   calico-kube-controllers-7775799c8c-5gd8m      0/1     Pending       0          0s      <none>           node-2     <none>           <none>
app           backend-69fdd59577-9qjsx                      0/1     ContainerCreating   0          0s      <none>           node-2     <none>           <none                                                 >
kube-system   coredns-6bd54f798b-6ngcq                      0/1     ContainerCreating   0          0s      <none>           node-2     <none>           <none                                                 >
kube-system   calico-kube-controllers-7775799c8c-5gd8m      0/1     ContainerCreating   0          0s      <none>           node-2     <none>           <none                                                 >
app           backend-69fdd59577-9qjsx                      0/1     ContainerCreating   0          2s      <none>           node-2     <none>           <none                                                 >
kube-system   calico-kube-controllers-7775799c8c-5gd8m      0/1     ContainerCreating   0          2s      <none>           node-2     <none>           <none                                                 >
kube-system   coredns-6bd54f798b-6ngcq                      0/1     ContainerCreating   0          2s      <none>           node-2     <none>           <none                                                 >
app           backend-69fdd59577-9qjsx                      1/1     Running             0          3s      10.244.247.18    node-2     <none>           <none                                                 >
kube-system   coredns-6bd54f798b-6ngcq                      0/1     Running             0          3s      10.244.247.15    node-2     <none>           <none                                                 >
kube-system   calico-kube-controllers-7775799c8c-5gd8m      0/1     Running             0          3s      10.244.247.16    node-2     <none>           <none                                                 >
kube-system   calico-kube-controllers-7775799c8c-5gd8m      1/1     Running             0          5s      10.244.247.16    node-2     <none>           <none                                                 >
kube-system   coredns-6bd54f798b-6ngcq                      1/1     Running             0          10s     10.244.247.15    node-2     <none>           <none
再次启动node-1节点,会删除掉宕机之前的pod,之前被驱逐到其他节点的pod不受影响
kube-system   coredns-6bd54f798b-4t2cq                      1/1     Terminating         0          23m     10.244.84.182    node-1     <none>           <none
kube-system   calico-kube-controllers-7775799c8c-49cds      1/1     Terminating         0          23m     10.244.84.129    node-1     <none>           <none
app           backend-69fdd59577-pxtcb                      1/1     Terminating         0          23m     10.244.84.131    node-1     <none>           <none
kube-system   calico-node-cczr6                             0/1     Error               44         30d     192.168.43.130   node-1     <none>           <none
default       ingressclass-ingress-nginx-controller-8pkhb   0/1     Error               0          59m     192.168.43.130   node-1     <none>           <none
app           backend-69fdd59577-pxtcb                      0/1     Terminating         0          23m     <none>           node-1     <none>           <none
app           backend-69fdd59577-pxtcb                      0/1     Terminating         0          23m     <none>           node-1     <none>           <none
app           backend-69fdd59577-pxtcb                      0/1     Terminating         0          23m     <none>           node-1     <none>           <none
kube-system   calico-kube-controllers-7775799c8c-49cds      0/1     Terminating         0          23m     <none>           node-1     <none>           <none
kube-system   calico-kube-controllers-7775799c8c-49cds      0/1     Terminating         0          23m     <none>           node-1     <none>           <none
kube-system   calico-kube-controllers-7775799c8c-49cds      0/1     Terminating         0          23m     <none>           node-1     <none>           <none
kube-system   coredns-6bd54f798b-4t2cq                      0/1     Terminating         0          23m     <none>           node-1     <none>           <none
kube-system   coredns-6bd54f798b-4t2cq                      0/1     Terminating         0          23m     <none>           node-1     <none>           <none
kube-system   coredns-6bd54f798b-4t2cq                      0/1     Terminating         0          23m     <none>           node-1     <none>           <none
kube-system   calico-node-cczr6                             0/1     Init:0/3            6          30d     192.168.43.130   node-1     <none>           <none
kube-system   calico-node-cczr6                             0/1     Error               44         30d     192.168.43.130   node-1     <none>           <none
default       ingressclass-ingress-nginx-controller-8pkhb   0/1     Running             1          59m     192.168.43.130   node-1     <none>           <none
kube-system   calico-node-cczr6                             0/1     Init:1/3            6          30d     192.168.43.130   node-1     <none>           <none
kube-system   calico-node-cczr6                             0/1     Error               44         30d     192.168.43.130   node-1     <none>           <none
kube-system   calico-node-cczr6                             0/1     Error               44         30d     192.168.43.130   node-1     <none>           <none
kube-system   calico-node-cczr6                             0/1     Running             45         30d     192.168.43.130   node-1     <none>           <none
kube-system   calico-node-cczr6                             1/1     Running             45         30d     192.168.43.130   node-1     <none>           <none
default       ingressclass-ingress-nginx-controller-8pkhb   1/1     Running             1          60m     192.168.43.130   node-1     <none>           <none
只有daemonset类的pod不会被驱逐,只会在节点恢复后,重新创建出来
]# kubectl get pod -A -owide -w |grep node-1
default       ingressclass-ingress-nginx-controller-8pkhb   1/1     Running   1          60m   192.168.43.130   node-1     <none>
kube-system   calico-node-cczr6                             1/1     Running   45         30d   192.168.43.130   node-1     <none>

【推荐】还在用 ECharts 开发大屏?试试这款永久免费的开源 BI 工具!
【推荐】国内首个AI IDE,深度理解中文开发场景,立即下载体验Trae
【推荐】编程新体验,更懂你的AI,立即体验豆包MarsCode编程助手
【推荐】抖音旗下AI助手豆包,你的智能百科全书,全免费不限次数
【推荐】轻量又高性能的 SSH 工具 IShell:AI 加持,快人一步