07 Sonic - 打包发布
前边讲了如何开发,那改了代码后如何发布呢?有下边几种方式:
1、编译后直接运行
2、打包成docker容器运行
一、编译后直接运行
1.1、前端
首先 npm run build ,然后将编译好的 dist 目录复制到服务器的web容器中,就ok了。
1.2、server端
server端使用spring-boot打成jar包,之后将jar包copy到服务器,通过java -jar的方式启动。
这种方式需要修改一下pom.xml,之后才可以打jar包,如果修改请百度
1.3、agent
两种方式agent打包都一样,请参考 https://www.cnblogs.com/rslai/p/16399307.html
二、打包成docker容器运行
2.1、前端
1、进入 sonic-client-web 目录,执行如下命令
# Install
npm install
# 打包
npm run build
# 构建镜像
docker build -t sonicorg/sonic-client-web .
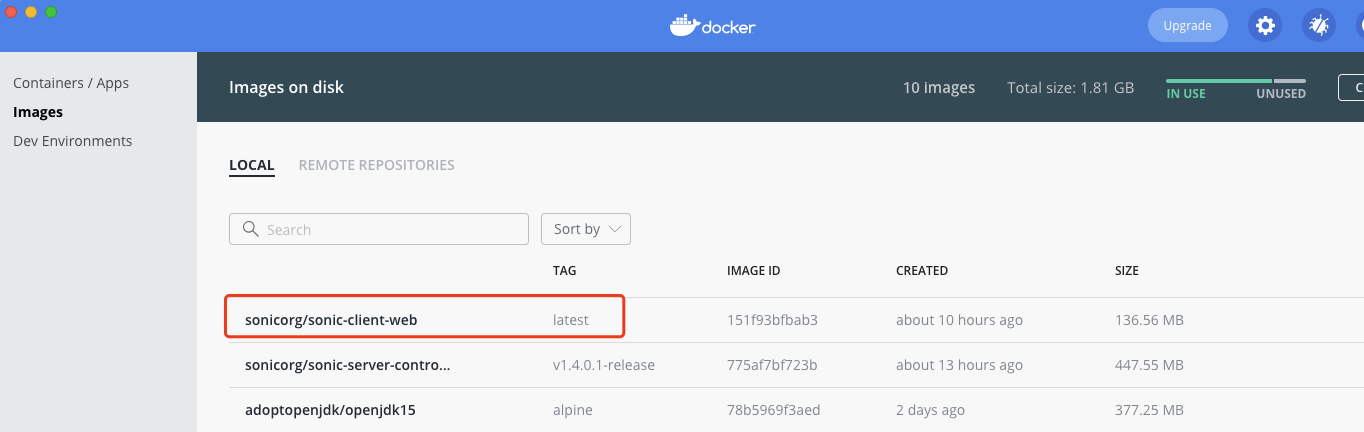
2、成功后 docker desktop 中就会有 client-web 的镜像,如下图
3、按照 2.2、server端讲的,导出镜像再导入镜像即可
2.1.1 手动更新前端页面
# Install
npm install

# 打包
npm run build

# 查看容器名称
docker ps

# cp dist 目录到 容器id=120379e1e5c3 中的 /usr 目录中
docker cp dist/ 120379e1e5c3:/usr

# 进入docker容器,容器id=120379e1e5c3
docker exec -it 120379e1e5c3 /bin/bash

# 进入 web 页面目录
cd /usr/share/nginx/html

# 删除就文件
rm -rf *

# 将编译后的新文件移动 copy 过来
mv /usr/dist/* .

# 重启 nginx
nginx -s reload

# 刷新页面即可,要是报错可以重启 docker 容器
2.2、server端
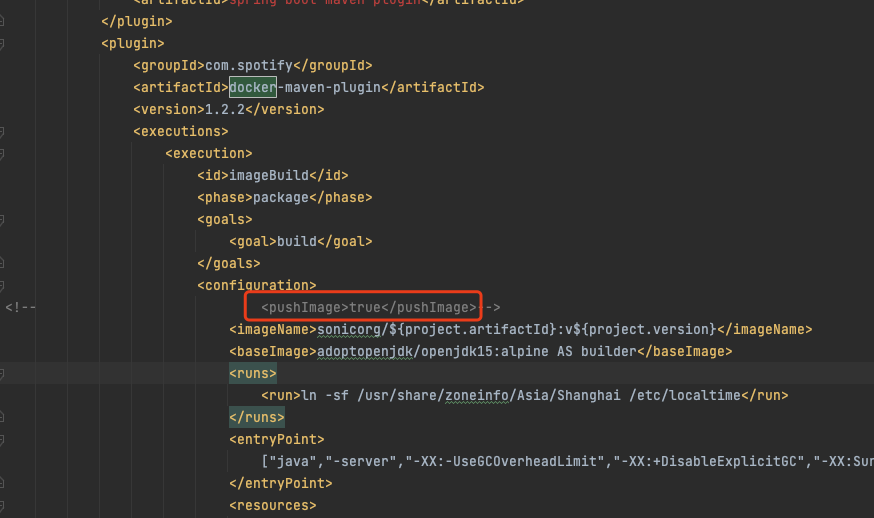
1、修改 pom.xml 文件,将 <pushImage>true</pushImage> 注释。这句的意思是打包后自动push的docker中,但是pom.xml中指定的又是sonic的参数地址,咱们没有权限push,如果不注释会报push失败
2、进入 sonic-server 目录
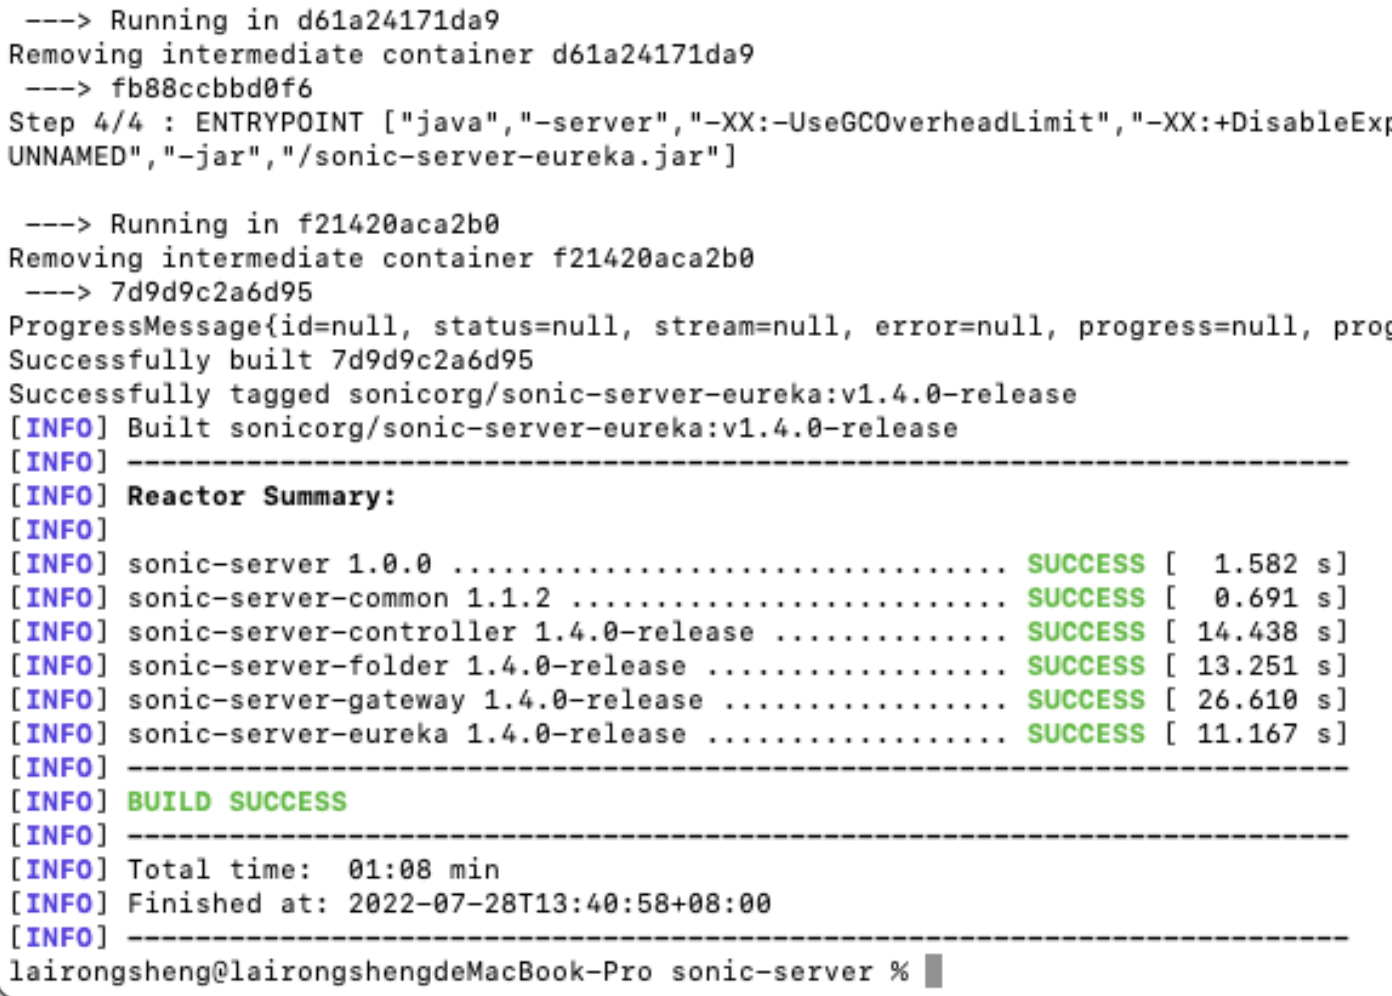
mvn clean
mvn package
编译成功后提示如下:
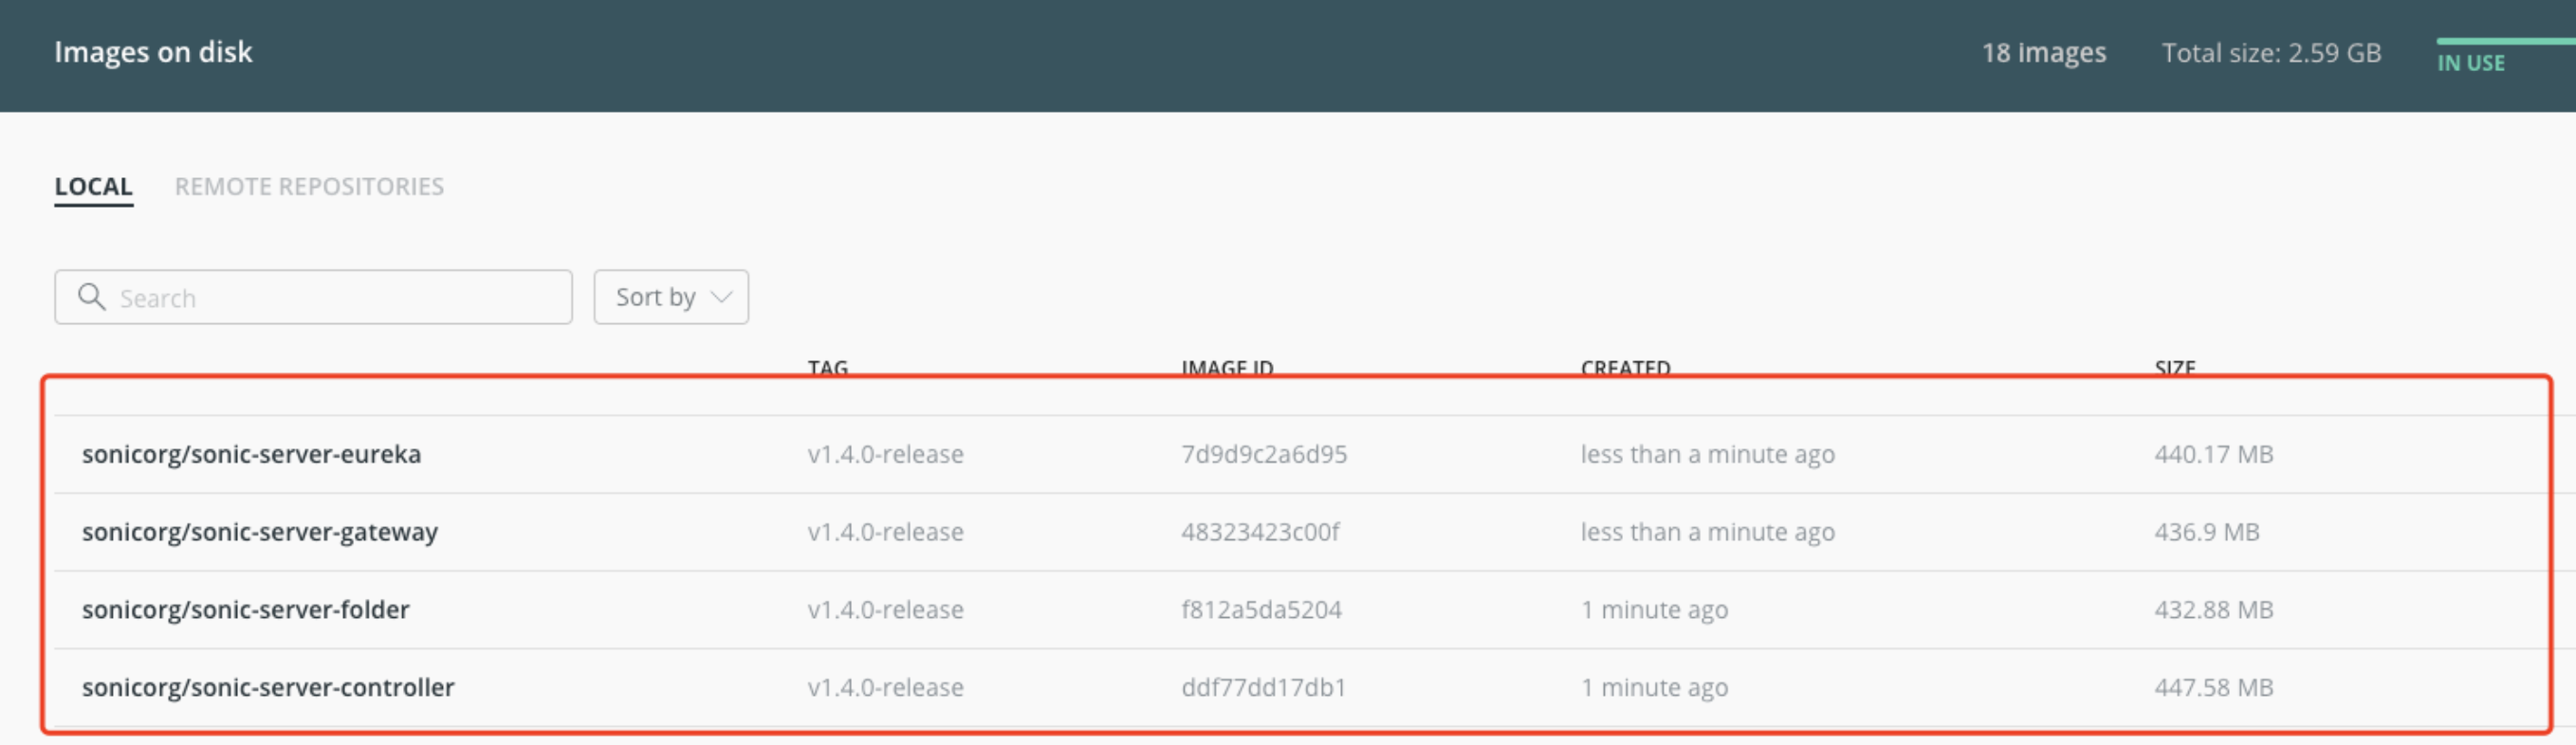
2、打开 docker desktop 你会看到打包好的image已经有了,如下图
4、从 docke 中导出镜像,命令如下
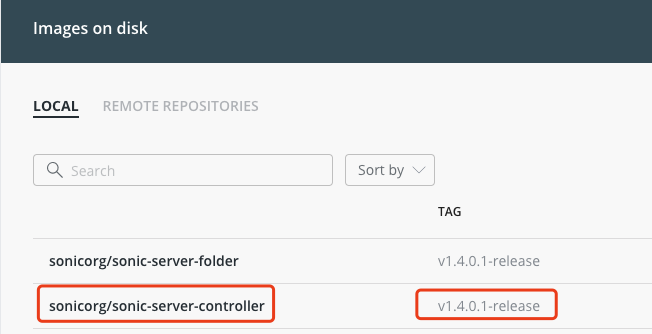
docker save sonicorg/sonic-server-controller:v1.4.0.1-release > controller.tar
其中:sonicorg/sonic-server-controller 是名字,v1.4.0.1-release是tag,如下图:
5、之后把导出的tar文件传到服务器后执行如下导入命令
docker load < controller.tar
2.3、agent
两种方式agent打包都一样,请参考 https://www.cnblogs.com/rslai/p/16399307.html

 浙公网安备 33010602011771号