依赖注入是实现控制反转的方式之一
Android 中的依赖项注入 | Android 开发者 | Android Developers https://developer.android.google.cn/training/dependency-injection?hl=zh-cn#kotlin
Android 中的依赖项注入
依赖项注入 (DI) 是一种广泛用于编程的技术,非常适用于 Android 开发。遵循 DI 的原则可以为良好的应用架构奠定基础。
实现依赖项注入可为您带来以下优势:
- 重用代码
- 易于重构
- 易于测试
依赖项注入基础知识
在专门介绍 Android 中的依赖项注入之前,本页提供了依赖项注入工作原理的总体概览。
什么是依赖项注入?
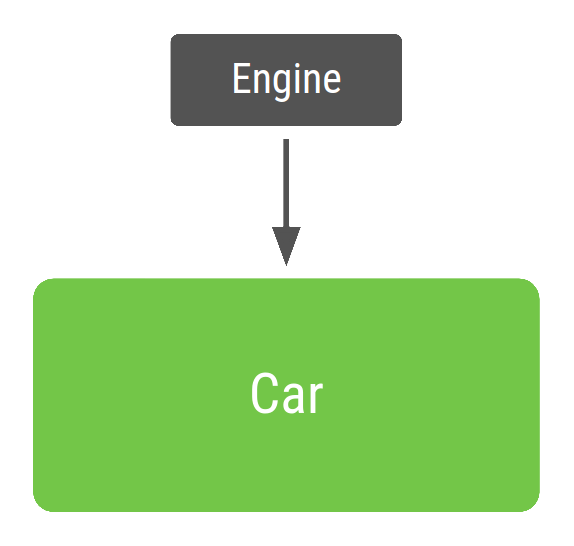
类通常需要引用其他类。例如,Car 类可能需要引用 Engine 类。这些必需类称为依赖项,在此示例中,Car 类依赖于拥有 Engine 类的一个实例才能运行。
类可通过以下三种方式获取所需的对象:
- 类构造其所需的依赖项。在以上示例中,
Car将创建并初始化自己的Engine实例。 - 从其他地方抓取。某些 Android API(如
Contextgetter 和getSystemService())的工作原理便是如此。 - 以参数形式提供。应用可以在构造类时提供这些依赖项,或者将这些依赖项传入需要各个依赖项的函数。在以上示例中,
Car构造函数将接收Engine作为参数。
第三种方式就是依赖项注入!使用这种方法,您可以获取并提供类的依赖项,而不必让类实例自行获取。
下面是一个示例。在不使用依赖项注入的情况下,要表示 Car 创建自己的 Engine 依赖项,代码如下所示:
class Car {

    private val engine = Engine()

    fun start() {
        engine.start()
    }
}

fun main(args: Array) {
    val car = Car()
    car.start()
}

这并非依赖项注入的示例,因为 Car 类构造了自己的 Engine。这可能会有问题,原因如下:
-
Car和Engine密切相关 -Car的实例使用一种类型的Engine,并且无法轻松使用子类或替代实现。如果Car要构造自己的Engine,您必须创建两种类型的Car,而不是直接将同一Car重用于Gas和Electric类型的引擎。 -
对
Engine的强依赖使得测试更加困难。Car使用Engine的真实实例,因此您无法使用测试替身针对不同的测试用例修改Engine。
如果使用依赖项注入,代码是什么样子的呢?Car 的每个实例在其构造函数中接收 Engine 对象作为参数,而不是在初始化时构造自己的 Engine 对象:
class Car(private val engine: Engine) {
    fun start() {
        engine.start()
    }
}

fun main(args: Array) {
    val engine = Engine()
    val car = Car(engine)
    car.start()
}
main 函数使用 Car。由于 Car 依赖于 Engine,因此应用会创建 Engine 的实例,然后使用它构造 Car 的实例。这种基于 DI 的方法具有以下优势:
-
重用
Car。您可以将Engine的不同实现传入Car。例如,您可以定义一个想要Car使用的名为ElectricEngine的新Engine子类。如果您使用 DI,只需传入更新后的ElectricEngine子类的实例,Car仍可正常使用,无需任何进一步更改。 -
轻松测试
Car。您可以传入测试替身以测试不同场景。例如,您可以创建一个名为FakeEngine的Engine测试替身,并针对不同的测试进行配置。
Android 中有两种主要的依赖项注入方式:
-
构造函数注入。这就是上面描述的方式。您将某个类的依赖项传入其构造函数。
-
字段注入(或 setter 注入)。某些 Android 框架类(如 activity 和 fragment)由系统实例化,因此无法进行构造函数注入。使用字段注入时,依赖项将在创建类后实例化。代码如下所示:
class Car {
    lateinit var engine: Engine

    fun start() {
        engine.start()
    }
}

fun main(args: Array) {
    val car = Car()
    car.engine = Engine()
    car.start()
}
自动依赖项注入
在上一个示例中,您自行创建、提供并管理不同类的依赖项,而不依赖于库。这称为手动依赖项注入或人工依赖项注入。在 Car 示例中,只有一个依赖项,但依赖项和类越多,手动依赖项注入就越繁琐。手动依赖项注入还会带来多个问题:
-
对于大型应用,获取所有依赖项并正确连接它们可能需要大量样板代码。在多层架构中,要为顶层创建一个对象,必须提供其下层的所有依赖项。例如,要制造一辆真车,可能需要引擎、传动装置、底盘以及其他部件;而要制造引擎,则需要汽缸和火花塞。
-
如果您无法在传入依赖项之前构造依赖项(例如,当使用延迟初始化或将对象作用域限定为应用流时),则需要编写并维护管理内存中依赖项生命周期的自定义容器(或依赖关系图)。
有一些库通过自动执行创建和提供依赖项的过程解决此问题。它们归为两类:
-
基于反射的解决方案,可在运行时连接依赖项。
-
静态解决方案,可生成在编译时连接依赖项的代码。
Dagger 是适用于 Java、Kotlin 和 Android 的热门依赖项注入库,由 Google 进行维护。Dagger 为您创建和管理依赖关系图,从而便于您在应用中使用 DI。它提供了完全静态和编译时依赖项,解决了基于反射的解决方案(如 Guice)的诸多开发和性能问题。
依赖项注入的替代方法
依赖项注入的替代方法是使用服务定位器。服务定位器设计模式还改进了类与具体依赖项的分离。您可以创建一个名为服务定位器的类,该类创建和存储依赖项,然后按需提供这些依赖项。
object ServiceLocator {
    fun getEngine(): Engine = Engine()
}

class Car {
    private val engine = ServiceLocator.getEngine()

    fun start() {
        engine.start()
    }
}

fun main(args: Array) {
    val car = Car()
    car.start()
}
服务定位器模式与依赖项注入在元素使用方式上有所不同。使用服务定位器模式,类可以控制并请求注入对象;使用依赖项注入,应用可以控制并主动注入所需对象。
与依赖项注入相比:
-
服务定位器所需的依赖项集合使得代码更难测试,因为所有测试都必须与同一全局服务定位器进行交互。
-
依赖项在类实现中编码,而不是在 API Surface 中编码。因此,很难从外部了解类需要什么。所以,更改
Car或服务定位器中可用的依赖项可能会导致引用失败,从而导致运行时或测试失败。 -
如果您想将作用域限定为除了整个应用的生命周期之外的任何区间,就会更难管理对象的生命周期。
在 Android 应用中使用 Hilt
Hilt 是推荐用于在 Android 中实现依赖项注入的 Jetpack 库。Hilt 通过为项目中的每个 Android 类提供容器并自动为您管理其生命周期,定义了一种在应用中执行 DI 的标准方法。
Hilt 在热门 DI 库 Dagger 的基础上构建而成,因而能够受益于 Dagger 提供的编译时正确性、运行时性能、可伸缩性和 Android Studio 支持。
如需详细了解 Hilt,请参阅使用 Hilt 实现依赖项注入。
总结
依赖项注入会为您的应用提供以下优势:
-
重用类以及分离依赖项:更容易换掉依赖项的实现。由于控制反转,代码重用得以改进,并且类不再控制其依赖项的创建方式,而是支持任何配置。
-
易于重构:依赖项成为 API Surface 的可验证部分,因此可以在创建对象时或编译时进行检查,而不是作为实现详情隐藏。
-
易于测试:类不管理其依赖项,因此在测试时,您可以传入不同的实现以测试所有不同用例。
如需充分了解依赖项注入的优势,您应该按照手动依赖项注入中的说明在应用中手动试用。
Golang依赖注入提升开发效率! https://mp.weixin.qq.com/s/Mj-EqwYWZBMr8XNIHxUqDA
facebook的inject基于反射,运行时注入。
google的wire基于AST,编译期注入。
uber的dig fx基于反射,运行时注入。
Spring In Action
data injection
aspect-oriented programming
Plain Old Java Object
依赖注入能让相互协作的软件组件保持松散组合
面向切面编程允许你把遍布应用各处的功能分离出来形成可重用的组件
面向切面编程往往被定义为促使软件系统实现关注点分离的一项技术。系统由许多不同的组件组成,每一个组件各负责
一块特定功能。除了实现自身核心的功能之外,这些组件还经常承担着额外的职责,诸如日志、事务管理和安全这样的系统服务经常
融入到自身具有核心业务逻辑的组件中去,这些系统服务通常被成为横切关注点,因为他们会跨越系统的多个组件。
通过依赖注入,对象的依赖关系由系统中负责协调各对象的第三方组件在创建对象的时候进行设定。
为了降低Java开发的复杂性,Spring采取了以下4种关键策略:
基于Plain Old Java Object的轻量级和最小侵入性编程
通过依赖注入和面向接口实现松耦合
基于切面和惯例进行声明式编程
通过切面和模板减少样式代码
激发Plain Old Java Object 潜能
不像一些框架那样,强迫应用继承它们的类或实现它们接口从而导致应用与框架绑死
https://en.wikipedia.org/wiki/Inversion_of_control
In software engineering, inversion of control (IoC) is a design principle in which custom-written portions of a computer program receive the flow of control from a generic framework. A software architecture with this design inverts control as compared to traditional procedural programming: in traditional programming, the custom code that expresses the purpose of the program calls into reusable libraries to take care of generic tasks, but with inversion of control, it is the framework that calls into the custom, or task-specific, code.
Inversion of control is used to increase modularity of the program and make it extensible,[1] and has applications in object-oriented programming and other programming paradigms. The term was popularized by Robert C. Martin and Martin Fowler.
https://zh.wikipedia.org/wiki/控制反转
控制反转(Inversion of Control,缩写为IoC),是面向对象编程中的一种设计原则,可以用来减低计算机代码之间的耦合度。其中最常见的方式叫做依赖注入(Dependency Injection,简称DI),还有一种方式叫“依赖查找”(Dependency Lookup)。通过控制反转,对象在被创建的时候,由一个调控系统内所有对象的外界实体,将其所依赖的对象的引用传递给它。也可以说,依赖被注入到对象中。
技术描述
Class A中用到了Class B的对象b,一般情况下,需要在A的代码中显式的new一个B的对象。
采用依赖注入技术之后,A的代码只需要定义一个私有的B对象,不需要直接new来获得这个对象,而是通过相关的容器控制程序来将B对象在外部new出来并注入到A类里的引用中。而具体获取的方法、对象被获取时的状态由配置文件(如XML)来指定。
实现方法
实现控制反转主要有两种方式:依赖注入和依赖查找。两者的区别在于,前者是被动的接收对象,在类A的实例创建过程中即创建了依赖的B对象,通过类型或名称来判断将不同的对象注入到不同的属性中,而后者是主动索取相应类型的对象,获得依赖对象的时间也可以在代码中自由控制。
依赖注入
依赖注入有如下实现方式:
- 基于接口。实现特定接口以供外部容器注入所依赖类型的对象。
- 基于 set 方法。实现特定属性的public set方法,来让外部容器调用传入所依赖类型的对象。
- 基于构造函数。实现特定参数的构造函数,在新建对象时传入所依赖类型的对象。
- 基于注解。基于Java的注解功能,在私有变量前加“@Autowired”等注解,不需要显式的定义以上三种代码,便可以让外部容器传入对应的对象。该方案相当于定义了public的set方法,但是因为没有真正的set方法,从而不会为了实现依赖注入导致暴露了不该暴露的接口(因为set方法只想让容器访问来注入而并不希望其他依赖此类的对象访问)。
@RestController
@RequestMapping("/forum/forumThread")
public class ForumThreadController extends BaseController {
    @Value("${ruoyi.avatarUrl}")
    private String avatarUrl;

    @Value("${ruoyi.thumbImageUrl}")
    private String thumbImageUrl;

    @Autowired
    private IForumThreadService forumThreadService;

    @Autowired
    private ISysUserService iSysUserService;
依赖查找
依赖查找更加主动,在需要的时候通过调用框架提供的方法来获取对象,获取时需要提供相关的配置文件路径、key等信息来确定获取对象的状态
https://www.tutorialspoint.com/spring/spring_dependency_injection.htm
Every Java-based application has a few objects that work together to present what the end-user sees as a working application. When writing a complex Java application, application classes should be as independent as possible of other Java classes to increase the possibility to reuse these classes and to test them independently of other classes while unit testing. Dependency Injection (or sometime called wiring) helps in gluing these classes together and at the same time keeping them independent.
Consider you have an application which has a text editor component and you want to provide a spell check. Your standard code would look something like this −
public class TextEditor {
   private SpellChecker spellChecker;

   public TextEditor() {
      spellChecker = new SpellChecker();
   }
}
What we've done here is, create a dependency between the TextEditor and the SpellChecker. In an inversion of control scenario, we would instead do something like this −
public class TextEditor {
   private SpellChecker spellChecker;

   public TextEditor(SpellChecker spellChecker) {
      this.spellChecker = spellChecker;
   }
}
Here, the TextEditor should not worry about SpellChecker implementation. The SpellChecker will be implemented independently and will be provided to the TextEditor at the time of TextEditor instantiation. This entire procedure is controlled by the Spring Framework.
Here, we have removed total control from the TextEditor and kept it somewhere else (i.e. XML configuration file) and the dependency (i.e. class SpellChecker) is being injected into the class TextEditor through a Class Constructor. Thus the flow of control has been "inverted" by Dependency Injection (DI) because you have effectively delegated dependances to some external system.
The second method of injecting dependency is through Setter Methods of the TextEditor class where we will create a SpellChecker instance. This instance will be used to call setter methods to initialize TextEditor's properties.
Thus, DI exists in two major variants and the following two sub-chapters will cover both of them with examples −
| Sr.No. | Dependency Injection Type & Description |
|---|---|
| 1 | Constructor-based dependency injection
Constructor-based DI is accomplished when the container invokes a class constructor with a number of arguments, each representing a dependency on the other class. |
| 2 | Setter-based dependency injection
Setter-based DI is accomplished by the container calling setter methods on your beans after invoking a no-argument constructor or no-argument static factory method to instantiate your bean. |
You can mix both, Constructor-based and Setter-based DI but it is a good rule of thumb to use constructor arguments for mandatory dependencies and setters for optional dependencies.
The code is cleaner with the DI principle and decoupling is more effective when objects are provided with their dependencies. The object does not look up its dependencies and does not know the location or class of the dependencies, rather everything is taken care by the Spring Framework.

 浙公网安备 33010602011771号