09 mysql 读写分离 +nginx
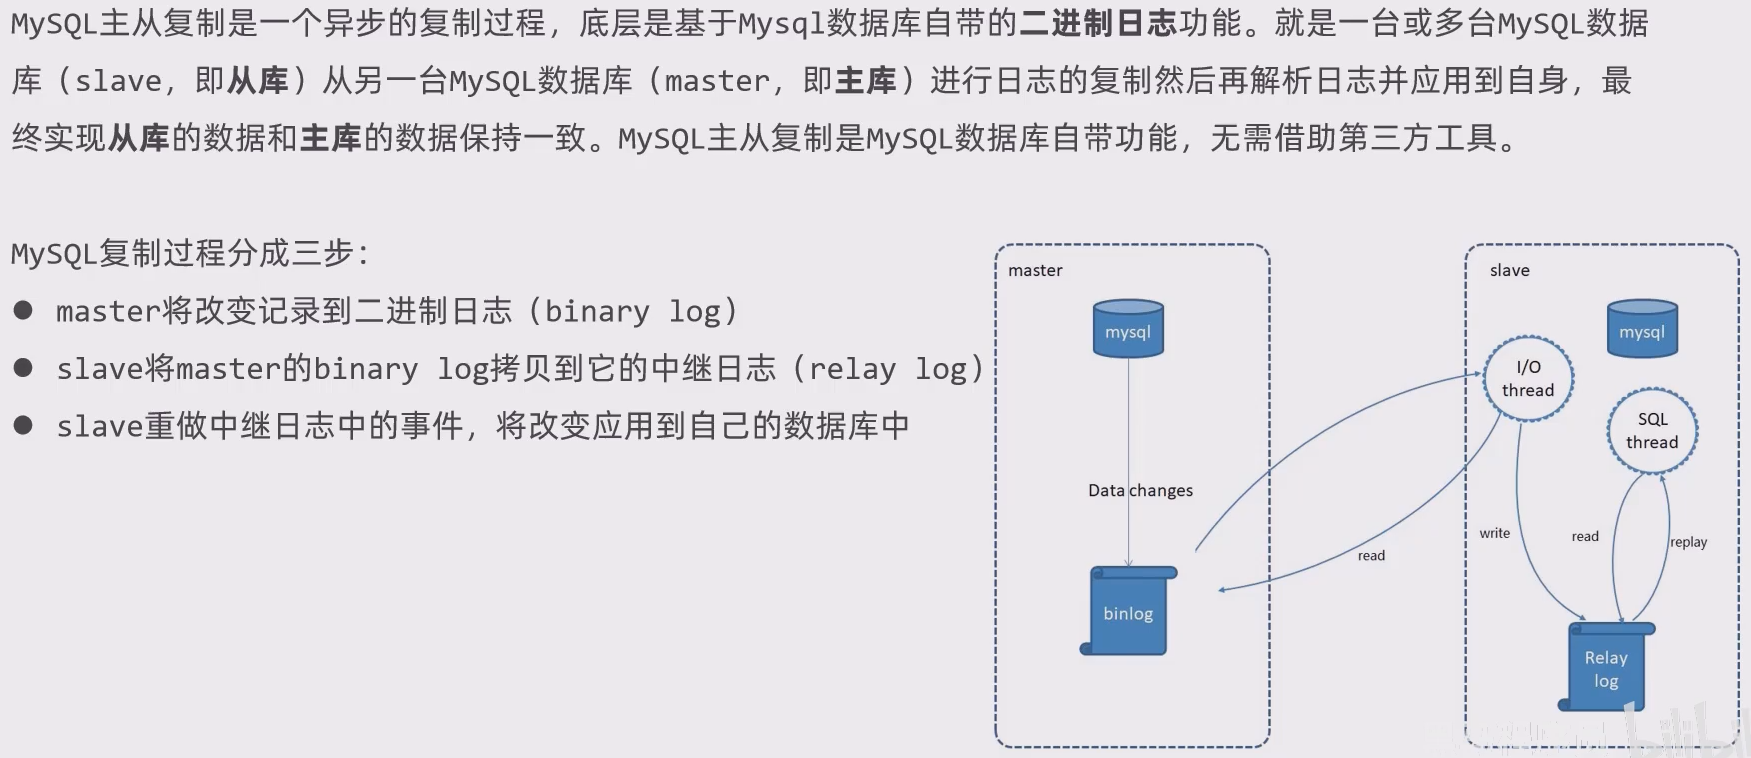
mysql主从复制
介绍
配置
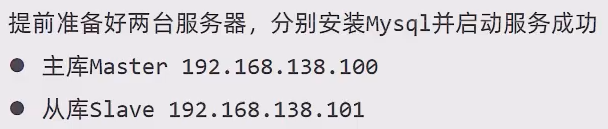
克隆虚拟机,搞两台虚拟机,再分别进入到网卡设置的那个enss33文件里面去修改ip地址,在同一个子网下。在finalShell里面配置好两台设备的ip地址就可以连接了。但是,我们还必须修改mysql的uuid:mysql修改uuid。
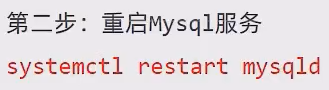
配置主库
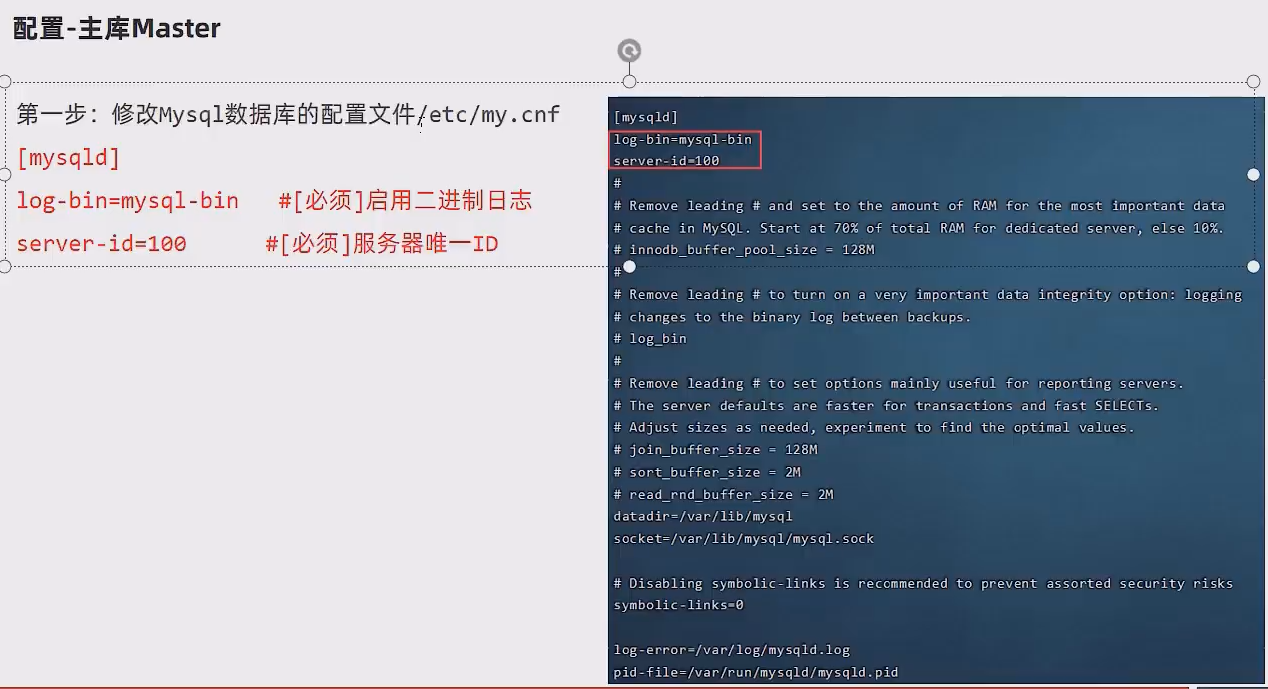
主:192.168.100.128
从:192.168.100.100
登录mysql:
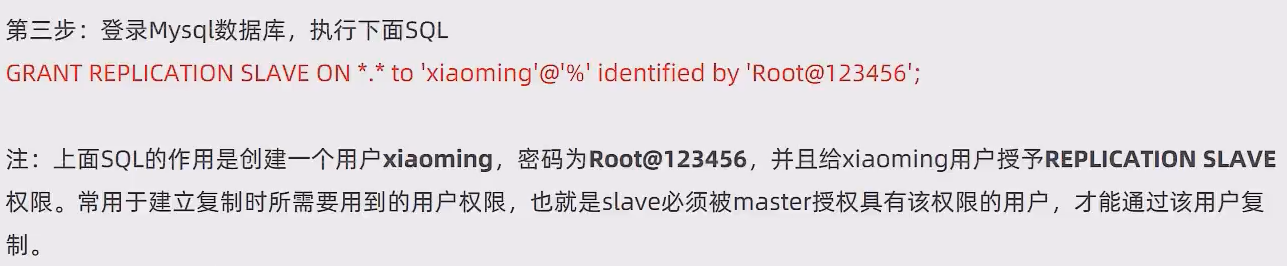
GRANT REPLICATION SLAVE ON *.* to 'xiaoming'@'%' identified by 'Root@123456';
配置从库

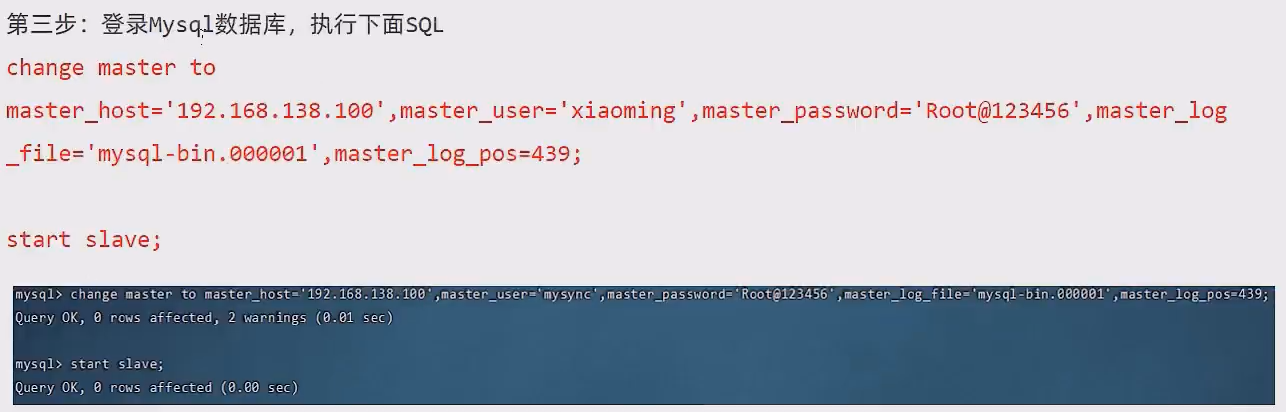
change master to
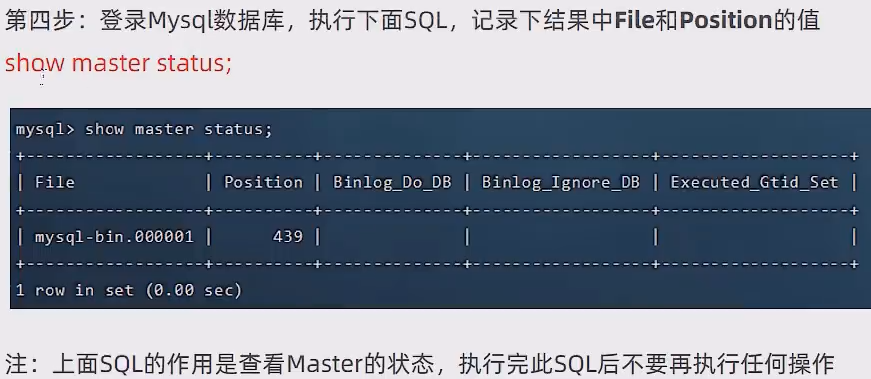
master_host='192.168.100.128',master_user='xiaoming',master_password='Root@123456',master_log_file='mysql-bin.000001',master_log_pos=441;
start slave;
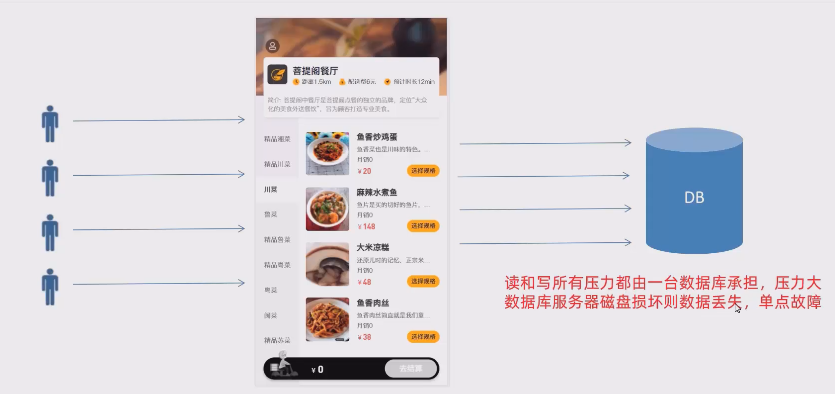
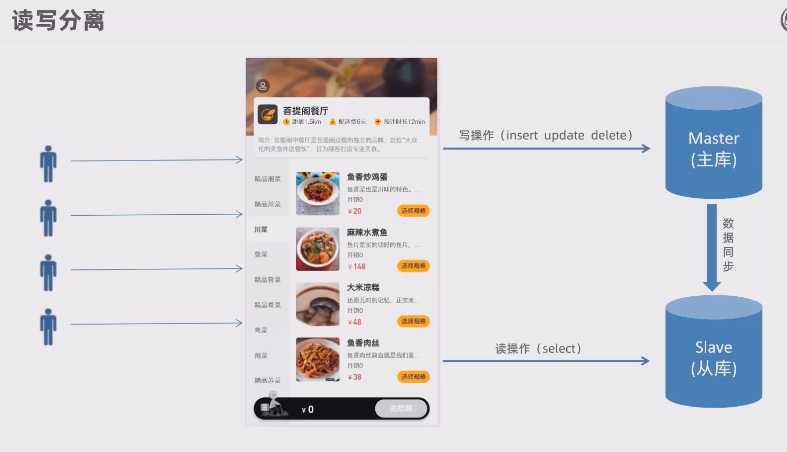
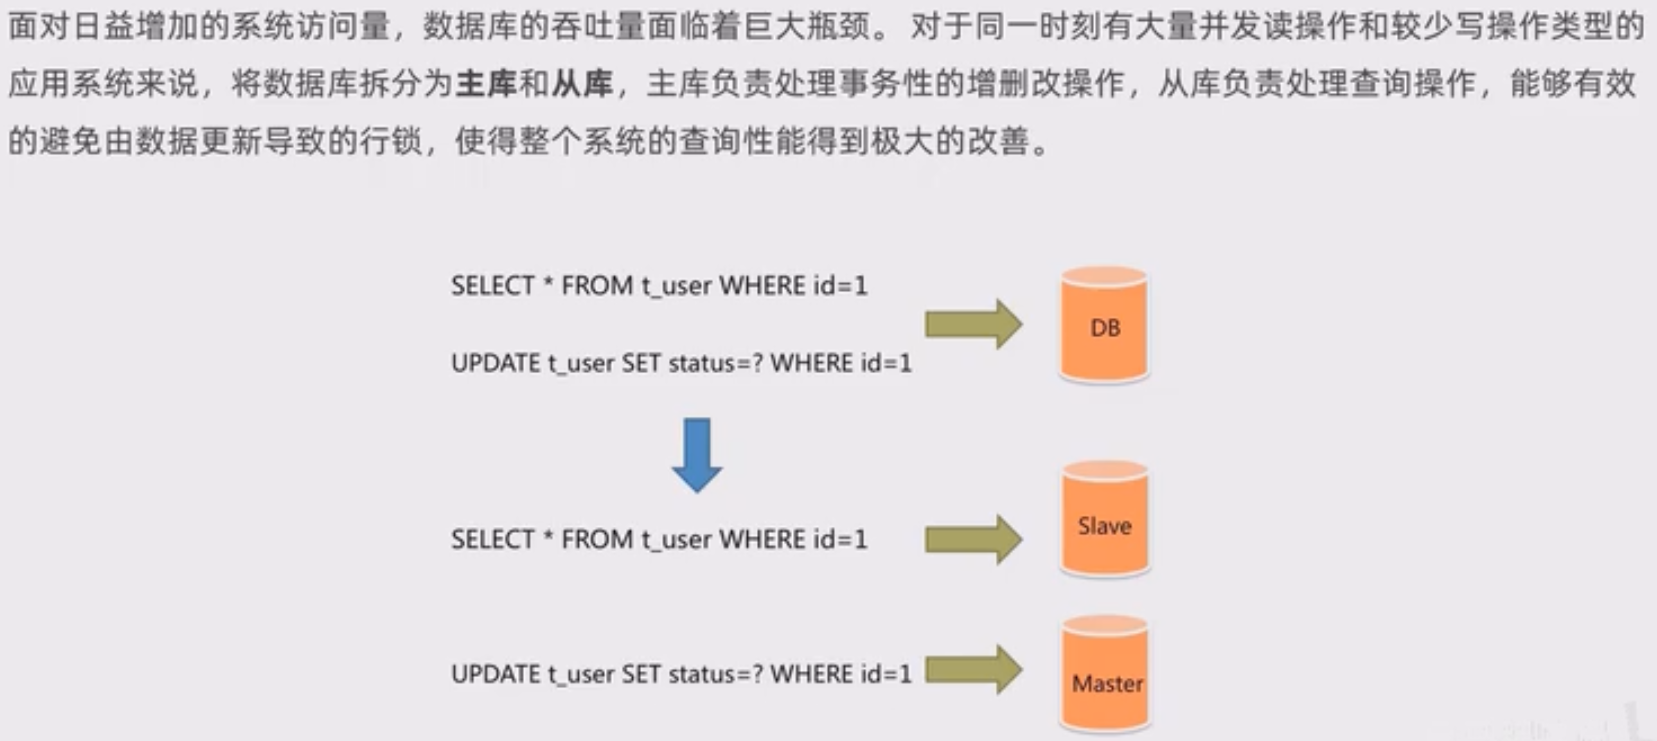
读写分离案例
介绍
入门案例
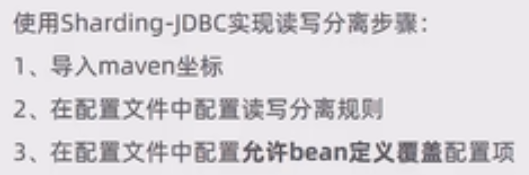
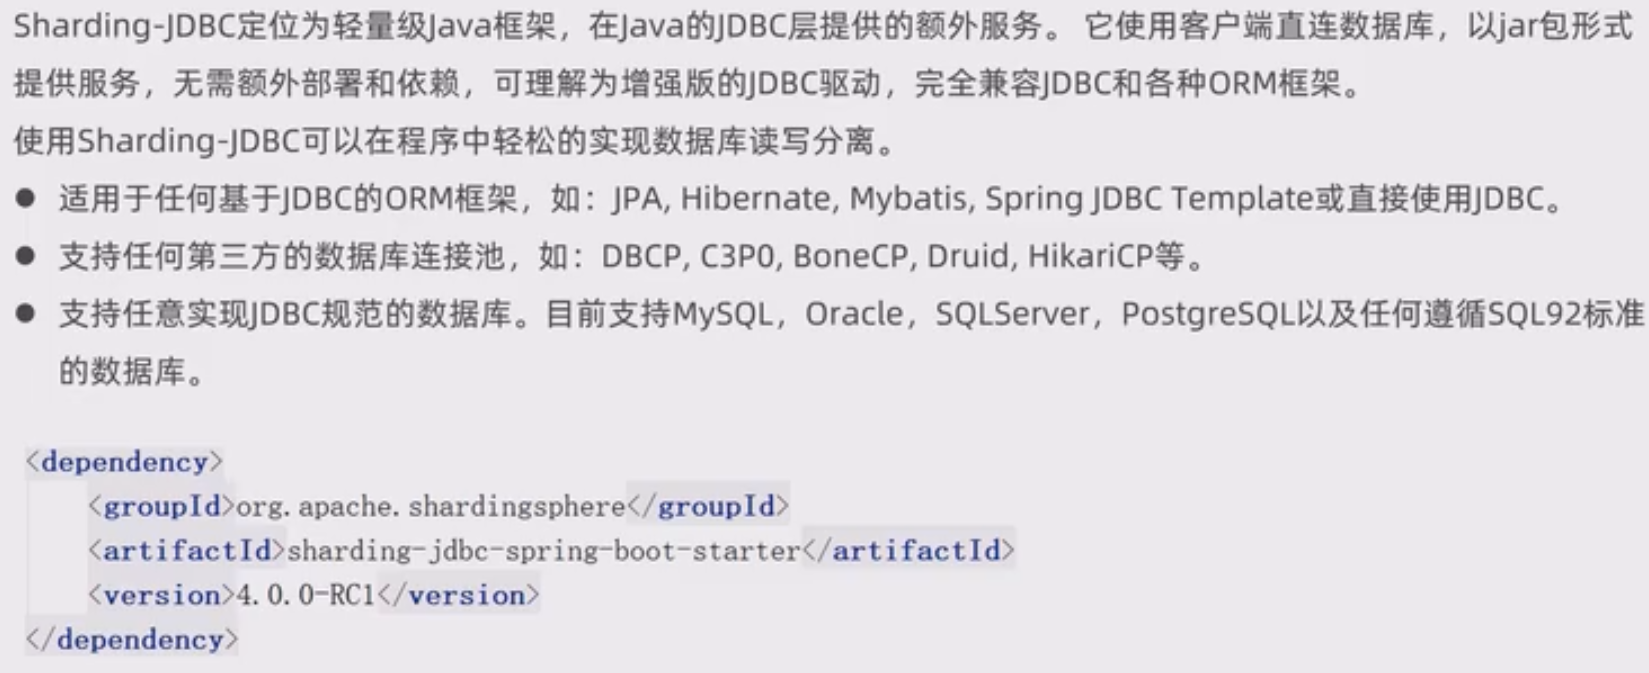
使用Sharding-JDBC实现读写分离。
准备工作
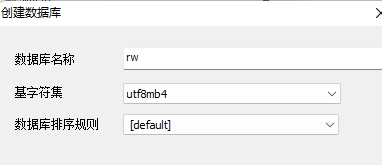
在主库下创建rw的数据库:
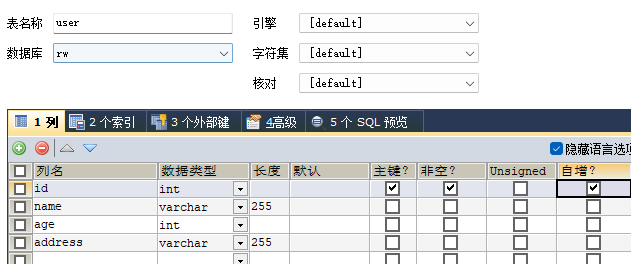
创建一张表:
maven坐标
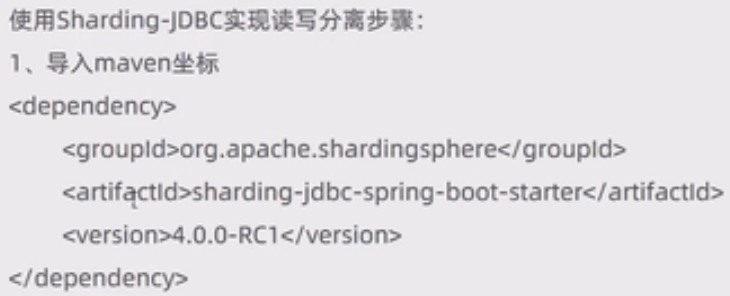
        <dependency>
            <groupId>org.apache.shardingsphere</groupId>
            <artifactId>sharding-jdbc-spring-boot-starter</artifactId>
            <version>4.0.0-RC1</version>
        </dependency>
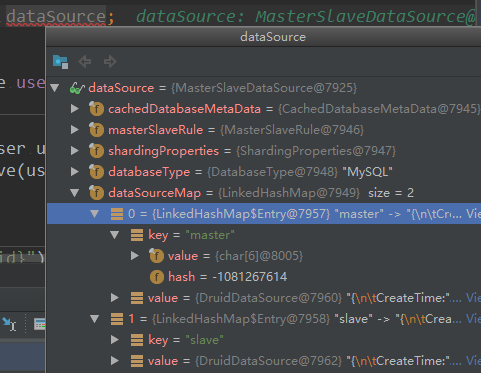
配置application.yml配置读写分离规则
spring:
  shardingsphere:
    datasource:
      names:
        master,slave
      # 主数据源
      master:
        type: com.alibaba.druid.pool.DruidDataSource
        driver-class-name: com.mysql.cj.jdbc.Driver
        url: jdbc:mysql://192.168.100.128:3306/rw?characterEncoding=utf-8
        username: root
        password: root
      # 从数据源
      slave:
        type: com.alibaba.druid.pool.DruidDataSource
        driver-class-name: com.mysql.cj.jdbc.Driver
        url: jdbc:mysql://192.168.100.100:3306/rw?characterEncoding=utf-8
        username: root
        password: root
    masterslave:
      # 读写分离配置
      load-balance-algorithm-type: round_robin #轮询
      # 最终的数据源名称
      name: dataSource
      # 主库数据源名称
      master-data-source-name: master
      # 从库数据源名称列表,多个逗号分隔
      slave-data-source-names: slave
    props:
      sql:
        show: true #开启SQL显示,默认false
在配置文件中允许自定义覆盖
在spring下:

  main:
    allow-bean-definition-overriding: true

项目实现读写分离
数据库环境准备(主从复制)
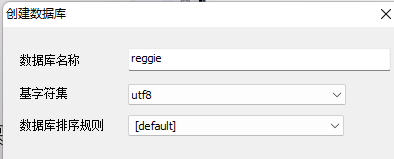
在主库下面创建reggie数据库,导入资料里面的sql语句。
创建一个v1.1的分支。
按照之前的配置好。
Nginx
ngnix概述

yum -y install gcc pcre-devel zlib-devel openssl=devel
先创建nginx的目录,再做第五步。
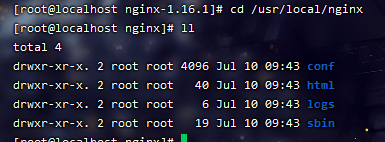
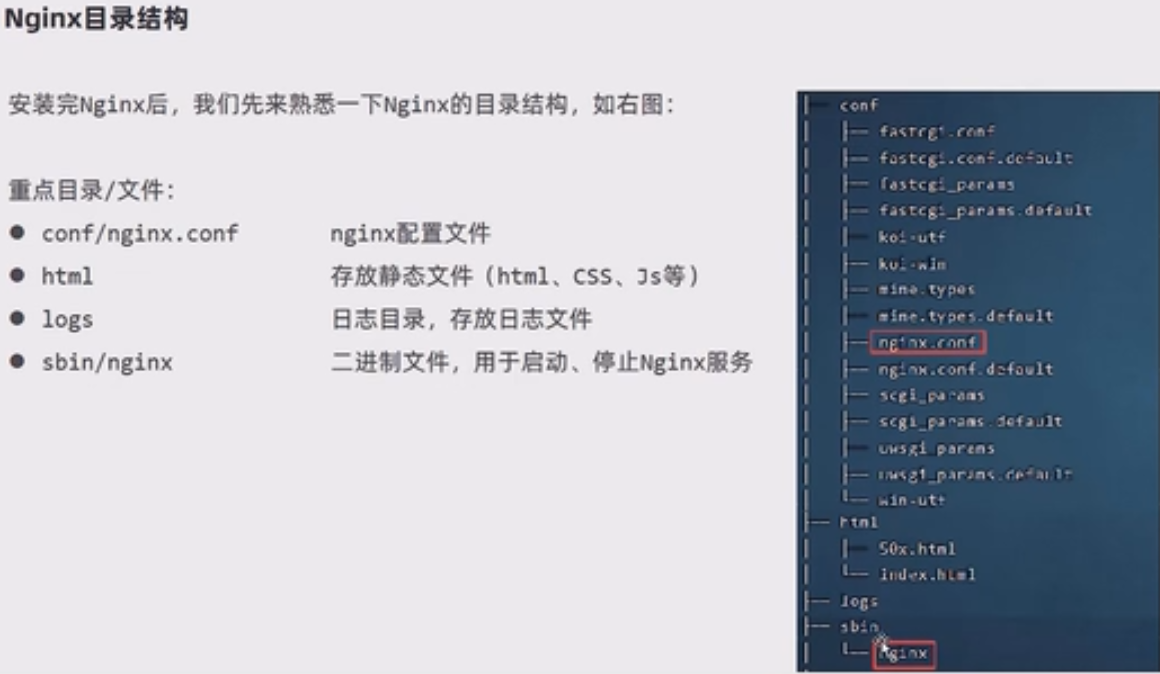
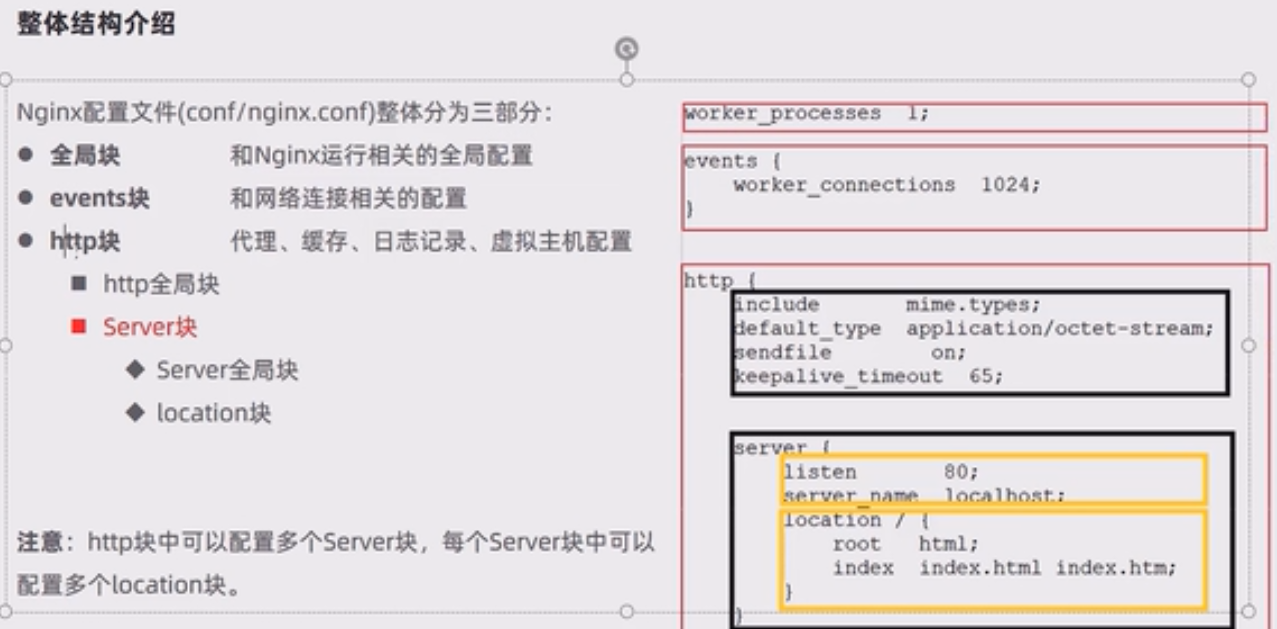
nginx配置文件结构
nginx命令
在sbin下执行
查看版本

检查配置文件正确性

启动和停止


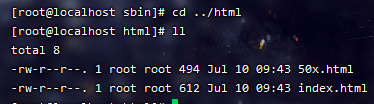
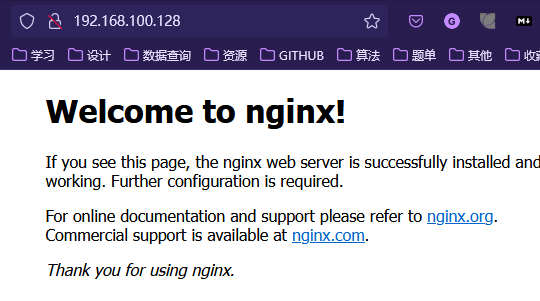
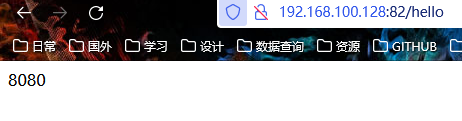
这个index.html是nginx的首页,默认使用的是80接口。
重新加载配置文件
配置文件位置:


加入到环境变量
为了方便随时随地使用,我们可以将这个执行命令的目录加入到linux的环境变量当中:


nginx具体应用
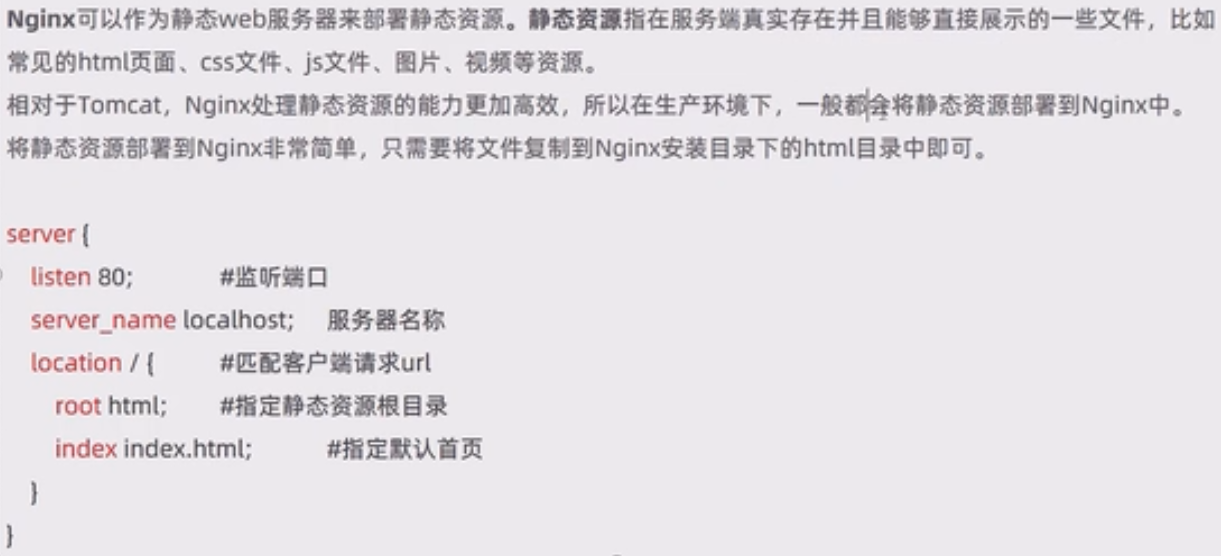
部署静态资源
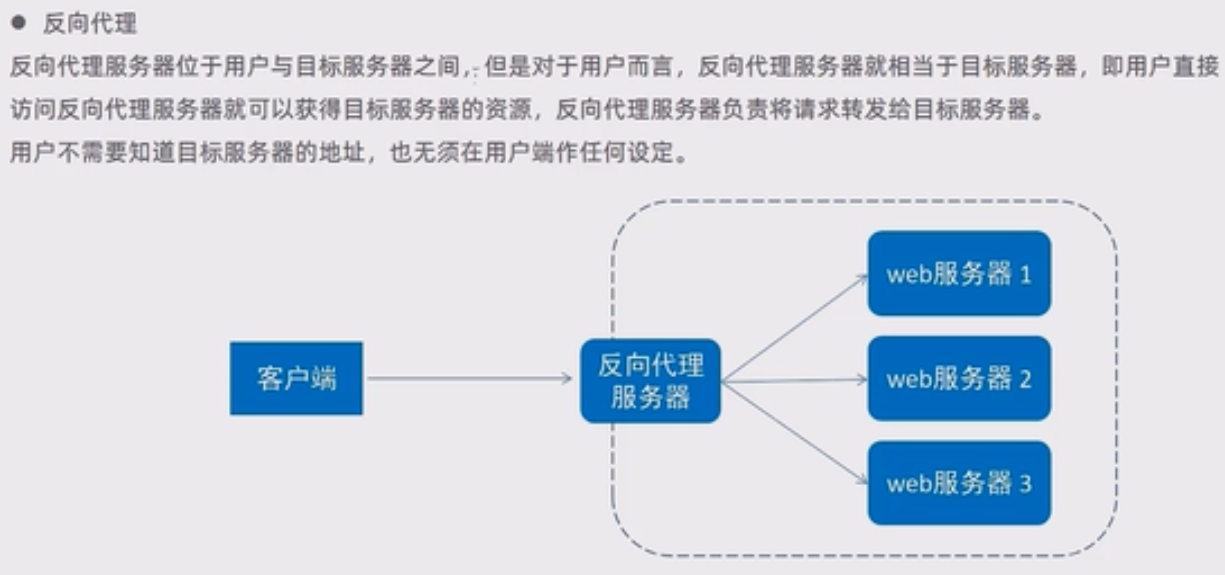
反向代理
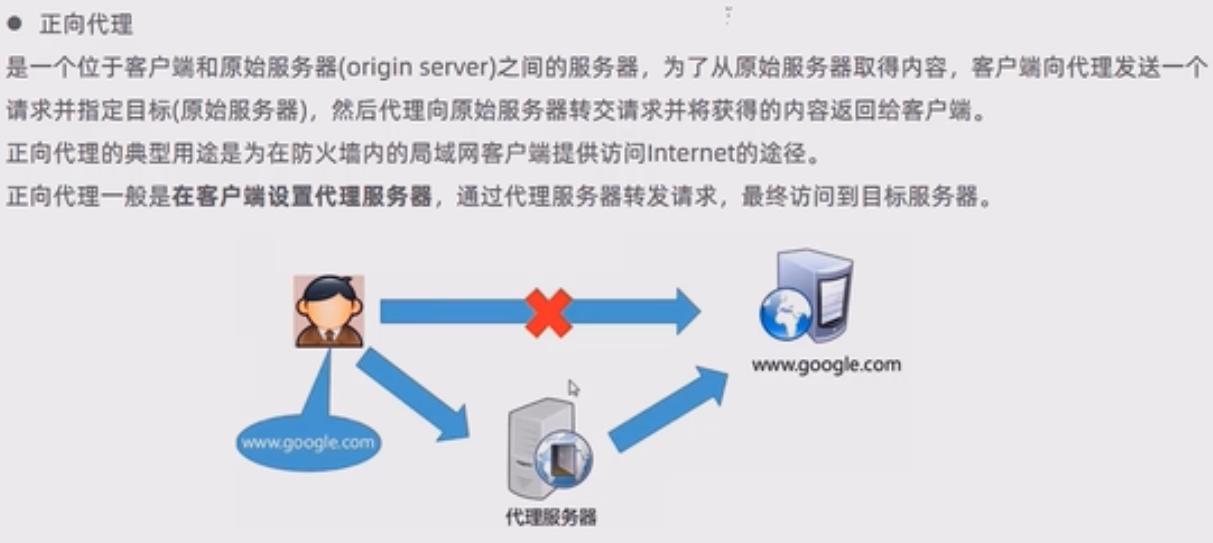
一个代理客户端,一个代理服务器。
正向代理:代理客户端去访问。
反向代理:代理服务器来接受,和正向代理不同,反向代理相当于是为目标服务器工作的,当你去访问某个网站时,你以为你访问问的是目标服务器,其实不然,当你访问时,其实是由一个代理服务器去接收你的请求。
正向代理其实是客户端的代理,帮助客户端访问其无法访问的服务器资源。反向代理则是服务器的代理,帮助服务器做负载均衡,安全防护等。
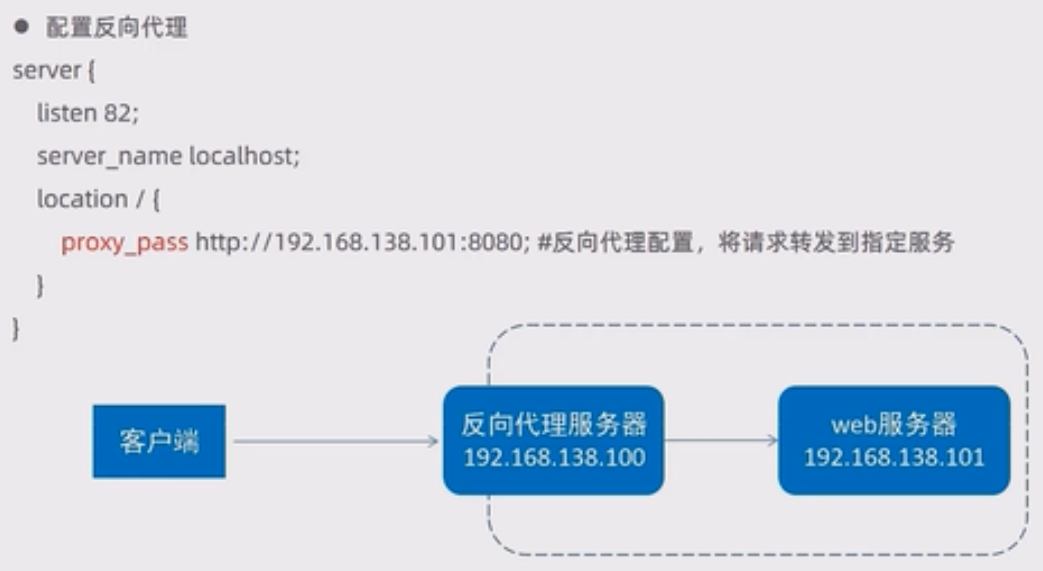
server{
        listen 82;
        server_name localhost;
        location / {
                proxy_pass http://192.168.100.100:8080;
                }
        }

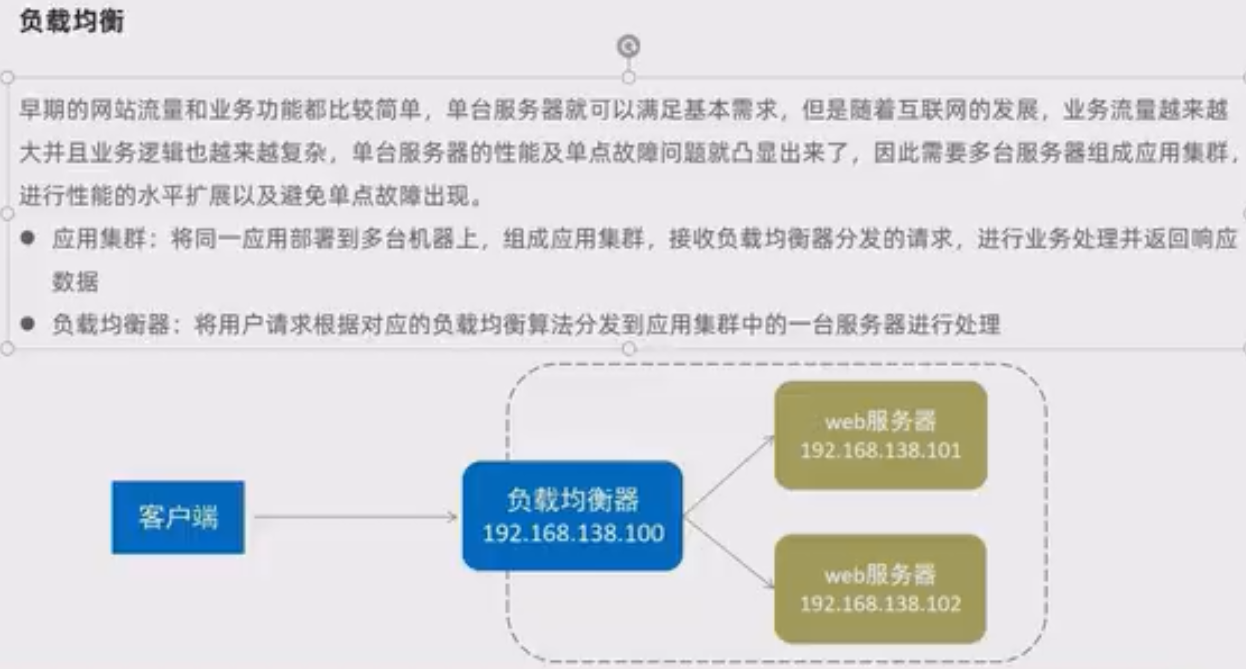
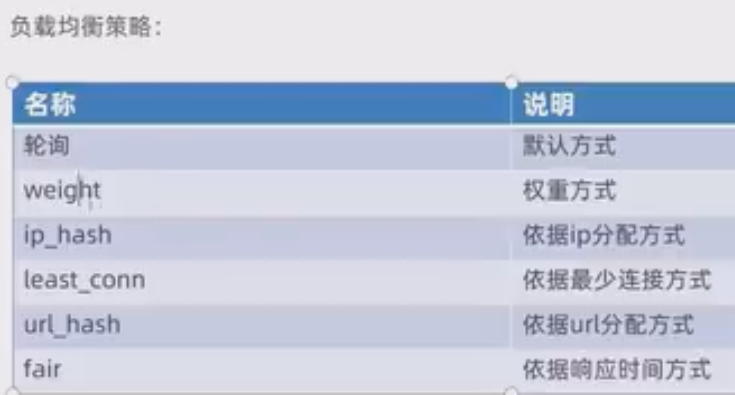
负载均衡
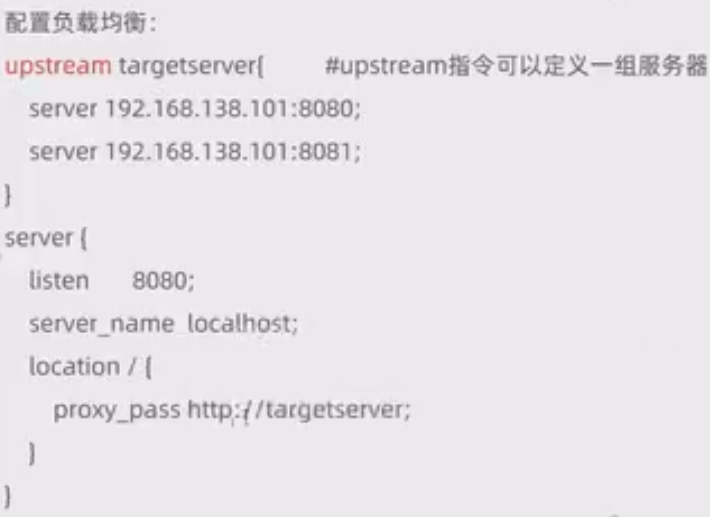
    upstream targetserver{
        server 192.168.100.128:8080;
        server 192.168.100.128:8081;

        }
     server{
        listen 8080;
        server_name localhost;
        location / {
                proxy_pass http://targetserver;
                }
        }

 浙公网安备 33010602011771号