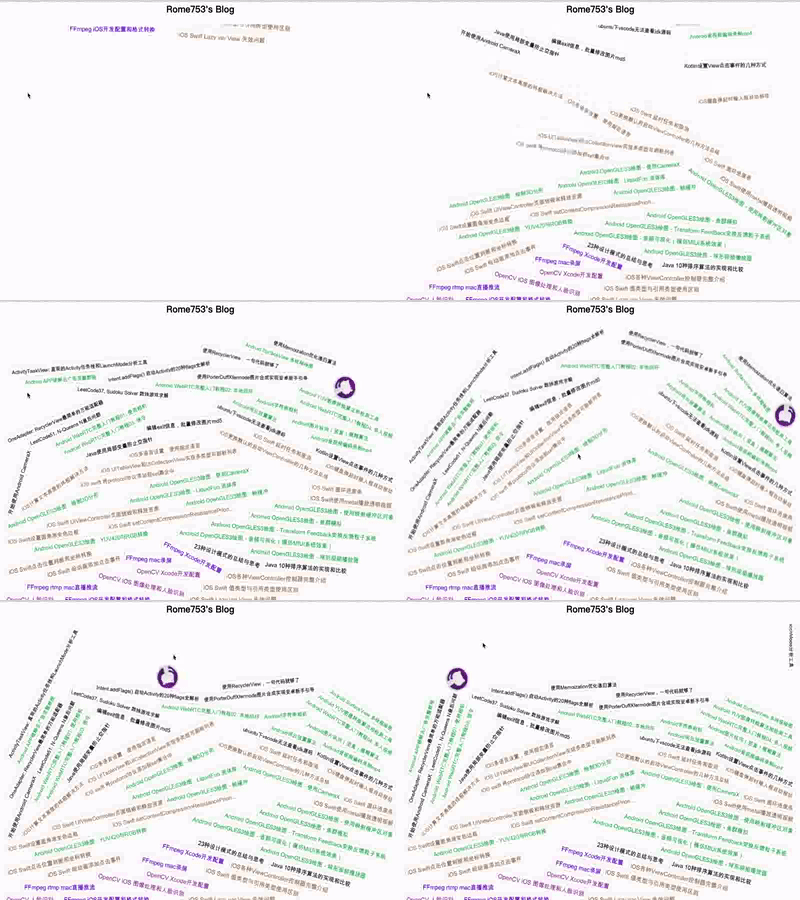
做一个独一无二的重力版个人博客
0 起因
一直在简书上写博客,书写和传图很方便,缺点是个人主页太过简陋。我试了一下个人博客Hexo,发现虽然功能很强大,可定制性也很高,然而定制起来也很麻烦,大部分只能改改颜色样式排版等。我想做的是一个独一无二个人博客页面,比如有树状图、物理碰撞或者WebGL 3D效果等。
先做个物理碰撞的页面试试:每篇博客标题是一个矩形方块,可以用鼠标拖动、有坠落碰撞反弹等。
1 box2d.js研究
以前研究过Box2D物理引擎,在Github上找了一下网页版的box2d.js,其实它是用Emscripten将Box2D的C++代码直接编译成JavaScript的,使用方法基本跟Box2D一样。看了一下它的testbed实例,效果不错,可以满足我的要求。
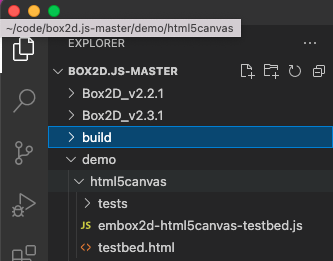
把box2d.js下载下来,用VSCode打开,我们需要的代码在demo/html5canvas里面。

搜索安装一下Live Preview插件,注意是微软官方开发的,它可以在预览网页时自动启动一个http服务器,这样就能正常预览网页了。打开testbed.html文件,点右上角的图标打开预览,就能在开发中实时预览,极其方便!
研究一下这个Demo项目:
- testbed.html
绘制的画布就是这个canvas,可以修改宽高等。
    <body>
        <div style="text-align:center">
            <h2>Emscripten Box2D demo</h2>

            <div style="margin:auto;width:640px;padding:2px;border:1px solid #888;text-align:left">

                <!--<canvas id="canvas" width="480" height="320" tabindex='1'></canvas>-->
                <canvas id="canvas" width="640" height="480" tabindex='1'></canvas>
- test目录
这里面是Box2D的测试集合,每个文件代表一个测试,每个测试里主要是在setup方法里创建Box2D模型。
embox2dTest_fallingShapes.prototype.setup = function() {

    //ground edges
    var shape0 = new b2EdgeShape();
    shape0.Set(new b2Vec2(-40.0, -6.0), new b2Vec2(40.0, -6.0));
    groundBody.CreateFixture(shape0, 0.0);
    shape0.Set(new b2Vec2(-9.0, -6.0), new b2Vec2(-9.0, -4.0));
    groundBody.CreateFixture(shape0, 0.0);
    shape0.Set(new b2Vec2(9.0, -6.0), new b2Vec2(9.0, -4.0));
    groundBody.CreateFixture(shape0, 0.0);

    NUMRANGE.forEach(function(i) {
        var bd = new b2BodyDef();
        // bd.set_type(b2_dynamicBody);
        bd.set_type(Module.b2_dynamicBody);
        bd.set_position(ZERO);
        var body = world.CreateBody(bd);
        var randomValue = Math.random();
        if ( randomValue < 0.2 )
            body.CreateFixture(cshape, 1.0);
        else
            body.CreateFixture(createRandomPolygonShape(0.5), 1.0);
        temp.Set(16*(Math.random()-0.5), 4.0 + 2.5*i);
        body.SetTransform(temp, 0.0);
        body.SetLinearVelocity(ZERO);
        body.SetAwake(1);
        body.SetActive(1);
    });
- embox2d-html5canvas-testbed.js
这个类是最重要的功能所在,分为创建World、绘制和处理鼠标时间三部分。
创建World和绘制
function createWorld() {

    if ( world != null )
        Box2D.destroy(world);

    world = new Box2D.b2World( new Box2D.b2Vec2(0.0, -10.0) );
    world.SetDebugDraw(myDebugDraw);

    mouseJointGroundBody = world.CreateBody( new Box2D.b2BodyDef() );

    var e = document.getElementById("testSelection");
    var v = e.options[e.selectedIndex].value;

    eval( "currentTest = new "+v+"();" );

    currentTest.setup();
}

function resetScene() {
    createWorld();
    draw();
}

function step(timestamp) {

    if ( currentTest && currentTest.step )
        currentTest.step();

    if ( ! showStats ) {
        world.Step(1/60, 3, 2);
        draw();
        return;
    }

    var current = Date.now();
    world.Step(1/60, 3, 2);
    var frametime = (Date.now() - current);
    frameTime60 = frameTime60 * (59/60) + frametime * (1/60);

    draw();
    statusUpdateCounter++;
    if ( statusUpdateCounter > 20 ) {
        updateStats();
        statusUpdateCounter = 0;
    }
}

function draw() {

    //black background
    context.fillStyle = 'rgb(0,0,0)';
    context.fillRect( 0, 0, canvas.width, canvas.height );

    context.save();
        context.translate(canvasOffset.x, canvasOffset.y);
        context.scale(1,-1);
        context.scale(PTM,PTM);
        context.lineWidth /= PTM;

        drawAxes(context);

        context.fillStyle = 'rgb(255,255,0)';
        world.DrawDebugData();

        if ( mouseJoint != null ) {
            //mouse joint is not drawn with regular joints in debug draw
            var p1 = mouseJoint.GetAnchorB();
            var p2 = mouseJoint.GetTarget();
            context.strokeStyle = 'rgb(204,204,204)';
            context.beginPath();
            context.moveTo(p1.get_x(),p1.get_y());
            context.lineTo(p2.get_x(),p2.get_y());
            context.stroke();
        }

    context.restore();
}
注意:DebugDraw的绘制是在helpers/embox2d-html5canvas-debugDraw.js这个类里,调试的时候一定要开启DebugDraw,不然有时找不到自己添加的物体跑哪里去了。DebugDraw把物体分解成点和线了,只能用来绘制物体轮廓,要绘制真正的图形需要遍历World里的body集合,根据body的位置和旋转角度绘制。
处理鼠标事件
通过QueryAABB方法找到鼠标事件在World里的点,创建mouseJoint用来拖动物体。
function startMouseJoint() {

    if ( mouseJoint != null )
        return;

    // Make a small box.
    var aabb = new Box2D.b2AABB();
    var d = 0.001;
    aabb.set_lowerBound(new b2Vec2(mousePosWorld.x - d, mousePosWorld.y - d));
    aabb.set_upperBound(new b2Vec2(mousePosWorld.x + d, mousePosWorld.y + d));

    // Query the world for overlapping shapes.
    myQueryCallback.m_fixture = null;
    myQueryCallback.m_point = new Box2D.b2Vec2(mousePosWorld.x, mousePosWorld.y);
    world.QueryAABB(myQueryCallback, aabb);

    if (myQueryCallback.m_fixture)
    {
        var body = myQueryCallback.m_fixture.GetBody();
        var md = new Box2D.b2MouseJointDef();
        md.set_bodyA(mouseJointGroundBody);
        md.set_bodyB(body);
        md.set_target( new Box2D.b2Vec2(mousePosWorld.x, mousePosWorld.y) );
        md.set_maxForce( 1000 * body.GetMass() );
        md.set_collideConnected(true);

        mouseJoint = Box2D.castObject( world.CreateJoint(md), Box2D.b2MouseJoint );
        body.SetAwake(true);
    }
}
2 抓取博客记录
我要获取自己在简书的全部博客记录,主要是每一篇的标题和链接。标题用来放进Box2D中,链接用来点击跳转。搜了一下,简书有非公开的api可以拉取。
https://blog.csdn.net/weixin_40508682/article/details/88577733
这篇文章讲到了具体接口。
首先拉取全部文章,然后把标题处理成图片,最后在网页里读取图片和其他信息。前两步用python处理。
blogRequest.py
- 拉取文章
用python循环拉取分页,并保存到文件中
def requestSaveFile():
    f = open(jsonPath, 'w')
    headers = {
        "user-agent": "Mozilla/5.0 (Macintosh; Intel Mac OS X 10_15_7) AppleWebKit/537.36 (KHTML, like Gecko) Chrome/103.0.0.0 Safari/537.36"
    }
    hasClose = False
    for i in range(1, 20):
        url = # 见完整代码
        r = requests.get(url, headers=headers)
        jo = json.loads(r.content)
        f.write(r.text)
        f.write('\n')
        print("write page: %d" % i)
        if (len(jo) == 0):
            print("close file")
            f.close()
            hasClose = True
            break
        # print(jo[0]['object']['data'])
        # print(i)
    if hasClose == False:
        f.close()
- 标题转换成图片
用PIL库进行python绘图,注意中文字体需要提供系统的字体库,mac系统是在/Library/Fonts/里面,测量文字宽高,然后绘图,顺便设置颜色边框等。将图片保存到目录里。
def createImage(fpath, text):
    global createCount
    fontSize = maxFontSize - int(createCount / 10)
    if (fontSize < 25):
        fontSize = 25
    createCount += 1
    fontPath = '/Library/Fonts/Arial Unicode.ttf' # 系统字体
    font = ImageFont.truetype(fontPath, fontSize)
    textSize = font.getsize(text)

    pd = 10
    w = textSize[0] + pd + pd
    h = textSize[1] + pd + pd

    fontColor = '#000000'
    if (text.startswith('Android')):
        fontColor = '#009933'
    if (text.startswith('iOS')):
        fontColor = '#996633'
    if (text.startswith('FFmpeg')):
        fontColor = '#6600cc'
    if (text.startswith('OpenCV')):
        fontColor = '#993399'

    im = Image.new("RGBA", [w, h], (255,255,255,0))
    dr = ImageDraw.Draw(im)

    dr.rounded_rectangle(xy=[0,0,w,h], radius=8, fill='#ffffff', outline='#dddddd', width=2)
    dr.text((pd, pd), text, font=font, fill=fontColor)
    im.save(fpath)
3 Box2D中添加图片
我需要的效果跟Demo里面tests/fallingShapes.js这个测试非常像,因此新建一个测试叫fallingImages.js,在里面创建物体。
- 添加物体
读取前面创建的标题图片,根据图片的宽高创建Shape,调用body SetUserData方法,将id放进去,后面遍历World里面的body时会用到。注意将image缓存到Map里,避免重复解析。
function addImageBody(id) {
    var image = new Image()
    image.src = myBlogJson[id]['path']
    image.onload = function() {
        var w = image.width / myImageScale
        var h = image.height / myImageScale
        var ZERO = new b2Vec2(0, 0);
        var temp = new b2Vec2(0, 0);
        var bd = new b2BodyDef();
        // bd.set_type(b2_dynamicBody);
        bd.set_type(Module.b2_dynamicBody);
        bd.set_position(ZERO);
        var body = world.CreateBody(bd);
        var randomValue = Math.random();

        if (id == 753) {
            var shape = new b2CircleShape();
            console.log(shape);
            shape.set_m_radius(w / 2);
            body.CreateFixture(shape, 1);
        } else {
            var shape = new b2PolygonShape();
            shape.SetAsBox(w / 2, h / 2);
            body.CreateFixture(shape, 1);
        }

        temp.Set(22*(Math.random()-0.5), 12);
        body.SetTransform(temp, 0.0);
        body.SetLinearVelocity(ZERO);
        // body.SetAngle
        body.SetAwake(1);
        body.SetActive(1);

        body.SetUserData(id);
        myBlogImages.set(id, image)
    }
}
- 绘制图片
这是最重要的一步
用world.GetBodyList和body = body.GetNext()遍历,注意要用body.a == 0来判断是否结束,否则会陷入死循环!
根据body.GetUserData()方法获取前面放进去的id,找到对应的图片image,用body.GetWorldCenter找到物体中心点,用body.GetAngle()找到图片旋转角度。注意JavaScript只能旋转画布,想旋转图片需要先save,将画布平移到图片中心点,旋转完再平移回来restore。
function draw() {

    //black background
    context.fillStyle = 'rgb(255,255,255)';
    context.fillRect( 0, 0, canvas.width, canvas.height );

    context.save();
        context.translate(canvasOffset.x, canvasOffset.y);
        context.scale(1,-1);
        context.scale(PTM,PTM);
        context.lineWidth /= PTM;

        // drawAxes(context);
        drawImage();

        context.fillStyle = 'rgb(255,255,0)';
        // world.DrawDebugData();

        if ( mouseJoint != null ) {
            //mouse joint is not drawn with regular joints in debug draw
            var p1 = mouseJoint.GetAnchorB();
            var p2 = mouseJoint.GetTarget();
            context.strokeStyle = 'rgb(204,204,204)';
            context.beginPath();
            context.moveTo(p1.get_x(),p1.get_y());
            context.lineTo(p2.get_x(),p2.get_y());
            context.stroke();
        }

    context.restore();
}

function drawImage() {
    var body = world.GetBodyList();
    while (true) {
        if (body == null || body.a == 0) {
            break;
        }
        var id = body.GetUserData();
        if (id > 0) {
            var c = body.GetWorldCenter();
            var w = myBlogImages.get(id).width / myImageScale;
            var h = myBlogImages.get(id).height / myImageScale;
            var a = body.GetAngle();


            // 旋转不在中心点,先平移再平移回来
            context.save();
            context.translate(c.x, c.y);
            context.scale(1,-1);
            context.rotate(-a);
            context.translate(-c.x, -c.y);
            var image = myBlogImages.get(id)
            context.drawImage(image, c.x - w / 2, c.y - h / 2, w, h);
            context.restore();
        }
        body = body.GetNext();
    }
}
- 添加点击事件
在onMouseDown和onMouseUp方法处理,由于有拖动事件,所以要根据点击时长和移动距离判断是不是真正的点击。用window.open(link)打开文章链接。
var clicktime = 0;
var clickx = 0;
var clicky = 0;

function onMouseDown(canvas, evt) {
    updateMousePos(canvas, evt);
    if ( !mouseDown )
        startMouseJoint();
    mouseDown = true;
    updateStats();

    clicktime = Date.now();
    clickx = evt.clientX;
    clicky = evt.clientY
}

function onMouseUp(canvas, evt) {
    mouseDown = false;
    updateMousePos(canvas, evt);
    updateStats();
    if ( mouseJoint != null ) {
        var dx = evt.clientX - clickx;
        var dy = evt.clientY - clicky;
        var dis = dx * dx + dy * dy;
        if ((Date.now() - clicktime) < 150 && dis < 10) {
            var id = mouseJoint.GetBodyB().GetUserData();
            var link = myBlogJson[id]['link']
            window.open(link);
            console.log(link);
        }

        world.DestroyJoint(mouseJoint);
        mouseJoint = null;
    }
}


【推荐】编程新体验,更懂你的AI,立即体验豆包MarsCode编程助手
【推荐】凌霞软件回馈社区,博客园 & 1Panel & Halo 联合会员上线
【推荐】抖音旗下AI助手豆包,你的智能百科全书,全免费不限次数
【推荐】博客园社区专享云产品让利特惠,阿里云新客6.5折上折
【推荐】轻量又高性能的 SSH 工具 IShell:AI 加持,快人一步
· PowerShell开发游戏 · 打蜜蜂
· 在鹅厂做java开发是什么体验
· 百万级群聊的设计实践
· WPF到Web的无缝过渡:英雄联盟客户端的OpenSilver迁移实战
· 永远不要相信用户的输入:从 SQL 注入攻防看输入验证的重要性