


本篇文章,使用pytorch框架 微调bert
bert官方文档:https://huggingface.co/transformers/model_doc/bert.html
bert文件:https://github.com/huggingface/transformers
这里有一篇文章可以很好的了解bert:https://leemeng.tw/attack_on_bert_transfer_learning_in_nlp.html
bert预训练模型下载地址(可以用迅雷下载):
PRETRAINED_VOCAB_ARCHIVE_MAP = {
'bert-base-uncased': "https://s3.amazonaws.com/models.huggingface.co/bert/bert-base-uncased-vocab.txt",
'bert-large-uncased': "https://s3.amazonaws.com/models.huggingface.co/bert/bert-large-uncased-vocab.txt",
'bert-base-cased': "https://s3.amazonaws.com/models.huggingface.co/bert/bert-base-cased-vocab.txt",
'bert-large-cased': "https://s3.amazonaws.com/models.huggingface.co/bert/bert-large-cased-vocab.txt",
'bert-base-multilingual-uncased': "https://s3.amazonaws.com/models.huggingface.co/bert/bert-base-multilingual-uncased-vocab.txt",
'bert-base-multilingual-cased': "https://s3.amazonaws.com/models.huggingface.co/bert/bert-base-multilingual-cased-vocab.txt",
'bert-base-chinese': "https://s3.amazonaws.com/models.huggingface.co/bert/bert-base-chinese-vocab.txt",
}
PRETRAINED_MODEL_ARCHIVE_MAP = {
    'bert-base-uncased': "https://s3.amazonaws.com/models.huggingface.co/bert/bert-base-uncased.tar.gz",
    'bert-large-uncased': "https://s3.amazonaws.com/models.huggingface.co/bert/bert-large-uncased.tar.gz",
    'bert-base-cased': "https://s3.amazonaws.com/models.huggingface.co/bert/bert-base-cased.tar.gz",
    'bert-large-cased': "https://s3.amazonaws.com/models.huggingface.co/bert/bert-large-cased.tar.gz",
    'bert-base-multilingual-uncased': "https://s3.amazonaws.com/models.huggingface.co/bert/bert-base-multilingual-uncased.tar.gz",
    'bert-base-multilingual-cased': "https://s3.amazonaws.com/models.huggingface.co/bert/bert-base-multilingual-cased.tar.gz",
    'bert-base-chinese': "https://s3.amazonaws.com/models.huggingface.co/bert/bert-base-chinese.tar.gz",
}
中文分类与英文分类主要区别在于所调用的预训练模型是英文的还是中文的(个人感觉)。比如,“bert-base-uncased”是英文的预训练模型,“bert-base-chinese”是中文模型。
通过下面源码中的例子,我们可以清楚的知道预训练分词的调用方式
Examples::

            # We can't instantiate directly the base class `PreTrainedTokenizer` so let's show our examples on a derived class: BertTokenizer

            # Download vocabulary from S3 and cache.
            tokenizer = BertTokenizer.from_pretrained('bert-base-uncased')

            # Download vocabulary from S3 (user-uploaded) and cache.
            tokenizer = BertTokenizer.from_pretrained('dbmdz/bert-base-german-cased')

            # If vocabulary files are in a directory (e.g. tokenizer was saved using `save_pretrained('./test/saved_model/')`)
            tokenizer = BertTokenizer.from_pretrained('./test/saved_model/')

            # If the tokenizer uses a single vocabulary file, you can point directly to this file
            tokenizer = BertTokenizer.from_pretrained('./test/saved_model/my_vocab.txt')

            # You can link tokens to special vocabulary when instantiating
            tokenizer = BertTokenizer.from_pretrained('bert-base-uncased', unk_token='<unk>')
            # You should be sure '<unk>' is in the vocabulary when doing that.
            # Otherwise use tokenizer.add_special_tokens({'unk_token': '<unk>'}) instead)
            assert tokenizer.unk_token == '<unk>'

        """
通过下面的BertForSequenceClassification的源码,我们可以发现,多分类与二分类模型上的区别在于 self.num_labels = config.num_labels 这句话,config是哪来的呢?
config参数来自于:
@add_start_docstrings("""Bert Model transformer with a sequence classification/regression head on top (a linear layer on top of the pooled output) e.g. for GLUE tasks. """,
    BERT_START_DOCSTRING, BERT_INPUTS_DOCSTRING)
class BertForSequenceClassification(BertPreTrainedModel):
    r"""
        **labels**: (`optional`) ``torch.LongTensor`` of shape ``(batch_size,)``:
            Labels for computing the sequence classification/regression loss.
            Indices should be in ``[0, ..., config.num_labels - 1]``.
            If ``config.num_labels == 1`` a regression loss is computed (Mean-Square loss),
            If ``config.num_labels > 1`` a classification loss is computed (Cross-Entropy).
    Outputs: `Tuple` comprising various elements depending on the configuration (config) and inputs:
        **loss**: (`optional`, returned when ``labels`` is provided) ``torch.FloatTensor`` of shape ``(1,)``:
            Classification (or regression if config.num_labels==1) loss.
        **logits**: ``torch.FloatTensor`` of shape ``(batch_size, config.num_labels)``
            Classification (or regression if config.num_labels==1) scores (before SoftMax).
        **hidden_states**: (`optional`, returned when ``config.output_hidden_states=True``)
            list of ``torch.FloatTensor`` (one for the output of each layer + the output of the embeddings)
            of shape ``(batch_size, sequence_length, hidden_size)``:
            Hidden-states of the model at the output of each layer plus the initial embedding outputs.
        **attentions**: (`optional`, returned when ``config.output_attentions=True``)
            list of ``torch.FloatTensor`` (one for each layer) of shape ``(batch_size, num_heads, sequence_length, sequence_length)``:
            Attentions weights after the attention softmax, used to compute the weighted average in the self-attention heads.
    Examples:
        tokenizer = BertTokenizer.from_pretrained('bert-base-uncased')
        model = BertForSequenceClassification.from_pretrained('bert-base-uncased')
        input_ids = torch.tensor(tokenizer.encode("Hello, my dog is cute")).unsqueeze(0)  # Batch size 1
        labels = torch.tensor([1]).unsqueeze(0)  # Batch size 1
        outputs = model(input_ids, labels=labels)
        loss, logits = outputs[:2]
    """
    def __init__(self, config):
        super(BertForSequenceClassification, self).__init__(config)
        self.num_labels = config.num_labels

        self.bert = BertModel(config)
        self.dropout = nn.Dropout(config.hidden_dropout_prob)
        self.classifier = nn.Linear(config.hidden_size, self.config.num_labels)

        self.init_weights()

    def forward(self, input_ids, token_type_ids=None, attention_mask=None, labels=None,
                position_ids=None, head_mask=None):
        outputs = self.bert(input_ids, position_ids=position_ids, token_type_ids=token_type_ids,
                            attention_mask=attention_mask, head_mask=head_mask)
        pooled_output = outputs[1]

        pooled_output = self.dropout(pooled_output)
        logits = self.classifier(pooled_output)

        outputs = (logits,) + outputs[2:]  # add hidden states and attention if they are here

        if labels is not None:
            if self.num_labels == 1:
                #  We are doing regression
                loss_fct = MSELoss()
                loss = loss_fct(logits.view(-1), labels.view(-1))
            else:
                loss_fct = CrossEntropyLoss()
                loss = loss_fct(logits.view(-1, self.num_labels), labels.view(-1))
            outputs = (loss,) + outputs

        return outputs  # (loss), logits, (hidden_states), (attentions)
还有另一种方法可以将多分类变成多分类问题,就是将bert的最后一层进行重写
https://blog.csdn.net/weixin_41519463/article/details/100863313
另一位大佬实现多文本分类,可以参考https://github.com/649453932/Bert-Chinese-Text-Classification-Pytorch
# 使用 transformers 提供的序列分类模型 BertForSequenceClassification
from transformers import BertForSequenceClassification

PRETRAINED_MODEL_NAME = "bert-base-chinese"
NUM_LABELS = 3

model = BertForSequenceClassification.from_pretrained(
    PRETRAINED_MODEL_NAME, num_labels=NUM_LABELS)
# 在 BertModel 基础上,自己添加 Dropout 层和 线性分类层,实际效果等价于 transformers 提供的 BertForSequenceClassification
class Model(nn.Module):

    def __init__(self, config):
        super(Model, self).__init__()
        self.bert = BertModel.from_pretrained(config.bert_path)
        for param in self.bert.parameters():
            param.requires_grad = True
        self.dropout = nn.Dropout(0.3)
        self.fc = nn.Linear(config.hidden_size, config.num_classes)

    def forward(self, x):
        context = x[0]  # 输入的句子
        mask = x[2]  # 对padding部分进行mask
        seg_ids = x[3]  # 句子间的分隔情况
        _, pooled = self.bert(input_ids=context, token_type_ids=seg_ids,  attention_mask=mask, output_all_encoded_layers=False)
        out = self.dropout(pooled)
        out = self.fc(out)
        return out

 model = Model(config)
通过BertForSequenceClassification中 from_pretrained函数中的example我们可以清楚的知道了预训练模型的调用方法
Examples::

            # For example purposes. Not runnable.
            model = BertModel.from_pretrained('bert-base-uncased')    # Download model and configuration from S3 and cache.
            model = BertModel.from_pretrained('./test/saved_model/')  # E.g. model was saved using `save_pretrained('./test/saved_model/')`
            model = BertModel.from_pretrained('bert-base-uncased', output_attention=True)  # Update configuration during loading
            assert model.config.output_attention == True
            # Loading from a TF checkpoint file instead of a PyTorch model (slower)
            config = BertConfig.from_json_file('./tf_model/my_tf_model_config.json')
            model = BertModel.from_pretrained('./tf_model/my_tf_checkpoint.ckpt.index', from_tf=True, config=config)
从下面开始,我通过AI研习社金融评论分类为案例,对bert简单应用。
1、导入头文件
import pandas as pd
import numpy as np
from transformers import BertTokenizer,AdamW, BertConfig,  BertForSequenceClassification
from keras.preprocessing.sequence import pad_sequences
from sklearn.model_selection import train_test_split

import torch
import torch.nn as nn
import torch.nn.functional as F
from torch.utils.data import DataLoader, TensorDataset

from tqdm import trange
2、数据处理将词转化成词向量:
#提取句子并处理
sentences = ['[CLS]' + sent + '[SEP]' for sent in train_data.text.values]
label = train_data.label.values
# print(len(train_data))
# print(train_data.text.values)
tokenizer = BertTokenizer.from_pretrained('bert-base-uncased', do_lower_case=True)
tokenized_sents = [tokenizer.tokenize(sent) for sent in sentences]
# print(tokenized_sents[0])


#将分割后的句子转化成数字  word-->idx
MAX_LEN = 512
input_ids = [tokenizer.convert_tokens_to_ids(sent) for sent in tokenized_sents]
3、做padding和 truncating 形成相同大小的长度:
'''
#自己手动做pad,truncating表示大于最大长度截断
def pad_sequences(inputs, max_l):
    def pad(x):
        return x[:max_l] if len(x) > max_l else x+[0]*(max_l-len(x))
    feature = np.array([pad(x) for x in input_ids], dtype=np.long)
return feature

 '''
#做PADDING,这里使用keras的包做pad,truncating
input_ids = pad_sequences(input_ids, maxlen=MAX_LEN, dtype='long', truncating='post', padding='post')
# input_ids = pad_sequences(input_ids, maxlen=MAX_LEN, truncating='post', padding='post')
# print(input_ids[0])
4、建立attention_mask, bert模型中必须要传入mask:
attention_mask=[]
for seq in input_ids:
    seq_mak = [float(i>0) for i in seq]
    attention_mask.append(seq_mak)
5、划分训练集和验证集:
train_inputs, validation_inputs, train_labels, validation_labels = train_test_split(input_ids,label,
                                                                    random_state=2020,test_size=0.1)

train_masks, valid_masks, _, _ = train_test_split(attention_mask, input_ids,random_state=2020,test_size=0.1)
6、生成dataloader数据迭代器:
#转成tensor
train_inputs = torch.LongTensor(train_inputs)
valid_inputs =torch.LongTensor(validation_inputs)
train_labels = torch.tensor(train_labels)
valid_labels = torch.tensor(validation_labels)
train_masks = torch.tensor(train_masks)
valid_masks = torch.tensor(valid_masks)

#生成dataloader
batch_size=16
train_data = TensorDataset(train_inputs, train_masks, train_labels)
train_dataloader = DataLoader(train_data, batch_size=batch_size, shuffle=True)
valid_data = TensorDataset(valid_inputs, valid_masks, valid_labels)
valid_dataloader =DataLoader(valid_data, batch_size=batch_size)
7、加载模型:
#加载模型
modelConfig = BertConfig.from_pretrained('bert-base-uncased/bert_config.json')
model = BertForSequenceClassification.from_pretrained('./bert-base-uncased/pytorch_model.bin', config=modelConfig)

# model = BertForSequenceClassification.from_pretrained('bert-base-uncased')
# fc_features = model.classifier.in_features
# model.classifier=nn.Linear(fc_features, 11)
8、加添优化器:
定义优化器,注意BertAdam、AdamW是不同版本的adam优化方法,版本更新太快,知道使用就行,定义需要weight decay的参数
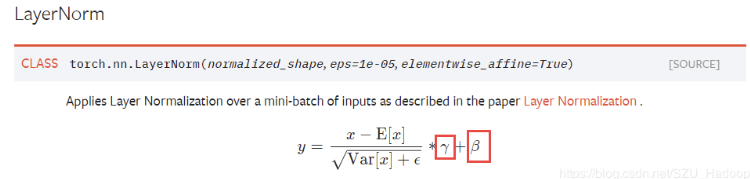
‘gamma’, ‘beta’ 是值LayerNormal层的,不要decay,直接训练即可。其他参数除去bias,均使用weight decay的方法进行训练
weight decay可以简单理解在Adam上的一个优化的基础上成使用L2正则(AdamW)。
param_optimizer = list(model.named_parameters())
no_decay = ['bias', 'gamma', 'beta']   #这三个变量不做梯度微调
optimizer_grouped_parameters = [
    {'params':[p for n, p in param_optimizer if not any(nd in n for nd in no_decay)],
    'weight_decay_rate':0.01},
    {'params':[p for n, p in param_optimizer if  any(nd in n for nd in no_decay)],
    'weight_decay_rate':0.0},
]

optimizer = AdamW(optimizer_grouped_parameters, lr=2e-5)
9、微调训练:
接下来就是训练部分了,注意在训练是传入label,模型可以直接得到loss,如果不传入label,便只有一个logits
#计算准确率
def flat_accuracy(preds, labels):
    pred_flat = np.argmax(preds, axis=1).flatten()
    label_flat = label.flatten()
    return np.sum(pred_flat == label_flat)/len(label_flat)

train_loss_set = []
epochs=10
for _ in trange(epochs, desc='Epoch'):
    model.train()
    tr_loss= 0.0
    nb_tr_example, nb_tr_steps = 0, 0
    for step, batch in enumerate(train_dataloader):
        batch = tuple(t.to(device) for t in batch)
        b_input_ids, b_input_mask, b_labels = batch
        optimizer.zero_grad()
         #取第一个位置,BertForSequenceClassification第一个位置是Loss,第二个位置是[CLS]的logits
        loss = model(b_input_ids, token_type_ids=None, attention_mask=b_input_mask, labels=b_labels)[0]
        train_loss_set.append(loss.item())
        loss.backward()
        optimizer.step()


        tr_loss+=loss.item()
        nb_tr_example+=b_input_ids.size(0)
        nb_tr_steps+=1

    print("Train loss: {}".format(tr_loss / nb_tr_steps))
(如果想要可视化参数可以执行)
   '''
    y = model(x)
    vis_graph = make_dot(y, params=dict(list(model.named_parameters()) + [('x', x)]))
    vise_graph.view()
    '''
10、评估:
#模型评估
    model.eval()
    eval_loss, eval_accuracy = 0, 0
    nb_eval_steps, nb_eval_examples = 0, 0
    for batch in valid_dataloader:
        batch = tuple(t.to(device) for t in batch)
        b_input_ids, b_input_mask, b_labels = batch
        with torch.no_grad():
            logits = model(b_input_ids, token_type_ids=None, attention_mask=b_input_mask)[0]

        logits = logits.detach().cpu().numpy()
        label_ids = b_labels.to('cpu').numpy()
        tmp_eval_accuracy = flat_accuracy(logits, label_ids)
        eval_accuracy += tmp_eval_accuracy
        nb_eval_steps += 1
    print("Validation Accuracy: {}".format(eval_accuracy / nb_eval_steps))
11、预测
test_df = pd.read_csv("./input/test.csv")

test_sencents = [[['CLS']+ sent + ['SEP']] for sent in test_df.text.values]
test_tokenizers = [tokenizer.tokenize(sent) for sent in test_sencents]

test_input_ids = [tokenizer.convert_tokens_to_ids(token) for token in test_tokenizers]

input_ids = pad_sequences(test_input_ids, maxlen=MAX_LEN, dtype='long', truncating='post', padding='post')
#建立mask
test_mask=[]
for seq in input_ids:
    seq_mak = [float(i>0) for i in seq]
    test_mask.append(seq_mak)

test_label=[]

for in_ids, mask, in input_ids, test_mask:
    in_ids=torch.LongTensor(in_ids).to(device)
    mask = torch.tensor(mask).to(device)
    logits_str = model(in_ids, token_type_ids=None, attention_mask=mask)[0]
    test_label.append(np.argmax(logits_str.detach().cpu().numpy(), axis=1))
bert_Test= pd.DataFrame(test_df.index,columns=['id'])
bert_Test['label']=test_label
bert_Test.to_csv('bert_test.csv', index=None, header=None)
本案例借鉴:
https://github.com/huggingface/transformers
https://zhuanlan.zhihu.com/p/56103665
https://github.com/real-brilliant/bert_chinese_pytorch
https://blog.csdn.net/Real_Brilliant/article/details/84880528
https://github.com/649453932/Bert-Chinese-Text-Classification-Pytorch
