SpringAOP学习之5种通知
一、Spring的AOP分为以下5种类型通知
①前置通知(Before):在连接点执行前执行该通知
②正常返回通知(AfterReturning):在连接点正常执行完后执行该通知,若目标方法执行异常则不会执行该通知
③异常返回通知(AfterThrowing):在连接点执行抛出异常时执行该通知
④后置通知(after/finally):在连接点执行完成后(不管成功、失败、异常)都会执行该通知
⑤环绕通知(Around):围绕在连接点前后
二、执行顺序
1、正常执行
①环绕通知:@Around
②前置通知:@Before
③连接点方法执行
④环绕通知:@Around
⑤后置通知:@After
⑥正常返回通知:@AfterReturning
其他结论说出来也没意思,还是自己通过简单demo测试一下就出来了
三、测试
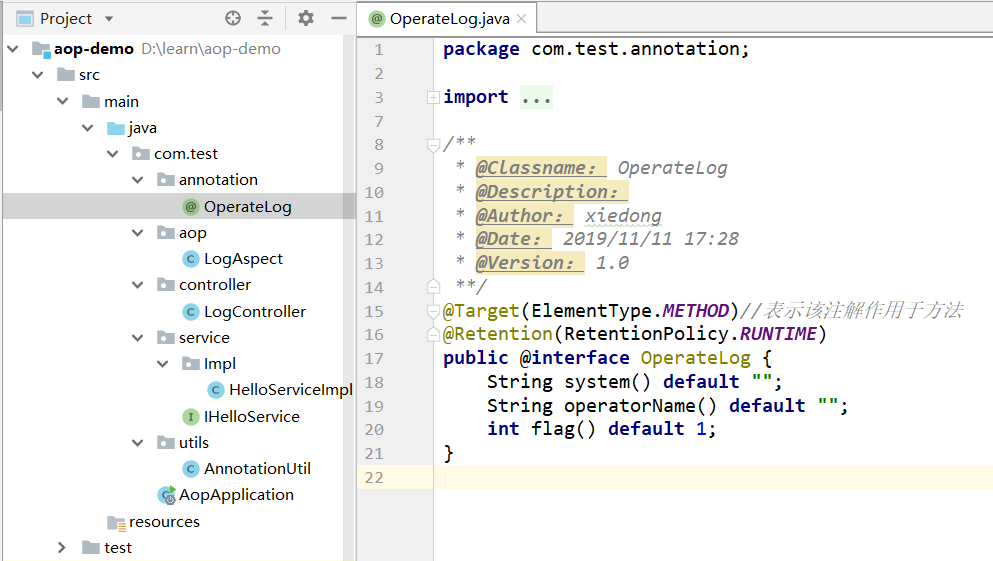
1、自定义注解

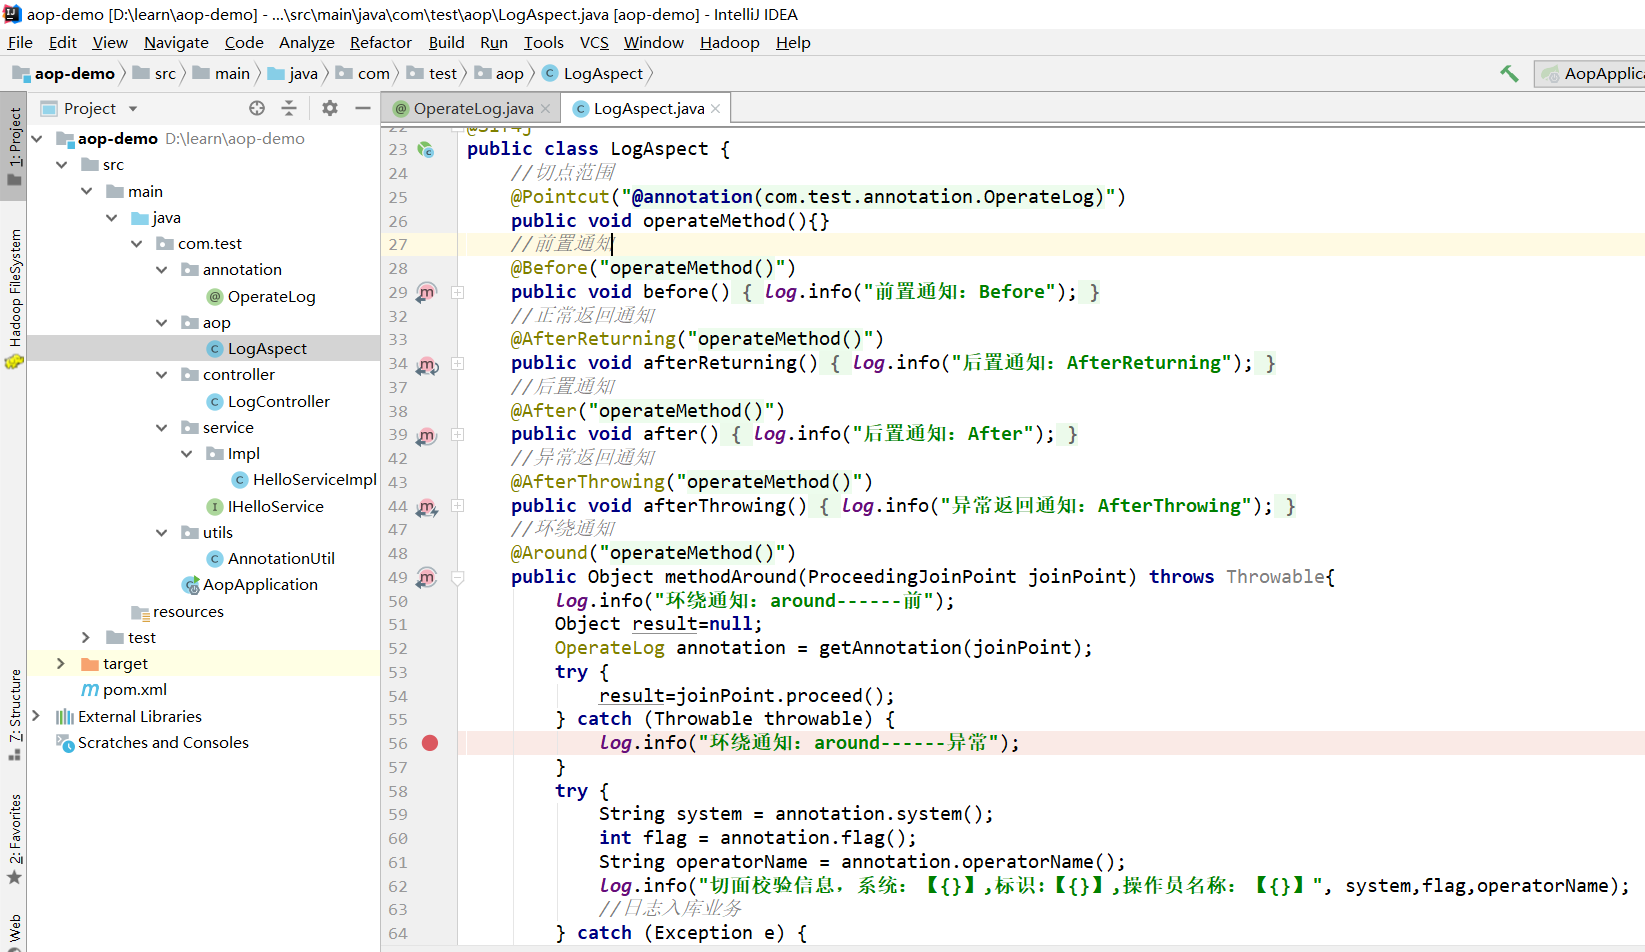
2、切面


@Aspect
@Component
@Slf4j
public class LogAspect {
    //切点范围
    @Pointcut("@annotation(com.test.annotation.OperateLog)")
    public void operateMethod(){}
    //前置通知
    @Before("operateMethod()")
    public void before(){
        log.info("前置通知:Before");
    }
    //正常返回通知
    @AfterReturning("operateMethod()")
    public void afterReturning(){
        log.info("后置通知:AfterReturning");
    }
    //后置通知
    @After("operateMethod()")
    public void after(){
        log.info("后置通知:After");
    }
    //异常返回通知
    @AfterThrowing("operateMethod()")
    public void afterThrowing(){
        log.info("异常返回通知:AfterThrowing");
    }
    //环绕通知
    @Around("operateMethod()")
    public Object methodAround(ProceedingJoinPoint joinPoint) throws Throwable{
        log.info("环绕通知:around------前");
        Object result=null;
        OperateLog annotation = getAnnotation(joinPoint);
        try {
            result=joinPoint.proceed();
        } catch (Throwable throwable) {
            log.info("环绕通知:around------异常");
        }
        try {
            String system = annotation.system();
            int flag = annotation.flag();
            String operatorName = annotation.operatorName();
            log.info("切面校验信息,系统:【{}】,标识:【{}】,操作员名称:【{}】", system,flag,operatorName);
            //日志入库业务
        } catch (Exception e) {
            log.info("切面异常",e);
        }
        log.info("环绕通知:around------后");
        return result;
    }

    private OperateLog getAnnotation(JoinPoint joinPoint){
        MethodSignature signature = (MethodSignature)joinPoint.getSignature();
        Method method = signature.getMethod();
        return method.getAnnotation(OperateLog.class);
    }
}
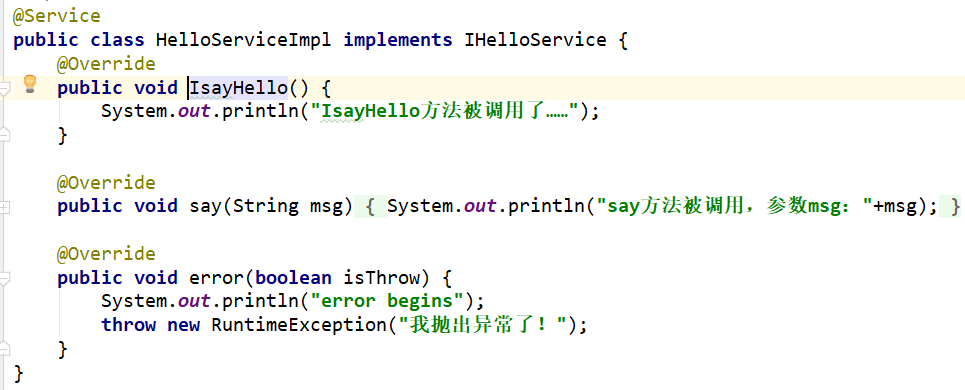
3、定义service接口并实现
service接口

实现类

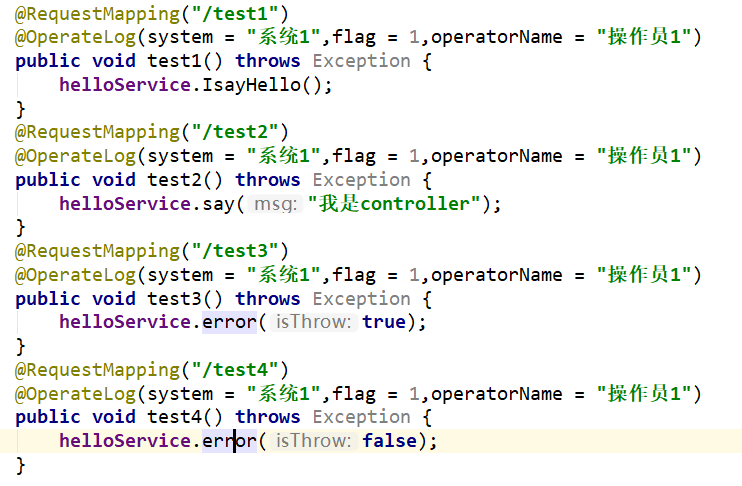
4、测试controller


@RestController
@Slf4j
public class LogController {
    @Autowired
    private IHelloService helloService;

    @RequestMapping("/test")
    @OperateLog(system = "系统1",flag = 1,operatorName = "操作员1")
    public void test() throws Exception {
        OperateLog test = (OperateLog)AnnotationUtil.getAnnotation(LogController.class, OperateLog.class, "test", 1);
        log.info("更改前的注解属性:【{}】,【{}】,【{}】",test.flag(),test.operatorName(),test.system() );
        //更改注解OperateLog的system属性值为“系统2”
        AnnotationUtil.ModifyAnnotation(LogController.class, OperateLog.class, "test", "system", "系统2");
        //更改flag的属性值为2
        AnnotationUtil.ModifyAnnotation(LogController.class, OperateLog.class, "test", "flag", 2);
        //更改注解的operatorName属性值为:张三
        AnnotationUtil.ModifyAnnotation(LogController.class, OperateLog.class, "test", "operatorName", "张三");
        log.info("更改后的注解属性:【{}】,【{}】,【{}】",test.flag(),test.operatorName(),test.system() );
    }
    @RequestMapping("/test1")
    @OperateLog(system = "系统1",flag = 1,operatorName = "操作员1")
    public void test1() throws Exception {
        helloService.IsayHello();
    }
    @RequestMapping("/test2")
    @OperateLog(system = "系统1",flag = 1,operatorName = "操作员1")
    public void test2() throws Exception {
        helloService.say("我是controller");
    }
    @RequestMapping("/test3")
    @OperateLog(system = "系统1",flag = 1,operatorName = "操作员1")
    public void test3() throws Exception {
        helloService.error(true);
    }
    @RequestMapping("/test4")
    @OperateLog(system = "系统1",flag = 1,operatorName = "操作员1")
    public void test4() throws Exception {
        helloService.error(false);
    }
}
5、测试

三、总结
1、Aop可以理解为一个同心圆,要执行的目标方法(底层还是jdk或cglib动态代理)为圆心,最外层的order最小,环绕、前置通知先执行,后置、正常返回通知后执行
2、多个aop执行的执行顺序可以使用@Order注解来实现


 浙公网安备 33010602011771号