
Visual studio2022 配置Libtorch
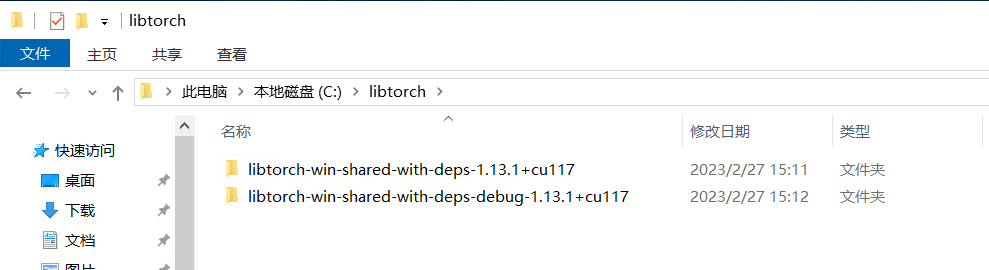
下载libtorch文件,有release、debug版本和CPU版本。下面以release版本为例
在VS2022中配置MKL
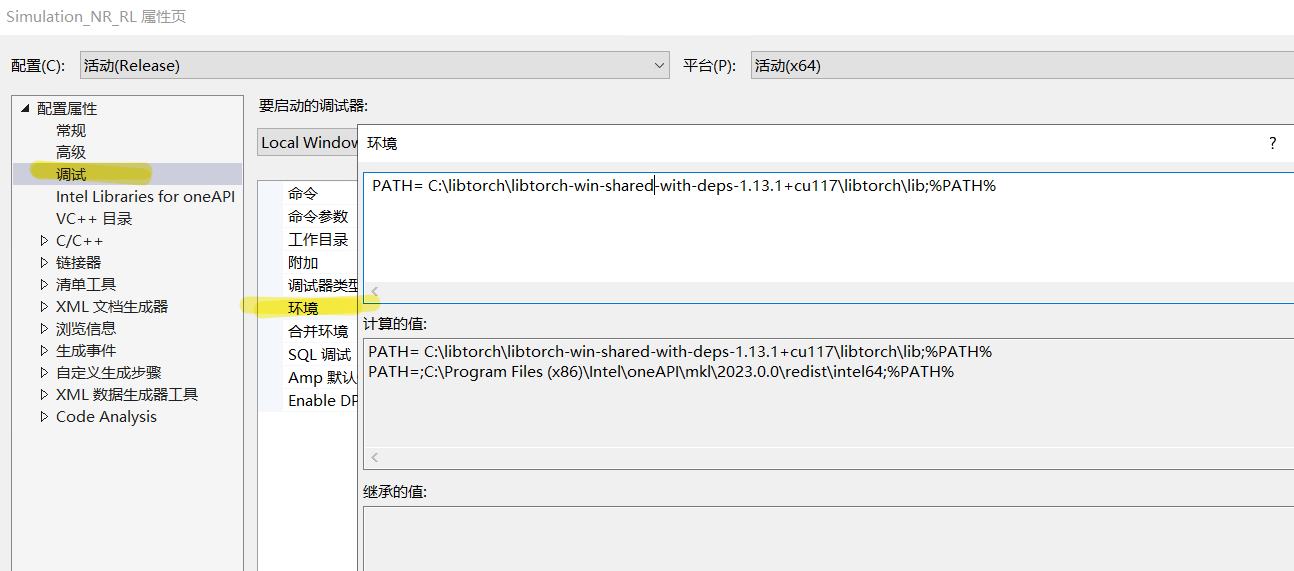
1. 配置环境变量
PATH= C:\libtorch\libtorch-win-shared-with-deps-1.13.1+cu117\libtorch\lib;%PATH%
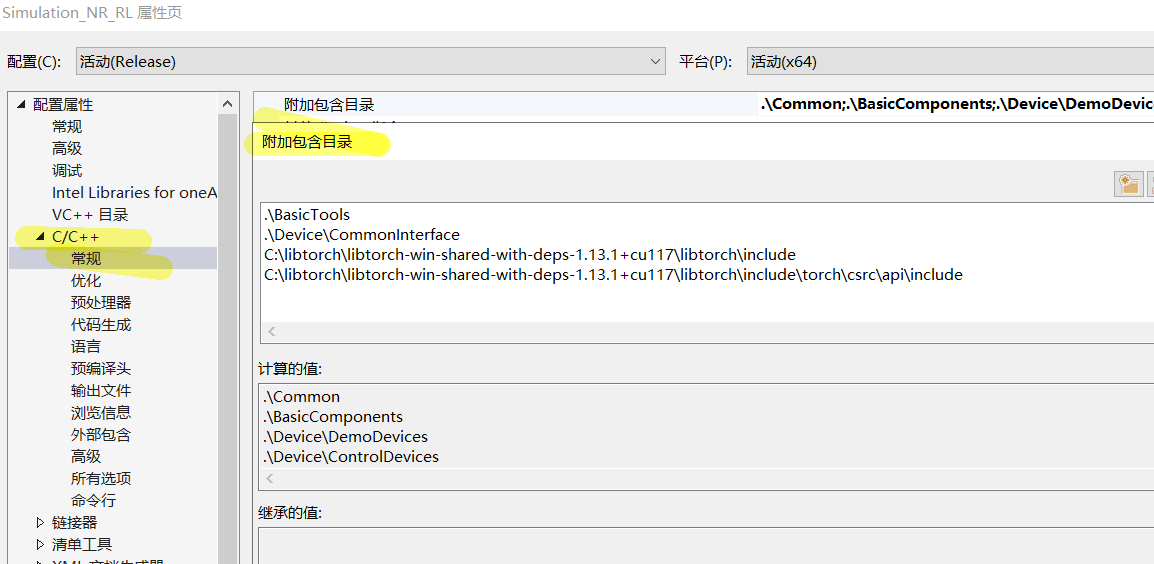
2. 配置C/C++--常规--附加包含目录
C:\libtorch\libtorch-win-shared-with-deps-1.13.1+cu117\libtorch\include\torch\csrc\api\include

C:\libtorch\libtorch-win-shared-with-deps-1.13.1+cu117\libtorch\include
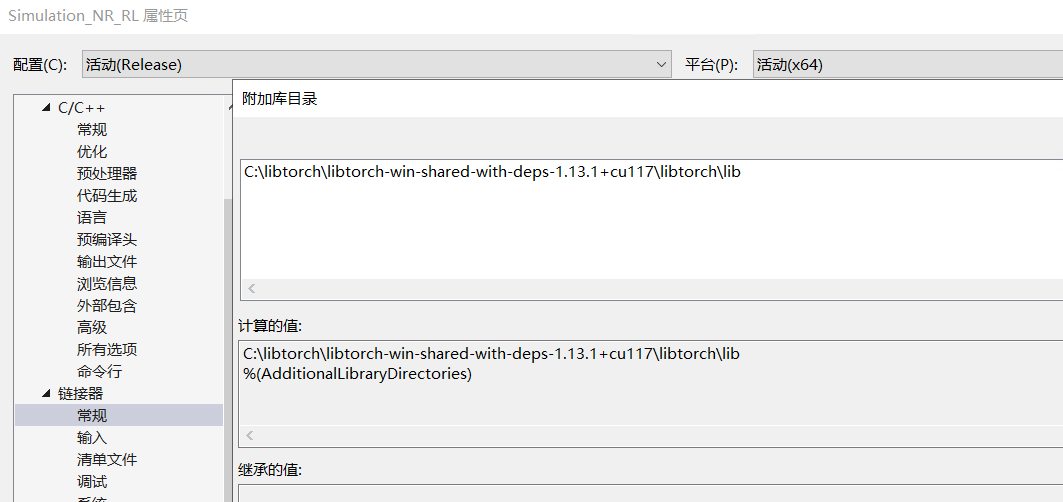
3. 配置连接器--常规--附加库目录
C:\libtorch\libtorch-win-shared-with-deps-1.13.1+cu117\libtorch\lib
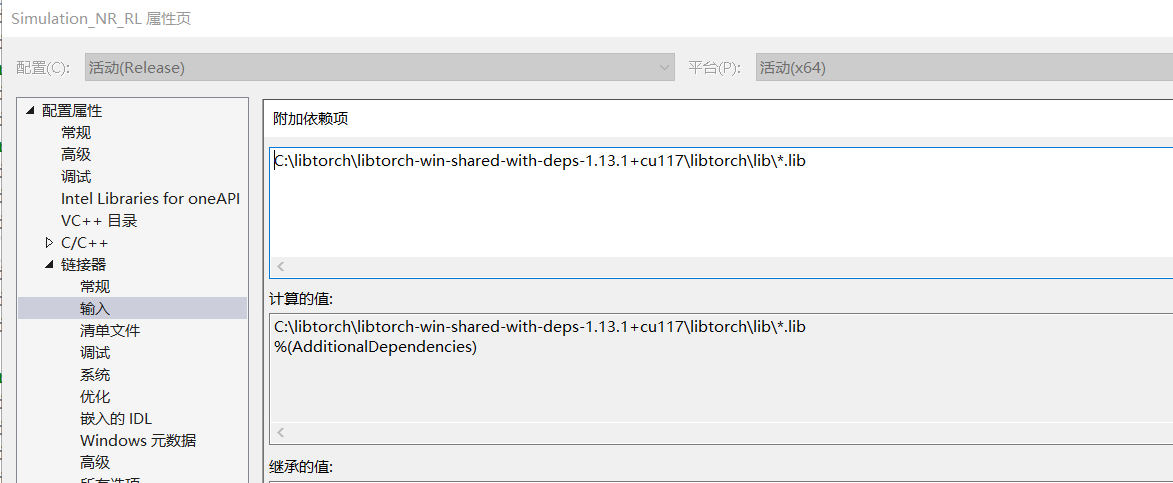
4. 配置依赖库文件
把文件夹里的lib文件都放进去。
C:\libtorch\libtorch-win-shared-with-deps-1.13.1+cu117\libtorch\lib\*.lib
至此,libtorch的配置都已经完成了,但是还不能使用cuda
5. 连接器--命令行
/INCLUDE:?warp_size@cuda@at@@YAHXZ /INCLUDE:?_torch_cuda_cu_linker_symbol_op_cuda@native@at@@YA?AVTensor@2@AEBV32@@Z
测试程序
#include <iostream>
#include <torch/torch.h>
#include <torch/script.h>
int main()
{
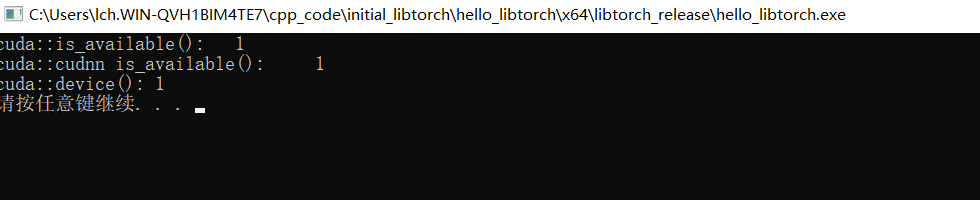
std::cout << "cuda::is_available():\t" << torch::cuda::is_available() << "\n";
std::cout << "cuda::cudnn is_available():\t" << torch::cuda::cudnn_is_available() << "\n";
std::cout << "cuda::device():\t" << torch::cuda::device_count() << "\n";
system("pause");
return 0;
}
输出结果
顶级配置libtorch+visual studio方案
LibTorch Project - Visual Studio Marketplace
下载运行即可


 浙公网安备 33010602011771号