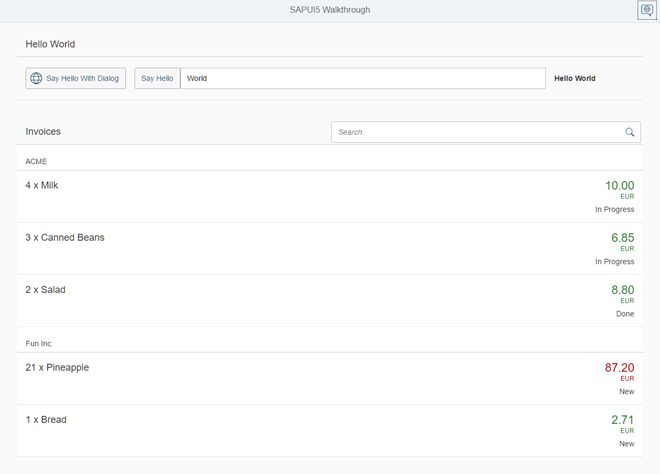
为了使我们的发票列表更加用户友好,我们将它按字母顺序排序,而不是仅仅显示来自数据模型的顺序。此外,我们还引入了组,并添加了发布产品的公司,以便更容易使用数据。
Preview

The list is now sorted and grouped by the shipping company
Coding
You can view and download all files at Walkthrough - Step 25.
webapp/view/InvoiceList.view.xml
<mvc:View
   controllerName="sap.ui.demo.walkthrough.controller.InvoiceList"
   xmlns="sap.m"
   xmlns:mvc="sap.ui.core.mvc">
   <List
      id="invoiceList"
      class="sapUiResponsiveMargin"
      width="auto"
      items="{
         path : 'invoice>/Invoices',
         sorter : {
            path : 'ProductName'
         }
      }" >
      <headerToolbar>
         ...
      </headerToolbar>
      <items>
         ...
      </items>
   </List>
</mvc:View>
我们将声明式排序器添加到绑定语法中。像往常一样,我们将简单的绑定语法转换为对象表示法,指定数据的路径,现在添加一个额外的sorter属性。我们指定了对发票项目进行排序的数据路径,其余的将自动完成。默认情况下,排序是升序的,但是您也可以在sorter属性中添加一个降序属性(值为true)来更改排序顺序。
如果我们现在运行这个应用程序,我们可以看到按产品名称排序的发票列表。
webapp/view/InvoiceList.view.xml
<mvc:View
controllerName="sap.ui.demo.walkthrough.controller.InvoiceList"
xmlns="sap.m"
xmlns:mvc="sap.ui.core.mvc">
<List
               id="invoiceList"
               class="sapUiResponsiveMargin"
               width="auto"
               items="{
                       path : 'invoice>/Invoices',
                       sorter : {
                               path : 'ShipperName',
                               group : true
                       }
               }">
        <headerToolbar>
               <Toolbar>
                       <Title text="{i18n>invoiceListTitle}"/>
                       <ToolbarSpacer/>
                       <SearchField width="50%" search="onFilterInvoices"/>
               </Toolbar>
        </headerToolbar>
        <items>
               …
        </items>
</List>
</mvc:View>
我们修改视图并添加不同的排序器,或者更好;我们更改排序器并将属性组设置为true。我们还指定ShipperName数据字段的路径。这是根据货运公司对发票项目进行分组。
与分类器一样,不需要进一步的操作。SAPUI5的列表和数据绑定特性可以自动显示组标题,并对组中的项目进行分类。如果需要,我们可以通过设置groupHeaderFactory属性来定义自定义分组函数,但是结果看起来已经很好了。
Parent topic: Walkthrough
Previous: Step 24: Filtering
Next: Step 26: (Optional) Remote OData Service
Related Information


 浙公网安备 33010602011771号