Cinemachine v2.2.8 学习
https://docs.unity3d.com/Packages/com.unity.cinemachine@2.2/manual/index.html
https://blog.csdn.net/tanyu159/article/details/88608559
https://learn.unity.com/tutorial/overview-of-cinemachine?language=en
https://learn.unity.com/tutorial/cinemachine?language=en
Cinemachine is a suite of modules for operating the Unity camera. Cinemachine solves the complex mathematics and logic of tracking targets, composing, blending, and cutting between shots.
Setting Virtual Camera properties
Setting Cinemachine Brain properties
Blending between Virtual Cameras
Cinemachine and Postprocessing
Managing and grouping Virtual Cameras
Avoiding collisions and evaluating shots
Cinemachine and top-down games
Cinemachine overview
Using Cinemachine requires a new way of thinking about working with cameras. For example, you might have already invested heavily in carefully scripted camera behaviors. However, Cinemachine can give the same results, if not better, in less time, Get up and running quickly to create and tune cameras without bothering your engineer.
Virtual Cameras
Cinemachine does not create new cameras. Instead, it directs a single Unity camera for multiple shots. You compose these shots with Virtual Cameras. Virtual Cameras move and rotate the Unity camera and control its settings.
The Virtual Cameras are separate GameObjects from the Unity Camera, and behave independently. They are not nested within each other.

The main tasks that the Virtual Camera does for you:
- Position the Unity camera in the Scene
- Aim the Unity camera at something
- Add procedural noise to the Unity camera. Noise simulates things like handdeld effects or vehicle shakes
Cinemachine encourages you to create many Virtual Cameras. The Virtual Camera is designed to consume little processing power. If your Scene is performance-senstive, deactivate all but the essential Virtual Cameras at any given moment for extreme performance.
A good rule of thumb is to use a single Virtual Camera for a single shot. Take advantage of this to create dramatic or subtle cuts or blends. Examples:
- For
- Duplicate
One Virtual Camera has control of the Unity camera at any point in time. This is the live Virtual Camera. The only exception to this rule is during a blend from one Virtual Camera to the next. During blending, both Virtual Cameras are live.
Cinemachine Brain
The Cinemachine Brain is a component in the Unity Camera itself. Cinemachine Brain monitors all active Virtual Cameras in the Scene. To specify the next live Virtual Camera, you active or deactive the desired Virtual Camera's game object. Cinemachine Brain then choose the most recently activated Virtual Camera with the same or higher priority as the live Virtual Camera. It performs a cut or blend between the previous and new Virtual Cameras
Tip: Use Cinemachine Brain to respond to dynamic game events in real time. It allows your game logic to control the camera by manipulating priorities. This is particularly useful for live gameplay, where action isn't always predictable. Use Timeline to choreograph cameras in predictable situations, like cutscenes. Timeline overrides the Cinemachine Brain priority system to give you precise, to-the-frame camera control.
Moving and aiming
Use the Body properties in a Virtual Camera to specify how to move it in the Scene. Use the Aim properties to sepcify how to rotate it.
A Virtual Camera has two targets:
- The Follow target specifies a GameObject for the Virtual Camera to move with.
- The Look At target specifies the GameObject to aim at
Cinemachine includes a variety of procedural algorithms to control moving and aiming. Each algorithm solves a specific problem, and has properties to customize the algorithm for your specific needs.
Cinemachine implements these algorithms as CinemachineComponent objects. Use the CinemachineComponent class to implement a custom moving or aiming behavior.
The Body properties offer the following procedural algorithms for moving the Virtual Camera in a Scene:
- Transposer: Move in a fixed relationship to the Follow target, with optional damping.
- Do Nothing: Do not move the Virtual Camera.
- Framing Transposer: Move in a fixed screen-space relationship to the Follow target, with optional damping.
- Orbital Transposer: Move in a variable relationship to the Follow target, optionally accepting player input.
- Tracked Dolly: Move along a predefined path.
- Hard Lock to Target: Use the same position at the Follow target.
The Aim properties offer the following procedural algorithms for rotating a Virtual Camera to face the Look At target:
- Composer: Keep the Look At target in the camera frame, with compositional constraints.
- Group Composer: Keep multiple Look At targets in the camera frame.
- Do Nothing: Do not rotate Virtual Camera.
- POV: Rotate the Virtual Camera based on the user's input.
- Same As Follow Target: Set the camera's rotation to the rotation of the Follow target.
- Hard Look At: Keep the Look At target in the center of the camera frame.
Composing a shot
The Framing Transposer, Composer, and Group Composer algorithms define areas in the camera frame for you to compose a shot:
- Dead Zone: The area of the frame that Cinemachine keeps the target in.
- Soft Zone: If the target enters this region of the frame, the camera will re-orient to put it back in the dead zone. It will do this slowly or quickly, according to the time specified in the Damping settings.
- Screen: The screen position of the center of the dead zone. 0.5 is the center of the screen.
- Damping: Simulates the lag that a real camera operator introduces while operating a heavy physical camera. Damping specifies quickly or slowly the camera reacts when the target enters the soft zone while the camera tracks the target. Use small numbers to simulate a more responsive camera, rapidly moving or aiming the camera to keep the target in the dead zone. Larger numbers simulate heavier cameras, The larger the value, the more Cinemachine allows the target to enter the soft zone.
The Game Window Guides gives an interactive, visual indication of these areas. The guides appear as tinted areas in the GameView
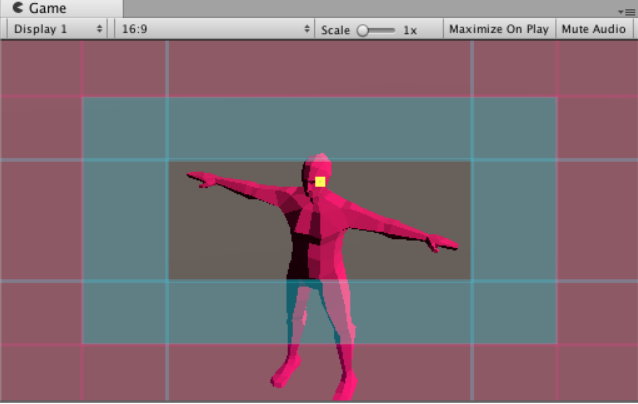
The clear area indicates the dead zone. The blue-tinted area indicates the soft zone.The position of the soft and dead zones indicates the screen position. The red-tinted area indicates the no pass area, which the target never enters. The yellow square indicates the target.
Adjust these area to get a wide range of camera behaviors. To do this, drag their edges in the Game view or edit their properties in the Inspector window. For example, user larger damping values to simulate a larger, heavier camera, or enlarge the soft zone and dead zone to create an area in the middle of the camera frame that is immune to target motion. Use this feature for things like animation cycles, where you don't want the camera to track the target if it moves just a little.
Using noise to simulate camera shake
Real-world physical cameras are often heavy and cumbersome. They are hand-held by the camera operator or mounted on unstable objects like moving vehicles. Use Noise properties to simulate these real-world qualities for cinematic effect. For example, you could add a camera shake when following a running character to immerse the player in the action.
At each frame update, Cinemachine adds noise separately from the movement of the camera to follow a target. Noise does not influence the camera's position in future frames. This separation ensures that properties like damping behave as expected.
Getting started
Installing Cinemachine
Upgrading from the Cinemachine Asset Package
Learning more about Cinemachine
Setting up Virtual Cameras
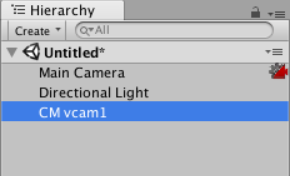
In your project, organize your Scene Hierarchy to have a single Unity camera with a CinemachineBrain component and many Virtual Cameras
To add a Virtual Camera to a Scene:
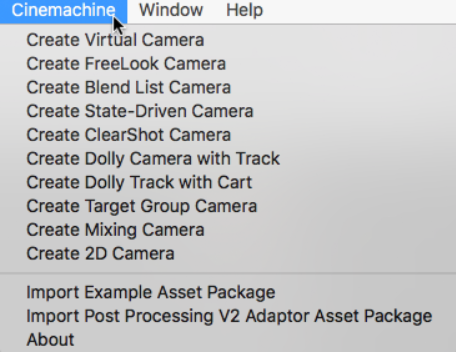
- In the Unity menu, choose Cinemachine -> Create Virtual Camera. Unity adds a new GameObject with a Cinemachine Virtual Camera component. If necessary, Unity also adds a Cinemachine Brain component to the Unity camera GameObject for you.
- Use the Follow property to specify a GameObject to follow. The Virtual Camera automatically positions the Unity camera relative to this GameObject at all times, even as you move it in the Scene.
- Use the Look At property to specify the GameObject that the Virtual Camera should aim at. The Virtual Camera automatically rotates the Unity camera to face this GameObject at all times, even as you move it in the Scene.
- Customize the Virtual Camera as needed. Choose the algorithm for following and looking at, and adjust settings such as the follow offset, the follow damping, the screen composition, and the damping used when re-aiming the camera.
Saving in Play Mode
Check Save During Play on any Virtual Camera in the Inspector to enable this feature. This is a global property, not per-camera, so you only need to check or uncheck it once.
Cinemachine components have the special attribute [SaveDuringPlay] to enable this functionality. Feel free to use it on classes within your own custom scripts too if you need it. To exclude a field in a class with the [SaveDuringPlay] attribute, add the [NoSaveDuringPlay] attribute to the field.
Setting Virtual Camera properties
The Cinemachine Virtual Camera is a component that you add to an empty GameObject. It represents a Virtual Camera in the Unity Scene.
Use the Aim, Body, and Noise properties to specify how the Virtual Camera animates position, rotation, and other properties. The Virtual Camera applies these settings to the Unity Camera when Cinemachine Brain or Timeline
At any time,each Virtual Camera may be in one of these states:
- Live: The Virtual Camera actively controls a Unity camera that has a Cinemachine Brain. When a Cinemachine Brain blends from one Virtual Camera to the next, both Virtual Cameras are live.When the blend is complete, there is only one live Virtual Camera
- Standby: The Virtual Camera doesn't control the Unity camera, However, it still follows and aims at its targets, and updates at every frame. A Virtual Camera in this state is actived and has a priority that is the same as or lower than the live Virtual Camera
- Disabled: The Virtual Camera doesn't control the Unity camera and doesn't actively follow or aim it's target.A Virtual Camera in this state doesn't consume processing power. To disable a Virtual Camera,deactive its game object.The Virtual Camera is present but disabled in the Scene However, even though the game object is deactived, the virtual camera can still control the Unity camera if the virtual camera is participating in a blend, or if it is invoked by Timeline
Properties
| Property: | Function: | |
|---|---|---|
| Solo | Toggles whether or not the Virtual Camera is temporarily live. Use this property to get immediate visual feedback in the Game view to adjust the Virtual Camera. | |
| Game Window Guides | Toggles the visibility of compositional guides in the Game view. These guides are available when Look At specifies a GameObject and the Aim section uses Composer or Group Composer, or when Follow specifies a target and the Body section uses Framing Composer. This property applies to all Virtual Cameras. | |
| Save During Play | Check to apply the changes while in Play mode. Use this feature to fine-tune a Virtual Camera without having to remember which properties to copy and paste. This property applies to all Virtual Cameras. | |
| Priority | The importance of this Virtual Camera for choosing the next shot. A higher value indicates a higher priority. Cinemachine Brain chooses the next live Virtual Camera from all Virtual Cameras that are activated and have the same or higher priority as the current live Virtual Camera. This property has no effect when using a Virtual Camera with Timeline. | |
| Follow | The target GameObject that the Virtual Camera moves with. The Body properties use this target to update the position of the Unity camera. Keep this property empty to make the Unity camera use the position of the Virtual Camera’ transform. For example, you might choose to animate the Virtual Camera in Timeline. | |
| Look At | The target GameObject to aim the Unity camera at. The Aim properties use this target to update the rotation of the Unity camera. Keep this property empty to make the Unity camera use the orientation of the Virtual Camera. | |
| Position Blending | Style for blending positions to and from this Virtual Camera. | |
| Linear | Standard linear position blend. | |
| Spherical | Spherical blend about the Look At position, if there is a Look At target. | |
| Cylindrical | Cylindrical blend about the Look At position, if there is a Look At target. Vertical coordinate is linearly interpolated. | |
| Lens | These properties mirror their counterparts in the properties for the Unity camera. | |
| Field Of View | The camera view in vertical degrees. For example, to specify the equivalent of a 50mm lens on a Super 35 sensor, enter a Field of View of 19.6 degrees. This property is available when the Unity camera with the Cinemachine Brain component uses a Projection of Perspective. | |
| Presets | A drop-down menu of settings for commonly-used lenses. Choose Edit Presets to add or edit the asset that contains a default list of lenses. | |
| Orthographic Size | When using an orthographic camera, defines the half-height of the camera view, in world coordinates. Available when the Unity camera with the Cinemachine Brain component uses a Projection of Orthographic. | |
| Near Clip Plane | The closest point relative to the camera where drawing occurs. | |
| Far Clip Plane | The furthest point relative to the camera where drawing occurs. | |
| Dutch | Dutch angle. Tilts the Unity camera on the z-axis, in degrees. This property is unique to the Virtual Camera; there is no counterpart property in the Unity camera. | |
| Extensions | Components that add extra behaviors to the Virtual Camera. | |
| Add Extension | Choose a new extension to add to the Virtual Camera. |
Body properties
Use the Body properties to specify the algorithm that moves the Virtual Camera in the Scene
- Transposer:moves in a fixed relationship to the Follow target
- Do Nothing:does not move the Virtual Camera
- Framing Transposer:moves in a fixed screen-space relationship to the Follow target
- Orbital Transposer:moves in a variable relationship to the Follow target, optionally accepting player input
- Tracked Dolly:moves along a predefined path
- Hard Lock to Target:uses the same position at the Follow target
Transposer
This Virtual Camera Body algorithm moves the Virtual Camera in a fixed offset to the Follow target. It also applies damping.
Properties:
| Property: | Function: | |
|---|---|---|
| Binding Mode | The coordinate space to use when interpreting the offset from the target, and the damping. For example, for a "Door Cam or “Hood Cam" in a car racing game, use Local Space Locked To Target. | |
| Lock To Target On Assign | Make the Virtual Camera use the Follow target’s local frame at the moment that the Virtual Camera is activated or when the target is assigned. This offset remains constant in world space. Also, the camera does not rotate along with the target. | |
| Lock To Target With World Up | Make the Virtual Camera use the Follow target’s local frame with tilt and roll set to 0. This binding mode ignores all target rotations except yaw. | |
| Lock To Target No Roll | Make the Virtual Camera use the Follow target’s local frame, with roll set to 0. | |
| Lock To Target | Make the Virtual Camera use the Follow target’s local frame. As the target rotates, the camera rotates around it to maintain the offset. | |
| World Space | The offset in interpreted in world space relative to the Follow target's origin. The camera will not change position when the target rotates. | |
| Simple Follow With World Up | Interpret the offset and damping values in camera-local space. This mode emulates what a human camera operator would do when instructed to follow a target. | |
| Follow Offset | The distance to maintain the Virtual Camera relative to the Follow target. Set X, Y, and Z to 0 to place the camera at the centre of the target. The default is 0, 0, -10, respectively, which places the camera behind the target. | |
| X Damping | How responsively the camera tries to maintain the offset in the x-axis. Small numbers make the camera more responsive. Larger numbers make the camera respond more slowly. | |
| Y Damping | How responsively the camera tries to maintain the offset in the y-axis. Small numbers make the camera more responsive. Larger numbers make the camera respond more slowly. | |
| Z Damping | How responsively the camera tries to maintain the offset in the z-axis. Small numbers make the camera more responsive. Larger numbers make the camera respond more slowly. | |
| Pitch Damping | How responsively the camera tracks the target rotation’s x angle. Small numbers make the camera more responsive. Larger numbers make the camera respond more slowly. | |
| Yaw Damping | How responsively the camera tracks the target rotation’s y angle. Small numbers make the camera more responsive. Larger numbers make the camera respond more slowly. | |
| Roll Damping | How responsively the camera tracks the target rotation’s z angle. Small numbers make the camera more responsive. Larger numbers make the camera respond more slowly. |
Do Nothing
This Virtual Camera Body algorithm does not move the Virtual Camera; it does not modify its position. Choose this algorithm for static or for animating the camera position directly with your custom scripts.
Framing Transposer
This Virtual Camera Body algorithm moves the camera in a fixed screen-space relationship to the Follow target. You can specify offset, damping, and composition rules. Framing Transposer only changes the camera's position in space. It does not re-orient or otherwise aim the camera.
Framing Transposer is designed for 2D and orthographic cameras. But it works equally well with perspective cameras and 3D environments.
This algorithm first moves the camera along the camera Z axis until the Follow target is at the desired distance from the camera's X-Y plane.It then moves the camera n its X-Y plane until the Follow target is at the desired point on the camera's screen
To use Framing Transposer, the Look At proprety must be empty
If the Follow target is a Target Group.then additional properties are available to frame the entire group
Properties
| Property: | Function: | |
|---|---|---|
| Lookahead Time | Adjusts the offset of the Virtual Camera from the Follow target based on the motion of the target. Cinemachine estimates the point where the target will be this many seconds into the future. This feature is sensitive to noisy animation and can amplify the noise, resulting in undesirable camera jitter. If the camera jitters unacceptably when the target is in motion, turn down this property, or animate the target more smoothly. | |
| Lookahead Smoothing | The smoothness of the lookahead algorithm. Larger values smooth out jittery predictions and increase prediction lag. | |
| Lookahead Ignore Y | If checked, ignore movement along the Y axis for lookahead calculations. | |
| X Damping | How responsively the camera tries to maintain the offset in the x-axis. Small numbers make the camera more responsive. Larger numbers make the camera respond more slowly. Using different settings per axis can yield a wide range of camera behaviors. | |
| Y Damping | How responsively the camera tries to maintain the offset in the y-axis. Small numbers make the camera more responsive. Larger numbers make the camera respond more slowly. | |
| Z Damping | How responsively the camera tries to maintain the offset in the z-axis. Small numbers make the camera more responsive. Larger numbers make the camera respond more slowly. | |
| Screen X | Horizontal screen position for target. The camera moves to position the tracked object here. | |
| Screen Y | Vertical screen position for target, The camera moves to position the tracked object here. | |
| Camera Distance | The distance to maintain along the camera axis from the Follow target. | |
| Dead Zone Width | Do not move the camera horizontally when the target is within this range of the position. | |
| Dead Zone Height | Do not move the camera vertically if the target is within this range of the position. | |
| Dead Zone Depth | Do not move the camera along its z-axis if the Follow target is within this distance of the specified camera distance. | |
| Unlimited Soft Zone | If checked, then the soft zone is unlimited in size. | |
| Soft Zone Width | When the target is in this range, move the camera horizontally to frame the target in the dead zone. The Damping properties affect the rate of the camera movement. | |
| Soft Zone Height | When the target is in this range, move the camera vertically to frame the target in the dead zone. The Damping properties affect the rate of the camera movement. | |
| Bias X | Moves the target position horizontally away from the center of the soft zone. | |
| Bias Y | Moves the target position vertically away from the center of the soft zone. | |
| Group Framing Mode | Available when Follow specifies a Target Group. Specifies the screen dimensions to consider when framing. | |
| Horizontal | Consider only the horizontal dimension. Ignore vertical framing. | |
| Vertical | Consider only the vertical dimension. Ignore horizontal framing. | |
| Horizontal And Vertical | Use the larger of the horizontal and vertical dimensions to get the best fit. | |
| None | Don’t do any framing adjustment. | |
| Adjustment Mode | How to adjust the camera to get the desired framing. You can zoom, dolly in or out, or do both. Available when Follow specifies a Target Group. | |
| Zoom Only | Don’t move the camera, only adjust the FOV. | |
| Dolly Only | Move the camera, don’t change the FOV. | |
| Dolly Then Zoom | Move the camera as much as permitted by the ranges, then adjust the FOV if necessary to make the shot. | |
| Group Framing Size | The bounding box that the targets should occupy. Use 1 to fill the whole screen, 0.5 to fill half the screen, and so on. Available when Follow specifies a Target Group. | |
| Max Dolly In | The maximum distance toward the target to move the camera. Available when Follow specifies a Target Group. | |
| Max Dolly Out | The maximum distance away from the target to move the camera. Available when Follow specifies a Target Group. | |
| Minimum Distance | Set this to limit how close to the target the camera can get. Available when Follow specifies a Target Group. | |
| Maximum Distance | Set this to limit how far from the target the camera can get. Available when Follow specifies a Target Group. | |
| Minimum FOV | If adjusting FOV, do not set the FOV lower than this. Available when Follow specifies a Target Group. | |
| Maximum FOV | If adjusting FOV, do not set the FOV higher than this. Available when Follow specifies a Target Group. | |
| Minimum Ortho Size | If adjusting Orthographic Size, do not set it lower than this. Available when Follow specifies a Target Group. | |
| Maximum Ortho Size | If adjusting Orthographic Size, do not set it higher than this. Available when Follow specifies a Target Group. |
Orbital Transposer
This Virtual Camera Body algorithm moves the Unity camera in a variable relationship to the Virtual Camera's Follow target. It optionally accepts player input,which allows the player to dynamically control the position of the camera relative to the target
The Orbital Transposer introduces the concept of heading, which is the direction in which the target is moving or facing. Orbital Transposer attempts to position the camera so that it points in the same direction as the heading direction. By default, this position is directly behind the target. Control this relationship by adjusting the Heading Bias property.
If you attach an input controller to the Orbital Transposer, then the player can also control the camera. This allows the player to move the camera to any spot on an orbit around the target. Configure the Orbital Transposer to take its input from any axis that you set up in the Input Manager. Or control the value directly using a custom input system
Orbital Transposer __optionally automatically re-centers the camera. When __Recenter To Target Heading is checked,Orbital Transposer automatically moves the camera back to the target heading. You can specify the length of time to wait after it has detected no user input and the speed of the rencentering
Properties:
| Property: | Function: | |
|---|---|---|
| Binding Mode | The coordinate space to use when interpreting the offset of the Virtual Camera from the Follow target. | |
| Lock To Target On Assign | The target’s local frame at the moment when the Virtual Camera was activated, or when the target was assigned. | |
| Lock To Target With World Up | The target’s local frame, with the tilt and roll reset to zero. | |
| Lock To Target No Roll | The target’s local frame, with the roll reset to zero. | |
| Lock To Target | The target’s local frame. | |
| World Space | World space offset. | |
| Simple Follow With World Up | Relative to the target, using camera-local axes. | |
| Follow Offset | The position offset to attempt to maintain from the Follow target. | |
| X Damping | How responsively the camera tries to maintain the offset in the x-axis. Small numbers make the camera more responsive. Larger numbers make the camera respond more slowly. Using different settings per axis can yield a wide range of camera behaviors. Not available when Binding Mode is Simple Follow With World Up. | |
| Y Damping | How responsively the camera tries to maintain the offset in the y-axis. Small numbers make the camera more responsive. Larger numbers make the camera respond more slowly. | |
| Z Damping | How responsively the camera tries to maintain the offset in the z-axis. Small numbers make the camera more responsive. Larger numbers make the camera respond more slowly. | |
| Yaw Damping | How responsively the camera tries to track the target rotation’s y angle. Small numbers make the camera more responsive. Larger numbers make the camera respond more slowly. Available when Binding Mode is Lock to Target With World Up, Lock to Target No Roll, or Lock to Target. | |
| Pitch Damping | How responsively the camera tries to track the target rotation’s x angle. Small numbers make the camera more responsive. Larger numbers make the camera respond more slowly. Available when Binding Mode is Lock to Target No Roll or Lock to Target. | |
| Roll Damping | How responsively the camera tries to track the target rotation’s z angle. Small numbers make the camera more responsive. Larger numbers make the camera respond more slowly. Available when Binding Mode is Lock to Target. | |
| Heading | Specifies how to calculate the heading of the Follow target. | |
| Definition | Choose Position Delta to calculate heading based on the difference in the position of the target from the last update and the current frame. Choose Velocity to use the velocity of the Rigidbody of the target. If the target has no Rigidbody component, reverts to Position Delta. Choose Target Forward to use the target's local Forward axis as the heading. Choose World Forward to use a constant world-space Forward as heading. | |
| Velocity Filter Strength | Controls the smoothing of the velocity when using Position Delta or Velocity in Definition. | |
| Bias | Angular offset in the orbit to place the camera, relative to the heading. Measured in degrees. An axis value of 0 will put the camera here. | |
| Recenter To Target Heading | Controls automatic recentering when the player gives no input. | |
| Enabled | Check to enable automatic recentering. | |
| Wait Time | If no user input has been detected on the axis, the camera waits this long in seconds before recentering. | |
| Recentering Time | Maximum angular speed of recentering. Accelerates into and decelerates out of this. | |
| X Axis | Heading Control. The settings here control the behaviour of the camera in response to the player’s input. | |
| Value | The current value of the axis, in degrees. | |
| Min Value | The minimum value for the axis. | |
| Max Value | The maximum value for the axis. | |
| Wrap | If checked, then the axis wraps around at the Min and Max values, forming a loop. | |
| Max Speed | The maximum speed of this axis in units/second. | |
| Accel Time | The amount of time in seconds to accelerate to MaxSpeed with the supplied axis at its maximum value. | |
| Decel Time | The amount of time in seconds o decelerate the axis to zero if the supplied axis is in a neutral position. | |
| Input Axis Name | The name of this axis as specified in the Unity Input manager. Set to an empty string to disable the automatic updating of this axis. | |
| Input Axis Value | The value of the input axis. A value of 0 means no input. Drive this directly from a custom input system, or set the Input Axis Name to drive the value by the Unity Input Manager. | |
| Invert | Check to invert the raw value of the input axis before it is used. |
Tracked Dolly
This Virtual Camera Body algorithm restricts the Virtual Camera to move along a predefined path. Use the Path Position property to specify where to put the Virtual Camera on the Path
Use Auto-Dolly mode to move the Virtual Camera to a position on the path that is closet to the Follow target. When enabled, Auto-Dolly automatically animates the position of the Virtual Camera to the position on the path that's closet to the target.
Properties:
| Property: | Function: | |
|---|---|---|
| Path | The path that the camera moves along. This property must refer to a Cinemachine Path or Cinemachine Smooth Path. | |
| Path Position | The position along the path to place the camera. Animate this property directly or enable Auto-Dolly. The value is in the units specified by Position Units. | |
| Position Units | The unit of measure for Path Position. | |
| Path Units | Use waypoints along the path. The value 0 represents the first waypoint on the path, 1 is the second waypoint, and so on. | |
| Distance | Use distance along the path. The path is sampled according to the Resolution property of the path. Cinemachine creates a distance lookup table, which it stores in an internal cache. | |
| Normalized | Use the beginning and end of the path. The value 0 represents the beginning of the path, 1 is the end of the path. | |
| Path Offset | The position of the camera relative to the path. X is perpendicular to the path, Y is up, and Z is parallel to the path. Use this property to offset the camera from the path itself. | |
| X Damping | How responsively the camera tries to maintain its position in a direction perpendicular to the path. Small numbers make the camera more responsive. Larger numbers make the camera respond more slowly. Using different settings per axis can yield a wide range of camera behaviors. | |
| Y Damping | How responsively the camera tries to maintain its position in the path-local up direction. Small numbers make the camera more responsive. Larger numbers make the camera respond more slowly. | |
| Z Damping | How responsively the camera tries to maintain its position in a direction parallel to the path. Small numbers make the camera more responsive. Larger numbers make the camera respond more slowly. | |
| Camera Up | How to set the up vector for the Virtual Camera. This affects the screen composition because the camera Aim algorithms try to respect the up direction. | |
| Default | Do not modify the up direction of the Virtual Camera. Instead, use the World Up Override property in Cinemachine Brain. | |
| Path | Use the path’s up vector at the current point. | |
| Path No Roll | Use the path’s up vector at the current point, but with the roll set to zero. | |
| Follow Target | Use the up vector from the Follow target’s transform. | |
| Follow Target No Roll | Use the up vector from the Follow target’s transform, but with the roll zeroed out. | |
| Pitch Damping | How responsively the camera tracks the target rotation’s x angle. Small numbers make the camera more responsive. Larger numbers make the camera respond more slowly. | |
| Yaw Damping | How responsively the camera tracks the target rotation’s y angle. Small numbers make the camera more responsive. Larger numbers make the camera respond more slowly. | |
| Roll Damping | How responsively the camera tracks the target rotation’s z angle. Small numbers make the camera more responsive. Larger numbers make the camera respond more slowly. | |
| Auto Dolly | Controls how automatic dollying occurs. A Follow target is necessary to use this feature. | |
| Enabled | Check to enable the automatic dolly. Note: this can have some performance impact, depending on the search resolution. | |
| Position Offset | Offset, in position units, from the closest point on the path to the follow target. | |
| Search Radius | The number of segments on either side of the current segment. Use 0 for the entire path. Use a lower number when the path’s shape relative to the target position causes the closest point on the path to become unstable. | |
| Search Resolution | Cinemachine searches a segment by dividing it into many straight pieces. The higher the number, the more accurate the result. However, performance is proportionally slower for higher numbers. |
Hard Lock to Target
This Virtual Camera Body algorithm uses the same position at the Follow target. In other words, the target acts as a mounting point for the Virtual Camera
Aim properties
Use the Aim properties to specify how to rotate the Virtual Camera.
- Composer: Keep the Look At target in the camera frame.
- Group Composer: Keep multiple Look At targets in the camera frame.
- Do Nothing: Do not procedurally rotate the Virutal Camera
- POV: Rotate the Virtual Camera based on the user's input
- Same As Follow Target: Set the camera's rotation to the rotation of the Follow target.
- Hard Look At: Keep the Look At target in the center of the camera frame.
Composer
This Virtual Camera Aim algorithm rotates the camera to face the Look At target. It also applies offsets, damping, and composition rules. Examples of targets for aiming: the upper spine or head bone of a character, vehicles, or dummy objects which are controlled or animated programmatically.
Properties:
| Property: | Function: |
|---|---|
| Tracked Object Offset | Offset from the center of the Look At target, in target-local space. Fine-tune the tracking target position when the desired area is not the tracked object’s center. |
| Lookahead Time | Adjust the offset based on the motion of the Look At target. The algorithm estimates the point that the target will be this many seconds into the future. This feature is sensitive to noisy animation. It can amplify the noise, resulting in undesirable camera jitter. If the camera jitters unacceptably when the target is in motion, turn down this property or animate the target more smoothly. |
| Lookahead Smoothing | Controls the smoothness of the lookahead algorithm. Larger values smooth out jittery predictions and increase prediction lag. |
| Lookahead Ignore Y | Toggle to ignore movement along the Y axis for lookahead calculations. |
| Horizontal Damping | How responsively the camera follows the target in the screen-horizontal direction. Use small numbers for more responsive, rapid rotation of the camera to keep the target in the dead zone. Use larger numbers for a more heavy, slowly-responding camera. |
| Vertical Damping | How responsively the camera follows the target in the screen-vertical direction. Use different vertical and horizontal settings to give a wide range of camera behaviors. |
| Screen X | Horizontal screen position for the center of the dead zone. The camera rotates so that the target appears here. |
| Screen Y | Vertical screen position for target, The camera rotates so that the target appears here. |
| Dead Zone Width | The width of the screen region within which the camera ignores any movement of the target. If the target is positioned anywhere within this region, the Virtual Camera does not update its rotation. This is useful for ignoring minor target movement. |
| Dead Zone Height | The height of the screen region within which the camera ignores any movement of the target. If the target is positioned anywhere within this region, the Virtual Camera does not update its rotation. This is useful for ignoring minor target movement. |
| Soft Zone Width | The width of the soft zone. If the target appears in this region of the screen, the camera will rotate to push it back out to the dead zone, in the time specified by the Horizontal Damping setting. |
| Soft Zone Height | The height of the soft zone. If the target appears in this region of the screen, the camera will rotate to push it back out to the dead zone, in the time specified by the Vertical Damping setting. |
| Bias X | Positions the soft zone horizontally, relative to the dead zone. |
| Bias Y | Positions the soft zone vertically, relative to the dead zone. |
Group Composer
This Virtual Camera Aim algorithm aims the camera at multiple GameObjects. Otherwise, it behaves identically to the Composer and has the same settings. If the Look At target is a Cinemachine Target Group, the algorithm adjusts the FOV and the camera distance to ensure that the group of targets is framed properly.
Do Nothing
This Virtual Camera Aim algorithm does not aim the Virtual Camera. Choose this algorithm for static shots or for animating the rotation directly with custom scripts.
POV
This Virtual Camera Aim algorithm aims the camera in response to the user's input.
Properties:
| Property: | Function: | |
|---|---|---|
| Vertical Axis | Controls the vertical orientation of the Virtual Camera’s aim. | |
| Value | The current value of the axis to aim the camera at, in degrees. Accepted values are -90 to 90. | |
| Value Range | The minimum and maximum values for the vertrial axis of the Virtual Camera. | |
| Wrap | If checked, the axis wraps around the Value Range values, forming a loop. | |
| Max Speed | The maximum speed of this axis in degrees/second. | |
| Accel Time | The amount of time in seconds it takes to accelerate to Max Speed with the supplied axis at its maximum value. | |
| Decel Time | The amount of time in seconds it takes to decelerate the axis to zero if the supplied axis is in a neutral position. | |
| Input Axis Name | The name of this axis as specified in Unity Input Manager. To disable the automatic updating of this axis, set this property to an empty string. | |
| Input Axis Value | The value of the input axis. A value of 0 means no input. You can drive this directly from a custom input system, or you can set the Input Axis Name and have the value driven by the Unity Input Manager. | |
| Invert | Check to invert the raw value of the input axis before it is used. | |
| Vertical Recentering | Controls automatic vertical recentering when the player gives no input. | |
| Enabled | Check to enable automatic vertical recentering. | |
| Wait Time | If no user input has been detected on the vertical axis, the camera waits this long in seconds before recentering. | |
| Recentering Time | Maximum angular speed of recentering. Accelerates into and decelerates out of this. | |
| Horizontal Axis | Controls the horizontal orientation. | |
| Value | The current value of the axis, in degrees. Accepted values are -180 to 180. | |
| Value Range | The minimum and maximum values for the axis. | |
| Wrap | If checked, the axis wraps around the Value Range values, forming a loop. | |
| Max Speed | The maximum speed of this axis in degrees per second. | |
| Accel Time | The amount of time in seconds it takes to accelerate to Max Speed with the supplied Axis at its maximum value. | |
| Decel Time | The amount of time in seconds it takes to decelerate the axis to zero if the supplied axis is in a neutral position. | |
| Input Axis Name | The name of this axis as specified in the Unity Input Manager. Set this property to an empty string to disable automatic update of this axis. | |
| Input Axis Value | The value of the input axis. A value of 0 means no input. You can drive this directly from a custom input system, or you can set the Input Axis Name and have the value driven by the Unity Input Manager. | |
| Invert | Check to invert the raw value of the input axis before it is used. | |
| Horizontal Recentering | Controls automatic vertical recentering when the player gives no input. | |
| Enabled | Check to enable automatic vertical recentering. | |
| Wait Time | If no user input has been detected on the vertical axis, the camera waits this long in seconds before recentering. | |
| Recentering Time | Maximum angular speed of recentering. Accelerates into and decelerates out of this. |
Same As Follow Target
This Virtual Camera Aim algorithm matches the orientation of the Follow target. When used with the Hard Lock to Target algorithm in the Body properties,this algorithm makes the Virtual Camera match the path and rotation of a control GameObject
Hard Look At
This Virtual Camera Aim algorithm rotates the Virtual Camera to keep the Look At target in the center of the camera frame
Noise properties
Use Noise properties in a Virtual Camera to simulate camera shake. Cinemachine includes a Basic Multi Channel Perlin component, which adds Perlin noise to the movement of the Virtual Camera. Perlin noise is a technique to compute random movement with a natural behavior.
Properties
| Property: | Function: |
|---|---|
| Noise Profile | The noise profile asset to use. |
| Amplitude Gain | Gain to apply to the amplitudes defined in the noise profile. Use 1 to use the amplitudes defined in the noise profile. Setting this to 0 mutes the noise. Tip: Animate this property to ramp the noise effect up and down. |
| Frequency Gain | Factor to apply to the frequencies defined in the noise profile. Use 1 to use the frequencies defined in the noise profile. Use larger values to shake the camera more rapidly. Tip: Animate this property to ramp the noise effect up and down. |
Extensions
Extensions are components that add more sophisticated behaviors to a Virtual Camera. For example, the Collider extension moves a camera out of the way of GameObjects that obstruct the camera's view of its target
Working with noise profiles
A noise profile is an asset that defines a procedural curve for camera noise. The Basic Multi Channel Perlin component applies a noise profile to the movement of the camera. Cinemachine applies noise movement after computing the position of the camera.This way, camera noise does not affect the computation of camera movement in future updates
Properties:
| Property: | Function: | |
|---|---|---|
| Preview Time | The number of seconds to display in the graphs in the Inspector. This property is for editing in the Inspector; it does not affect the content of the noise profile asset that you are editing. | |
| Preview Height | The vertical height of the graphs of the noise profile in the Inspector. This property is for editing noise profiles; it does not affect the noise profile asset. | |
| Animated | Check to show a moving representation of an example of the noise profile in the graph. This property is for editing noise profiles; it does not affect the noise profile asset. | |
| Position Noise | A graphical representation of all noise layers for all axes for camera movement. | |
| Position X, Position Y, Position Z | The layers of noise for each axis to apply to camera movement. Each axis has a graphical representation of its layers. Each layer has properties for Frequency, Amplitude, and optional Perlin noise. Click + or - to add and remove layers, respectively. | |
| Frequency | The frequency of the wave in the noise layer, in Hz. | |
| Amplitude | The amplitude (height) of the wave in the noise layer, in distance units. | |
| Non-random wave if checked | Check to remove the Perlin noise from the noise layer. Without Perlin noise, Cinemachine uses a regular sine wave. Uncheck to apply Perlin noise to the layer, randomizing both the frequency and the amplitude while remaining in the neighbourhood of the selected values. | |
| Rotation Noise | A graphical representation of all noise layers for all axes for camera rotation. | |
| Rotation X, Rotation Y, Rotation Z | The layers of noise for each axis to apply to camera rotation. Each layer has properties for Frequency, Amplitude, and optional Perlin Noise. Click + or - to add and remove layers, respectively. | |
| Frequency | The frequency of the wave in the noise layer, in Hz. | |
| Amplitude | The amplitude (height) of the wave in the noise layer, in degrees. | |
| Non-random wave if checked | Check to remove the Perlin noise from the noise layer. Without Perlin noise, Cinemachine uses a regular sine wave. Uncheck to include random Perlin noise variation, randomizing both the frequency and the amplitude while remaining in the neighbourhood of the selected values. |
Setting Cinemachine Brain properties
The Cinemachine Brain is a component in the Unity camera itself. Cinemachine Brain monitors all active Virtual Camera in the Scene. It choose the next Virtual Camera to control the Unity camera. It also controls the cut or blend from the current Virtual Camera to the next
To add a Cinemachine Brain component to a Unity camera, do one of the following:
- Add a Virtual Camera, or other Cinemachine object, to your Scene. Unity adds a Cinemachine Brain component to the Unity camera for you if there isn't one already.
- Add a Cinemachine Brain component to the Unity camera yourself.
Tip: You can also control Virtual Cameras from Timeline. Timeline overrides the decisions that Cinemachine Brain makes
Cinemachine Brain holds the following key properties:
- Blend Settings: A list that defines how to blend from one Virtual Camera to another. For example, add an item to the list for a 4 second blend from vcam1 to vcam2 then add another item for a 1 second blend from vcam2 back to vcam1. If a blend between two cameras isn't defined, Cinemachine Brain uses its default blend.
- Layer Filter: Cinemachine Brain uses only those Virtual Cameras that pass the culling mask of the Unity camera. You can set up split-screen environments by using the culling mask to filter layers.
- Event Dispatching: Cinemachine Brain fires events when it changes shot. It fires an event when a Virtual Camera goes live. It also fires an event when it cuts from one Virtual Camera to another. Use the latter event to reset temporal post effects.
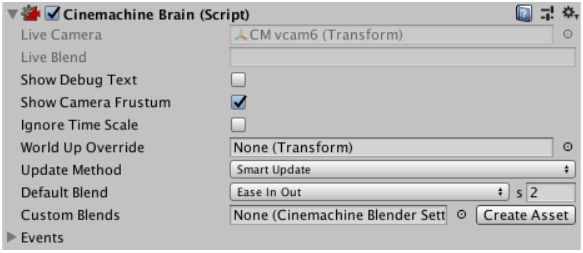
Properties:
| Property: | Function: | |
|---|---|---|
| Show Debug Text | Check to display a textual summary of the live Virtual Camera and blend in the view. | |
| Show Camera Frustum | Check to display the frustum of the camera in the Scene view. | |
| Ignore Time Scale | Check to make the Virtual Cameras respond in real time to user input and damping, even if the game is running in slow motion. | |
| World Up Override | The Y axis of the specified GameObject defines the worldspace up vector for Virtual Cameras. Use this property in top-down game environments. Set to None to use the worldspace Y axis. Setting this appropriately is important to avoid gimbal-lock in extreme up/down conditions. | |
| Update Method | When to update the position and rotation of the Virtual Cameras. | |
| Fixed Update | Synchronize Virtual Camera update with the Physics module, in FixedUpdate. | |
| Late Update | In MonoBehaviour LateUpdate. | |
| Smart Update | Update each virtual camera according to how its target is updated. This is the recommended setting. | |
| Default Blend | The blend to use when you haven’t explicitly defined a blend between two Virtual Cameras. | |
| Cut | Zero-length blend. | |
| Ease In Out | S-shaped curve, giving a gentle and smooth transition. | |
| Ease In | Linear out of the outgoing shot, and easy into the incoming. | |
| Ease Out | Easy out of the outgoing shot, and linear into the incoming. | |
| Hard In | Easy out of the outgoing, and hard into the incoming. | |
| Hard Out | Hard out of the outgoing, and easy into the incoming. | |
| Linear | Linear blend. Mechanical-looking. | |
| Custom | Custom blend curve. Draw the curve you want. | |
| Custom Blends | The asset that contains custom settings for blends between specific Virtual Cameras in your Scene. | |
| Create Asset | Create an asset containing a list of custom blends between Virtual Cameras. | |
| Camera Cut Event | This event fires when a Virtual Camera goes live and there is no blend. | |
| Camera Activated Event | This event fires when a Virtual Camera goes live. If a blend is involved, then the event fires on the first frame of the blend. |
Blending between Virtual Cameras
Use blending properties to specify how the Cinemachine Brain component performs a blend between virtual cameras
A Cinemachine blend is not a fade,wipe, or dissolve.Rather,Cinemachine Brain performs a smooth animation of the position, rotation and other settings of the Unity camera from one Virtual Camera to the next
Properties:
| Property: | Function: | |
|---|---|---|
| From | The name of the Virtual Camera to blend from. Use the name **ANY CAMERA** to blend from any Virtual Camera. This property is available only for custom blends. | |
| To | The name of the Virtual Camera to blend to. Use the name **ANY CAMERA** to blend to any Virtual Camera. This property is available only for custom blends. | |
| Style Default Blend | Shape of the blend curve. | |
| Cut | Zero-length blend. | |
| Ease In Out | S-shaped curve, giving a gentle and smooth transition. | |
| Ease In | Linear out of the outgoing Virtual Camera, and ease into the incoming Virtual Camera. | |
| Ease Out | Ease out of the outgoing Virtual Camera, and blend linearly into the incoming Virtual Camera. | |
| Hard In | Ease out of the outgoing Virtual Camera, and accelerate into the incoming Virtual Camera. | |
| Hard Out | Accelerate out of the outgoing Virtual Camera, and ease into the incoming Virtual Camera. | |
| Linear | Linear blend. mechanical-looking. | |
| Custom | Custom blend curve. Allows you to draw a custom blend curve. | |
| Time | Duration (in seconds) of the blend. |
Cinemachine and Timeline
Storyboard
Cinemachine and Postprocessing
Managing and grouping Virtual Cameras
A manager camera oversees many Virtual Cameras but acts as a single Virtual Camera from the point of view of Cinemachine Brain and Timeline
Cinemachine includes these manager cameras:
- Free Look Camera: an enhanced Orbital Transposer. It manages three horizontal orbits, arranged vertically to surround an avatar
- Mixing Camera: uses the weighted average of up to eight child Virtual Cameras
- Blend List Camera: executes a sequence of blends or cuts of its child Virtual Cameras
- Clear Shot Camera: picks the child Virtual Camera with the best view of the target
- State-Driven Camera: picks a child Virtual Camera in reaction to changes in animation state.
Because manager cameras act like normal Virtual Cameras, you can nest them. In other words, create arbitrarily complex camera rigs that combine regular Virtual Cameras and manager cameras.
Cinemachine Free Look
Cinemachine Mixing Camera
Cinemachine Blend List Camera
The Cinemachine Blend List Camera component executes a sequence of blends or cuts among its child Virtual Cameras
When the Blend List camera is activated, it executes its list of instructions, activating the first child Virtual Camera in the list, holding for a designated time, then cutting or blending to the next child, and so on.The Blend List camera holds the last Virtual Camera until Cinemachine Brain or Timeline deactivates the Blend List camera.
Tip: Use a Blend List Camera instead of Timeline for simple,automatic sequences.
Properties:
| Property: | Function: |
|---|---|
| Solo | Toggles whether or not the Blend List camera is temporarily live. Use this property to get immediate visual feedback in the Game view to adjust the Virtual Camera. |
| Game Window Guides | Toggles the visibility of compositional guides in the Game view. This property applies to all Virtual Cameras. |
| Save During Play | Check to apply the changes while in Play mode. Use this feature to fine-tune a Virtual Camera without having to remember which properties to copy and paste. This property applies to all Virtual Cameras. |
| Priority | The importance of this Blend List camera for choosing the next shot. A higher value indicates a higher priority. Cinemachine Brain chooses the next live Virtual Camera from all Virtual Cameras that are activated and have the same or higher priority as the current live Virtual Camera. This property has no effect when using a Virtual Camera with Timeline. |
| Look At | The default target GameObject that the children Virtual Camera move with. The Blend List camera uses this target when the child does not specify this target. May be empty if all of the children define targets of their own. |
| Follow | The default target GameObject to aim the Unity camera at. The Blend List camera uses this target when the child does not specify this target. May be empty if all of the children define targets of their own. |
| Show Debug Text | Check to display a textual summary of the live Virtual Camera and blend in the view. |
| Enable All Child Cameras | Check to activate all child cameras. This is useful if animating them in Timeline, but consumes extra resources. |
| Instructions | The set of instructions for enabling child cameras. |
Cinemachine Clear Shot
Cinemachine State-Driven camera
Avoiding collisions and evaluating shots
Cinemachine Collider
Cinemachine Confiner
Cinemachine Target Group
Cinemachine and 2D graphics
Cinemachine and top-down games
Using multiple Unity cameras
Cinemachine External Camera
Cinemachine Follow Zoom
Using dolly paths
Cinemachine Path
Cinemachine Smooth Path
Cinemachine Dolly Path
Cinemachine Impulse
Cinemachine Impulse
Cinemachine Impulse Sources
Cinemachine Collision Impulse Source
Cinemachiine Impulse Source
Raw Vibration Signals
Using Noise Profiles
Using Fixed Signals
Cinemachine Impulse Listener
Filtering impulses


 浙公网安备 33010602011771号