android10源码编译并刷入pixel4
编译android源码
- 这里使用的是ubuntu18.04虚拟机进行编译,虚拟机先进行换源。(下载和编译代码需要200多g的空间,需要预留)
sudo gedit /etc/apt/sources.list
执行上述命令后在文件开始加上
deb http://mirrors.aliyun.com/ubuntu/ bionic main restricted universe multiverse
deb http://mirrors.aliyun.com/ubuntu/ bionic-security main restricted universe multiverse
deb http://mirrors.aliyun.com/ubuntu/ bionic-updates main restricted universe multiverse
deb http://mirrors.aliyun.com/ubuntu/ bionic-proposed main restricted universe multiverse
deb http://mirrors.aliyun.com/ubuntu/ bionic-backports main restricted universe multiverse
deb-src http://mirrors.aliyun.com/ubuntu/ bionic main restricted universe multiverse
deb-src http://mirrors.aliyun.com/ubuntu/ bionic-security main restricted universe multiverse
deb-src http://mirrors.aliyun.com/ubuntu/ bionic-updates main restricted universe multiverse
deb-src http://mirrors.aliyun.com/ubuntu/ bionic-proposed main restricted universe multiverse
deb-src http://mirrors.aliyun.com/ubuntu/ bionic-backports main restricted universe multiverse
deb http://us.archive.ubuntu.com/ubuntu/ xenial main universe
deb-src http://us.archive.ubuntu.com/ubuntu/ xenial main universe
- 进行更新
sudo apt-get update
sudo apt-get upgrade
sudo apt-get install build-essential
- 安装编译环境
sudo apt-get install openjdk-8-jdk
sudo apt-get install openjdk-8-jre

sudo apt-get install libx11-dev:i386 libreadline6-dev:i386 libgl1-mesa-dev g++-multilib
sudo apt-get install -y git flex bison gperf build-essential libncurses5-dev:i386
sudo apt-get install tofrodos python-markdown libxml2-utils xsltproc zlib1g-dev:i386
sudo apt-get install dpkg-dev libsdl1.2-dev libesd0-dev
sudo apt-get install git-core gnupg flex bison gperf build-essential
sudo apt-get install zip curl zlib1g-dev gcc-multilib g++-multilib
sudo apt-get install libc6-dev-i386
sudo apt-get install lib32ncurses5-dev x11proto-core-dev libx11-dev
sudo apt-get install libgl1-mesa-dev libxml2-utils xsltproc unzip m4
sudo apt-get install lib32z-dev ccache
sudo apt-get install libssl-dev
- 设置git
sudo apt-get install git
git config --global user.email "test@test.com"
git config --global user.name "test"
- 因为需要编译android10的源码刷入pixel 4,先查看手机型号对应的android10的分支。这里选取的是android10.0.0_r7
https://source.android.google.cn/docs/setup/about/build-numbers?hl=zh-cn#source-code-tags-and-builds
mkdir ~/bin
PATH=~/bin:$PATH
curl https://storage.googleapis.com/git-repo-downloads/repo > ~/bin/repo
chmod a+x ~/bin/repo

export HTTP_PROXY=
export HTTPS_PROXY=
export REPO_URL='https://gerrit-googlesource.lug.ustc.edu.cn/git-repo'
repo init -u git://mirrors.ustc.edu.cn/aosp/platform/manifest -b android-10.0.0_r7
repo sync // start download
下载中途失败或中断可以执行repo sync继续下载。

- 下载对应的驱动
因为是pixel 4的android10.0.0_r7分支,找到对应版本的驱动。android10.0.0_r7对应的build id为QD1A.190821.007。
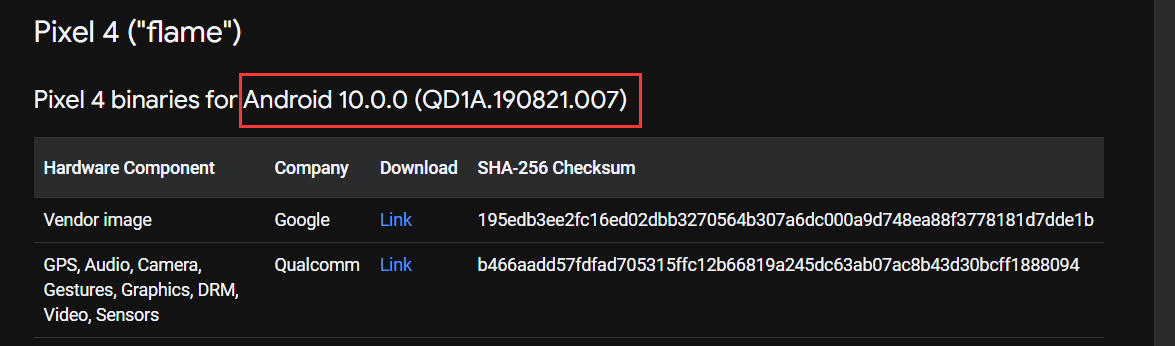
https://developers.google.cn/android/drivers#flameqd1a.190821.007
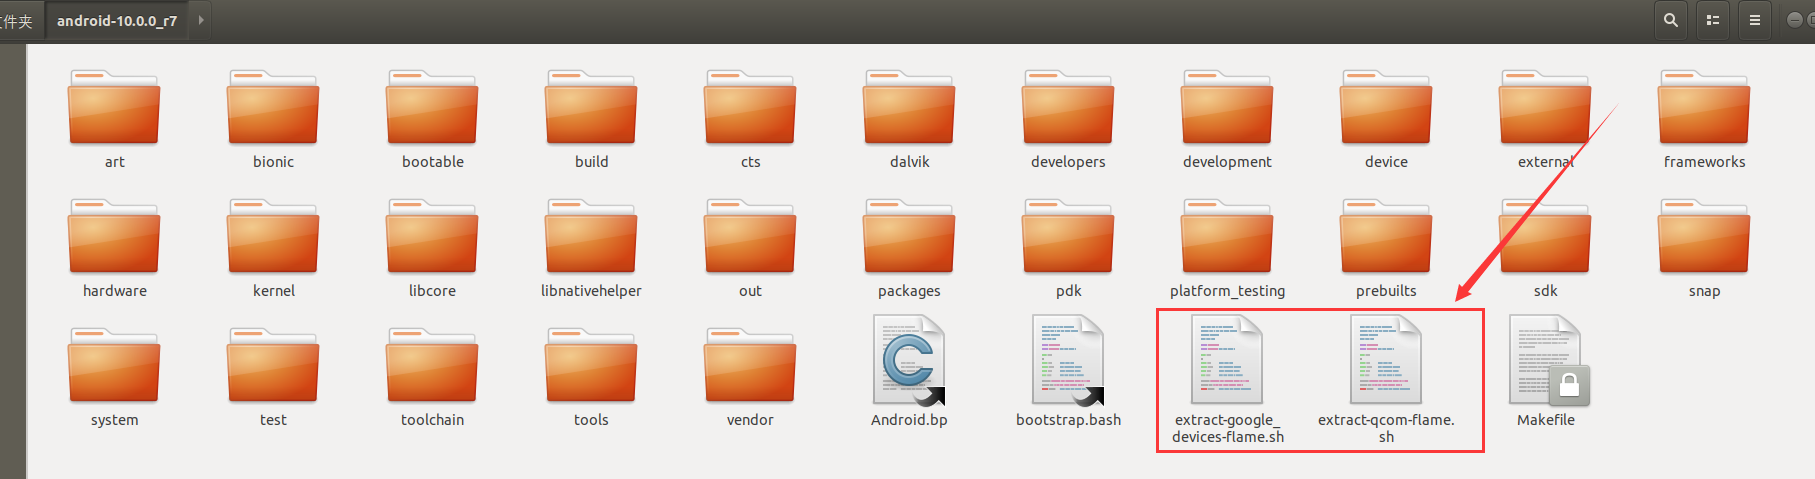
下载后解压到android源码的根目录中,然后执行解压得到的两个脚本会生成vender目录存放对应的驱动文件。
- 进行编译
编译的时候可能需要设置swap的大小。
source build/envsetup.sh
lunch
//选择 aosp_flame_userdebug
make update-api -j2
make -j2
编译成功后生成的镜像文件保存在"/out/target/product/手机型号/" 目录下。

刷入pixel
来到"/out/target/product/手机型号/" 目录下并打开终端将镜像文件都刷入pixel,需要设置ANDROID_PRODUCT_OUT环境变量为需要刷入镜像所在的目录。
#进入bootloader模式
adb reboot bootloader

#自动刷入 -w双清
fastboot flashall -w

#重启手机
fastboot reboot
不知道为什么我编译生产的镜像缺少bootloader.img和radio.img镜像,导致刷入后一直卡在开机页面。google官方的刷机包包含这两个镜像。
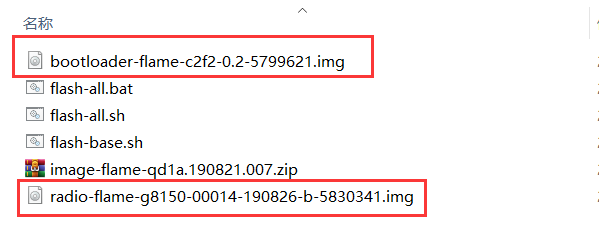
找到google官方对应版本的刷机包

https://developers.google.cn/android/images#flame
然后将编译生成的所有img镜像文件都放入官方的刷机包中,执行flash-all命令将镜像刷入pixel 4中即可
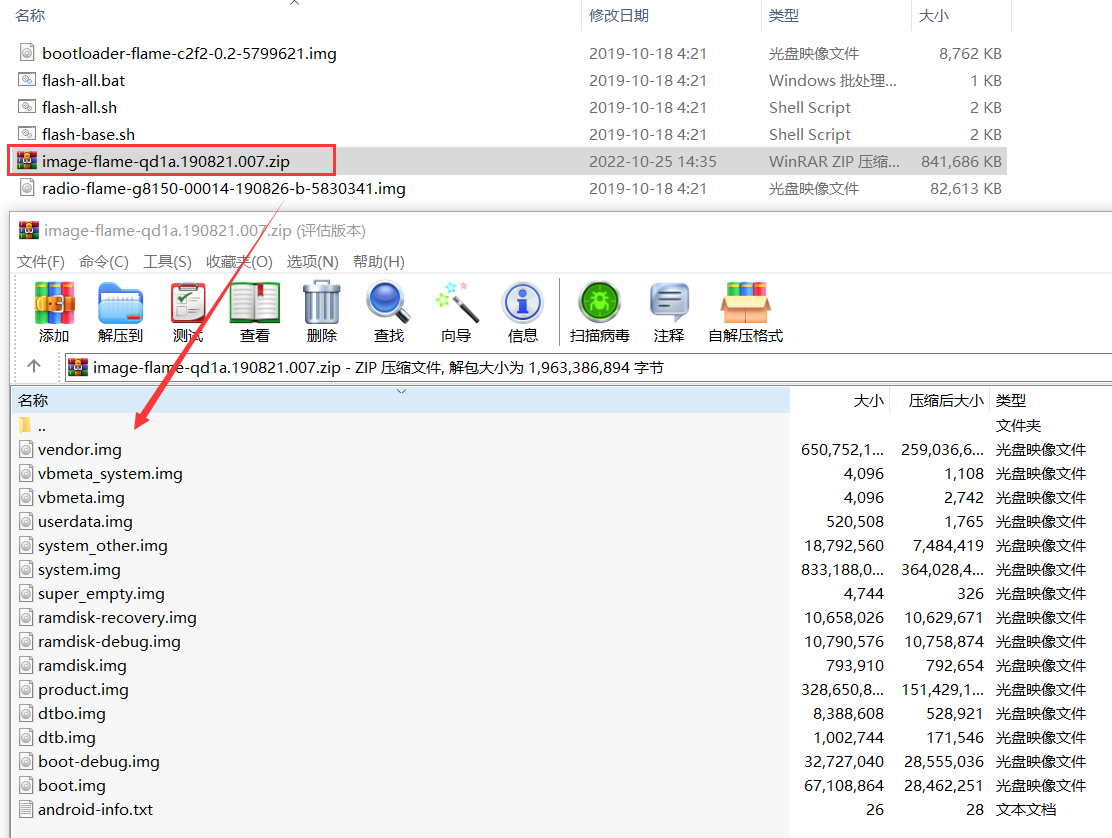
如果修改了系统代码需要重新刷回pixel的话直接将vbmeta.img,vbmeta_system.img,system.img,system_other.img,product.img刷入pixel即可。
adb reboot fastboot
fastboot flash system_b system.img
fastboot flash system_a system_other.img
fastboot flash vbmeta_b vbmeta.img
fastboot flash vbmeta_system_b vbmeta_system.img
fastboot flash product_b product.img

 浙公网安备 33010602011771号