ELK的安装
准备工作
- 首先将我们下载的Elasticsearch、Kibana压缩文件上传,我们此处是选择的压缩包安装
- 创建用户(必须创建,使用root安装会报错不能进行)
- 创建用户组
- 为用户和用户组分配文件的权限(主要是分配对解压文件所在目录的执行权限)
- 切换到新建用户下,将压缩包解压
Elasticsearch
安装
进入elasticsearch的bin目录下,执行命令./elasticsearch,启动成功
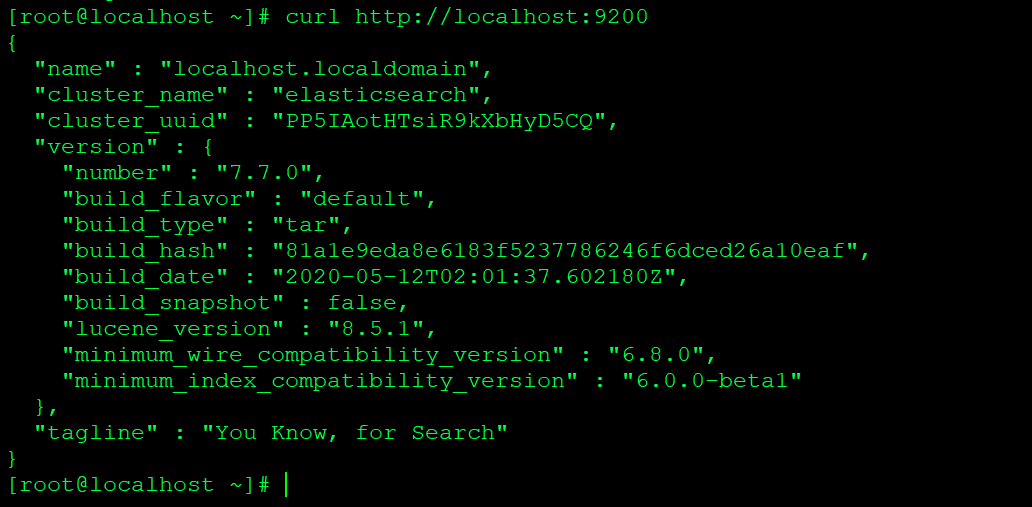
执行curl http://localhost:9200 查看是否启动成功

配置
但是这时,我们在浏览器中输入非127.0.0.1:9200进行访问,会发现我们是访问不到的,所以还需要去改一下配置文件,打开conf/elasticsearch.yml文件,修改其中的内容:
# 开启 同时配置IP为本机真实IP
network.host: 192.168.21.121

# 开启
node.name: node-1
cluster.initial_master_nodes: ["node-1"]
启动出现的错误
- max file descriptors [4096] for elasticsearch process is too low, increase to at least [65535]
解决方案:找到文件 /etc/security/limits.conf,编辑,在文件的最后追加如下配置:
# es为ELK安装的管理用户,比如我本机用户名为elk,就是elk soft nofile 65535
es soft nofile 65535

es hard nofile 65537
修改了limits.conf,不需要重启,重新登录即生效。
查看当前用户的软/硬限制
ulimit -n   # 软限制

ulimit -H -n    #硬限制
- max virtual memory areas vm.max_map_count [65530] is too low, increase to at least [262144]
解决方案:切换到root用户,编辑 /etc/sysctl.conf文件,追加以下配置:
vm.max_map_count=655360
保存后执行:sysctl -p,然后重新启动elasticsearch即可
Kibana
准备工作还是同上
配置
但是在启动之前,我们需要更改一些kibana的配置 conf/kibana.yml
server.host: "192.168.21.121"

elasticsearch.hosts: ["http://192.168.21.121:9200"]
安装
进入kibana的bin目录下,执行命令./kibana,启动
安装出现的错误
暂无
