Fabric.js的使用
最近项目有一个绘制的功能,搜了一圈发现fabric.js口碑不错,但是文档稀缺,于是东看看西搜搜的把项目的需求都给实现了,想分享一下。
篇幅有点长,但看完后可以轻松驾驭fabric。我的项目是基于VUE+webpack的。
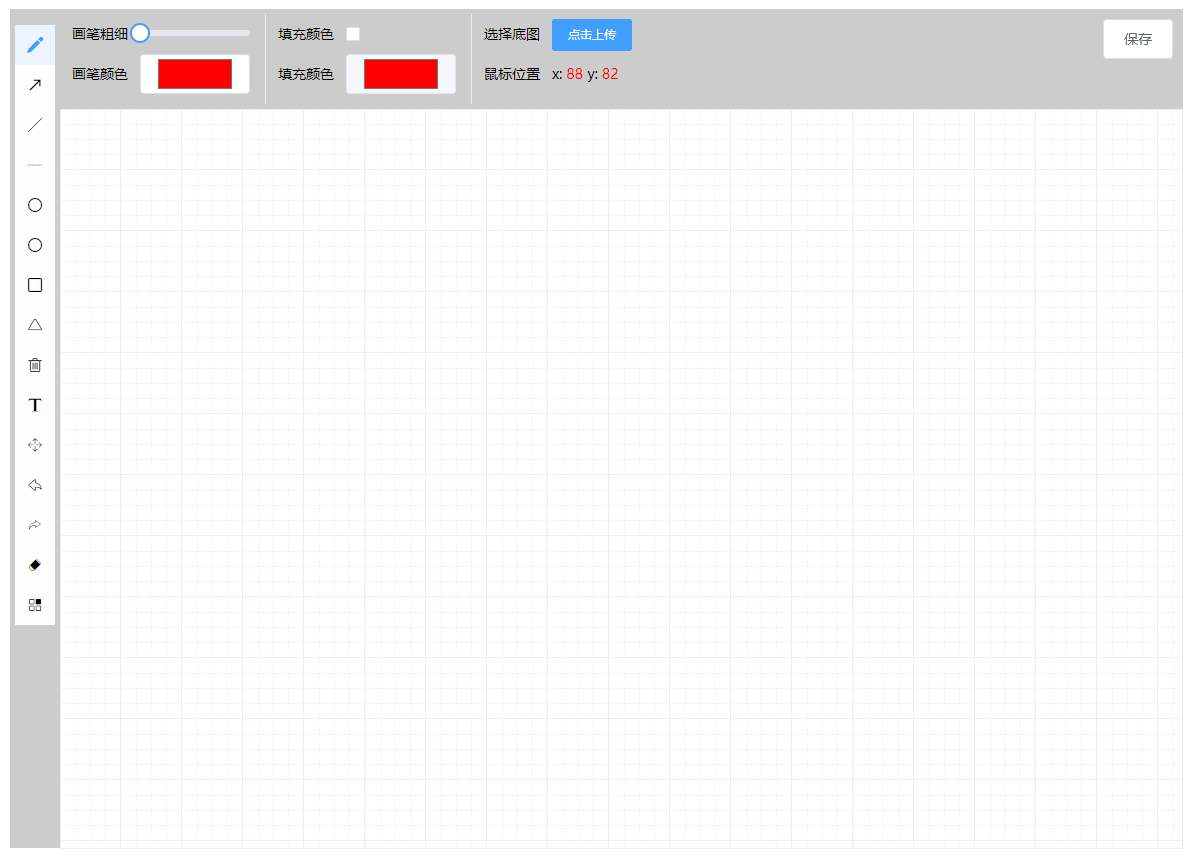
先来看一下整体效果
1.安装fabric
在node环境下安装fabric.js需要先安装 jsdom 和canvas
①安装jsdom依赖
npm install jsdom --save-dev
②安装canvas依赖
npm install canvas --save-dev
③安装fabric.js
npm install fabricjs --save-dev
安装完成后 npm run dev启动你的项目就可以,无需更改其他配置
2.使用fabric
fabric.js是基于canvas的一款强大的绘制插件,我的项目里主要包括功能如下
`铅笔 箭头 直线 虚线 圆 椭圆 矩形 三角形 输入文字 移动 清空 撤回 前进 绘制图片 上传背景图`
使用之前你需要在你使用的vue页面导入fabric
import { fabric } from 'fabric'
①初始化
你的html需要有一个canvas标签: <canvas id="canvas"></canvas>
初始化:
let _this = this  //下面得用
this.canvasObj = new fabric.Canvas('canvas', {
        isDrawingMode: true,   //设置是否可以绘制
        selectable: false,     //设置是否可以选中拖动  fabric提供的
        selection: false
})
this.canvasObj.setWidth(this.canvasWidth)     //设置画布的宽度
this.canvasObj.setHeight(this.canvasHeight)   //设置画布的高度

/* this.canvasWidth 和 this.canvasHeight 是我在 computed 里定义的 */

//绑定画板时间 fabric为我们提供了一些事件
this.canvasObj.on({
  'mouse:down': (o) => {
    //鼠标在画布上按下事件(起点)
    //mouseFrom.x 和 mouseFrom.y 是在data中定义的数据 可以打印这个o看看
    this.mouseFrom.x = o.pointer.x   //鼠标按下的X的起点
    this.mouseFrom.y = o.pointer.y   //鼠标按下的y的起点
    this.doDrawing = true            //绘制设为true
  },
  'mouse:up': (o) => {
    //鼠标抬起的事件(终点)
    //mouseTo.x 和 mouseTo.y 也是在data中定义的数据
    this.mouseTo.x = o.pointer.x
    this.mouseTo.y = o.pointer.y
    this.drawingObject = null

    this.doDrawing = false    //停止绘制
  },
  'mouse:move': (o) => {
    //鼠标在移动中的事件
    this.offsetX = o.pointer.x.toFixed(0)   //因为是小数,所以我给取整
    this.offsetY = o.pointer.y.toFixed(0)
    if(!_this.doDrawing){
      return
    }
    this.mouseTo.x = o.pointer.x
    this.mouseTo.y = o.pointer.y
    if(this.sineNum === 1){   //这个if是我的项目里有自定义图片的功能
      this.drawing()
    }else if(this.sineNum === 2){
      this.diy()
    }
  },
  'object:move': (e) => {
    e.target.opacity = 0.5  //你绘画在画布上对象,移动它们的时候,让它们的透明度变成0.5
  },
  'object:added': (e) => {
    if(!this.controlFlag){
      this.redo = []  //撤回用的
    }
    this.controlFlag = false
  },
  'object:modified': (e) => {
    e.target.opacity = 1
  }
})
初始化就这样完成了!
②点击不同形状的icon绘制不同的图形(左边那一列是写在data里的数据,然后通过v-for加载出来的)
toolsArr: [
  {
    name: 'pencil',
    icon: 'iconpen',
    label: '铅笔'
  },
]
格式就是这样的。
然后我们给每个li添加一个名叫 handleTools的事件
handleTools (tools, idx) {
      //tools是item,idx是index
      this.sineNum = 1   //把sineNum设置为1 就会去加载drawing方法
      console.log(tools)
      this.initIdx = idx   //这是给li绑定的高亮的样式
      this.$store.commit('TOOGLE_TOOLS', tools.name)  //把我们点击的图形保存到vuex里
      if (tools.name === 'delete') {   //清空单独处理
        this.resetObj()                //重置的方法
        this.canvasObj.clear()         //清空画布
        this.canvasObj.renderAll()     //重新渲染
      } else if (tools.name === 'text') {   //文字也单独处理 因为在选择到文字的时候 有一个改变文字大小的range
        this.canvasObj.isDrawingMode = true
        this.drawing()
        this.choseItem = true      //文字大小range是否显示  是
      } else {
        this.drawing()            //调用drawing方法
        this.choseItem = false    //否
      }
}
之前存到vuex里的数据,现在我们要拿出来:
watch: {
    '$store.state.drawType': function () {
      this.currentTool = this.$store.state.drawType
    }
  }
接下来先看看resetObj方法:
resetObj () {
      this.canvasObj.isDrawingMode = false
      this.canvasObj.selectable = false
      this.canvasObj.selection = false
      this.canvasObj.skipTargetFind = true
    }
然后是drawing方法:(重点)------用到一个switch case
drawing () {
      if (this.drawingObject) {
        this.canvasObj.remove(this.drawingObject)
      }
      let canvasObject = null
      switch (this.currentTool) {
        case 'pencil':    //name为铅笔时
          this.resetObj()
          this.canvasObj.isDrawingMode = true
          this.canvasObj.freeDrawingBrush.color = this.strokeColor   //画笔颜色
          this.canvasObj.freeDrawingBrush.width = this.strokeWidths  //画笔宽度
          break
        case 'line':   //name为直线
          this.resetObj()
          canvasObject = new fabric.Line([this.mouseFrom.x, this.mouseFrom.y, this.mouseTo.x, this.mouseTo.y], {
            //fabric.Line是fabric封装的方法 直接用就好了
            stroke: this.strokeColor,   //画笔颜色
            strokeWidth: this.strokeWidths   //画笔宽度
          })
          console.log(canvasObject)
          break
        case 'arrow':
          this.resetObj()
          //isFill 是用来判断是否要填充颜色
          if (this.isFill === false) {
            this.fillColor = ''
          } else {
            this.fillColor = this.strokeInnerColor
          }
          canvasObject = new fabric.Path(this.drawArrow(this.mouseFrom.x, this.mouseFrom.y, this.mouseTo.x, this.mouseTo.y, 17.5, 17.5), {
            stroke: this.strokeColor,
            fill: this.fillColor,
            strokeWidth: this.strokeWidths
          })
          break
        case 'xuxian':
          this.resetObj()
          canvasObject = new fabric.Line([this.mouseFrom.x, this.mouseFrom.y, this.mouseTo.x, this.mouseTo.y], {
            strokeDashArray: [3, 3],  //[3,3]是每个3个像素,间隔3个像素  后面的参数是间隔数
            stroke: this.strokeColor,
            strokeWidth: this.strokeWidths
          })
          break
        case 'juxing':
          this.resetObj()
          if (this.isFill === false) {
            this.fillColor = ''
          } else {
            this.fillColor = this.strokeInnerColor
          }
          canvasObject = new fabric.Rect({
            left: this.mouseFrom.x,
            top: this.mouseFrom.y,
            width: this.mouseTo.x - this.mouseFrom.x,
            height: this.mouseTo.y - this.mouseFrom.y,
            stroke: this.strokeColor,
            fill: this.fillColor
          })
          console.log(canvasObject)
          break
        case 'circle':
          this.resetObj()
          if (this.isFill === false) {
            this.fillColor = ''
          } else {
            this.fillColor = this.strokeInnerColor
          }
          let radius = Math.sqrt((this.mouseTo.x - this.mouseFrom.x) * (this.mouseTo.x - this.mouseFrom.x) + (this.mouseTo.y - this.mouseFrom.y) * (this.mouseTo.y - this.mouseFrom.y)) / 2;
          //Math.sqrt 这个方法是返回平方根  计算圆的半径时用的是勾股定理
          canvasObject = new fabric.Circle({
            left: this.mouseFrom.x,
            top: this.mouseFrom.y,
            radius: radius,   //圆的半径
            stroke: this.strokeColor,
            strokeWidth: this.strokeWidths,
            fill: this.fillColor
          })
          console.log(canvasObject)
          break
        case 'ellipse':   //椭圆
          this.resetObj()
          let left = this.mouseFrom.x
          let top = this.mouseFrom.y
          if (this.isFill === false) {
            this.fillColor = ''
          } else {
            this.fillColor = this.strokeInnerColor
          }
          let ellipse = Math.sqrt((this.mouseTo.x - left) * (this.mouseTo.x - left) + (this.mouseTo.y - top) * (this.mouseTo.y - top)) / 2
          canvasObject = new fabric.Ellipse({
            left: left,
            top: top,
            fill: this.fillColor,
            originX: 'center',    //从X轴中心点绘制
            originY: 'center',    //从Y轴中心点绘制
            rx: Math.abs(left - this.mouseTo.x),  //x轴半径
            ry: Math.abs(top - this.mouseTo.y),   //y轴半径   math.abs返回绝对值
            stroke: this.strokeColor,
            strokeWidth: this.strokeWidths
          })
          break
        case 'equilateral':
          this.resetObj()
          if (this.isFill === false) {
            this.fillColor = ''
          } else {
            this.fillColor = this.strokeInnerColor
          }
          let height = this.mouseTo.y - this.mouseFrom.y
          canvasObject = new fabric.Triangle({
            top: this.mouseFrom.y,
            left: this.mouseFrom.x,
            width: Math.sqrt(Math.pow(height, 2) + Math.pow(height / 2.0, 2)),
            height: height,
            stroke: this.strokeColor,
            strokeWidth: this.strokeWidths,
            fill: this.fillColor
          })
          break
        case 'text':
          this.resetObj()
          let textbox = new fabric.Textbox('', {
            left: this.mouseFrom.x,
            top: this.mouseFrom.y,
            width: 150,
            fontSize: this.fontSizes,
            fill: this.strokeColor,
            hasControls: false
          })
          this.canvasObj.add(textbox)
          textbox.enterEditing()
          console.log(textbox)
          console.log(this.canvasObj)
          break
        case 'draggle':   //移动
          this.canvasObj.isDrawingMode = false
          this.canvasObj.skipTargetFind = false
          this.canvasObj.selectable = true
          this.canvasObj.selection = true
          break
        case 'undo':     //撤回
          this.resetObj()
          if (this.canvasObj._objects.length > 0) {
            this.redo.push(this.canvasObj._objects.pop())
            this.canvasObj.renderAll()
          }
          break
        case 'redo':    //前进
          this.resetObj()
          if (this.redo.length > 0) {
            this.controlFlag = true
            this.canvasObj.add(this.redo.pop())
            this.canvasObj.renderAll()
          }
          break
        case 'eraser':  //橡皮擦功能还在研究中心0.0
          console.log('擦掉')
          this.resetObj()
          //this.canvasObj.clearRect(12, 12, 20, 20)
          //canvasObject = new fabric.clear()
          break
        default:
          break
      }
      if (canvasObject) {
        this.canvasObj.add(canvasObject)   //把要绘制的内容添加到画布中
        this.canvasObj.renderAll()
        this.drawingObject = canvasObject
      }
    },
这样你就可以在页面上绘制大多数图形了 其中有个橡皮擦功能还在研究中。。。
③设置背景图片:
正上方有个点击上传 用el-upload做的
fabric.Image.fromURL(imgUrl, (img) => {
     //imgUrl接收路径和base64  这里你上传的照片 肯定是用base64  img是固定写法
        console.log(img)
        this.bgcW = img.width
        this.bgcH = img.height
        img.set({
          width: img.width,
          height: img.height
        })
        this.canvasObj.setBackgroundImage(img, this.canvasObj.renderAll.bind(this.canvasObj))
        this.canvasObj.renderAll()
      })
④至于在桌面上绘制图片,有的需求里没有 但我这里有 前面我们设置了sineNum=1 加载drawing这个方法 当sineName=2的时候 我们加载diy() 这个方法

点击这个图标的时候,弹出popover 这里面的图片是通过接口加载出来的 当点击里面的图片的时候 在点击画布 画布上就会加载刚刚我点击的图片

这个地方的实现跟设置背景图片差不多,代码如下:
diy () {
      if (this.drawingObject) {
        this.canvasObj.remove(this.drawingObject)
      }
      let canvasObject = null
      console.log(this.diyImage)
      this.resetObj()
      canvasObject = fabric.Image.fromURL(this.diyImage, (img) => {
        console.log(img)
        img.set({
          left: this.mouseFrom.x,
          top: this.mouseFrom.y,
          fill: ''
        })
        this.canvasObj.add(img)
      })
      if (canvasObject) {
        this.canvasObj.add(canvasObject)
        this.drawingObject = canvasObject
      }
    },
然后可以把当前画好的访问后台接口保存起来。因为我的项目里有一些其他功能,这里就不把全部代码贴出来了。
fabric一些常用的方法都在这儿了,如果有什么错误,还望指教,互相探讨。
================================分割线 2019/12/20========================================

箭头的实现方法:
/*箭头的方法*/
drawArrow (fromX, fromY, toX, toY, theta, headlen) {
  theta = typeof theta !== 'undefined' ? theta : 30
  headlen = typeof theta !== 'undefined' ? headlen : 10
  // 计算各角度和对应的P2,P3坐标
  let angle = Math.atan2(fromY - toY, fromX - toX) * 180 / Math.PI,
    angle1 = (angle + theta) * Math.PI / 180,
    angle2 = (angle - theta) * Math.PI / 180,
    topX = headlen * Math.cos(angle1),
    topY = headlen * Math.sin(angle1),
    botX = headlen * Math.cos(angle2),
    botY = headlen * Math.sin(angle2)
  let arrowX = fromX - topX,
    arrowY = fromY - topY
  let path = ' M ' + fromX + ' ' + fromY
  path += ' L ' + toX + ' ' + toY
  arrowX = toX + topX
  arrowY = toY + topY
  path += ' M ' + arrowX + ' ' + arrowY
  path += ' L ' + toX + ' ' + toY
  arrowX = toX + botX
  arrowY = toY + botY
  path += ' L ' + arrowX + ' ' + arrowY
  return path
}

 浙公网安备 33010602011771号