

websocket基于java实现
实现方式
-
常用的 Node 实现有以下三种。
/**
 * 服务器
 * @ClassName: WebSocket
 * @Description: TODO
 * @author OnlyMate
 * @Date 2018年8月16日 下午2:46:54
 *
 */
@ServerEndpoint("/webSocketByTomcat/{username}")
public class WebSocket {
    private static int onlineCount = 0;
    private static Map<String, WebSocket> clients = new ConcurrentHashMap<String, WebSocket>();
    private Session session;
    private String username;

    @OnOpen
    public void onOpen(@PathParam("username") String username, Session session) throws IOException {

        this.username = username;
        this.session = session;

        addOnlineCount();
        clients.put(username, this);
        System.out.println("已连接");

    }

    @OnClose
    public void onClose() throws IOException {
        clients.remove(username);
        subOnlineCount();
    }

    @OnMessage
    public void onMessage(String message) throws IOException {
        JSONObject jsonTo = JSONObject.parseObject(message);
        System.out.println(jsonTo.getString("to") +":"+ jsonTo.getString("msg"));

        if (!jsonTo.getString("to").toLowerCase().equals("all")){
            sendMessageTo(jsonTo.getString("msg"), jsonTo.getString("to"));
        }else{
            sendMessageAll(jsonTo.getString("msg"));
        }
    }

    @OnError
    public void onError(Session session, Throwable error) {
        error.printStackTrace();
    }

    public void sendMessageTo(String message, String To) throws IOException {
        // session.getBasicRemote().sendText(message);
        //session.getAsyncRemote().sendText(message);
        for (WebSocket item : clients.values()) {
            if (item.username.equals(To) )
                item.session.getAsyncRemote().sendText(message);
        }
    }

    public void sendMessageAll(String message) throws IOException {
        for (WebSocket item : clients.values()) {
            item.session.getAsyncRemote().sendText(message);
        }
    }


    public static synchronized int getOnlineCount() {
        return onlineCount;
    }

    public static synchronized void addOnlineCount() {
        WebSocket.onlineCount++;
    }

    public static synchronized void subOnlineCount() {
        WebSocket.onlineCount--;
    }

    public static synchronized Map<String, WebSocket> getClients() {
        return clients;
    }
}
客户端
<%@ page language="java" import="java.util.*" pageEncoding="utf-8"%>
<%@ taglib uri="http://java.sun.com/jsp/jstl/core" prefix="c"%>
<%@ taglib uri="http://java.sun.com/jsp/jstl/fmt" prefix="fmt"%>
<c:set var="ctx" value="${pageContext.request.contextPath}" />
<c:set var="ctxpath"
    value="${pageContext.request.scheme}${'://'}${pageContext.request.serverName}${':'}${pageContext.request.serverPort}${pageContext.request.contextPath}" />
<!DOCTYPE html PUBLIC "-//W3C//DTD HTML 4.01 Transitional//EN" "http://www.w3.org/TR/html4/loose.dtd">
<html>
<head>
<meta charset=UTF-8">
<title>登录测试</title>
</head>
<body>
    <h2>Hello World!</h2>
    <div>
        <span>sessionId:</span>
        <%
            HttpSession s= request.getSession();
            out.println(s.getId());
        %>
    </div>

    <input id="sessionId" type="hidden" value="<%=session.getId() %>" />
    <input id="text" type="text" />
    <button onclick="send()">发送消息</button>
    <hr />
    <button onclick="closeWebSocket()">关闭WebSocket连接</button>
    <hr />
    <div id="message"></div>
</body>
<script type="text/javascript" src="http://localhost:8088/static/js/sockjs-0.3.min.js"></script>
<script type="text/javascript">
        var websocket = null;
        if('WebSocket' in window) {
            websocket = new WebSocket("ws://localhost:8088/websocket/webSocketByTomcat/"+document.getElementById('sessionId').value);
        } else if('MozWebSocket' in window) {
            websocket = new MozWebSocket("ws://localhost:8088/websocket/webSocketByTomcat/"+document.getElementById('sessionId').value);
        } else {
            websocket = new SockJS("localhost:8088/websocket/webSocketByTomcat/"+document.getElementById('sessionId').value);
        }

        //连接发生错误的回调方法
        websocket.onerror = function () {
            setMessageInnerHTML("WebSocket连接发生错误");
        };

        //连接成功建立的回调方法
        websocket.onopen = function () {
            setMessageInnerHTML("WebSocket连接成功");
        }

        //接收到消息的回调方法
        websocket.onmessage = function (event) {
            setMessageInnerHTML(event.data);
        }

        //连接关闭的回调方法
        websocket.onclose = function () {
            setMessageInnerHTML("WebSocket连接关闭");
        }

        //监听窗口关闭事件,当窗口关闭时,主动去关闭websocket连接,防止连接还没断开就关闭窗口,server端会抛异常。
        window.onbeforeunload = function () {
            closeWebSocket();
        }

        //将消息显示在网页上
        function setMessageInnerHTML(innerHTML) {
            document.getElementById('message').innerHTML += innerHTML + '<br/>';
        }

        //关闭WebSocket连接
        function closeWebSocket() {
            websocket.close();
        }

        //发送消息
        function send() {
            var message = document.getElementById('text').value;
            websocket.send(message);
        }
    </script>
</html>
注意导入socketjs时要使用地址全称,并且连接使用的是http而不是websocket的ws
服务端如何向客户端推送消息呢?
代码如下
/**
 * 服务端推送消息对客户端
 * @ClassName: ServiceClientController
 * @Description: TODO
 * @author OnlyMate
 * @Date 2018年8月16日 下午2:45:22
 *
 */
@Controller
@RequestMapping(value="webSocketByTomcat/serviceToClient")
public class ServiceClientByTomcatController {
    private WebSocket websocket = new WebSocket();

    @RequestMapping
    public void sendMsg(HttpServletRequest request, HttpServletResponse response) throws IOException {
        JSONObject json = new JSONObject();
        json.put("to", request.getSession().getId());
        json.put("msg", "欢迎连接WebSocket!!!!");
        websocket.onMessage(json.toJSONString());
    }
}
效果如下图所示
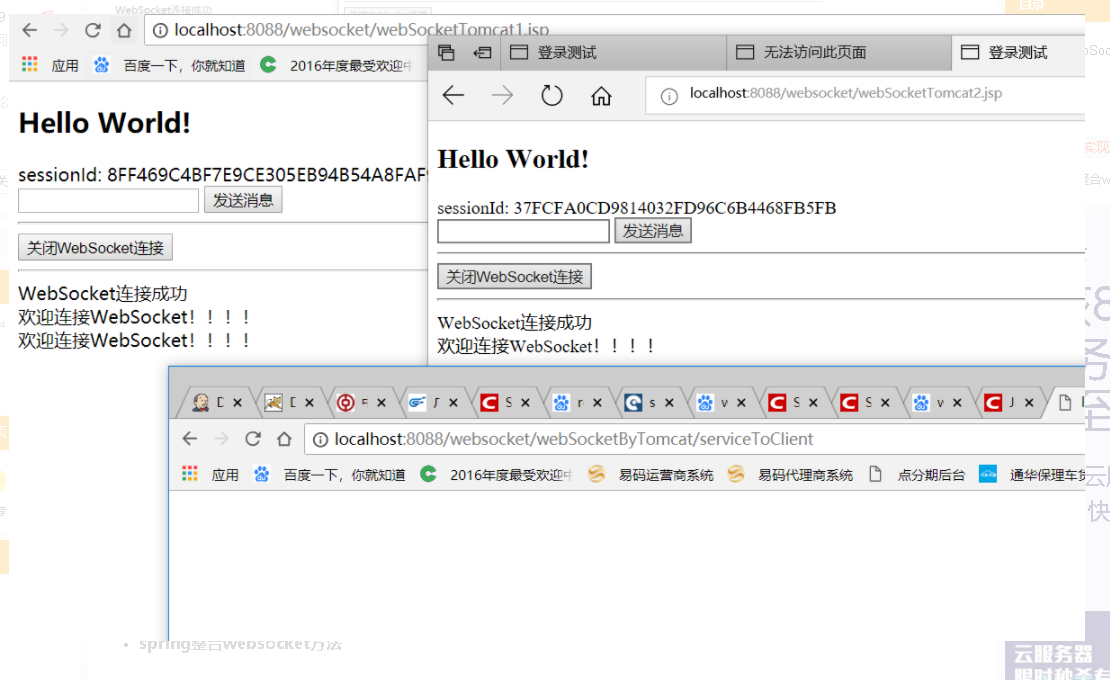
-
spring整合websocket方法
springboot对websocket支持很友好,只需要继承webSocketHandler类,重写几个方法就可以了
这个类是对消息的一些处理,比如是发给一个人,还是发给所有人,并且前端连接时触发的一些动作
/**
 * 创建一个WebSocket server
 *
 * @ClassName: CustomWebSocketHandler
 * @Description: TODO
 * @author OnlyMate
 * @Date 2018年8月16日 下午3:17:34
 *
 */
@Service
public class CustomWebSocketHandler extends TextWebSocketHandler implements WebSocketHandler {
    private Logger logger = LoggerFactory.getLogger(CustomWebSocketHandler.class);
    // 在线用户列表
    private static final Map<String, WebSocketSession> users;
    // 用户标识
    private static final String CLIENT_ID = "mchNo";

    static {
        users = new HashMap<>();
    }

    @Override
    public void afterConnectionEstablished(WebSocketSession session) throws Exception {
        logger.info("成功建立websocket-spring连接");
        String mchNo = getMchNo(session);
        if (StringUtils.isNotEmpty(mchNo)) {
            users.put(mchNo, session);
            session.sendMessage(new TextMessage("成功建立websocket-spring连接"));
            logger.info("用户标识:{},Session:{}", mchNo, session.toString());
        }
    }

    @Override
    public void handleTextMessage(WebSocketSession session, TextMessage message) {
        logger.info("收到客户端消息:{}", message.getPayload());
        JSONObject msgJson = JSONObject.parseObject(message.getPayload());
        String to = msgJson.getString("to");
        String msg = msgJson.getString("msg");
        WebSocketMessage<?> webSocketMessageServer = new TextMessage("server:" +message);
        try {
            session.sendMessage(webSocketMessageServer);
            if("all".equals(to.toLowerCase())) {
                sendMessageToAllUsers(new TextMessage(getMchNo(session) + ":" +msg));
            }else {
                sendMessageToUser(to, new TextMessage(getMchNo(session) + ":" +msg));
            }
        } catch (IOException e) {
            logger.info("handleTextMessage method error:{}", e);
        }
    }

    @Override
    public void handleTransportError(WebSocketSession session, Throwable exception) throws Exception {
        if (session.isOpen()) {
            session.close();
        }
        logger.info("连接出错");
        users.remove(getMchNo(session));
    }

    @Override
    public void afterConnectionClosed(WebSocketSession session, CloseStatus status) throws Exception {
        logger.info("连接已关闭:" + status);
        users.remove(getMchNo(session));
    }

    @Override
    public boolean supportsPartialMessages() {
        return false;
    }

    public void sendMessage(String jsonData) {
        logger.info("收到客户端消息sendMessage:{}", jsonData);
        JSONObject msgJson = JSONObject.parseObject(jsonData);
        String mchNo = StringUtils.isEmpty(msgJson.getString(CLIENT_ID)) ? "陌生人" : msgJson.getString(CLIENT_ID);
        String to = msgJson.getString("to");
        String msg = msgJson.getString("msg");
        if("all".equals(to.toLowerCase())) {
            sendMessageToAllUsers(new TextMessage(mchNo + ":" +msg));
        }else {
            sendMessageToUser(to, new TextMessage(mchNo + ":" +msg));
        }
    }

    /**
     * 发送信息给指定用户
     * @Title: sendMessageToUser
     * @Description: TODO
     * @Date 2018年8月21日 上午11:01:08
     * @author OnlyMate
     * @param mchNo
     * @param message
     * @return
     */
    public boolean sendMessageToUser(String mchNo, TextMessage message) {
        if (users.get(mchNo) == null)
            return false;
        WebSocketSession session = users.get(mchNo);
        logger.info("sendMessage:{} ,msg:{}", session, message.getPayload());
        if (!session.isOpen()) {
            logger.info("客户端:{},已断开连接,发送消息失败", mchNo);
            return false;
        }
        try {
            session.sendMessage(message);
        } catch (IOException e) {
            logger.info("sendMessageToUser method error:{}", e);
            return false;
        }
        return true;
    }

    /**
     * 广播信息
     * @Title: sendMessageToAllUsers
     * @Description: TODO
     * @Date 2018年8月21日 上午11:01:14
     * @author OnlyMate
     * @param message
     * @return
     */
    public boolean sendMessageToAllUsers(TextMessage message) {
        boolean allSendSuccess = true;
        Set<String> mchNos = users.keySet();
        WebSocketSession session = null;
        for (String mchNo : mchNos) {
            try {
                session = users.get(mchNo);
                if (session.isOpen()) {
                    session.sendMessage(message);
                }else {
                    logger.info("客户端:{},已断开连接,发送消息失败", mchNo);
                }
            } catch (IOException e) {
                logger.info("sendMessageToAllUsers method error:{}", e);
                allSendSuccess = false;
            }
        }

        return allSendSuccess;
    }

    /**
     * 获取用户标识
     * @Title: getMchNo
     * @Description: TODO
     * @Date 2018年8月21日 上午11:01:01
     * @author OnlyMate
     * @param session
     * @return
     */
    private String getMchNo(WebSocketSession session) {
        try {
            String mchNo = session.getAttributes().get(CLIENT_ID).toString();
            return mchNo;
        } catch (Exception e) {
            return null;
        }
    }
}
这个类的作用就是在连接成功前和成功后增加一些额外的功能
我们希望能够把websocketSession和httpsession对应起来,这样就能根据当前不同的session,定向对websocketSession进行数据返回;在查询资料之后,发现spring中有一个拦截器接口,HandshakeInterceptor,可以实现这个接口,来拦截握手过程,向其中添加属性
/**
 * WebSocket握手时的拦截器
 * @ClassName: CustomWebSocketInterceptor
 * @Description: TODO
 * @author OnlyMate
 * @Date 2018年8月16日 下午3:17:04
 *
 */
public class CustomWebSocketInterceptor implements HandshakeInterceptor {
    private Logger logger = LoggerFactory.getLogger(CustomWebSocketInterceptor.class);
    /**
     * 关联HeepSession和WebSocketSession,
     * beforeHandShake方法中的Map参数 就是对应websocketSession里的属性
     */
    @Override
    public boolean beforeHandshake(ServerHttpRequest request, ServerHttpResponse response, WebSocketHandler handler, Map<String, Object> map) throws Exception {
        if (request instanceof ServletServerHttpRequest) {
            logger.info("*****beforeHandshake******");
            HttpServletRequest httpServletRequest = ((ServletServerHttpRequest) request).getServletRequest();
            HttpSession session = httpServletRequest.getSession(true);

            logger.info("mchNo:{}", httpServletRequest.getParameter("mchNo"));
            if (session != null) {

                map.put("sessionId",session.getId());
                map.put("mchNo", httpServletRequest.getParameter("mchNo"));
            }
        }
        return true;
    }

    @Override
    public void afterHandshake(ServerHttpRequest serverHttpRequest, ServerHttpResponse serverHttpResponse, WebSocketHandler webSocketHandler, Exception e) {
        logger.info("******afterHandshake******");
    }
}
这个类是配置类向Spring中注入handler
/**
 * websocket的配置类
 * @ClassName: CustomWebSocketConfig
 * @Description: TODO
 * @author OnlyMate
 * @Date 2018年8月16日 下午3:17:26
 *
 */
@Configuration
@EnableWebSocket
public class CustomWebSocketConfig implements WebSocketConfigurer {

    @Override
    public void registerWebSocketHandlers(WebSocketHandlerRegistry registry) {
        registry.addHandler(customWebSocketHandler(), "/webSocketBySpring/customWebSocketHandler").addInterceptors(new CustomWebSocketInterceptor()).setAllowedOrigins("*");
        registry.addHandler(customWebSocketHandler(), "/sockjs/webSocketBySpring/customWebSocketHandler").addInterceptors(new CustomWebSocketInterceptor()).setAllowedOrigins("*").withSockJS();
    }

    @Bean
    public WebSocketHandler customWebSocketHandler() {
        return new CustomWebSocketHandler();
    }
}
补充说明:
setAllowedOrigins("*")一定要加上,不然只有访问localhost,其他的不予许访问
setAllowedOrigins(String[] domains),允许指定的域名或IP(含端口号)建立长连接,如果只允许自家域名访问,这里轻松设置。如果不限时使用"*"号,如果指定了域名,则必须要以http或https开头
经查阅官方文档springwebsocket 4.1.5版本前默认支持跨域访问,之后的版本默认不支持跨域,需要设置
使用withSockJS()的原因:
一些浏览器中缺少对WebSocket的支持,因此,回退选项是必要的,而Spring框架提供了基于SockJS协议的透明的回退选项。
SockJS的一大好处在于提供了浏览器兼容性。优先使用原生WebSocket,如果在不支持websocket的浏览器中,会自动降为轮询的方式。
除此之外,spring也对socketJS提供了支持。如果代码中添加了withSockJS()如下,服务器也会自动降级为轮询。
registry.addEndpoint("/coordination").withSockJS();SockJS的目标是让应用程序使用WebSocket API,但在运行时需要在必要时返回到非WebSocket替代,即无需更改应用程序代码。
SockJS是为在浏览器中使用而设计的。它使用各种各样的技术支持广泛的浏览器版本。对于SockJS传输类型和浏览器的完整列表,可以看到SockJS客户端页面。
传输分为3类:WebSocket、HTTP流和HTTP长轮询(按优秀选择的顺序分为3类)客户端
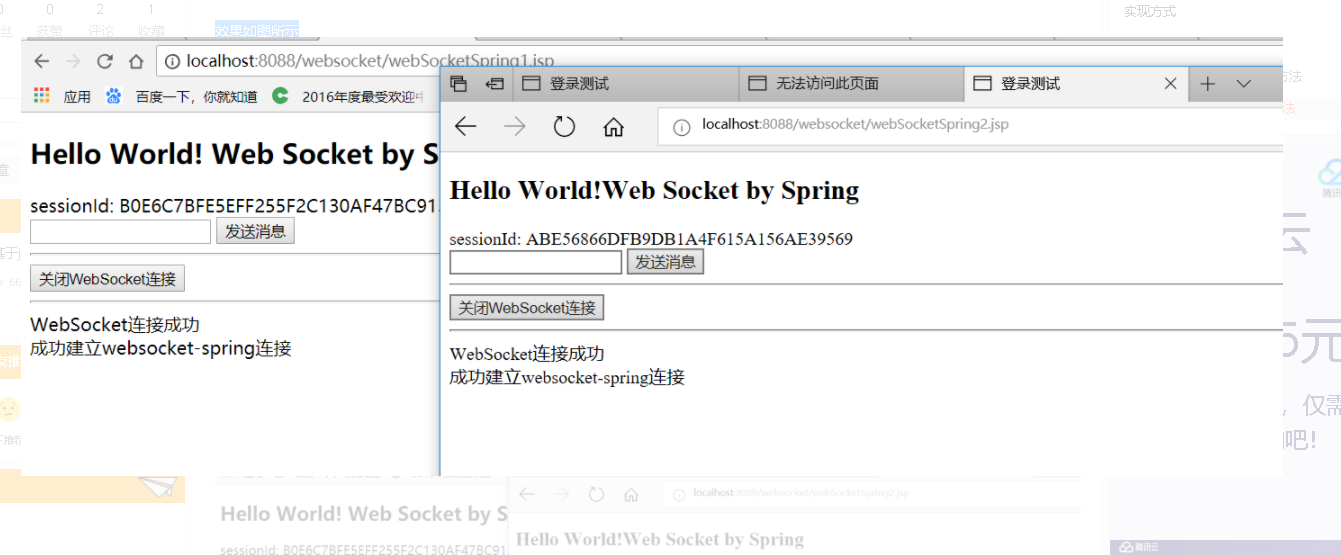
<%@ page language="java" import="java.util.*" pageEncoding="utf-8"%>
<%@ taglib uri="http://java.sun.com/jsp/jstl/core" prefix="c"%>
<%@ taglib uri="http://java.sun.com/jsp/jstl/fmt" prefix="fmt"%>
<c:set var="ctx" value="${pageContext.request.contextPath}" />
<c:set var="ctxpath"
    value="${pageContext.request.scheme}${'://'}${pageContext.request.serverName}${':'}${pageContext.request.serverPort}${pageContext.request.contextPath}" />
<!DOCTYPE html PUBLIC "-//W3C//DTD HTML 4.01 Transitional//EN" "http://www.w3.org/TR/html4/loose.dtd">
<html>
<head>
<meta charset=UTF-8">
<title>登录测试</title>
</head>
<body>
    <h2>Hello World! Web Socket by Spring</h2>
    <div>
        <span>sessionId:</span>
        <%
            HttpSession s= request.getSession();
            out.println(s.getId());
        %>
    </div>

    <input id="sessionId" type="hidden" value="<%=session.getId() %>" />
    <input id="text" type="text" />
    <button onclick="send()">发送消息</button>
    <hr />
    <button onclick="closeWebSocket()">关闭WebSocket连接</button>
    <hr />
    <div id="message"></div>
</body>
<script type="text/javascript" src="http://localhost:8088/static/js/sockjs-0.3.min.js"></script>
<script type="text/javascript">
        var websocket = null;
        //判断当前浏览器是否支持WebSocket
        //判断当前浏览器是否支持WebSocket
        if('WebSocket' in window) {
            websocket = new WebSocket("ws://localhost:8088/websocket/webSocketBySpring/customWebSocketHandler?mchNo="+ 123);
        } else if('MozWebSocket' in window) {
            websocket = new MozWebSocket("ws://localhost:8088/websocket/webSocketBySpring/customWebSocketHandler?mchNo="+ 123);
        } else {
            websocket = new SockJS("http://localhost:8088/websocket/sockjs/webSocketBySpring/customWebSocketHandler?mchNo="+ 123);
        }
        //连接发生错误的回调方法
        websocket.onerror = function () {
            setMessageInnerHTML("WebSocket连接发生错误");
        };

        //连接成功建立的回调方法
        websocket.onopen = function () {
            setMessageInnerHTML("WebSocket连接成功");
        }

        //接收到消息的回调方法
        websocket.onmessage = function (event) {
            setMessageInnerHTML(event.data);
        }

        //连接关闭的回调方法
        websocket.onclose = function () {
            setMessageInnerHTML("WebSocket连接关闭");
        }

        //监听窗口关闭事件,当窗口关闭时,主动去关闭websocket连接,防止连接还没断开就关闭窗口,server端会抛异常。
        window.onbeforeunload = function () {
            closeWebSocket();
        }

        //将消息显示在网页上
        function setMessageInnerHTML(innerHTML) {
            document.getElementById('message').innerHTML += innerHTML + '<br/>';
        }

        //关闭WebSocket连接
        function closeWebSocket() {
            websocket.close();
        }

        //发送消息
        function send() {
            var message = document.getElementById('text').value;
            websocket.send(message);
        }
    </script>
</html>
效果如图所示
![]()
原文来自:https://blog.csdn.net/weixin_50770886/article/details/117569005

 浙公网安备 33010602011771号